Last week, I was teaching my neighbor how to crochet, and she kept asking about the “right” way to hold her yarn. Honestly, there isn’t just one right way – and that’s actually the beauty of it. After twenty years of crocheting, I’ve watched countless people develop their own unique yarn-holding styles, and guess what? They all work just fine.
The thing is, how you hold your yarn directly affects your tension, speed, and comfort level. Some methods give you lightning-fast stitches, while others offer rock-solid tension control. And if you’re dealing with hand fatigue or inconsistent stitches, tweaking your yarn hold might be the simple fix you’ve been looking for.
I remember when I first started crocheting, I gripped everything so tightly that my hand would cramp up after just ten minutes. My grandmother watched me struggle for about five minutes before gently showing me how to let the yarn flow more naturally through my fingers. That one adjustment changed everything – suddenly I could crochet for hours without pain, and my stitches became way more even.
Whether you’re a complete beginner trying to figure out the basics or an experienced crocheter looking to improve your technique, understanding different yarn-holding methods can seriously level up your crochet game. Some techniques work better for specific projects too – what works great for a delicate lace pattern might feel clunky when you’re working on a chunky blanket.
Quick Answer
Hold your working yarn with your non-dominant hand, wrapping it around your pinky and over your index finger to control tension. Your dominant hand guides the hook while your yarn hand maintains consistent flow and prevents tangles.
Basic Yarn Holding Technique
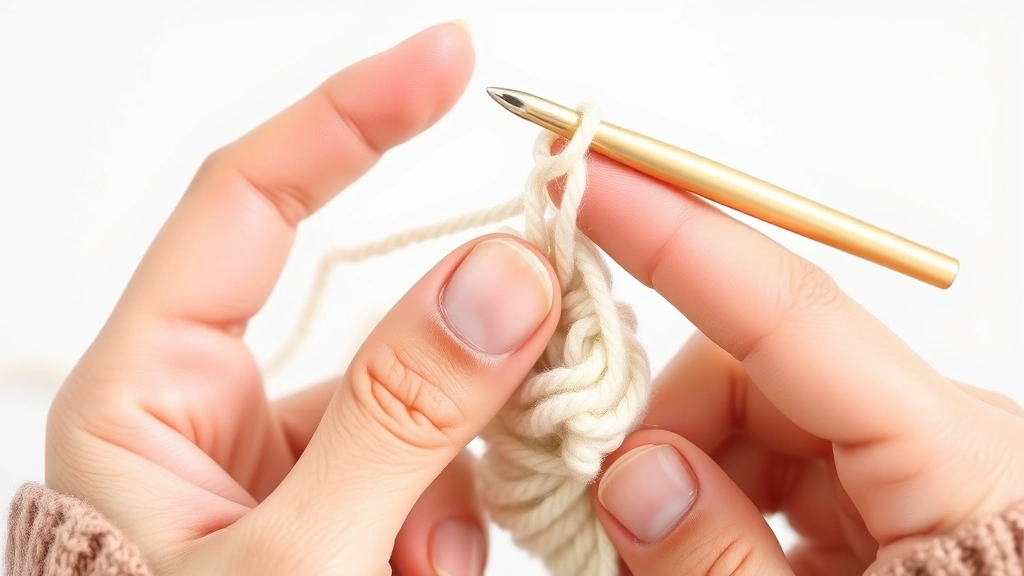
Let’s start with the foundation that works for about 80% of crocheters. Hold your crochet hook in your dominant hand like you’d hold a pencil – not too tight, not too loose. Your working yarn (the strand coming from your ball or skein) goes in your non-dominant hand.
Here’s where it gets interesting: wrap the yarn around your pinky finger, then bring it up and over your index finger. This creates a natural tension system that lets you control how much yarn feeds to your hook. Your middle and ring fingers can help guide the yarn, but they’re mostly just along for the ride.
The key is keeping your yarn hand relaxed. I see so many new crocheters death-gripping their yarn like it’s going to escape. Trust me, it won’t. Let your fingers do the work naturally – they’re surprisingly good at finding the right balance once you stop overthinking it.
Pro tip: Practice this motion without actually crocheting first. Just hold the yarn and practice pulling it through your fingers smoothly. It should feel like silk sliding through, not like you’re wrestling with it.
Your hook hand should move freely while your yarn hand stays relatively stationary. Think of your yarn hand as the anchor and your hook hand as the dancer. This setup works especially well when you’re learning basic crochet stitches because it gives you maximum control over both tension and yarn flow.
Right-Hand vs Left-Hand Methods
Most crochet tutorials assume you’re right-handed, but about 10% of us lefties need a different approach. If you’re left-handed, you’ll hold your hook in your left hand and your yarn in your right hand – basically everything flipped.
Right-handed crocheters typically find the “knife grip” or “pencil grip” most comfortable for their hook. The knife grip (holding the hook like you’re cutting something) gives you more power for tough yarns, while the pencil grip offers better precision for detailed work. I switch between both depending on what I’m making.
Left-handed crocheters often struggle with pattern instructions because most are written for righties. Here’s what I tell my left-handed students: mirror everything. When a pattern says “insert hook from right to left,” you’ll go from left to right. It sounds confusing at first, but your brain adapts quickly.
Finding Your Natural Grip
Don’t force yourself into a grip that feels awkward. I’ve seen people try to copy exactly what they see in videos, even when it clearly doesn’t work for their hands. Your fingers are different lengths, your joints bend differently – embrace that.
Try this experiment: pick up your hook without thinking about it. How does it naturally fall in your hand? That’s probably close to your ideal grip. You might need to adjust slightly for better control, but start with what feels natural.
“I spent months trying to hold my hook the ‘proper’ way from YouTube tutorials before realizing my natural grip was actually more efficient for my hands.” – Sarah, experienced crocheter
Controlling Yarn Tension
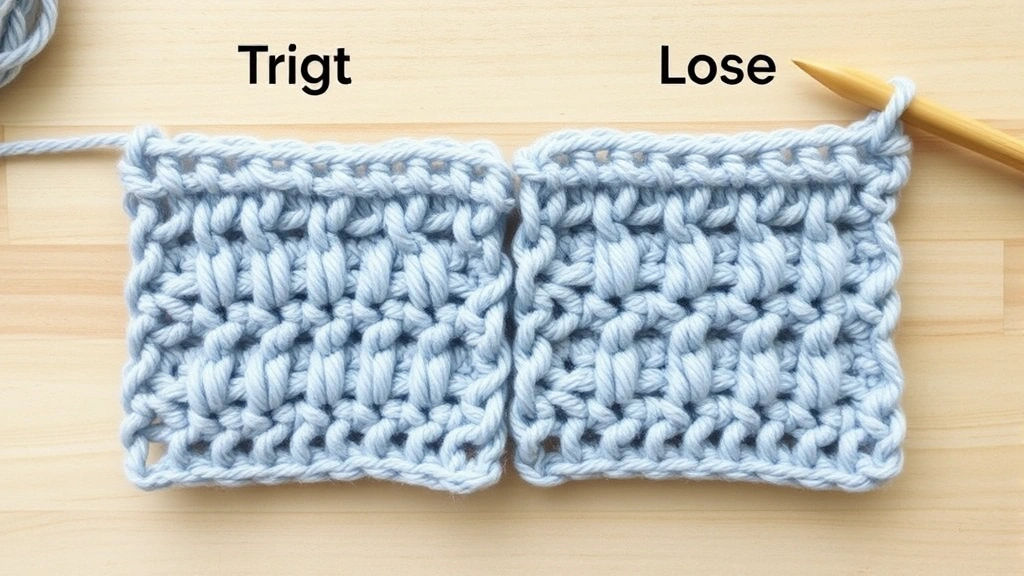
Tension control is where the magic happens, and it’s probably the most important skill you’ll develop as a crocheter. Too tight, and your stitches become impossible to work into. Too loose, and your fabric looks sloppy and has holes.
The pinky wrap I mentioned earlier is your primary tension control. Wrap the yarn around your pinky finger clockwise (when looking at your palm). This creates just enough friction to slow down the yarn flow without stopping it completely. If you need more tension, wrap it around your pinky twice. Need less? Skip the pinky wrap and just drape the yarn over your index finger.
Your index finger acts like a guide, directing the yarn toward your hook. Keep it about an inch or two away from your work – close enough to control the yarn, far enough to avoid cramping. Some crocheters like to “pinch” the working yarn between their thumb and index finger right near where they’re stitching. This gives you incredibly precise control, which is perfect for intricate stitch patterns.
Testing Your Tension
Make a foundation chain of 20 stitches, then single crochet back across. Your stitches should be even, and you should be able to insert your hook easily into each stitch. If you’re struggling to get your hook through the stitches, you’re too tight. If there are visible gaps between your stitches, you’re too loose.
| Tension Issue | What It Looks Like | How to Fix |
|---|---|---|
| Too Tight | Hard to insert hook, stitches bunched | Loosen pinky wrap, relax grip |
| Too Loose | Visible holes, floppy fabric | Add pinky wrap, guide yarn closer |
| Uneven | Some stitches tight, others loose | Practice consistent yarn flow |
Fixing Common Yarn Holding Issues
Let me share the most common problems I see and how to fix them, because chances are you’ll run into at least one of these.
The Death Grip
This is the big one. New crocheters often squeeze their yarn and hook like they’re hanging off a cliff. Your hands will cramp, your stitches will be tight, and you’ll hate crocheting within an hour. The fix? Consciously relax every few stitches. Shake out your hands, roll your shoulders, and remind yourself that the yarn isn’t going anywhere.
Yarn Splitting
If your hook keeps piercing through the yarn strands instead of sliding under them cleanly, you’re probably holding the yarn too close to your work or approaching at the wrong angle. Try holding the yarn a bit further back and inserting your hook more deliberately. This is especially common when working with cotton yarn because it doesn’t have much stretch.
Inconsistent Feed
Some stitches get lots of yarn, others barely any. This usually happens when you’re not maintaining consistent tension or when you’re fighting with your yarn instead of letting it flow. Practice the motion slowly – yarn flows to hook, hook catches yarn, yarn flows through. It should feel rhythmic, almost meditative.
Quick fix: If you’re struggling with yarn flow, try using a smoother yarn like acrylic while you’re learning. Cotton and wool can be grabbier and less forgiving for beginners.
Advanced Holding Techniques
Once you’ve mastered the basics, there are some advanced techniques that can seriously speed up your crocheting and reduce hand fatigue.
The Knife Hold Plus
This is my personal favorite for long crochet sessions. Hold your hook like a knife, but rest the shaft against the side of your index finger for extra support. This distributes the pressure across more of your hand and lets you work for hours without cramping.
Your yarn hand gets an upgrade too: instead of just wrapping around your pinky, weave the yarn between your pinky and ring finger, then over your middle finger and index finger. This creates multiple tension points and gives you incredibly fine control over yarn flow.
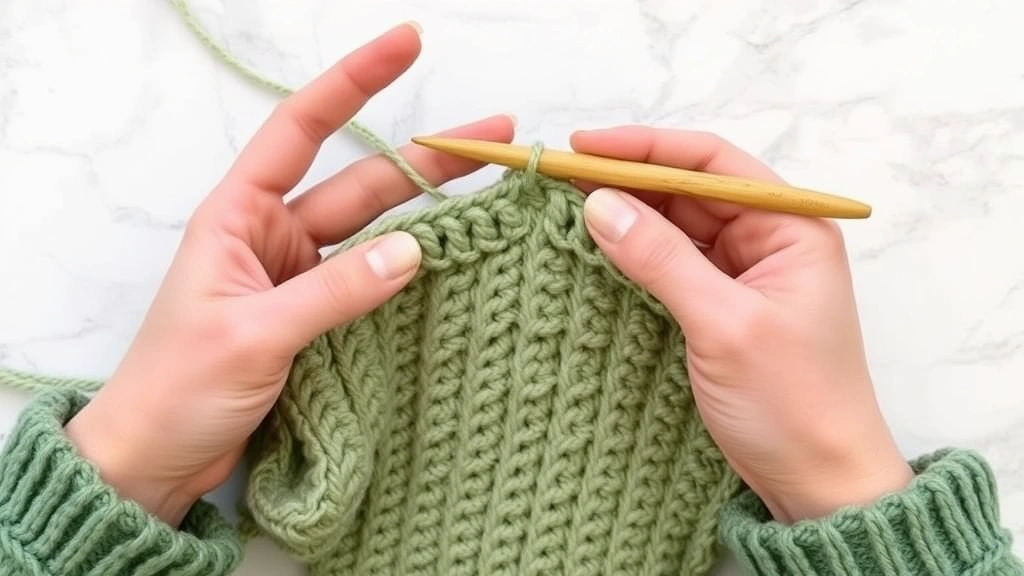
Continental-Style Adaptation
Borrowed from knitting, this technique keeps your yarn hand almost completely still while your hook hand does all the movement. Hold the yarn in your left hand (even if you’re right-handed) and use your right hand to “pick” the yarn with your hook. It’s faster once you get the hang of it, but there’s definitely a learning curve.
This technique works especially well for projects with lots of repetitive stitches, like when you’re making easy blanket patterns. The reduced hand movement means less fatigue during those marathon crochet sessions.
Two-Handed Colorwork
When you’re working with multiple colors, you can hold one yarn in each hand. Your dominant hand controls the primary color, while your non-dominant hand manages the contrast color. This eliminates the need to constantly drop and pick up different yarns, which is a huge time-saver for projects like tapestry crochet.
Yarn Holding for Different Projects
Different projects call for different approaches, and adjusting your yarn hold can make a huge difference in your results.
Delicate Lacework
For lace patterns, you need precise tension control. Hold your yarn closer to your work – about half an inch from your hook. Use the pinch method between your thumb and index finger to control exactly how much yarn feeds through each stitch. This prevents the loose, uneven stitches that can ruin a lace pattern’s definition.
I also recommend using a lighter touch overall. Lace yarn is usually finer and more delicate, so your normal tension might be too much. Practice on a swatch first to find the sweet spot.
Chunky Blankets
Chunky yarn requires a completely different approach. Hold the yarn further back – maybe 3-4 inches from your work – and let it flow more freely. The yarn is thick enough that you don’t need as much tension control, and fighting with it will just tire out your hands.
For really chunky projects, I sometimes skip the pinky wrap entirely and just drape the yarn over my index finger. The weight of the yarn provides enough natural tension.
Amigurumi and 3D Projects
When you’re working in the round or creating shaped pieces, consistent tension becomes even more critical. I use a tighter grip than usual and work closer to my project. This gives me better control over stitch placement and helps maintain the shape as I work.
The pinch method works great here too, especially when you’re decreasing or working into tight spaces. You need precision over speed for these projects.
Remember: there’s no crochet police checking your yarn hold. If it works for you and produces good results, you’re doing it right.
Troubleshooting Hand Fatigue
Hand fatigue is real, and it can turn a relaxing hobby into a painful chore. Here’s how to keep your hands happy during long crochet sessions.
Take Regular Breaks
I know, I know – you’re in the zone and don’t want to stop. But your hands need breaks every 20-30 minutes. Set a timer if you have to. During breaks, stretch your fingers, roll your wrists, and shake out your hands. It makes a bigger difference than you’d think.
Adjust Your Environment
Your setup matters more than you might realize. Sit in a chair that supports your back and lets your arms rest comfortably. Keep your work at a height where you’re not hunching over or reaching up. Good lighting reduces eye strain, which indirectly reduces hand tension too.
Switch Techniques
If your usual yarn hold is causing problems, try switching it up. Alternate between different grips throughout your session. Sometimes I’ll do fifty stitches with a pencil grip, then switch to a knife grip for the next fifty. It uses slightly different muscles and prevents overuse.
Pain relief tip: If you’re experiencing actual pain (not just fatigue), stop immediately. Persistent pain could indicate repetitive strain injury, which needs proper treatment.
Ergonomic Tools
Consider investing in ergonomic hooks if you crochet regularly. They’re designed to reduce hand strain and can make a noticeable difference during long projects. Ravelry has great reviews from other crocheters about which brands work best for different hand sizes and grip styles.
Common Questions
Which hand should hold the yarn?
Your non-dominant hand should hold the yarn. So if you’re right-handed, hold the yarn in your left hand and the hook in your right. This gives your dominant hand the precision work of manipulating the hook while your other hand provides steady tension control.
How tight should I hold my yarn?
Your yarn should flow smoothly through your fingers with just enough resistance to maintain even tension. Think “firm but gentle” – like holding a bird that you don’t want to escape but also don’t want to hurt. You should be able to pull yarn through easily but it shouldn’t slip through uncontrolled.
Why do my stitches keep getting tighter as I work?
This usually happens because you gradually increase tension without realizing it, often due to concentration or hand fatigue. Check your yarn hold every few rows and consciously relax your grip. Taking short breaks helps prevent this tension creep.
Can I hold my yarn differently for different yarns?
Absolutely! Slippery yarns like bamboo or silk might need a firmer grip with an extra wrap around your pinky. Sticky yarns like cotton might work better with a looser hold. Adjust your technique based on what you’re working with – there’s no one-size-fits-all approach.
My hand cramps after just a few minutes. What am I doing wrong?
You’re probably gripping too tightly or holding your hands in an unnatural position. Relax your grip, take frequent breaks, and make sure your workspace is set up ergonomically. If cramping persists, consider trying different hook grips or ergonomic tools.
Should beginners learn a specific yarn holding method?
Start with the basic pinky wrap and index finger guide method – it works for most people and most projects. Once you’re comfortable with that, experiment with variations. Don’t stress about finding the “perfect” method right away; your technique will naturally evolve as you gain experience.
How do I know if my tension is consistent?
Make a practice swatch and look at your stitches. They should be roughly the same size and shape, and your fabric should lie flat without curling or puckering. If you can easily insert your hook into each stitch and the fabric has a nice drape, your tension is probably good.
Is it normal for my yarn holding to feel awkward at first?
Yes, completely normal! Like learning to write or ride a bike, it takes time for the movements to become automatic. Most people need several hours of practice before yarn holding feels natural. Be patient with yourself and focus on consistency rather than speed initially.
Learning how to hold your yarn properly is one of those fundamental skills that affects everything else you do in crochet. It might feel awkward at first, but once you find your groove, it becomes as natural as breathing. Don’t be afraid to experiment with different techniques until you find what works best for your hands and your projects.
Remember, the “right” way is whatever gives you comfortable, consistent results. I’ve seen crocheters with completely unconventional yarn holds create absolutely beautiful work. The most important thing is that you’re enjoying the process and creating something you love.
So grab your hook and yarn, try out these techniques, and see what feels good. Your hands will thank you, your stitches will improve, and you’ll be well on your way to many happy hours of crocheting. Trust me, once you nail down your yarn hold, everything else starts falling into place much more easily.