Last weekend, I was helping my neighbor Sarah with her first crochet project when she asked me something that stopped me in my tracks: “How do I know if I’m holding my hook right?” It seems like such a basic question, but honestly, it’s one of the most important things you can learn as a crocheter. I’ve been crocheting for over fifteen years, and I still remember the hand cramps and frustration from my early days when I was gripping my hook like I was trying to stab something.
The truth is, there’s no single “perfect” way to hold a crochet hook, but there are definitely techniques that’ll save your hands and make your stitches more consistent. After teaching dozens of people to crochet, I’ve noticed that most beginners either grip too tightly (hello, hand cramps!) or hold their hook so loosely that they can’t control their stitches. Both approaches will slow you down and make crocheting feel like work instead of the relaxing hobby it should be.
Your hook hold affects everything – your crochet tension, how fast you can work, and whether you’ll still want to crochet after an hour-long session. I’ve seen people give up on crochet entirely because no one taught them proper ergonomics from the start. Don’t let that be you.
Quick Answer
Hold your crochet hook like a pencil (pencil grip) or a knife (knife grip), keeping your grip relaxed about an inch from the hook’s tip. Your working hand should guide the hook while your yarn hand controls tension, with both hands working together in a smooth rhythm.
The Two Main Grip Styles
There are two primary ways to hold a crochet hook, and both are perfectly valid. I’ve used both depending on the project and my mood, so don’t feel like you have to pick one and stick with it forever.
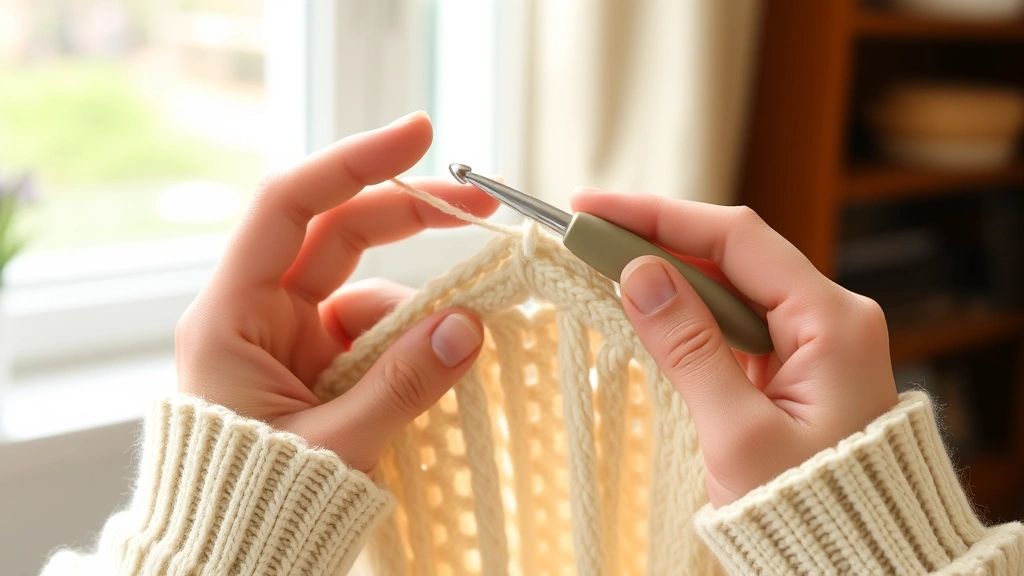
The Pencil Grip (Overhand)
This is exactly what it sounds like – you hold your hook the same way you’d hold a pencil when writing. Your thumb and index finger pinch the hook about an inch from the tip, with the hook resting against the side of your middle finger. Your remaining fingers curl naturally underneath for support.
I love the pencil grip for detailed work like amigurumi basics or intricate stitch patterns because it gives you incredible precision. When I’m working on tiny pieces or need to see exactly where my hook is going, this is my go-to method. The downside? It can be slower for large projects, and some people find it puts more strain on their thumb joint.
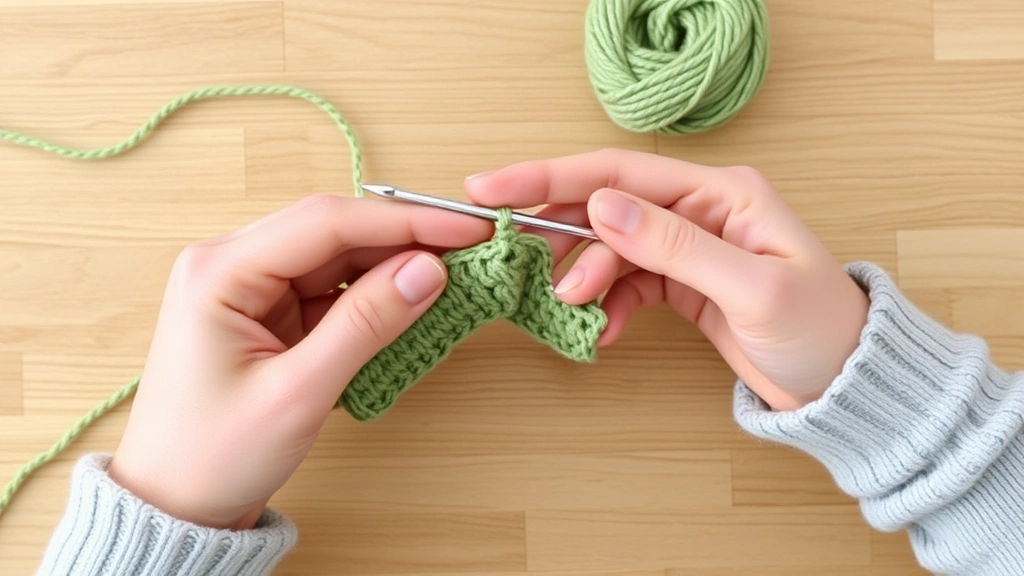
The Knife Grip (Underhand)
With the knife grip, you hold the hook more like you’re holding a butter knife to spread something on toast. Your entire hand wraps around the hook handle, with your thumb on top and your fingers underneath. The hook extends from the pinky side of your hand.
This grip is fantastic for speed and power. When I’m working on large projects like chunky blanket patterns, I switch to the knife grip because I can maintain a steady rhythm for hours. It’s also easier on your joints if you have arthritis or other hand issues.
Pro tip: Try both grips with the same simple stitch pattern (like single crochet) for about 10 minutes each. Your hands will tell you which feels more natural, but don’t be afraid to switch between them as needed.
Proper Hand Positioning
Your grip is only half the equation. How you position your hands relative to your work makes a huge difference in your comfort and stitch quality.
Working Hand Position
Your working hand (the one holding the hook) should move primarily from your wrist, not your fingers or shoulder. Keep your elbow relaxed at your side – if you’re lifting your whole arm with each stitch, you’re working too hard and you’ll tire out quickly.
The hook should point slightly downward toward your work. I see a lot of beginners holding their hook perfectly horizontal, which makes it harder to see where you’re inserting it and can lead to missed stitches.
Yarn Hand Coordination
Your non-dominant hand does the heavy lifting when it comes to yarn control. This hand should stay relatively stationary while your working hand moves the hook. Think of it like playing piano – your yarn hand is the steady bass line while your hook hand plays the melody.
Keep your work close to the hook tip. I used to let my stitches slide way down the hook shaft, which made everything harder to control. Now I keep my active stitch right up near the tip where I can see what’s happening.
| Hand Position | What It Controls | Common Mistake |
|---|---|---|
| Working Hand | Hook movement and insertion | Moving from shoulder instead of wrist |
| Yarn Hand | Tension and yarn feeding | Gripping yarn too tightly |
| Both Together | Stitch formation rhythm | Fighting each other’s movements |
Controlling Your Yarn
How you hold and control your yarn is just as important as your hook grip. Poor yarn control leads to uneven stitches, and trust me, you’ll see those inconsistencies in your finished projects.
The Basic Yarn Hold
There are several ways to wrap yarn around your fingers, but here’s the method I teach beginners: Drape the working yarn over your index finger, then under your middle finger, over your ring finger, and under your pinky. This creates natural tension points that help control your yarn flow.
Some people prefer to wrap the yarn around their pinky instead of just going under it. Experiment with both – the pinky wrap gives you more control but can be harder on that little finger during long sessions.
Tension Control
Good crochet tension comes from your yarn hand, not your hook hand. Your yarn should flow smoothly but not loosely. Think of it like holding a bird – firm enough that it can’t fly away, but gentle enough that you’re not hurting it.
I adjust my tension by changing how tightly I curl my controlling fingers. For looser stitches, I relax my pinky and ring finger. For tighter control (like when working with slippery yarn), I curl them more.
Avoiding Hand Strain
Nothing ruins the joy of crocheting like sore hands and wrists. After years of long crochet sessions, I’ve learned some hard lessons about taking care of my hands.
Grip Pressure
The biggest mistake I see (and made myself for years) is gripping everything too tightly. Your hook hold should be firm but relaxed – imagine you’re holding a small bird that you don’t want to escape, but you also don’t want to hurt.
Check your grip pressure regularly while you work. I set a timer for every 15 minutes when I’m in a big project zone, and when it goes off, I consciously relax my hands and adjust my grip if needed.
Wrist Position
Keep your wrists in a neutral position – not bent up, down, or to the side. If you’re working on a large project like an afghan stitch tutorial, consider using a lap desk or pillow to bring your work up to a comfortable height.
I learned this lesson the hard way during a marathon weekend of making Christmas gifts. By Sunday evening, my wrists were screaming. Now I’m religious about maintaining good posture and taking breaks.
Taking Breaks
Even with perfect technique, your hands need breaks. I follow the 20-20-20 rule: every 20 minutes, look at something 20 feet away for 20 seconds, and do some hand stretches. It sounds excessive, but it’s kept me crocheting pain-free for years.
- Finger Stretches
Spread your fingers wide, then make a fist. Repeat 5 times with each hand.
- Wrist Circles
Gently rotate your wrists in both directions, 5 times each way.
- Prayer Stretch
Press your palms together in front of your chest, then lower your hands while keeping palms together until you feel a stretch.
Exercises to Improve Your Hold
Like any skill, holding your hook properly takes practice. Here are some exercises I use with students to develop muscle memory and comfort.
The Pencil Exercise
Before you even pick up yarn, practice holding your hook like a pencil and making small circular motions in the air. Do this for 2-3 minutes, focusing on keeping your grip relaxed and moving from your wrist, not your fingers.
This might feel silly, but it’s building the foundation for smooth, effortless crocheting. I do this warm-up before starting any big project.
Chain Practice
Make a foundation chain of 50 stitches, focusing entirely on your grip and hand position rather than speed or perfection. Count your stitches out loud – this helps you maintain a steady rhythm while you concentrate on technique.
When working on foundation chain tips, pay attention to how your hands feel. Are you tensing up? Is one hand working harder than the other? Adjust as needed.
Switch Grip Challenge
Spend 10 minutes working with your non-preferred grip style. If you usually use pencil grip, try knife grip, and vice versa. This isn’t about switching permanently – it’s about understanding how different holds affect your work and giving your dominant grip muscles a break.
I do this switch-grip exercise whenever I’m working on a long project. It prevents overuse injuries and sometimes I discover that the “other” grip actually works better for certain stitch patterns.
Common Problems and Solutions
Even experienced crocheters run into grip-related issues. Here are the problems I see most often and how to fix them.
Hand Cramping
If your hands are cramping, you’re almost certainly gripping too tightly. This is especially common when learning double crochet tutorial techniques because the taller stitches feel less stable.
Solution: Take a break, do some hand stretches, then resume with a consciously lighter grip. It might feel unstable at first, but your muscle memory will adjust within a session or two.
Inconsistent Stitches
If your stitches are different sizes, the problem is usually inconsistent yarn tension rather than your hook grip. However, an unstable grip can contribute to this issue.
Solution: Focus on keeping your yarn hand position consistent. Your hook hand can move and adjust, but your yarn hand should be your steady anchor point.
Slow Progress
Beginners often think they need to grip tighter for more control, but this actually slows you down because tense muscles move less efficiently.
Solution: Practice the relaxed grip exercises above, and remember that speed comes with time. I’d rather see you crochet comfortably for an hour than struggle through 15 minutes with a death grip on your hook.
| Problem | Likely Cause | Quick Fix |
|---|---|---|
| Hand cramps | Gripping too tightly | Relax grip, take breaks |
| Uneven stitches | Inconsistent yarn tension | Focus on yarn hand position |
| Hook slipping | Grip too loose or hands sweaty | Adjust grip, try textured hooks |
| Slow progress | Overthinking technique | Practice basic stitches until automatic |
How Hook Types Affect Your Grip
Not all crochet hooks are created equal, and the type of hook you’re using can significantly impact how comfortable your grip feels.
Aluminum Hooks
Standard aluminum hooks like the classic Boye or Susan Bates styles are what most people learn on. They’re smooth and lightweight, but the thin handles can be hard on your hands during long sessions.
If you’re using aluminum hooks and experiencing discomfort, try adding foam grips or switching to hooks with built-in ergonomic handles.
Ergonomic Hooks
Ergonomic hooks have wider, cushioned handles that reduce hand strain. I recommend these for anyone planning to crochet for more than an hour at a time, or if you have any existing hand or wrist issues.
Popular brands include Clover Amour, ChiaoGoo Twist, and Prym Ergonomics. Yes, they cost more than basic aluminum hooks, but your hands will thank you.
Inline vs. Tapered Hooks
The shape of your hook’s head affects how you insert it into stitches, which can influence your grip comfort. Inline hooks (like Susan Bates) have a deeper throat, while tapered hooks (like Boye) have a more gradual slope.
Try both styles to see which feels more natural with your grip. I prefer inline hooks for most work, but I switch to tapered for delicate yarns that might split.
Common Questions
Should I hold my crochet hook in my dominant hand?
Yes, definitely hold your hook in your dominant hand. This hand does the precise work of inserting the hook and forming stitches, so you want your most coordinated hand handling those tasks. Your non-dominant hand controls the yarn, which requires less fine motor control.
How tightly should I grip my crochet hook?
Your grip should be firm enough to control the hook but relaxed enough that your hand doesn’t get tired after 10-15 minutes. Think of holding a pencil when you’re writing casually, not when you’re filling out important forms. If your knuckles are white or your fingers are cramping, you’re gripping too tightly.
Can I switch between pencil and knife grips in the same project?
Absolutely! I switch grips all the time depending on what I’m doing. I might use pencil grip for detailed colorwork and switch to knife grip for long stretches of simple stitches. As long as your tension stays consistent, switching grips won’t affect your finished project.
Why do my hands hurt after crocheting for a short time?
Hand pain usually comes from gripping too tightly, poor wrist position, or not taking breaks. Make sure you’re holding your hook and yarn with a relaxed grip, keep your wrists in a neutral position, and take a 2-3 minute break every 20 minutes to stretch your hands and fingers.
What’s the best crochet hook for beginners?
I recommend starting with a size G/6 (4.0mm) aluminum hook and medium-weight yarn like Lion Brand Vanna’s Choice or Red Heart Super Saver. This combination is forgiving, affordable, and gives you clear stitch definition so you can see what you’re doing. Once you’re comfortable, you can explore different hook materials and sizes.
How long does it take to develop a comfortable hook hold?
Most people find a comfortable basic grip within their first few practice sessions, but developing the muscle memory for smooth, effortless crocheting takes about 10-15 hours of practice. Don’t worry if it feels awkward at first – everyone goes through that phase. Focus on keeping your grip relaxed and taking breaks when your hands get tired.
Should I use the same grip for all types of crochet projects?
Not necessarily. Many experienced crocheters adjust their grip based on the project. You might use a pencil grip for intricate lacework where precision matters, and switch to a knife grip for large, simple projects where speed and endurance are more important. Experiment with both styles to see what works best for different situations.
Can I crochet if I have arthritis or other hand problems?
Many people with hand issues can still enjoy crocheting with some modifications. Try ergonomic hooks with larger handles, take frequent breaks, do hand exercises before and after crocheting, and consider using lighter-weight yarns that require less grip strength. Always consult with your doctor about activities that might affect your condition.
Learning to hold your crochet hook properly isn’t just about following rules – it’s about setting yourself up for years of comfortable, enjoyable crocheting. I wish someone had taught me these techniques when I started, instead of letting me struggle through months of hand cramps and frustration.
Remember, there’s no single “perfect” way to hold a hook. The best grip is the one that feels comfortable to you, allows you to maintain consistent tension, and doesn’t cause pain or fatigue. Start with the basic techniques I’ve outlined here, then adjust based on what your hands are telling you.
Take your time developing good habits now, and your future self will thank you when you’re still crocheting comfortably for hours at a time. Whether you’re working on a simple beginner scarf pattern or tackling an ambitious blanket project, proper technique is your foundation for success. Happy crocheting!