
You know that moment when you’re halfway through a project and suddenly realize your stitches look nothing like the pattern photo? I’ve been there more times than I care to admit, especially when I first started learning about crochet stitch anatomy. Understanding how stitches are constructed isn’t just academic knowledge – it’s the difference between creating beautiful, even fabric and ending up with wonky, uneven work that makes you want to frog everything.
When I first picked up a hook, I thought a single crochet was just “yarn over, pull through, yarn over, pull through.” But there’s so much more happening in those simple movements. Each stitch has specific parts that serve important functions, and once you understand these components, everything else starts clicking into place. Your tension improves, your stitches become more consistent, and troubleshooting becomes infinitely easier.
The anatomy of crochet stitches affects everything from how your fabric drapes to how well seams hold together. It determines whether your granny squares will lay flat or pucker, whether your blanket patterns will have the right drape, and whether your amigurumi will hold its shape. I wish someone had explained this to me early on – it would have saved me from so many frustrating moments of wondering why my work didn’t match the pattern.
Quick Answer
Every crochet stitch has four main parts: the post (vertical shaft), the top loops (front and back), the working loop, and the foundation. Understanding these components helps you create consistent stitches, follow patterns accurately, and troubleshoot common problems like uneven tension or twisted stitches.
Basic Stitch Components
Every crochet stitch, regardless of height, shares the same fundamental anatomy. Think of it like understanding the parts of a flower – once you know the basic components, you can identify any variety you encounter. The four essential parts are the post, the top loops, the working loop, and the foundation connection.
The post is the vertical shaft of your stitch – the main body that gives it height and structure. In a single crochet, the post is short and compact. In a double crochet, it’s taller and more prominent. The post determines your stitch height and is what you’ll work around when creating textured stitches like front post double crochet.
The top loops are arguably the most important part for most crocheters. These are the two horizontal loops that sit at the top of your completed stitch – one facing toward you (front loop) and one facing away (back loop). When patterns say “work in the next stitch,” they typically mean work under both of these loops unless specified otherwise.
The working loop is the active loop on your hook as you’re creating the stitch. This might seem obvious, but understanding how this loop behaves affects your tension and stitch consistency. A loose working loop creates sloppy stitches, while an overly tight one makes the next row difficult to work into.
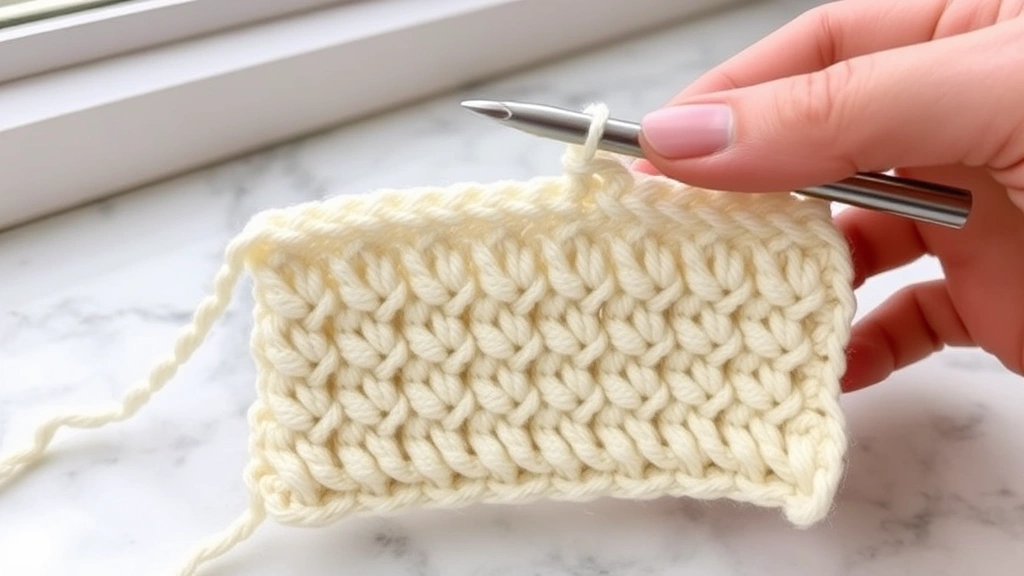
Pro tip: Practice identifying these components on different stitch heights using the same yarn and hook. Use a light-colored worsted weight yarn like Lion Brand Vanna’s Choice in white or cream – it makes the stitch structure much easier to see.
Single Crochet Anatomy
Single crochet is the foundation stitch that teaches you all the basic components in their simplest form. When you insert your hook, yarn over, and pull through (creating two loops on your hook), then yarn over and pull through both loops, you’re creating a specific structure that’s worth examining closely.
The post of a single crochet is minimal – just enough height to create a stable foundation for the next row. This compact structure makes single crochet perfect for projects that need dense, sturdy fabric like bag patterns or pot holders. The short post also means less yarn consumption per stitch, making it economical for large projects.
What’s fascinating about single crochet anatomy is how the working process affects the final structure. When you pull that first loop through, you’re creating the base of your post. The second pull-through creates the top loops and completes the stitch height. This two-step process is why single crochet has such a clean, uniform appearance when worked with consistent tension.
The top loops in single crochet sit very close to the post, creating a tight, secure connection. This is why single crochet fabric has minimal stretch and excellent stitch definition. Each stitch locks firmly into place, making it ideal for projects where you need structural integrity.
| Component | Single Crochet Characteristics | Function |
|---|---|---|
| Post Height | Minimal, compact | Creates dense fabric |
| Top Loops | Close together, tight | Secure stitch connection |
| Yarn Usage | Economical | Less yarn per stitch |
| Fabric Drape | Stiff, structured | Ideal for bags, baskets |
Double Crochet Structure
Double crochet is where stitch anatomy gets really interesting. The additional yarn over at the beginning creates a fundamentally different structure that affects everything from fabric drape to pattern possibilities. Understanding this anatomy helps explain why double crochet is the go-to stitch for so many projects.
The post in double crochet is significantly taller than single crochet, created by that initial yarn over before inserting your hook. This extra height means each stitch uses more yarn but also creates more open, breathable fabric. The post has two distinct sections: the lower portion (from the foundation to where you first yarn over and pull through) and the upper portion (the remaining height to the top loops).
Here’s where it gets technical but important: when you work a double crochet, you’re actually creating three separate “pull-through” actions. First, you pull through the foundation stitch (three loops on hook). Then you yarn over and pull through two loops (two loops remain). Finally, you yarn over and pull through the last two loops. Each of these actions contributes to the stitch’s final anatomy.
The top loops in double crochet sit much higher above the foundation than in single crochet, creating natural spaces between rows. This is why double crochet stitch fabric has better drape and is perfect for garments and flowing blankets. The increased height also means you need fewer rows to achieve the same project dimensions.
I learned this the hard way when I tried to substitute single crochet for double crochet in a blanket pattern. The finished project was much smaller and stiffer than intended because I didn’t account for the anatomical differences between the stitches.
Half Double Crochet Breakdown
Half double crochet sits perfectly between single and double crochet in both height and complexity, but its anatomy creates unique characteristics that make it special for certain applications. The stitch begins like a double crochet with a yarn over, but completes differently, creating a hybrid structure.
The post height in half double crochet is about 1.5 times that of single crochet but shorter than double crochet. What makes this stitch anatomically unique is how it completes: after inserting your hook, yarn over, and pulling through (creating three loops), you yarn over and pull through all three loops in one motion. This creates a post with a slightly different internal structure than either single or double crochet.
This completion method affects the top loops significantly. They’re positioned at a medium height and have a distinctive lean or slant to them. This lean is actually a feature, not a flaw – it creates beautiful texture in solid fabric and makes half double crochet excellent for projects where you want subtle visual interest without complex stitch patterns.
The fabric created by half double crochet has moderate drape – more flexible than single crochet but more structured than double crochet. This makes it perfect for scarf patterns where you want some drape but don’t want the fabric to be too loose or floppy. I often use half double crochet for baby blankets because it creates just the right balance of warmth and softness.
Working Characteristics
The three-loops-at-once completion creates a stitch that works up relatively quickly while maintaining good stitch definition. Your hook moves through more loops per action than single crochet, but you’re not dealing with the multiple yarn-overs of taller stitches. This makes half double crochet great for beginners who want to try something beyond single crochet without jumping straight to double crochet complexity.
Treble Crochet Elements
Treble crochet (also called triple crochet) represents the tall end of basic crochet stitches, and its anatomy reflects this height in fascinating ways. With two yarn overs before inserting your hook, you’re creating a post that’s significantly taller than any of the previous stitches we’ve discussed.
The post structure in treble crochet is complex, with multiple sections created by the various yarn-over and pull-through actions. You start with two yarn overs, insert your hook, yarn over and pull through (four loops on hook), then work through these loops in pairs: yarn over, pull through two (three loops remain), yarn over, pull through two (two loops remain), yarn over, pull through the final two loops.
This multi-step process creates a post with distinct segments, almost like a spiral staircase when viewed closely. Each yarn-over and pull-through action contributes to the stitch’s height and internal structure. The result is a tall, elegant stitch that creates very open fabric with excellent drape.
The top loops in treble crochet sit quite high above the foundation, creating significant space between rows. This openness makes treble crochet perfect for lightweight summer garments, lacy shawl patterns, and projects where you want maximum coverage with minimal yarn weight. However, this same openness can be a drawback for projects that need structure or warmth.
Yarn consideration: Because treble crochet creates such open fabric, yarn choice becomes crucial. Smooth yarns like cotton or bamboo blends show off the stitch structure beautifully, while fuzzy yarns can obscure the elegant lines of tall stitches.
Working Into Different Stitch Parts
Understanding stitch anatomy becomes practical when you learn to work into different parts of existing stitches. This isn’t just about following pattern instructions – it’s about manipulating fabric texture, creating shaping, and achieving specific visual effects. Each part of a stitch offers different possibilities when used as your foundation for the next row or round.
Working under both top loops is the standard approach and creates the smoothest, most stable fabric. The stitches stack neatly on top of each other, creating even tension and consistent appearance. This is your default method unless a pattern specifies otherwise, and it’s what most crocheters do automatically without thinking about the anatomy involved.
Working in the front loop only creates a horizontal ridge on the back of your work and leaves the back loop free. This technique is fundamental for creating textured fabrics and is used extensively in ribbing patterns. The anatomy here is crucial – you’re essentially creating two different surfaces on your fabric by leaving half of each stitch’s top structure unused.
Back loop only work creates the opposite effect, with ridges facing toward you and a smoother surface on the back. This technique is popular for creating the look of knitted stockinette stitch in crochet. Understanding the anatomy helps you see why this works: you’re consistently working into the same relative position on each stitch, creating uniform texture.
Working Around the Post
Post stitches take advantage of the vertical anatomy of crochet stitches by working around the post rather than into the top loops. Front post stitches push forward, back post stitches recede, creating three-dimensional texture. The key to success with post stitches is understanding exactly where to insert your hook relative to the post’s anatomy.
For front post double crochet, you insert your hook from right to left (for right-handed crocheters) around the front of the post, going behind the stitch and emerging on the right side. The post acts as a foundation that you’re wrapping your new stitch around, creating raised texture that’s perfect for cables and basketweave patterns.
| Technique | Effect on Fabric | Best Uses |
|---|---|---|
| Both loops | Smooth, stable | Standard fabric, garments |
| Front loop only | Horizontal ridges | Ribbing, texture work |
| Back loop only | Knit-like appearance | Stockinette look, hats |
| Around post | 3D texture | Cables, basketweave |
Common Stitch Problems and Solutions
Understanding stitch anatomy helps you diagnose and fix common problems that plague many crocheters. When you know how a stitch should look and function, deviations become obvious, and solutions become clearer. Let me walk you through the most frequent issues I see and how anatomical knowledge helps solve them.
Twisted stitches are probably the most common problem I encounter in student work. This happens when you don’t insert your hook correctly into the top loops, often catching only one loop or inserting at an angle. The anatomy of a properly formed stitch shows two distinct, parallel top loops. When stitches look twisted or lean unnaturally, check your hook insertion – you’re likely not going under both loops cleanly.
Uneven stitch height often results from inconsistent tension in the working loop or variations in how you complete each stitch. The anatomy here is about the relationship between your working loop size and the final post height. If your working loop is sometimes loose and sometimes tight, your posts will vary in height even if you’re doing the same stitch throughout.
Gaps between stitches usually indicate that your foundation chain or previous row’s top loops are too loose, or that you’re not working into the correct stitch. Understanding stitch anatomy helps here because you can see exactly where each new stitch should connect to maintain proper fabric structure. Count your stitches and check that you’re working into every top loop pair.
Tension Issues
Tension problems often stem from misunderstanding how the working loop affects stitch anatomy. Your working loop should be snug enough to maintain stitch shape but loose enough to allow easy hook insertion on the next row. I tell students to think of it like a firm handshake – confident but not crushing.
When your tension is too tight, the top loops become difficult to identify and work into, leading to missed stitches or split yarn. When it’s too loose, stitches lose their definition and fabric becomes floppy. The Craft Yarn Council provides excellent guidelines for achieving consistent gauge, which directly relates to proper stitch anatomy.
I spent years fighting with tension until I realized I was thinking about it wrong. Instead of focusing on how tightly to hold the yarn, I started paying attention to the size and shape of my working loop. Once I understood how that loop affected stitch anatomy, my tension became much more consistent.
Common Questions
Why do my stitches lean to one side?
Leaning stitches usually result from inconsistent hook insertion or working too tightly into one side of the top loops. Check that you’re inserting your hook straight down through both top loops, not at an angle. Also ensure you’re not pulling the working yarn too tightly to one side as you complete each stitch. Practice with a larger hook and lighter tension until the movement feels natural.
How can I make my stitch height more consistent?
Consistent stitch height comes from controlling your working loop size and maintaining the same number of yarn overs for each stitch type. Practice making your working loop the same size each time – about the diameter of your hook shaft is a good starting point. Count your yarn overs: single crochet (none), half double (one), double crochet (one), treble (two).
What’s the difference between American and British stitch names?
The anatomy is identical, but the names are different. American single crochet equals British double crochet. American double crochet equals British treble crochet. American treble equals British double treble. When following patterns, always check which terminology is used to avoid confusion about stitch height and structure.
Why do some patterns specify working in specific loops?
Working in different parts of the stitch anatomy creates different textures and fabric properties. Front loop only creates ridges, back loop only mimics knitted stockinette, and both loops create standard smooth fabric. Designers specify these techniques to achieve particular visual or structural effects in their patterns.
How do I know if I’m working into the right part of the stitch?
Look for two parallel horizontal loops at the top of each completed stitch – these are your target unless the pattern specifies otherwise. If you see only one loop, you might be looking at the side of a stitch or working into a different row. Take time to identify the anatomy clearly before inserting your hook.
Can I substitute one stitch height for another?
Substitution is possible but requires adjustments because different stitch heights have different anatomical properties. Shorter stitches create denser fabric and use more yarn per square inch. Taller stitches create more open fabric with better drape. You’ll need to adjust your stitch and row counts, and the final fabric characteristics will be different.
Why does my fabric curve or cup instead of lying flat?
Curving usually indicates incorrect stitch count or tension issues affecting the stitch anatomy. Too few stitches cause cupping (edges pull inward), while too many cause ruffling (edges wave outward). Check your stitch count against the pattern and ensure you’re working into every stitch of the previous row. Consistent tension also helps maintain flat fabric.
How do I fix a mistake several rows back without starting over?
Understanding stitch anatomy helps here because you can identify exactly where the mistake occurred and work backward to that point. Carefully remove your hook and gently pull out stitches row by row until you reach the error. The key is recognizing the anatomy of each stitch as you unravel so you can insert your hook back into the correct working loop when you’re ready to continue.
Mastering crochet stitch anatomy isn’t about memorizing technical terms or impressing other crocheters – it’s about giving yourself the tools to create better, more consistent work and solve problems when they arise. Once you understand how stitches are constructed and how each component functions, you’ll find yourself working with more confidence and achieving more professional-looking results.
The beautiful thing about understanding stitch anatomy is how it builds on itself. Start with single crochet, really examine its structure, then apply that knowledge to taller stitches. Practice working into different parts of stitches and observe how it changes your fabric. Before long, you’ll be reading your work like a book, spotting issues before they become major problems, and understanding exactly why certain techniques create specific effects.
Take your time with this knowledge – there’s no rush to master everything at once. Pick one concept, like identifying top loops clearly, and focus on that until it becomes second nature. Then add another layer, like understanding post structure or practicing different insertion techniques. Your crochet journey will be more enjoyable and successful when you truly understand the anatomy of what you’re creating.