You know that moment when you’re cruising through a crochet project, feeling pretty confident, and then you hit a stitch pattern that makes you question everything? Yeah, I’ve been there too. Learning to read crochet charts felt like trying to decode ancient hieroglyphics when I first started. Those little symbols scattered across a grid looked more like a puzzle than helpful instructions.
But here’s the thing – once you crack the code, crochet charts become your best friend. They’re like having a GPS for your yarn journey, showing you exactly where each stitch goes without all the wordy explanations that can get confusing. I remember spending hours trying to follow written patterns for complex lace designs, only to mess up somewhere in the middle and have no idea where I went wrong.
Charts changed everything for me. Now I can see the whole picture of what I’m making, spot mistakes quickly, and actually enjoy working on intricate patterns instead of dreading them. The visual nature of charts makes it so much easier to understand how stitches relate to each other and how the fabric will look when it’s finished.
If you’ve been avoiding patterns with charts or feeling intimidated by all those symbols, I get it. But trust me on this – investing a little time to learn chart reading will open up a whole world of beautiful patterns that you might have passed by before. Plus, many international patterns only come in chart form, so you’ll have access to gorgeous designs from crocheters all around the world.
Quick Answer
Crochet charts use symbols to represent stitches in a visual grid format, showing exactly where each stitch goes. Read charts from bottom to top and right to left for rows, following the symbol key provided with each pattern.
Understanding Chart Basics
Think of a crochet chart as a bird’s-eye view of your finished fabric. Each square on the grid represents one stitch, and the symbols inside those squares tell you what type of stitch to make. The beauty of this system is that you can actually see how your project will look before you even pick up your hook.
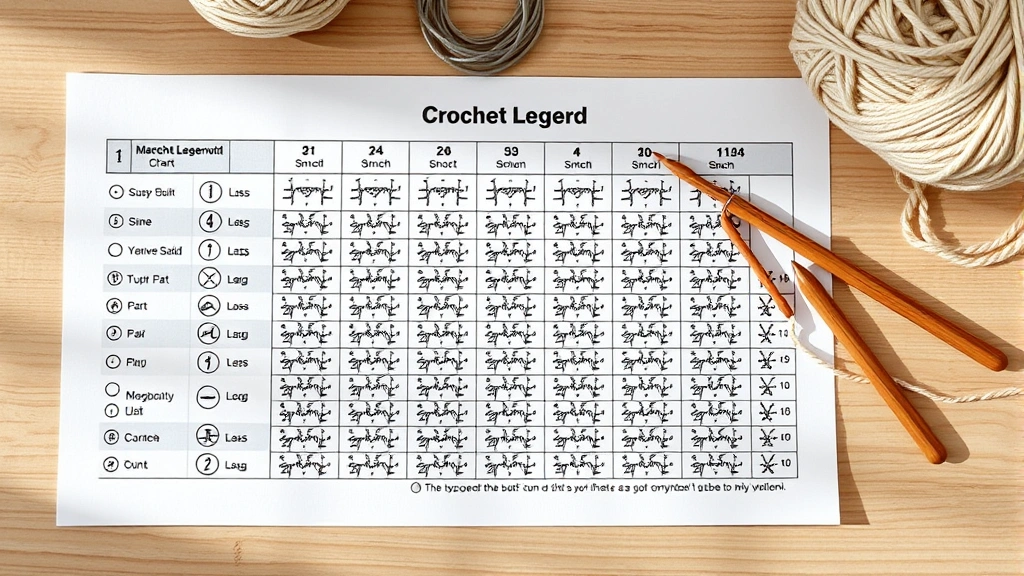
Charts typically come with a key or legend that shows what each symbol means. Don’t worry about memorizing every symbol right away – even experienced crocheters keep the key handy while working. The Craft Yarn Council has standardized many symbols, but you’ll still see variations between pattern designers.
Most charts include row or round numbers along the edges. These numbers help you keep track of where you are in the pattern. You’ll also notice that some charts have different colored backgrounds or highlighted sections – these usually indicate pattern repeats or special sections.
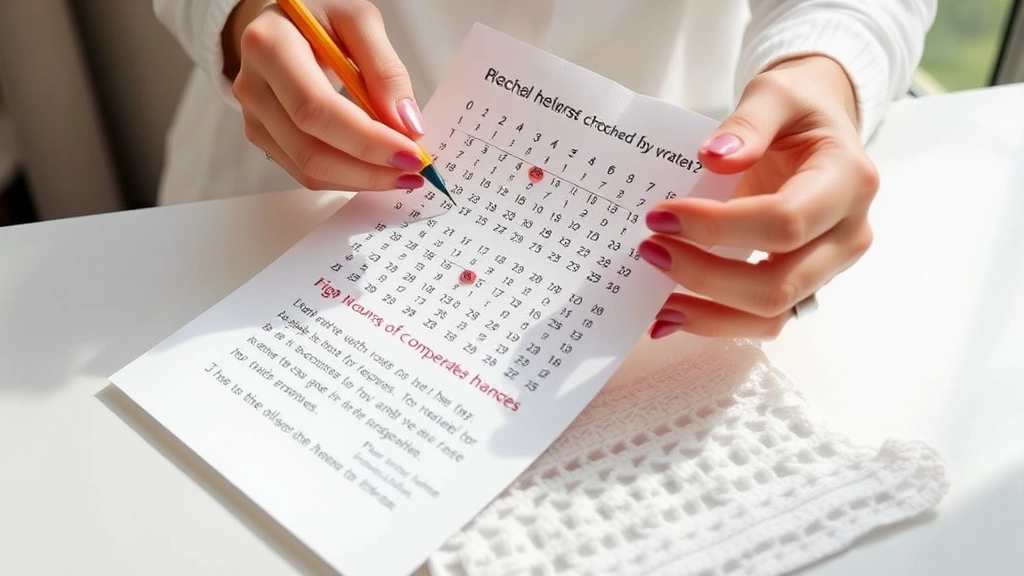
Here’s a tip I learned the hard way: always print out your charts or use a tablet where you can zoom in. Trying to read tiny symbols on your phone while crocheting is a recipe for mistakes and eye strain.
The grid layout shows you the relationship between stitches much more clearly than written instructions. When you’re working on gauge swatches, charts make it easier to see if your tension is consistent across different stitch types. You can spot irregularities in your work before they become bigger problems.
Decoding Chart Symbols
Let’s start with the basics – the symbols you’ll see most often. A chain stitch usually looks like a small oval or circle. Single crochet appears as an X or a short vertical line with a horizontal line through it. Double crochet symbols are taller, often looking like a T with one or more horizontal lines crossing the vertical line.
The height of the symbol generally corresponds to the height of the actual stitch. So double crochet symbols are taller than single crochet symbols, and treble crochet symbols are even taller. This visual representation makes it much easier to understand how your fabric will look.
Decrease symbols often show two or more stitches coming together at the top, while increase symbols might show multiple stitches spreading out from one base. When you’re working on projects that require stitch markers, the chart will often indicate these placement points with special symbols or highlighting.
| Symbol Type | Common Appearance | Represents |
|---|---|---|
| Chain | Small oval or circle | Chain stitch (ch) |
| Single Crochet | X or short line with cross | Single crochet (sc) |
| Double Crochet | T with one crossbar | Double crochet (dc) |
| Treble Crochet | T with two crossbars | Treble crochet (tr) |
Special stitches like popcorns, bobbles, and clusters have their own unique symbols. These might look more complex, but they’re designed to give you a visual hint about what the finished stitch will look like. A popcorn symbol might look like a small circle with lines radiating from it, representing the dimensional nature of the stitch.
Which Direction to Read
This is where many beginners get confused, and honestly, it took me a while to get this down pat. For flat pieces worked in rows, you read charts from the bottom up and from right to left on right-side rows. But here’s the tricky part – on wrong-side rows, you read from left to right.
Think about it logically: when you finish a row and turn your work, you’re starting from the opposite end. The chart reflects this by having you read in the opposite direction on alternate rows. Many charts will have arrows or numbers to help you follow the correct path.
For projects worked in the round, like when you’re making amigurumi projects, you always read from right to left because you never turn your work. The chart will typically show this with curved arrows indicating the circular direction.
Pro tip: Use a ruler or piece of paper to cover the rows above where you’re working. This helps you focus on just the current row and prevents you from accidentally reading ahead.
Some designers include directional indicators right on the chart. Look for small arrows at the beginning of each row or round – these show you which direction to read. If you don’t see arrows, the row numbers can give you a clue. Odd-numbered rows typically read right to left, while even-numbered rows read left to right.
Charts for Rows vs Rounds
Working in rows versus rounds creates different chart layouts, and understanding these differences will save you a lot of confusion. Row charts look like rectangular grids, while round charts often appear circular or are presented as straight grids that represent the “unrolled” rounds.
When working in rounds, you’ll often see a chart that looks like it’s laid out in rows, but it’s actually showing each round stacked on top of each other. The beginning of each round is typically marked, and you’ll work around continuously rather than turning at the end of each row.
For projects like blanket patterns, you might encounter charts that show both row and round sections. Maybe the center is worked in rounds to create a medallion, then switches to rows for the border. The chart will usually indicate where these transitions happen.
I always keep track of my place by highlighting completed rows or rounds with a colored pencil. It sounds old-school, but it works better than any app I’ve tried.
Round charts for complex doilies or mandalas can look intimidating with all those radiating lines and symbols. Start by identifying the center point and the repeat sections. Most round patterns have sections that repeat around the circle, so once you master one repeat, you’ve got the whole round figured out.
Avoiding Common Chart Mistakes
Let me share the mistakes I see most often – and the ones I’ve definitely made myself. The biggest one? Not checking the chart key before starting. I can’t tell you how many times I’ve assumed I knew what a symbol meant, only to realize halfway through that this designer uses a slightly different symbol for double crochet.
Another common mistake is losing track of your place in the chart. This happens especially with larger, more complex patterns. I’ve learned to use both a row counter and physical markers on my printed charts. When working on intricate patterns, having the right crochet tools makes a huge difference in keeping track of your progress.
Misreading the direction is another biggie. I still sometimes catch myself reading the wrong direction on wrong-side rows. The key is to slow down and double-check the row numbers and any directional indicators before you start each new row.
Mistake prevention: Before starting any new row or round, count your stitches from the previous row. If your count doesn’t match what the chart shows, stop and figure out where the discrepancy is.
Not understanding increases and decreases in chart form trips up a lot of people. Remember that the chart shows the finished result, not necessarily the order you work the stitches. A decrease might show two stitches coming together at the top, but you actually work into both base stitches and then combine them at the top.
Building Your Chart Reading Skills
Start small – that’s my best advice for building chart reading confidence. Look for simple patterns with basic stitches and clear charts. Dishcloths and washcloths are perfect for this because they’re quick to work up and use fundamental stitches.
Practice with patterns that include both written instructions and charts. This way, you can compare the two formats and see how they relate to each other. Many beginner patterns are designed exactly this way to help you build skills gradually.
Try recreating simple charts by hand. Pick a basic stitch pattern you know well and draw out what the chart would look like. This exercise really helps you understand the relationship between the physical stitches and their symbolic representation.
- Start with Basic Symbols
Focus on learning chain, single crochet, and double crochet symbols first. These appear in most patterns and form the foundation for more complex charts.
- Practice Direction Reading
Work simple back-and-forth patterns to get comfortable with changing direction between rows. Use a highlighter to mark your path if needed.
- Work Small Samples
Make 4-inch squares using different chart patterns. Keep these as reference samples for future projects.
Join online communities where crocheters share chart reading tips. Ravelry has excellent forums where you can ask questions about specific chart symbols or get help troubleshooting pattern issues.
Troubleshooting Chart Problems
When your work doesn’t match the chart, don’t panic. First, check your stitch count for the current row. If you’re short or over, look back at the previous few rows to find where the discrepancy started. Often, a missed increase or an extra decrease early on will throw off your entire pattern.
Sometimes the problem isn’t with your crocheting – it’s with the chart itself. Pattern errors do happen, and experienced crocheters often spot them and share corrections in online forums. If something seems impossible or doesn’t make sense, search for that pattern name plus “errata” or “corrections.”
Gauge issues can make chart reading more challenging. If your gauge is significantly different from the pattern’s gauge, the proportions shown in the chart might not match your actual work. This is especially important when working on fitted items or when precise measurements matter.
Keep notes on your patterns! I write directly on my chart copies, noting any corrections, modifications, or personal reminders. Future me is always grateful for these notes.
When working with different yarn weights than specified, remember that the chart structure stays the same, but your finished dimensions will change. The visual representation remains accurate, but scale everything up or down based on your yarn choice.
Common Questions
How do I know which direction to read a crochet chart?
For flat pieces worked in rows, read from bottom to top, right to left on right-side rows, and left to right on wrong-side rows. For rounds, always read right to left since you never turn your work. Look for arrows or row numbers to confirm direction.
What if the chart symbols don’t match what I know?
Always check the pattern’s symbol key or legend first. Different designers may use variations of standard symbols. The Craft Yarn Council provides standard symbols, but variations exist.
Can I convert written patterns to charts?
Yes, but it takes practice and patience. Start with simple stitch patterns and use graph paper to map out each stitch. Software like StitchMastery or even Excel can help with more complex conversions.
Why doesn’t my work look like the chart?
Check your gauge first – tension differences can significantly affect how your work looks. Also verify you’re reading the chart in the correct direction and using the right symbols. Count your stitches frequently to catch errors early.
How do I handle chart errors or unclear symbols?
Search online for pattern corrections or errata first. Join the pattern designer’s Ravelry group or social media pages where other crocheters often share solutions. When in doubt, contact the designer directly.
Should I print charts or use digital versions?
Both have advantages. Printed charts let you mark your progress and make notes, while digital versions allow zooming and easy storage. Many crocheters use both – printing working copies and keeping digital backups.
How long does it take to learn chart reading?
Basic chart reading can be learned in a few practice sessions, but becoming comfortable takes several projects. Most crocheters feel confident with simple charts after 2-3 projects and can tackle complex charts after 6-8 months of regular practice.
What’s the best way to keep track of my place in complex charts?
Use multiple methods: highlight completed rows, use a ruler to cover unworked sections, keep written notes of your current position, and count stitches frequently. Row counters and removable stitch markers also help tremendously.
Learning to read crochet charts is honestly one of the best skills you can develop as a crocheter. Yes, it feels overwhelming at first, but once you get the hang of it, you’ll wonder how you ever managed without them. Charts make complex patterns so much clearer and help you catch mistakes before they become disasters.
Remember, every expert chart reader started exactly where you are now. Give yourself permission to go slowly, make mistakes, and ask questions. The crochet community is incredibly supportive, and there’s always someone willing to help decode a tricky symbol or explain a confusing section.
Start with simple patterns and work your way up gradually. Before you know it, you’ll be tackling those gorgeous lace doilies and intricate colorwork patterns that once seemed impossible. Your future self will thank you for taking the time to master this skill – trust me on that one. Happy crocheting!