
You know that moment when you’re scrolling through social media and see someone wearing the most gorgeous crocheted sweater? Your first thought is probably “I need to make that!” followed immediately by “But wait, how do I even start?” I’ve been there too, staring at a beautiful pattern and feeling completely overwhelmed by the prospect of creating something so complex.
Here’s the thing about crocheting sweaters – they’re not nearly as intimidating as they look. Sure, there’s more planning involved than your typical dishcloth project, but once you break it down into manageable pieces, it’s really just a series of rectangles and sleeves sewn together. The key is understanding the fundamentals: choosing the right yarn and hook, taking accurate measurements, and following a pattern that matches your skill level.
I remember my first sweater attempt. I dove headfirst into an intricate cable design without properly understanding gauge (spoiler alert: it ended up fitting my teenage niece instead of me). But that disaster taught me everything I needed to know about the importance of preparation. Now, after making dozens of sweaters for myself and others, I can confidently say that anyone who can single crochet and double crochet can absolutely make a wearable, beautiful sweater.
The best part? Once you’ve mastered the basics, you’ll have a skill that saves you money and gives you a completely custom wardrobe. No more settling for sweaters that are too short in the arms or too loose in the waist – you’ll be creating pieces that fit you perfectly every single time.
Quick Answer
Start with a simple pullover pattern in worsted weight yarn, take accurate body measurements, and always make a gauge swatch first. Choose a pattern rated for beginners and work your way up to more complex designs as your skills improve.
Choosing Your First Sweater Pattern
Your pattern choice can make or break your first sweater experience. I always recommend starting with a simple pullover that’s worked in pieces – think basic rectangles for the front, back, and sleeves. Avoid anything with complex colorwork, intricate stitch patterns, or fitted shaping until you’ve got a few sweaters under your belt.
Look for patterns specifically labeled “beginner-friendly” or “easy.” These typically use basic stitches like single crochet, half double crochet, and double crochet. The Ravelry database is fantastic for finding patterns with detailed reviews from other makers who’ll tell you exactly what to expect.
Drop-shoulder construction is your friend here. Unlike set-in sleeves, which require precise shaping, drop shoulders are essentially rectangles attached to more rectangles. The fit is relaxed and forgiving, which means small gauge issues won’t ruin the final product.
Pro tip: Read through the entire pattern before starting. I know it’s tempting to dive right in, but understanding the construction method and sequence will save you from nasty surprises later.
Consider the yarn weight specified in your pattern carefully. Most beginner sweater patterns use worsted weight yarn (Category 4) because it works up quickly and shows stitch definition clearly. You’ll want to stick with the recommended yarn weight for your first project – substitutions can drastically change the fit and drape.
Selecting the Right Yarn and Tools
Yarn choice is crucial for sweater success, and honestly, this is where a lot of beginners go wrong. You might think that gorgeous fuzzy mohair blend looks perfect, but trust me – save the specialty yarns for when you’re more experienced. For your first sweater, choose a smooth, plied yarn in a solid or semi-solid color.
Worsted weight acrylic yarns like Lion Brand Vanna’s Choice or Red Heart Super Saver are excellent choices for beginners. They’re affordable, machine washable, and forgiving to work with. If you prefer natural fibers, cotton blends or superwash wool work beautifully and are still beginner-friendly.
| Yarn Type | Pros | Cons | Best For |
|---|---|---|---|
| Acrylic | Affordable, machine washable, consistent | Less breathable, can pill | First sweaters, everyday wear |
| Cotton | Breathable, machine washable, durable | Less stretch, can be heavy | Summer sweaters, structured pieces |
| Wool | Warm, elastic, natural | Requires hand washing, more expensive | Winter sweaters, fitted pieces |
| Blends | Combines best properties | Varies by blend | Versatile, good compromise |
You’ll need significantly more yarn than you might expect. A typical adult sweater requires 1200-2000 yards of worsted weight yarn, depending on size and length. Always buy extra – running out of yarn mid-project when your dye lot is discontinued is heartbreaking. I typically purchase 10-15% more than the pattern calls for.
Hook size matters too. Most worsted weight sweater patterns call for a size H/8 (5.0mm) or I/9 (5.5mm) hook. Having a few sizes available lets you adjust if your gauge is off. Ergonomic hooks with comfortable grips are worth the investment for large projects like sweaters.
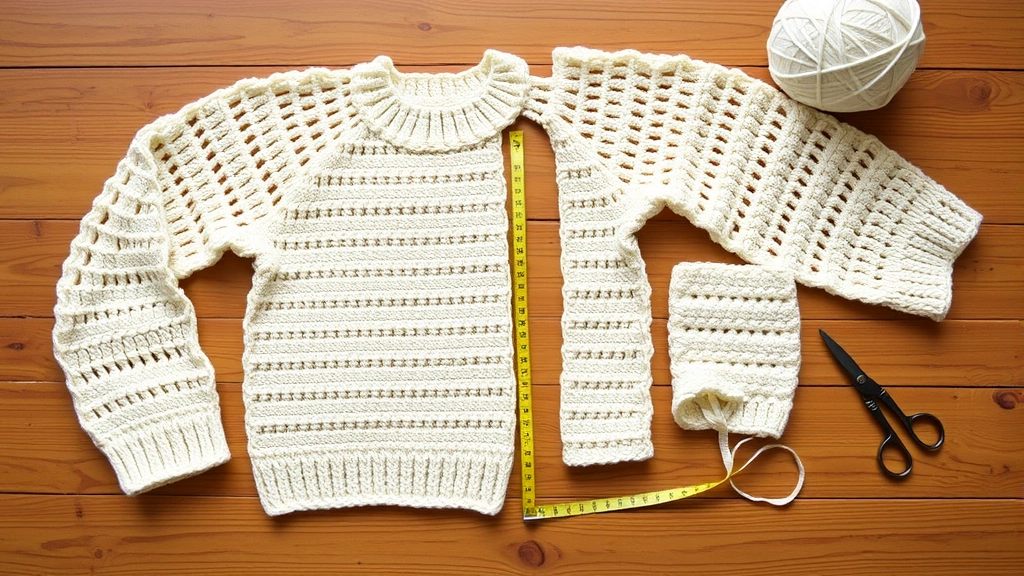
Taking Accurate Measurements
This step is absolutely critical, and it’s where I see most beginners stumble. Sweater patterns typically include a schematic showing the finished measurements of each piece, but you need to know your body measurements to choose the right size.
Here are the essential measurements you’ll need:
- Bust/chest circumference: Measure around the fullest part of your chest, keeping the tape measure level
- Waist circumference: Measure at your natural waistline
- Hip circumference: Measure around the fullest part of your hips
- Shoulder width: Measure from shoulder point to shoulder point across your back
- Arm length: Measure from shoulder to wrist with your arm slightly bent
- Upper arm circumference: Measure around the fullest part of your upper arm
Most crochet sweaters include 2-4 inches of positive ease, meaning the finished garment measures larger than your body. This creates a comfortable, wearable fit. Don’t choose a size based solely on your bust measurement – compare all your measurements to the pattern’s finished dimensions.
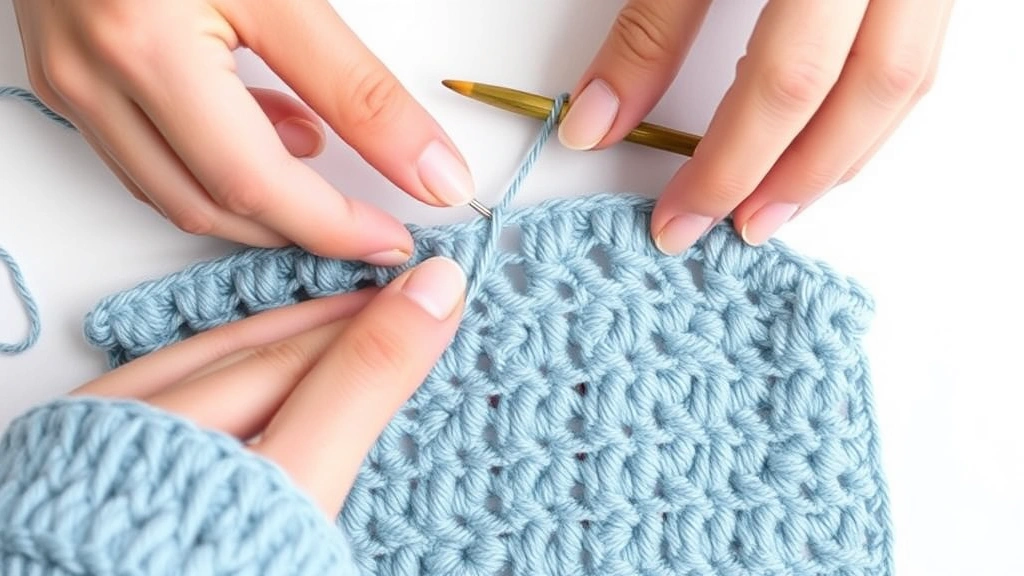
When working with basic crochet stitches, remember that different stitches create different amounts of stretch and drape. Single crochet creates a dense, stable fabric with minimal stretch, while double crochet is more open and flexible.
Understanding Gauge and Why It Matters
Gauge is the number of stitches and rows per inch in your fabric, and it’s the difference between a sweater that fits and one that becomes an expensive pillow cover. I cannot stress this enough: always, always make a gauge swatch before starting your sweater.
Most patterns specify gauge over a 4-inch square. For example, “16 stitches and 12 rows = 4 inches in double crochet.” This means you should have exactly 16 stitches across and 12 rows down in a 4-inch measurement.
To make a proper gauge swatch, crochet a square that’s at least 5 inches by 5 inches using the yarn and hook specified in the pattern. This gives you enough fabric to measure accurately in the center, away from the potentially distorted edges. Wash and block your swatch the same way you’ll care for the finished sweater – some yarns change dramatically after washing.
- Crochet Your Swatch
Make a 5×5 inch square using the pattern stitch and specified hook size. Don’t cheat and make it smaller – you need enough fabric for accurate measurement.
- Measure Carefully
Place a ruler in the center of your swatch and count stitches across 4 inches. Then count rows down 4 inches. Use a row counter or place pins to mark your measurements.
- Adjust If Needed
If you have too many stitches per inch, try a larger hook. Too few stitches? Go down a hook size. Re-swatch until you match the pattern gauge exactly.
I know gauge swatching feels tedious, but it’s literally the foundation of a well-fitting sweater. The difference between 15 stitches per 4 inches and 17 stitches per 4 inches might seem tiny, but over the width of a sweater, that’s several inches of difference in the final size.
Basic Sweater Construction Methods
Understanding how sweaters are constructed helps you follow patterns more easily and troubleshoot problems. Most beginner-friendly sweaters use one of two construction methods: bottom-up or top-down.
Bottom-Up Construction
This traditional method involves crocheting separate pieces (front, back, and sleeves) and then seaming them together. It’s perfect for beginners because you can see each piece take shape individually, and it’s easy to try pieces on for fit as you go.
The typical sequence is: back panel, front panel, sleeves, then assembly. Each piece is worked from the bottom hem up to the shoulders. This method works well with various stitch patterns and is very forgiving if you need to adjust length.
Top-Down Construction
Top-down sweaters start at the neckline and work downward, often in one continuous piece. While this eliminates most seaming, it requires more advanced planning and shaping techniques. I’d recommend mastering bottom-up construction first.
The advantage of top-down construction is minimal finishing work and the ability to try the sweater on as you work. However, it’s harder to adjust fit issues once you’ve passed that point in the construction.
For your first sweater, stick with bottom-up construction in pieces. It’s more forgiving, easier to understand, and gives you better control over fit and shaping.
When working on sweater construction, having a solid understanding of reading crochet patterns becomes essential. Pattern abbreviations and construction notes can seem overwhelming at first, but they follow consistent conventions once you learn the basics.
Step-by-Step Sweater Making Process
Now let’s walk through the actual process of making your first sweater. I’ll break it down into manageable phases so you don’t feel overwhelmed.
Phase 1: Preparation (Don’t Skip This!)
Before you make your first chain, gather everything you need. This includes your pattern, yarn, hooks, scissors, stitch markers, measuring tape, and a notebook for tracking your progress. Read through the entire pattern at least twice, highlighting any techniques you’re unfamiliar with.
Calculate your total yarn needs and organize your skeins. I like to wind center-pull balls for easier working, especially for large pieces. Set up a comfortable workspace with good lighting – you’ll be here for a while!
Phase 2: The Back Panel
Most patterns start with the back panel because it’s usually the simplest piece. You’ll typically start with a foundation chain, work in your chosen stitch pattern for the body length, then shape the armholes and neckline.
Pay attention to stitch counts at the end of each row. It’s much easier to fix a mistake immediately than to discover it twenty rows later. I keep a row counter handy and mark my progress on a printed copy of the pattern.
Phase 3: The Front Panel
The front panel often mirrors the back until you reach the neckline shaping. This is where patterns can get tricky, with decreases and short rows to create the neck opening. Take your time here and double-check your stitch counts frequently.
If your pattern includes a V-neck or scoop neck, you’ll likely work each side separately after a certain point. Use separate balls of yarn for each side to avoid tangling.
Phase 4: Sleeves
Sleeves are typically worked from the cuff up, with increases along the way to create the proper shape. The rate of increase determines how fitted or loose the sleeve will be. Most beginner patterns include clear instructions for when and where to increase.
Keep both sleeves consistent by working them simultaneously or taking detailed notes about your first sleeve. Nothing’s more frustrating than having sleeves of different lengths!
Avoiding Common Beginner Mistakes
Let me save you from some of the pitfalls I’ve seen (and experienced) over the years. These mistakes are incredibly common, so don’t feel bad if you’ve made them – we all have!
Mistake #1: Ignoring Gauge
I mentioned this earlier, but it bears repeating. Your gauge swatch might match perfectly, but your tension can change as you work on the actual project. Check your gauge periodically throughout the sweater, especially if you take breaks between work sessions.
Mistake #2: Not Counting Stitches
It’s tempting to just crochet along without counting, especially in simple stitch patterns. But gradual increases or decreases in stitch count will create a wonky, trapezoid-shaped piece instead of a rectangle. Count your stitches at the end of every few rows.
Mistake #3: Inconsistent Tension
Your tension naturally varies based on your mood, fatigue level, and even the time of day. Some crocheters work tighter in the morning and looser in the evening. Pay attention to your fabric and adjust your hook size if needed to maintain consistency.
Mistake #4: Poor Seaming
Even a perfectly crocheted sweater can look homemade if the seams are sloppy. Take time to learn proper seaming techniques. Good finishing techniques can make the difference between a sweater you’re proud to wear and one that stays hidden in your closet.
Use the same yarn for seaming that you used for the sweater body. Contrasting thread or yarn creates visible seam lines that look unprofessional. Pin pieces together before seaming to ensure proper alignment.
Finishing and Assembly Tips
The finishing work is where your sweater transforms from a collection of crocheted pieces into a wearable garment. This phase requires patience, but it’s absolutely worth the effort.
Blocking Your Pieces
Before assembly, block each piece to the measurements specified in your pattern. Wet blocking works well for most yarns – soak pieces in cool water with wool wash, gently squeeze out excess water, and pin to measurements on blocking mats.
Proper blocking evens out your stitches, opens up lace patterns, and ensures all pieces are the correct size. It’s especially important for pieces that will be seamed together – mismatched edges create puckered, uncomfortable seams.
Seaming Techniques
For crochet sweaters, I prefer mattress stitch for side seams and sleeve attachments. It creates a nearly invisible seam that lies flat against the body. Work with pieces right-side up so you can see how the seam will look as you work.
Pin pieces together before seaming, matching stitch patterns and ensuring even distribution. Take your time – rushing through seaming shows in the final product.
Adding Finishing Touches
Most sweater patterns include instructions for neckline finishing, often a simple single crochet border or ribbing. These finishing touches aren’t optional – they prevent stretching and give your sweater a polished, professional appearance.
If your pattern doesn’t include finishing instructions, a simple round of single crochet around the neckline, worked with a hook one size smaller than used for the body, creates a neat edge that won’t curl or stretch out.
Understanding different stitch combinations can help you customize finishing details or troubleshoot pattern instructions that don’t seem quite right for your yarn choice.
Common Questions
How long does it take to crochet a sweater?
A simple adult pullover typically takes 40-80 hours of work time, depending on size, stitch pattern, and your crochet speed. Working 2-3 hours per day, most beginners complete their first sweater in 3-6 weeks. Complex patterns with intricate stitch work or colorwork can take significantly longer.
How much yarn do I need for a sweater?
Adult sweaters typically require 1200-2000 yards of worsted weight yarn, depending on size and style. Larger sizes, longer lengths, and long sleeves require more yarn. Always buy 10-15% extra to account for gauge swatching and potential mistakes. It’s better to have leftover yarn than to run short mid-project.
What’s the easiest sweater pattern for beginners?
Look for a simple pullover with drop-shoulder construction, worked in basic stitches like single crochet or double crochet. Avoid patterns with complex shaping, colorwork, or intricate stitch patterns for your first project. Rectangle-based construction is most forgiving for beginners.
Can I modify a sweater pattern to fit better?
Yes, but start with simple modifications like adjusting length. To change body width, you’ll need to recalculate stitch counts based on your gauge. Sleeve modifications are more complex because they affect armhole fit. For your first sweater, choose a pattern size that fits well rather than attempting major modifications.
What if my gauge doesn’t match the pattern?
Change your hook size and re-swatch. If you have too many stitches per inch (tight gauge), use a larger hook. Too few stitches per inch (loose gauge) requires a smaller hook. Don’t skip this step – incorrect gauge will result in a poorly fitting sweater regardless of how carefully you follow the pattern.
Should I wash my sweater before wearing it?
Yes, especially if you used acrylic yarn. Washing relaxes the fibers and gives the sweater a softer hand. Follow the yarn label care instructions. Many acrylic yarns become softer and more drapey after the first wash. Block your sweater to measurements after washing for the best fit and appearance.
How do I fix a mistake several rows back?
For small mistakes like a missed stitch, you can often work a correction into the next row without frogging (ripping out) your work. For significant errors affecting stitch count or pattern alignment, it’s usually better to frog back to the mistake and rework correctly. This is frustrating but results in a better finished product.
What’s the best way to store a handmade sweater?
Fold sweaters rather than hanging them to prevent stretching. Store in a cool, dry place with cedar blocks or lavender sachets to deter moths if using natural fibers. For long-term storage, use breathable cotton bags rather than plastic, which can trap moisture and lead to mildew.
Making your first crochet sweater is definitely a commitment, but it’s one of the most rewarding projects you can tackle. Yes, it takes longer than a scarf or dishcloth, and yes, there are more opportunities for things to go wrong. But there’s something incredibly satisfying about wearing a sweater you made with your own hands, knowing it fits you perfectly because you created it specifically for your body.
Remember, every expert crocheter started exactly where you are now. That gorgeous sweater you admired on social media? The person who made it probably frogged their first attempt at least once. The key is to start with a simple pattern, take your time with the preparation steps, and not be afraid to ask for help when you need it.
Your first sweater doesn’t have to be perfect – it just has to be finished. Each project teaches you something new, and by the time you’re working on your second or third sweater, you’ll be amazed at how much more confident and skilled you’ve become. So pick out that yarn, find a pattern that excites you, and dive in. You’ve got this!