Last week, I was helping my neighbor Sarah with her first crochet project, and she asked me something that stopped me in my tracks: “What’s the difference between a chain and a slip stitch?” It hit me that these two fundamental stitches, while both seeming simple, actually serve completely different purposes in crochet. If you’re just starting out, or even if you’ve been crocheting for a while, understanding when and how to use each one can make or break your projects.
Here’s the thing – I see a lot of new crocheters get confused about these basics, and honestly, I don’t blame them. Pattern instructions often assume you know the difference, but no one really explains WHY you’d use one over the other. Sarah’s question reminded me of my own early days when I’d accidentally slip stitch when I should have chained, creating wonky edges that drove me crazy.
The truth is, both stitches are essential building blocks, but they work in completely different ways. Chains create height and structure, while slip stitches join and finish. Think of chains as the scaffolding of your project and slip stitches as the glue that holds everything together. Once you understand their unique roles, you’ll start seeing why patterns call for specific stitches in specific places.
Quick Answer
Chain stitches create height and form the foundation of most crochet work, while slip stitches are primarily used for joining rounds, moving across stitches without adding height, and creating smooth finishes. Chains build up; slip stitches connect and travel.
Chain Stitch Fundamentals
The chain stitch is probably the first stitch you learned, and for good reason – it’s the foundation of almost everything in crochet. When you make a chain, you’re essentially creating a series of loops that provide structure and height to your work. Each chain measures roughly the same width as your yarn, and they stack up to create the vertical space needed for taller stitches.
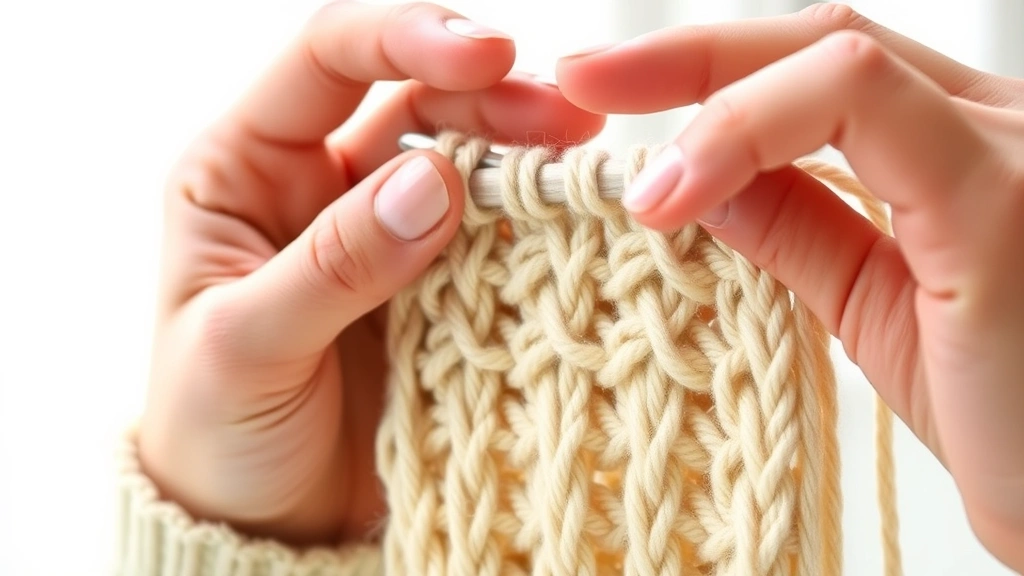
To make a chain stitch, you yarn over (wrap the yarn around your hook from back to front), then pull that yarn through the loop already on your hook. That’s it. The key is keeping consistent tension – not too tight that you can’t work into the chains later, but not so loose that your foundation looks sloppy.
Here’s what I’ve learned after years of crocheting: your foundation chain tension sets the tone for your entire project. If you’re working on something like granny squares, loose chains will make your first round wonky, while tight chains will pucker and be nearly impossible to work into.
Pro tip: Count your chains as you make them, especially for foundation chains. I usually count in groups of 10 and place a stitch marker every 50 chains for longer projects. It saves so much time compared to recounting everything.
The height of chain stitches also matters depending on what comes next. One chain roughly equals the height of a single crochet, two chains equal a half double crochet, three chains equal a double crochet, and so on. This is why turning chains are so important – they give you the height you need to start the next row.
Chain Stitch Variations
Not all chains are created equal. Foundation chains (your starting row) need to be worked into, so they should be slightly looser than regular chains. Turning chains, which you make at the beginning of each new row, can be tighter since they’re mainly for height. Space chains (like the chain-1 spaces in mesh patterns) need consistent tension to keep your fabric even.

Slip Stitch Fundamentals
If chain stitches are the workhorses of crochet, slip stitches are the quiet helpers that make everything possible. A slip stitch is essentially pulling one loop through another without adding any height. It’s the flattest stitch in crochet, which makes it perfect for joining, traveling, and finishing.
To make a slip stitch, insert your hook into the designated stitch or space, yarn over, and pull the yarn through both the stitch and the loop on your hook in one motion. Unlike other stitches where you work in stages, slip stitches happen all at once.
The most common use for slip stitches is joining rounds in circular projects. When you’re working in the round, you slip stitch into the first stitch of the round to close the circle. This creates a seamless join that’s much neater than leaving the round open.
But slip stitches do so much more than just join. They’re perfect for moving your working yarn to a different position without adding bulk. Let’s say you’re working on a flower pattern and need to get from the center to the edge without creating visible stitches – slip stitches are your answer.
Tension matters: Slip stitches should be snug but not tight. If they’re too loose, your joins will be visible and sloppy. Too tight, and you’ll distort your fabric and make it hard to work the next round.
Slip Stitch Applications
Beyond joining, slip stitches create beautiful surface textures. Slip stitch crochet (working slip stitches into the surface of completed fabric) can add decorative lines, outlines, and even colorwork designs. They’re also essential for finishing techniques like reinforcing edges and creating smooth transitions between colors.
When to Use Chain Stitches
Understanding when to use chain stitches comes down to recognizing their primary functions: creating height, forming foundations, and making spaces. Every time you need vertical structure in your crochet, chains are usually the answer.
Foundation chains are the most obvious application. Whether you’re making a simple single crochet dishcloth or an intricate lace shawl, you’ll typically start with a foundation chain that determines the width of your project. The general rule is to chain the number of stitches you want plus the appropriate number of turning chains for your stitch height.
Turning chains are another essential use. At the end of each row, you’ll chain up to create the height needed for the next row’s stitches. For single crochet, that’s usually chain 1. For double crochet, it’s chain 3. These turning chains often count as the first stitch of the new row, which is something that confused me for months when I started crocheting.
Chain spaces are where things get really interesting. In lace patterns, mesh designs, and openwork projects, chains create the gaps that give these patterns their characteristic look. A chain-2 space in a filet crochet pattern creates a different effect than a chain-5 space in a lace design.
| Stitch Type | Turning Chain | Counts as First Stitch? |
|---|---|---|
| Single Crochet | Chain 1 | Usually no |
| Half Double Crochet | Chain 2 | Sometimes |
| Double Crochet | Chain 3 | Usually yes |
| Treble Crochet | Chain 4 | Yes |
Chains also create structure in three-dimensional projects. When making amigurumi, chains often form the starting point for appendages like arms, tails, or decorative elements. They provide the foundation that everything else builds upon.
When to Use Slip Stitches
Slip stitches shine when you need to connect, travel, or finish without adding bulk or height. Their flat profile makes them invisible helpers that keep your projects looking professional and neat.
The most common application is joining rounds. Every time you work in the round – whether it’s a hat, a granny square, or the center of a mandala – you’ll use slip stitches to close each round. The technique is always the same: slip stitch into the first stitch of the round, then chain up for the next round if needed.
Slip stitches are also perfect for moving your working yarn to a new position. Imagine you’re working a complex motif pattern where you need to start the next section from a different point. Instead of cutting your yarn and reattaching it (which creates more ends to weave in), you can slip stitch across to where you need to be.
Color changes often involve slip stitches too. When you’re working stripes or color patterns, slip stitches help you transition smoothly from one color to another without creating visible jogs or steps in your work.
Here’s something I wish someone had told me earlier: slip stitches are your friend when fixing mistakes. If you’ve crocheted past an error and need to get back to the right spot, slip stitching backward is often faster and neater than ripping out entire rows.
Surface slip stitches open up a whole world of decorative possibilities. You can use them to add contrasting outlines, create textural interest, or even “draw” designs on finished pieces. I love using surface slip stitches to add details to blanket squares or to outline shapes in pictorial crochet.
Common Mistakes and How to Fix Them
Let’s talk about the mistakes I see most often with these two stitches, because honestly, we’ve all been there. The good news is that once you know what to watch for, these problems are totally fixable.
The biggest chain stitch mistake is inconsistent tension in foundation chains. I can’t tell you how many times I’ve seen beautiful projects ruined by foundation chains that are too tight to work into comfortably. Your foundation chain should have enough give that you can easily insert your hook and pull yarn through without fighting it.
Another common issue is miscounting chains. It happens to everyone, but it’s especially frustrating when you’re 50 chains into a 200-chain foundation and realize you’ve lost count. That’s why I always recommend using stitch markers every 10 or 20 chains, especially for larger projects.
With slip stitches, the most frequent problem is pulling them too tight. When your slip stitches are overly snug, they distort the fabric and make it nearly impossible to work the next round. The join should lie flat against your work, not pucker or pull.
Quick fix for tight slip stitches: Make your slip stitch join, then gently stretch the joined area with your fingers. This helps the stitches settle into their proper position and prevents puckering.
Placement errors with slip stitches are also super common. When joining rounds, make sure you’re slip stitching into the first stitch of the round, not into the chain space or turning chain. The pattern will usually specify, but when in doubt, slip stitch into the actual stitch.
Fixing Chain Mistakes
If your foundation chain is too tight, you have a few options. You can try using a larger hook just for the foundation (then switch back to your pattern hook), or you can practice making looser chains. Some crocheters prefer foundation stitches instead of traditional chains because they’re automatically the right tension.
Practical Applications in Real Projects
Let me share some real-world examples of how these stitches work in actual projects, because seeing them in context makes everything click.
When I made my first baby blanket, I used chains for the foundation (180 chains for a 36-inch width), turning chains at the end of each row (chain 3 for double crochet rows), and chain spaces in the border pattern. The slip stitches came in when I joined the border rounds and when I needed to travel from one corner to the next without creating visible stitches.
In hat projects, chains create the crown’s foundation (usually a chain 4 joined into a ring), while slip stitches close every single round from the crown to the brim. Without those slip stitch joins, you’d have a spiral instead of distinct rounds, which would throw off your shaping completely.
Granny squares are perfect examples of both stitches working together. You start with a foundation chain (usually chain 4), join it with a slip stitch to form a ring, then use chains to create the corner spaces and slip stitches to join each round. The interplay between the two creates the classic granny square structure.
| Project Type | Chain Uses | Slip Stitch Uses |
|---|---|---|
| Scarves | Foundation, turning chains | Joining ends (if circular) |
| Hats | Starting ring, crown increases | Joining all rounds |
| Blankets | Foundation, borders, spaces | Joining motifs, border rounds |
| Amigurumi | Starting rings, appendages | Joining rounds, closing holes |
For edging projects, slip stitches are often used to attach the edging to the main fabric, while chains create the decorative loops, picots, and arches that make edgings so pretty. I always tell people that mastering slip stitch attachment techniques will elevate their finishing skills more than any other single technique.
Troubleshooting Common Problems
Even experienced crocheters run into issues with these fundamental stitches. Here are the problems I help people solve most often, along with practical solutions that actually work.
Problem: Foundation chain twists while you’re working the first row. This usually happens when your chains are too loose or when you’re not paying attention to which side of the chain you’re working into. The solution is to keep your foundation chain flat on your work surface and always work into the same side of each chain.
Problem: Slip stitch joins create visible bumps or ridges. This typically means you’re pulling too tight or working into the wrong part of the stitch. Try loosening your tension slightly and make sure you’re inserting your hook completely through the stitch, not just under one loop.
Problem: Turning chains create holes or gaps at the edges. This is super common and usually happens when the turning chain is too long for the stitch height or when you’re skipping the first stitch incorrectly. Check your pattern to see if the turning chain counts as a stitch, and adjust accordingly.
Here’s a game-changer I learned from an experienced designer: when your slip stitch joins look messy, try making the join one stitch earlier or later than where you think it should go. Sometimes the “first stitch” of a round isn’t where you expect it to be.
Problem: Chain spaces are uneven sizes. This usually comes down to counting and tension. Make sure you’re chaining the exact number specified in the pattern, and try to keep consistent tension throughout. Using a consistent hook size helps too.
Problem: Can’t find where to slip stitch when joining rounds. Look for the top of the first stitch you made in that round – it should have a distinctive “V” shape on top. That’s usually where your slip stitch goes, unless the pattern specifies otherwise.
Common Questions
Do I always need to slip stitch when working in the round?
Not always! Some patterns use continuous rounds (spirals) where you never join, just keep working around and around. This is common in amigurumi and some hat patterns. The pattern will tell you whether to join each round or work continuously. Joined rounds create distinct levels, while continuous rounds create smooth spirals.
How many chains do I need for different stitch heights?
The standard is: chain 1 for single crochet, chain 2 for half double crochet, chain 3 for double crochet, and chain 4 for treble crochet. However, these can vary depending on your tension and the specific pattern. Some designers prefer chain 2 for double crochet to reduce bulk. Always follow your pattern’s instructions first.
Why do my foundation chains look twisted?
This happens when you’re not working into the correct part of the chain or when your tension varies too much. Make sure you’re working into the back bump of each chain (the side that looks like a braid) and keep your work flat. Consistent tension is key – practice making chains until they look even and uniform.
Can I use slip stitches instead of chains for height?
No, slip stitches don’t add any height, so they can’t replace turning chains. If you try to use slip stitches where you need chains, your work will be too short and likely distorted. Each stitch type has its specific purpose – chains for height, slip stitches for joining and traveling.
How tight should my slip stitch joins be?
Slip stitch joins should be snug enough to close the round completely but not so tight that they pucker the fabric or make it hard to work the next round. The join should lie flat against your work. If you can see a gap, it’s too loose. If the fabric bunches up, it’s too tight.
What happens if I skip the slip stitch join in a round?
Skipping the slip stitch join means your round isn’t properly closed, which can cause your work to spiral instead of forming distinct rounds. This affects stitch count and can throw off your entire pattern. In some cases, like continuous amigurumi rounds, this might be intentional, but for most patterns, you need that join.
Why do patterns sometimes say “chain 3 counts as first dc”?
When a turning chain counts as the first stitch, it means you treat that chain as if it were an actual double crochet stitch. You don’t work a double crochet into the first stitch of the previous row – instead, you skip it and start with the second stitch. At the end of the row, you work your last stitch into the top of the turning chain from the previous row.
Can I fix a mistake by slip stitching backward?
Yes! Slip stitching backward (sometimes called reverse slip stitch) is a great way to get back to where you need to be without completely ripping out your work. Insert your hook into the previous stitch, yarn over, and pull through both loops. It’s much neater than unraveling rows, especially in complex patterns.
Understanding the difference between chain and slip stitches really is one of those foundational skills that makes everything else in crochet easier. Once you’ve got these basics down solid, you’ll find yourself reading patterns more confidently and troubleshooting problems more effectively. The key is practice and patience – both stitches are simple in concept but take time to master in application.
Remember, every expert crocheter started exactly where you are now, wondering about these same basic questions. Don’t get discouraged if it takes a while to get comfortable with when to use each stitch. Keep practicing, pay attention to how different patterns use these stitches, and soon you’ll be using chains and slip stitches instinctively. Happy crocheting!