You know that feeling when you’re scrolling through Instagram, admiring all those gorgeous crochet projects, and wondering how on earth people manage to create such intricate designs? I’ve been there too. After years of making basic scarves and dishcloths, I finally decided to tackle some of those stunning patterns I’d been bookmarking. What I discovered was that most “complex” crochet projects aren’t actually that complicated – they just use a combination of techniques that look impressive when put together.
The truth is, once you master a handful of intermediate techniques, you’ll unlock a whole world of beautiful patterns. I’m talking about those show-stopping blankets with intricate texture work, delicate lace shawls that look like they belong in a boutique, and amigurumi creatures with personality that jumps off the hook. The secret isn’t some mysterious advanced skill – it’s understanding how to combine basic stitches in creative ways and knowing a few key techniques that elevate your work.
I remember the first time I successfully completed a pattern that used front post and back post stitches to create a cable effect. It felt like magic! Suddenly, I wasn’t just making flat fabric anymore – I was sculpting with yarn. That’s when crochet transformed from a simple hobby into something that genuinely excited me every time I picked up my hook.
Quick Answer
Intermediate crochet techniques include textural stitches like front/back post work, colorwork methods such as tapestry and intarsia, shaping techniques like increases and decreases, and construction methods like join-as-you-go. These skills open up complex-looking patterns that are actually quite manageable once broken down.
Textural Stitches That Add Dimension
Let’s start with the techniques that’ll make people ask “How did you DO that?” when they see your work. Textural stitches are your gateway to creating fabric that has depth, interest, and that professional look you’ve been admiring in other people’s projects.
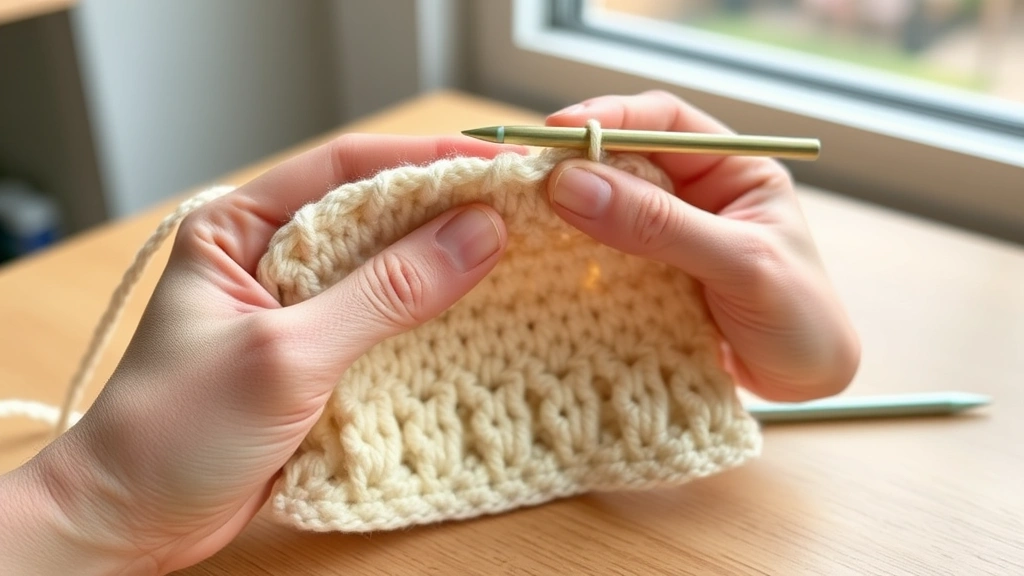
Front Post and Back Post Stitches
These are absolute game-changers. Instead of working into the top of your stitches like usual, you’re working around the post (the vertical part) of the stitch. Front post double crochet (fpdc) brings stitches forward, while back post double crochet (bpdc) pushes them back. When you alternate these, you get ribbing that looks just like knitting.
I love using these for hat brims because they create that snug, professional fit. The key is maintaining consistent tension – too tight and your fabric won’t have enough give, too loose and you’ll lose the definition. Practice on a swatch first with worsted weight yarn and a 5mm hook until the motion feels natural.
Pro Tip: When working front post stitches, your yarn should be in front of your work. For back post stitches, keep your yarn in back. This prevents that awkward twisting that makes beginners think they’re doing something wrong.
Cable Stitches and Crossed Stitches
Real cables require cable needles in knitting, but we can fake the look beautifully with crossed stitches. You’re essentially skipping stitches and working them out of order, creating that woven appearance. The Craft Yarn Council has great visual guides for these symbol charts.
Start with simple 2-over-2 crosses before attempting more complex cables. I find that using a slightly smaller hook than recommended gives better stitch definition – if your pattern calls for a 5mm, try a 4.5mm instead.
Bobble and Popcorn Stitches
These dimensional stitches add incredible texture to blankets and sweaters. Bobbles are worked in one stitch and closed at the top, while popcorns are folded and secured. Both techniques require you to work multiple stitches without completing them, then yarn over and pull through all the loops at once.
The trick with these stitches is yarn choice. They show up beautifully in solid colors but can get lost in busy variegated yarns. I’ve had great success using them in baby blankets with soft cotton blends.
Colorwork Techniques for Stunning Effects
Colorwork is where crochet really shines compared to knitting. We can create intricate designs without the complexity of managing multiple needles, and our stitches naturally create more defined color blocks.
Tapestry Crochet
This technique involves carrying unused colors along your work and switching between them to create patterns. Unlike intarsia, you’re always working with the same number of stitches, making it perfect for geometric designs and pictorial work.
The key to clean tapestry work is changing colors at the right moment. Always complete your last stitch in the old color up to the final yarn over, then use the new color for that final pull-through. This prevents that messy bleed-through effect that screams “beginner.”
Tension is crucial here. Keep your carried yarn snug but not tight – you want it to lie flat against the back of your work without puckering. I recommend practicing with high-contrast colors first so you can easily see any mistakes.
Intarsia Method
Unlike tapestry crochet, intarsia uses separate balls of yarn for each color section. This is perfect for large blocks of color or when you don’t want the bulk of carried yarns. Think graphgans with large pictorial elements.
Organization is everything with intarsia. I use small bobbins or even just loose lengths of yarn, but keep them untangled. When changing colors, twist your yarns around each other to prevent holes – always bring the new color up from under the old color.
Yarn Management: For large intarsia projects, I tape small ziplock bags to my work surface, one for each color. Keeps everything organized and prevents the yarn spaghetti situation we’ve all experienced.
Planned Pooling
This trendy technique uses the color repeats in variegated yarn to create argyle or plaid effects. It requires precise stitch counts and consistent tension, but the results are absolutely stunning.
Success depends on your yarn choice and hook size. Red Heart Super Saver stripes is the gold standard for planned pooling because of its consistent color lengths. Start with their recommended hook size, but don’t be afraid to adjust if your pooling isn’t lining up.
| Yarn Type | Best Hook Size | Pooling Difficulty |
|---|---|---|
| Red Heart Stripes | 5.5mm (I) | Beginner |
| Caron Simply Soft Stripes | 5mm (H) | Intermediate |
| Lion Brand Mandala | 4.5mm (7) | Advanced |
Essential Shaping and Construction Methods
This is where your projects go from “obviously handmade” to “where did you buy that?” Understanding how to shape your crochet work opens up garments, fitted accessories, and three-dimensional projects.
Strategic Increases and Decreases
Increases and decreases aren’t just for amigurumi. They’re essential for creating curved edges, fitted sleeves, and shaped necklines. The key is placing them strategically rather than randomly.
For gradual shaping, I prefer invisible increases (working two stitches in one space) over obvious ones like shells. For decreases, the invisible decrease (pulling through two stitches at once) creates much cleaner lines than skipping stitches.
When working fitted sweaters, I always make increases at the same point in each row – usually at the side seams or raglan lines. This creates clean, professional-looking shaping that’s easy to replicate.
Short Rows for Curves
Short rows let you add length to specific sections without affecting the whole row. They’re perfect for bust darts, curved hems, and shoulder shaping. The concept is simple: you work partway across a row, turn, and work back, leaving some stitches unworked.
The trick is hiding the turns so they don’t create holes or obvious jogs. I like to work a slip stitch in the turning stitch, then continue with my pattern stitch. It takes practice, but once you get it, you’ll wonder how you ever made fitted garments without short rows.
Working in the Round vs. Flat
Knowing when to work in the round versus flat construction can make or break a project. Seamless construction is beautiful, but sometimes seams provide necessary structure and shaping.
For cardigans, I prefer working flat pieces and seaming because it gives better drape and fit. But for hats and cowls, working in the round eliminates bulk and creates smoother lines. Consider your yarn weight too – bulky yarns often look better with minimal seaming.
Join-as-You-Go and Seamless Techniques
Nobody enjoys spending hours sewing pieces together, especially when the seaming doesn’t look as neat as you’d hoped. These techniques let you construct projects as you go, eliminating most finishing work.
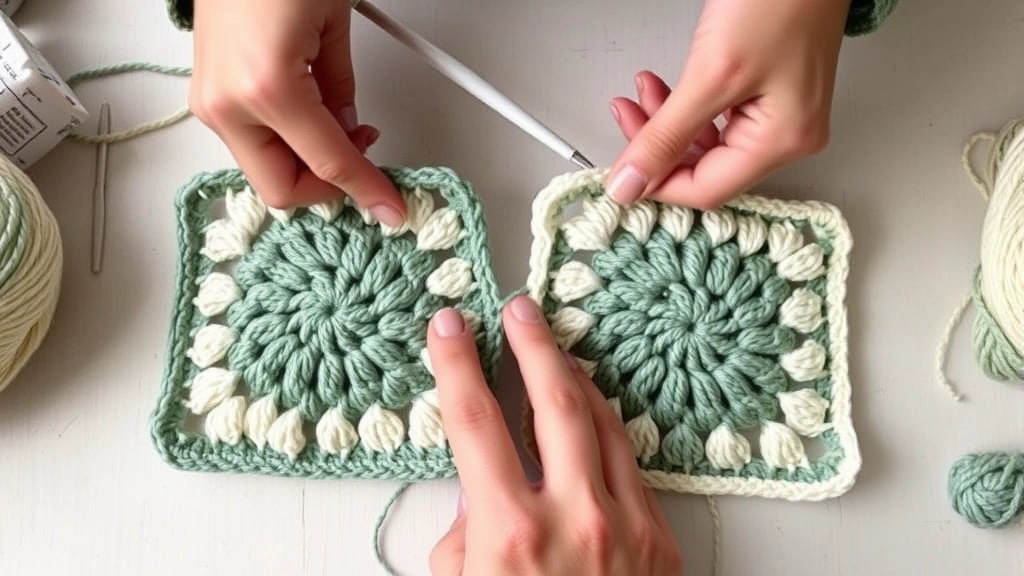
Join-as-You-Go Squares
This method connects granny squares during the final round, creating a seamless join that’s actually stronger than sewn seams. You’re essentially sharing stitches between adjacent squares.
The key is planning your layout before you start joining. I always arrange my squares and take a photo so I don’t lose track of the pattern. When joining, work your final round up to a corner, then connect to the adjacent square by working through both loops of the corresponding stitch.
Planning Tip: For large blankets, I join squares in strips first, then join the strips. It’s much easier to manage than trying to join everything at once.
Continuous Rounds
Instead of joining each round with a slip stitch, continuous rounds spiral upward without seams. This creates incredibly smooth fabric, perfect for amigurumi and seamless garments.
The challenge is keeping track of your rounds without that obvious join mark. I use removable stitch markers to mark the beginning of each round, moving it up as I work. Some crocheters prefer to use a different colored yarn as a running marker.
Seamless Sleeve Construction
Working sleeves from the shoulder down eliminates the need for setting in sleeves – often the most intimidating part of garment construction. You pick up stitches around the armhole and work downward, shaping with decreases.
This technique works beautifully for summer tops and casual sweaters. The key is getting your pickup ratio right – usually about 3 stitches for every 2 row ends, but this varies with your yarn and stitch pattern.
Decoding Complex Patterns Like a Pro
Complex patterns can look intimidating with their walls of abbreviations and technical terms. But once you understand how to break them down, even the most elaborate designs become manageable.
Understanding Charts and Symbols
Symbol charts are actually easier than written instructions once you get comfortable with them. Each symbol represents a specific stitch, and the chart shows exactly where each stitch goes in relation to the others.
Start by learning the basic symbols – chain, single crochet, double crochet, and slip stitch cover 80% of most patterns. Ravelry has an excellent symbol library if you encounter unfamiliar ones.
I always trace my progress on charts with a highlighter or removable marker. It prevents losing your place and helps you see the pattern emerging.
Breaking Down Complex Stitch Patterns
When faced with a 12-row repeat that looks like gibberish, break it down into smaller chunks. Most complex patterns are just variations on basic themes – shells, fans, clusters, or post stitches arranged in different ways.
I like to work a small swatch of any new stitch pattern before starting the full project. It helps me understand the rhythm and catch any mistakes early. Plus, swatches are great for testing yarn and hook combinations.
Gauge and Sizing Adjustments
Gauge isn’t just about matching the designer’s measurements – it’s about understanding how your personal tension affects the finished project. Even experienced crocheters need to adjust for different yarns and hook materials.
For lace shawls, I often go up a hook size from what the pattern suggests because I tend to crochet tightly. The extra drape is worth the slight size increase. Always make a generous gauge swatch – at least 6 inches square for accurate measurement.
Professional Finishing Techniques
The difference between handmade and homemade often comes down to finishing. These techniques take a bit more time but elevate your work to professional standards.
Blocking for Perfect Results
Blocking transforms your finished pieces, evening out stitches and opening up lace patterns. It’s especially crucial for large blankets and fitted garments.
Wet blocking works for most natural fibers – soak your piece in cool water with wool wash, gently squeeze out excess water, then pin to measurements on blocking mats. Steam blocking with an iron works well for acrylics that might not respond to wet blocking.
Investment in good blocking mats pays off quickly. I use interlocking foam tiles marked with a grid – they’re much easier than trying to measure and pin on carpet or beds.
Invisible Seaming
When seaming is necessary, invisible techniques create clean, professional-looking joins. The mattress stitch works beautifully for side seams, while single crochet seaming adds stability to shoulders and armholes.
Always use the same yarn for seaming when possible, and take your time. Rushing through seaming shows in the finished project. I prefer to seam with slightly looser tension than my main fabric to prevent puckering.
Edge Finishes
A clean edge finish can make or break a project. Simple single crochet borders work well for most pieces, but consider picot edges for feminine touches or crab stitch (reverse single crochet) for a decorative rope-like border.
For afghans, I often work a round of single crochet first to even out any irregularities, then add a more decorative border on top. This two-step approach creates much neater results.
Common Challenges and Solutions
Every crocheter faces these challenges when tackling more complex projects. Here’s how to handle them without frogging hours of work.
Tension Issues
Inconsistent tension is the most common problem I see in intermediate projects. It’s especially noticeable in colorwork and textural patterns where uneven stitches really show.
Practice is key, but there are shortcuts. Hold your yarn consistently – I keep my pinky finger hooked through the working yarn to maintain steady tension. If you’re a tight crocheter, try holding your hook more like a pencil rather than a knife.
For projects where tension is critical, I sometimes switch to a different hook material. Bamboo hooks tend to grab yarn more than aluminum, which can help loose crocheters maintain tension.
Color Changes and Yarn Ends
Complex projects generate lots of yarn ends, and weaving them in properly is crucial for durability. I weave ends as I go rather than leaving them all for the end – it’s much less overwhelming.
For color changes in the middle of rows, I prefer the Russian join for wool yarns or careful weaving for cotton and acrylic. Never just tie knots – they’ll work loose over time and create weak spots.
End Management: I keep a tapestry needle threaded and ready while working complex colorwork. Every few rows, I stop and weave in the accumulated ends. Much easier than facing 50+ ends at once.
Pattern Mistakes
When you discover a mistake several rows back in a complex pattern, don’t automatically frog everything. Often you can fix errors by carefully dropping down to the mistake and rebuilding just that section.
For dropped stitches, use a crochet hook one size smaller to rebuild the column of stitches. For wrong stitches, sometimes you can camouflage them with creative interpretation rather than ripping out hours of work.
Common Questions
What’s the difference between intermediate and advanced crochet techniques?
Intermediate techniques involve combining basic stitches in new ways, working with multiple colors, and understanding construction methods. Advanced techniques typically require specialized tools, complex mathematical calculations for original designs, or mastery of historical techniques like Tunisian or Irish crochet. If you can read patterns, work basic increases/decreases, and maintain consistent tension, you’re ready for intermediate techniques.
How long does it take to master intermediate crochet skills?
Most crocheters can pick up individual intermediate techniques within a few practice sessions, but mastering them takes 3-6 months of regular practice. Complex colorwork and shaping techniques require more time to perfect. I recommend focusing on one new technique per project rather than trying to learn everything at once. Your muscle memory needs time to develop.
What yarn weight is best for learning intermediate techniques?
Worsted weight (size 4) yarn with a 5mm hook is ideal for learning most intermediate techniques. It’s thick enough to see your stitches clearly but not so bulky that details get lost. Light-colored, smooth yarn like cotton or acrylic shows stitch definition better than dark or fuzzy yarns. Save the fancy fibers for after you’ve mastered the techniques.
Should I use stitch markers for complex patterns?
Absolutely! Stitch markers are essential for intermediate work. Use locking markers to mark pattern repeats, removable markers for round beginnings, and safety pins to mark right and wrong sides. I also use different colored markers to indicate different pattern elements – blue for increases, red for decreases, green for color changes. It saves countless hours of counting and recounting.
How do I know if I’m ready for a particular intermediate pattern?
Read through the entire pattern first. If you understand 80% of the techniques and abbreviations, you’re probably ready. Unknown techniques can be learned, but if more than half the pattern is unfamiliar, choose something simpler first. Also check the recommended skill level and read project reviews on Ravelry – other crocheters often mention if a pattern is harder than advertised.
What’s the most important intermediate technique to learn first?
Front post and back post stitches are game-changers because they open up so many texture possibilities and are used in countless patterns. They’re also relatively easy to master and give immediate gratification. Once you’re comfortable with post stitches, basic colorwork techniques like simple stripes and color changes will expand your options dramatically.
How much yarn should I buy for intermediate projects?
Always buy 10-20% more yarn than the pattern calls for, especially for complex projects where you might need to redo sections. For colorwork projects, buy all your yarn at once to ensure dye lot consistency. I keep detailed notes of yarn amounts used in successful projects – it helps with future planning and gives me confidence when substituting yarns.
Can I modify intermediate patterns for different sizes?
Simple modifications like length adjustments are usually fine, but width changes in intermediate patterns can be tricky because they often rely on specific stitch counts for pattern repeats. Start with patterns that include multiple sizes or clear instructions for customization. As you gain experience, you’ll develop the skills to make more complex modifications, but it requires understanding the pattern’s construction logic.
Learning intermediate crochet techniques feels like unlocking a secret level in your favorite game. Suddenly, all those patterns you’ve been admiring become achievable, and your projects start looking like the ones you see in magazines and on social media. The key is patience with yourself and consistent practice.
Remember, every expert was once a beginner who kept going. Those beautiful, complex-looking projects are just combinations of techniques you can absolutely master. Start with one new skill per project, practice it until it feels natural, then add another layer of complexity.
The most rewarding part of advancing your crochet skills isn’t just the beautiful finished projects – it’s the confidence that comes with knowing you can tackle any pattern that catches your eye. Trust me, once you’ve mastered these intermediate techniques, you’ll wonder why you ever thought they were intimidating. Now grab your hook, pick a technique that excites you, and start creating something amazing.