You know that moment when you’re halfway through a beautiful crochet project and suddenly realize your stitches are getting looser and looser? Or maybe you’ve been crocheting for years but your gauge still seems to have a mind of its own, making every pattern a guessing game. Trust me, I’ve been there – staring at a supposedly “medium” sweater that could fit a linebacker, wondering where I went wrong.
Crochet tension is one of those things that can make or break your projects, yet it’s often glossed over in tutorials. I learned this the hard way when I spent weeks on an intricate baby blanket pattern only to end up with something that looked more like a circus tent than a cozy coverlet. The frustrating part? I thought I was following the pattern perfectly.
Here’s what I wish someone had told me years ago: tension isn’t just about how tightly you hold your yarn. It’s about understanding how your hands, your hook, your yarn choice, and even your mood all work together to create consistent stitches. Some days you’ll crochet tighter when you’re stressed, looser when you’re relaxed. Learning to recognize and adjust for these variations is what separates confident crocheters from frustrated ones.
The good news is that once you understand the mechanics behind tension control, you can tackle any pattern with confidence. Whether you’re working on delicate doily patterns that require precision or chunky blankets where slight variations won’t show, mastering your tension will transform your crochet experience.
Quick Answer
Perfect crochet tension comes from consistent yarn positioning, proper hook grip, and regular gauge checking. Practice holding your yarn with steady pressure while maintaining relaxed hands – tension should feel controlled but not forced.
Understanding What Tension Really Means
Let’s clear up some confusion right off the bat. When crocheters talk about “tension,” we’re really talking about two related but different things: the physical tension in your hands and yarn, and the resulting stitch gauge. Think of it like driving a car – your foot pressure on the gas pedal (physical tension) determines your speed (stitch gauge).
Physical tension refers to how tightly you grip your hook and control your yarn. Too tight, and you’ll struggle to insert your hook and create cramped, dense fabric. Too loose, and your stitches will be sloppy and uneven. The sweet spot is what I call “controlled relaxation” – firm enough to maintain consistency, relaxed enough to let the yarn flow smoothly.
Stitch gauge, on the other hand, is the measurable result of your tension. It’s how many stitches and rows you get per inch, and it’s what determines whether your finished project matches the pattern’s intended size. The Craft Yarn Council provides standard gauge ranges for different yarn weights, but your personal gauge might vary.
Why Consistent Tension Matters
I used to think slight variations in tension wouldn’t matter much – after all, who’s going to measure my stitches with a ruler? But inconsistent tension creates a ripple effect throughout your project. Loose sections will stretch and sag over time, while tight sections remain rigid. This is especially noticeable in garments and structured projects like bags and purses.
For decorative items like wall hangings, slight tension variations can actually add character. But for fitted items or projects where stitch count matters – think sweaters, hats, or amigurumi – consistency is crucial.
| Project Type | Tension Priority | Tolerance Level |
|---|---|---|
| Garments | High | Very Low |
| Blankets | Medium | Medium |
| Amigurumi | High | Low |
| Scarves | Medium | Medium-High |
| Decorative Items | Low-Medium | High |
Hand Position and Hook Grip Fundamentals
Your hook grip is like your crochet signature – everyone develops their own style, but some approaches definitely work better than others. I’ve tried every grip variation out there, and here’s what I’ve learned works best for maintaining consistent tension.
The Pencil Grip vs. Knife Grip
Most crocheters naturally gravitate toward either a pencil grip (holding the hook like you’d hold a pencil) or a knife grip (holding it like a dinner knife). Neither is inherently better, but each affects your tension control differently.
The pencil grip gives you more precise control and works well for detailed work. Your thumb and index finger do most of the work, while your other fingers provide stability. This grip tends to produce slightly tighter tension because you have more fine motor control.
The knife grip uses your whole hand and can be less fatiguing for large projects. You’ll typically get slightly looser, more relaxed stitches with this grip. I find it particularly good for projects using bulky yarn or larger hooks.
Pro tip: Try both grips with the same yarn and hook size, then measure your gauge. You might find one grip naturally produces gauge that’s closer to pattern requirements.
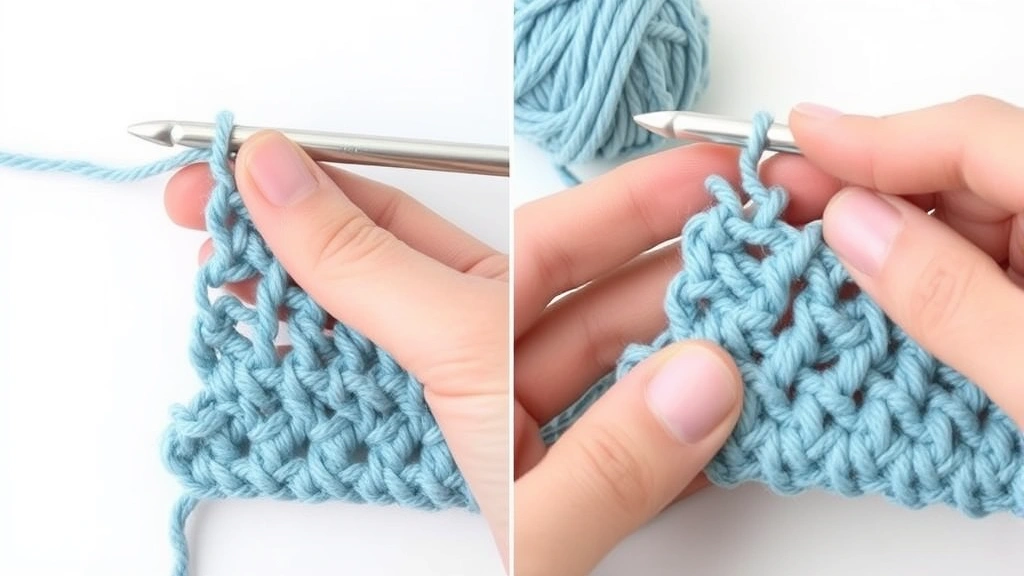
Finding Your Optimal Grip Pressure
Here’s an exercise that changed my crochet game: Hold your hook normally, then gradually tighten your grip until your knuckles turn white. Now slowly relax until the hook barely stays in your hand. Your optimal grip pressure is about 30% of the way between completely relaxed and death-grip tight.
Your grip should feel secure but not strained. If your hand starts cramping after 15-20 minutes, you’re gripping too tightly. If you’re constantly readjusting your hold on the hook, you’re probably too relaxed.
Yarn Control Techniques That Actually Work
Yarn control is where the magic really happens. You can have perfect hook technique, but if your yarn feed is inconsistent, your tension will be all over the place. I learned this lesson while working on a complex afghan pattern where every row looked slightly different despite using the same stitches.
The Three-Point Control System
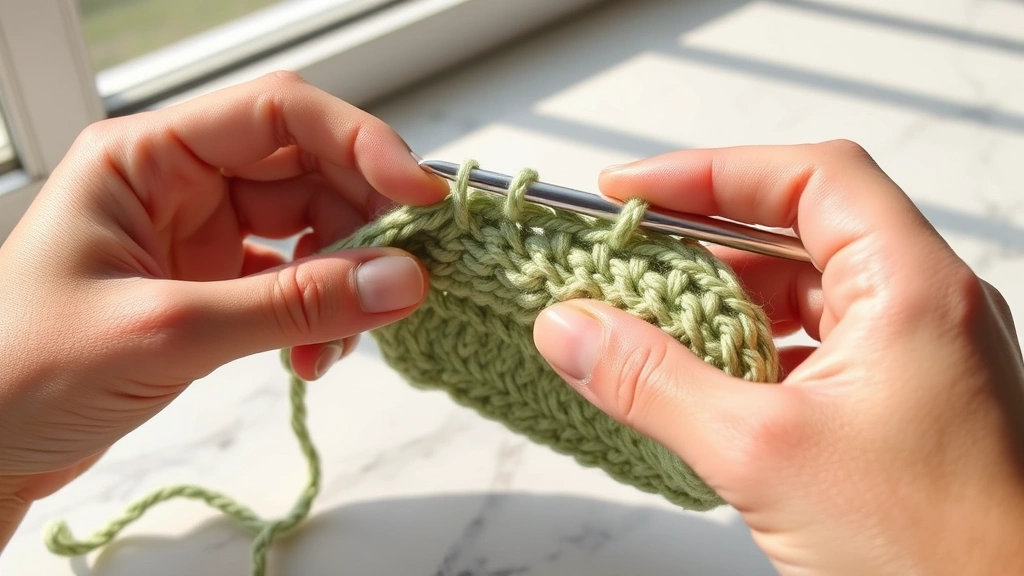
Think of yarn control as a three-point system: your yarn source (ball or skein), your tension finger, and your hook. The yarn should flow smoothly between these three points without binding or slacking.
Your tension finger – usually your index finger on your non-hook hand – is the control center. The yarn should wrap around or rest against this finger, giving you a consistent reference point for pressure. Some crocheters wrap the yarn around their pinky finger too, creating additional control points.
I prefer the “index finger wrap” method: yarn comes from the ball, goes under my middle finger, over my index finger, then to the hook. This gives me excellent control without creating too much friction. Experiment with different wrapping patterns to find what feels natural for your hands.
Adjusting for Different Yarn Types
Not all yarns behave the same way, and your tension control needs to adapt accordingly. Slippery yarns like bamboo or silk need slightly firmer control to prevent them from sliding around. Cotton yarns tend to be less forgiving of tension variations because they don’t have the stretch to accommodate irregularities.
Fuzzy yarns like mohair or alpaca can hide minor tension inconsistencies, making them more forgiving for beginners. Synthetic acrylics usually have moderate stretch and consistent texture, making them ideal for practicing tension control.
When switching between yarn types within a project, always work a few practice rows to readjust your tension. Your muscle memory needs time to adapt to the new yarn’s characteristics.
Gauge Swatching for Consistent Results
I know, I know – gauge swatches feel like homework when you just want to start your project. But here’s the thing: a 10-minute gauge swatch can save you hours of frogging later. I learned this the expensive way with a sweater that required three complete do-overs.
Making Gauge Swatches That Actually Matter
Forget those tiny 2-inch gauge squares that some patterns suggest. Make your swatch at least 6 inches square using the same yarn, hook, and stitch pattern as your project. Why? Because your tension often changes as you get into a rhythm, and small swatches don’t capture this variation.
Use the exact yarn you’ll use for the project – not just the same brand and weight, but yarn from the same dye lot. Yarn characteristics can vary between dye lots, affecting your gauge. Work your swatch in the same environment where you’ll do most of your project work. If you usually crochet while watching TV, make your swatch while watching TV.
- Create Your Base
Chain enough stitches to make about 6 inches, then work in your project’s main stitch pattern for at least 6 inches height.
- Let It Rest
Don’t measure immediately. Let your swatch sit overnight, or at least for a few hours. Yarn has memory and needs time to settle into its natural state.
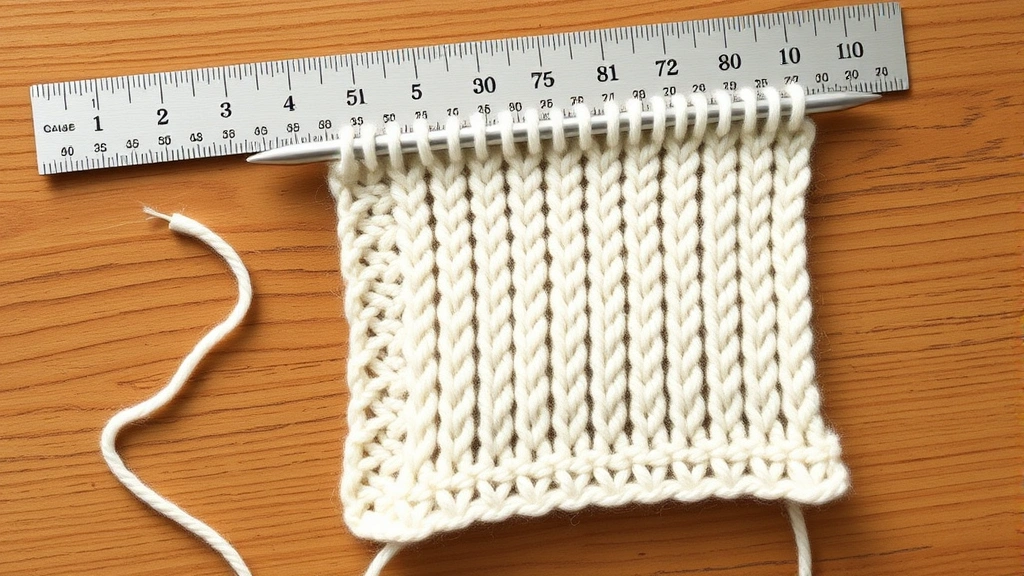
- Measure Accurately
Use a rigid ruler, not a flexible tape measure. Measure multiple sections of your swatch and average the results. Count stitches and rows over 4 inches, not just 1 inch scaled up.
- Block if Necessary
If your project will be blocked, block your gauge swatch too. Some yarns change dramatically after blocking, especially cotton and linen.
Interpreting and Adjusting Your Gauge
If your gauge is off, resist the urge to just “crochet differently.” Instead, change your hook size. Going up one hook size typically loosens your gauge by about half a stitch per inch. Going down tightens it by roughly the same amount.
Keep detailed notes about your gauge adjustments. I maintain a simple notebook with yarn type, hook size, and resulting gauge for every project. This reference has saved me countless hours of re-swatching for similar projects.
| Your Gauge | Pattern Gauge | Adjustment Needed |
|---|---|---|
| Too many stitches/inch | Fewer stitches/inch | Larger hook |
| Too few stitches/inch | More stitches/inch | Smaller hook |
| Correct stitch gauge | Wrong row gauge | Adjust technique, not hook |
Troubleshooting Common Tension Problems
Let’s talk about the tension problems that make you want to throw your project across the room. I’ve experienced every single one of these, and I’ve learned that most tension issues have surprisingly simple solutions once you identify the root cause.
The “Tightening Spiral”
This is when your stitches gradually get tighter as you work, often without you realizing it. It usually happens when you’re concentrating hard or feeling stressed. The result is a project that starts normal-sized but gradually shrinks.
The fix is awareness and regular checking. Every few rows, hold up your work and look at the overall shape. If it’s starting to curve or pucker, you’re tightening up. Take a break, shake out your hands, and consciously relax your grip for the next few stitches.
Inconsistent Edge Stitches
Edge stitches often look different from the rest of your row because you handle them differently. Your turning chain might be too tight or too loose, or you might be working your first and last stitches with different tension than the middle ones.
For turning chains, try this: make your turning chain with slightly looser tension than your regular stitches. The chain needs to accommodate the height of the next row without pulling tight. For single crochet rows, chain 1 loosely. For double crochet, chain 3 with relaxed tension.
Edge stitch trick: Work your first and last stitch of each row with conscious attention to matching the tension of your middle stitches. It takes practice, but it makes a huge difference in how professional your edges look.
Hook Size vs. Tension Confusion
Sometimes crocheters try to fix gauge problems by forcing different tension instead of changing hook sizes. This creates an exhausting, inconsistent experience. If you find yourself constantly fighting to make looser or tighter stitches, you probably need a different hook size, not different tension.
Your natural tension should feel comfortable and sustainable. If maintaining the “right” tension requires conscious effort throughout your project, something’s wrong with your setup, not your technique.
Practice Exercises to Build Muscle Memory
Muscle memory is everything in crochet tension control. Your hands need to learn what consistent tension feels like so they can maintain it automatically while you focus on stitch patterns and counting. These exercises have helped me and countless students develop reliable tension control.
The Metronome Exercise
This might sound weird, but working to a steady rhythm helps develop consistent tension. Set a metronome (or use a phone app) to about 60-80 beats per minute. Work single crochet stitches in time with the beat – yarn over on one beat, pull through on the next.
The goal isn’t speed; it’s consistency. When you work at a steady rhythm, your hands naturally settle into consistent movements and pressure. After practicing this for 15-20 minutes a few times, you’ll notice your regular crochet becomes more even.
The Tension Ladder
This exercise helps you understand your tension range and find your sweet spot. Using worsted weight yarn and an H hook, make a foundation chain of 20 stitches. Work the first row with deliberately tight tension – not so tight you can’t work, but tighter than comfortable.
For the second row, relax your tension slightly. Continue for 10 rows, gradually loosening your tension with each row until the last row is almost too loose to maintain stitch definition. When you’re done, you’ll have a clear visual of your tension range and can identify which rows look best.
Blind Consistency Practice
Work double crochet stitches while watching TV or listening to music – something that occupies your visual attention. The goal is to develop tension control that doesn’t require constant visual monitoring. Start with just 10-15 minutes at a time.
When you can maintain consistent tension while distracted, you’ll find regular crochet becomes much more relaxing and automatic. This is especially valuable for large projects like blankets where you need to maintain consistency over many hours of work.
Applying Perfect Tension to Different Projects
Different types of projects have different tension requirements, and understanding these differences will make you a more versatile crocheter. What works perfectly for a loose, drapey shawl might be completely wrong for a structured tote bag.
Garments: Precision Matters
For sweaters, cardigans, and fitted tops, tension consistency directly affects fit and drape. Even small variations can cause pulling, puckering, or uneven hemlines. I always work garment pieces in order from most visible to least visible – usually back, front, then sleeves – so any slight tension changes happen in less noticeable areas.
Pay special attention to tension when working decreases and increases. These shaping techniques can naturally alter your tension if you’re not careful. Practice your increases and decreases on a swatch first, focusing on maintaining consistent tension through the shaping.
Amigurumi: Tight and Consistent
Stuffed toys require tighter tension than most other projects to prevent stuffing from showing through. Your stitches should be snug enough that you can barely see between them when the piece is stuffed. This usually means going down a hook size or two from what you’d normally use with that yarn weight.
Consistent tension is crucial in amigurumi because uneven stitches create lumpy, unprofessional-looking toys. The repetitive nature of amigurumi rounds makes it easy to fall into inconsistent patterns, so check your work frequently.
Blankets and Afghans: Comfort Over Perfection
Large projects like blankets are more forgiving of slight tension variations, but they present their own challenges. Your tension might naturally change as you get tired during long crochet sessions, or as your hands warm up and relax.
For granny square blankets, focus on keeping consistent tension within each square rather than worrying about perfect consistency across the entire project. Slight variations between squares often add character rather than detracting from the finished piece.
Large project tip: Take photos of your work in progress every few inches. It’s easier to spot tension changes in photos than when you’re looking at the work up close.
Lace and Openwork: Controlled Relaxation
Lace patterns require a delicate balance – tight enough to maintain stitch definition, loose enough to allow the openwork to show properly. This is where understanding your yarn becomes crucial. Cotton lace thread behaves very differently from wool yarn, even when working the same pattern.
Most lace patterns benefit from slightly looser tension than you might use for solid fabric. The multiple yarn overs and chain spaces need room to open up and show their structure. When in doubt, err on the side of slightly looser rather than tighter.
Common Questions
How long does it take to develop consistent tension?
Most crocheters see noticeable improvement in tension consistency within 2-3 weeks of regular practice, but developing truly automatic tension control takes 2-3 months of consistent crocheting. The key is regular practice rather than marathon sessions – 20-30 minutes daily beats one long weekend session.
Should I use the same tension for all yarn weights?
No, different yarn weights require different approaches to tension. Fingering weight yarns need lighter, more delicate handling, while bulky yarns can handle firmer tension. Your grip pressure should stay consistent, but the yarn control adjusts based on the yarn’s characteristics. Practice with each new yarn weight until it feels natural.
Why does my tension change when I’m tired?
Fatigue affects fine motor control, usually making your grip either too tight (when you’re concentrating hard to compensate) or too loose (when your muscles relax). Take breaks every 30-45 minutes, and avoid working on critical project sections when you’re very tired. Save mindless sections like long rows of single crochet for tired times.
Can I fix tension problems after I’ve already crocheted several inches?
Minor tension variations often even out with blocking, especially in natural fibers like wool. For more significant problems, you might need to frog back to where the tension changed and rework with corrected technique. It’s frustrating, but it’s usually faster than trying to work around tension problems later.
What’s the best yarn for practicing tension control?
Medium worsted weight acrylic yarn in a light color works best for practice. Brands like Lion Brand Vanna’s Choice or Red Heart Super Saver are consistent, affordable, and forgiving. Light colors make it easier to see your stitch definition and spot tension variations.
How do I maintain consistent tension across multiple crochet sessions?
Start each session with a few practice rows using scrap yarn to “warm up” your hands and reestablish your tension. Keep notes about your hook size and any tension adjustments you made. Store your project in a way that lets you see the last few rows you worked, so you can match that tension when you resume.
Does hook material affect tension control?
Yes, hook material can impact your tension. Aluminum hooks have moderate friction and work well for most yarns. Plastic hooks can be grabby with some yarns, potentially tightening your tension. Smooth materials like bamboo or coated hooks let yarn slide more easily, which might loosen your natural tension. Try different hook materials to see what feels most comfortable for your grip style.
Should I worry about tension when making dishcloths or other utility items?
For purely functional items like dishcloths or pot holders, slight tension variations won’t affect performance. However, practicing good tension control on these simple projects builds skills you’ll need for more complex work. Think of utility projects as training opportunities rather than high-stakes situations.
Mastering crochet tension is like learning to ride a bike – it feels impossible until suddenly it clicks, and then you can’t imagine why it seemed so difficult. The key is understanding that perfect tension isn’t about rigid control; it’s about developing a relaxed consistency that becomes second nature.
Remember that every crocheter’s optimal tension is slightly different. What matters isn’t matching someone else’s technique exactly, but finding your own sustainable approach that produces the results you want. Give yourself permission to experiment, make mistakes, and adjust your technique as you learn.
The time you invest in developing good tension control now will pay dividends in every project you make going forward. Your stitches will be more even, your projects will fit better, and you’ll enjoy the process more because you’re not constantly fighting with inconsistent results. Trust the process, be patient with yourself, and keep your hook moving. You’ve got this!