Last weekend, I was teaching my neighbor Sarah how to crochet, and she asked me something that stopped me in my tracks: “Why does everyone talk about gauge like it’s some sacred crochet commandment?” I laughed because I remember asking the exact same question when I started crocheting fifteen years ago. Back then, I thought gauge was just another annoying step that pattern designers threw in to make things complicated. Boy, was I wrong.
Here’s the thing about gauge – it’s literally the difference between a sweater that fits perfectly and one that could house a small family. I learned this the hard way when I spent three weeks crocheting a cardigan that ended up fitting my husband instead of me. The yarn was gorgeous, the stitches were perfect, but I’d completely ignored the gauge swatch. That expensive lesson taught me why understanding gauge is absolutely crucial for any crocheter who wants consistent, well-fitting results.
Gauge affects everything from how much yarn you’ll need to whether your finished project will actually serve its intended purpose. It’s not just about following rules – it’s about understanding how your hands, your hook, and your yarn work together to create something beautiful and functional.
Quick Answer
Gauge in crochet measures how many stitches and rows you create per inch with specific yarn and hook size. It ensures your finished project matches the pattern’s intended dimensions and fit. Always make a gauge swatch before starting any fitted project.
What Is Gauge in Crochet
Gauge is simply a measurement of how many stitches and rows you create within a specific area – usually measured as stitches per inch or per 4-inch square. Think of it as your personal crochet fingerprint. Every crocheter has a slightly different tension, hook grip, and working style that affects how their stitches turn out.
When you see “Gauge: 18 sts and 24 rows = 4 inches in single crochet” in a pattern, the designer is telling you exactly how their stitches measured when they created the original project. This measurement was taken using the recommended yarn and hook size, worked in the specified stitch pattern.
Your gauge might be different from the pattern’s gauge for several reasons. Maybe you crochet tighter when you’re stressed, or looser when you’re relaxed. Perhaps you hold your hook differently, or your yarn has slightly different fiber content than what the designer used. These variations are completely normal – the key is knowing how to work with them.
Pro Tip: Gauge can vary between stitch patterns even with the same yarn and hook. Single crochet typically creates a tighter gauge than double crochet, so always check gauge in the actual stitch pattern you’ll be using.
The Craft Yarn Council provides standardized guidelines for measuring gauge, but remember that these are starting points. Your individual technique will always be the final determining factor in how your projects turn out.
Why Gauge Actually Matters
Let me paint you a picture of why gauge matters so much. Imagine you’re making a baby blanket that should measure 30 inches square. The pattern calls for a gauge of 16 stitches per 4 inches. If your gauge is off by just one stitch per inch – say you’re getting 17 stitches instead of 16 – your finished blanket will be about 2 inches smaller in each direction. That might not sound like much, but it’s the difference between a cozy blanket and one that barely covers the baby.
For garments, gauge becomes even more critical. I once made a sweater where my gauge was off by half a stitch per inch. The pattern was designed for a 38-inch bust, but my finished sweater measured 42 inches. What should have been a fitted cardigan became an oversized tunic. While oversized can be stylish, it wasn’t what I was going for after investing in beautiful alpaca yarn.
Gauge also affects your yarn consumption. If you’re crocheting tighter than the pattern suggests, you’ll use more yarn because you’re packing more stitches into each inch. I learned this lesson when working on an afghan pattern – my tight gauge meant I needed an extra skein of yarn that I hadn’t budgeted for.
| Gauge Difference | Impact on 40″ Sweater | Yarn Usage Change |
|---|---|---|
| 1 st per inch tighter | 36″ finished size | +15-20% more yarn |
| 1 st per inch looser | 44″ finished size | -10-15% less yarn |
| Perfect match | 40″ as intended | As calculated |
Beyond fit and yarn usage, gauge affects the drape and texture of your finished piece. When working with beginner-friendly yarns, getting the right gauge ensures your project has the intended feel and structure.
How to Measure Your Gauge
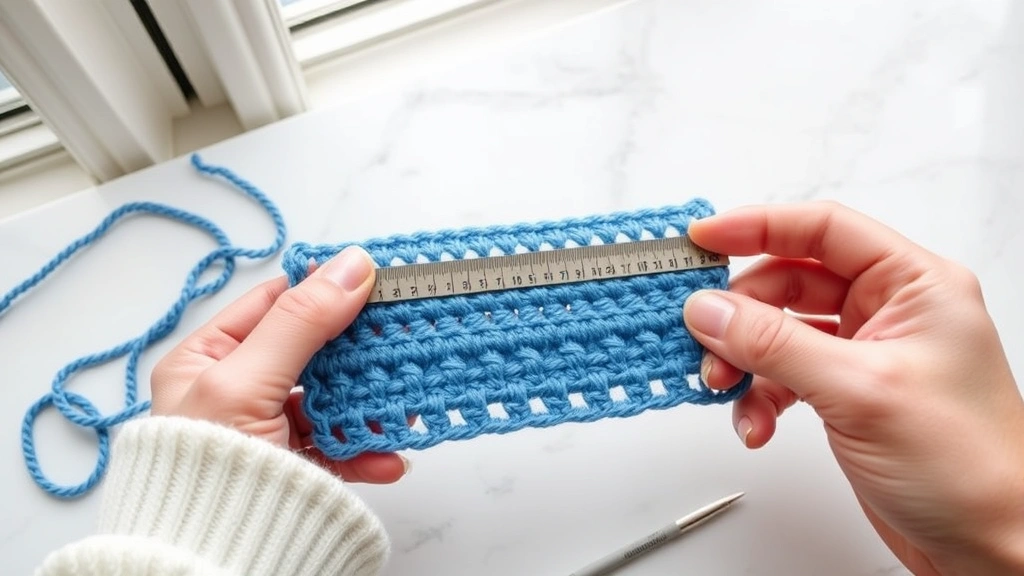
Measuring gauge accurately is a skill that improves with practice, but the basic technique is straightforward. You’ll need a ruler or gauge tool, good lighting, and your completed gauge swatch. I prefer using a rigid ruler rather than a flexible measuring tape because it gives more accurate measurements.
Start by laying your swatch on a flat surface – not stretched or compressed. Place your ruler horizontally across the middle of your swatch, avoiding the edges where stitches might be distorted. Count the number of stitches within a 4-inch span. If your pattern gives gauge as stitches per inch, divide your count by four.
For row gauge, turn your ruler vertically and count the rows within a 4-inch measurement. Row gauge is often less critical than stitch gauge, especially for projects worked in rounds, but it’s important for projects where length matters, like sweater bodies or scarf patterns.
Measuring Tip: If you’re between two measurements – say you have 17.5 stitches in 4 inches – make note of this. Don’t round up or down until you’ve considered how it will affect your project size.
Some crocheters find it helpful to use T-pins to mark exact 4-inch boundaries on their swatch before counting. This method reduces counting errors and makes it easier to see exactly which stitches fall within your measurement area.
When working with textured stitches like those found in advanced stitch patterns, measuring can be trickier. Focus on the most prominent stitch elements and try to be consistent in what you’re counting across the entire measurement.
Making the Perfect Gauge Swatch
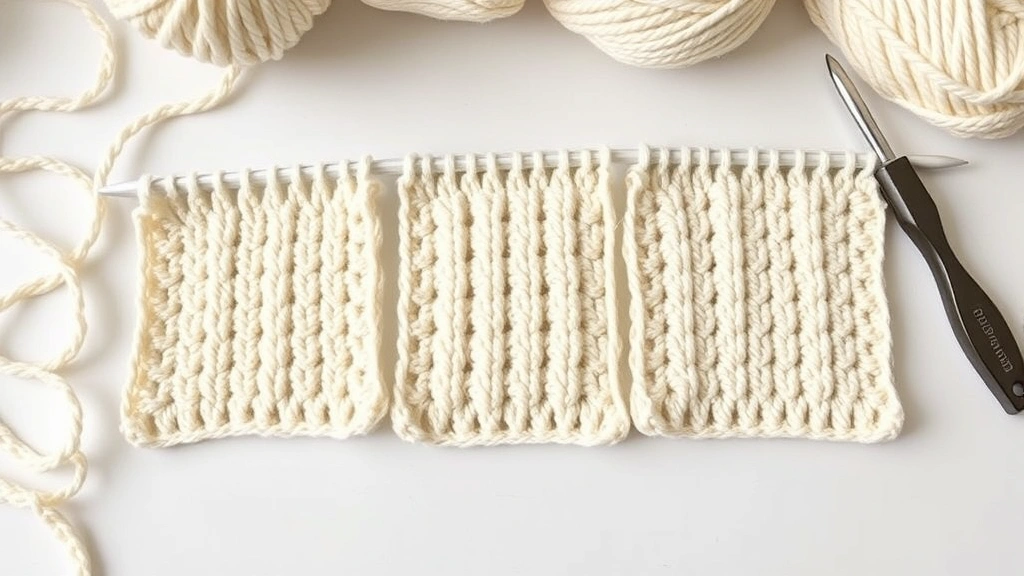
A proper gauge swatch is bigger than you might think. I used to make tiny 3-inch squares and wonder why my gauge was always off. The truth is, you need at least a 6-inch square to get an accurate reading. The edges of your swatch behave differently than the middle stitches, so you need enough fabric to measure from the center area.
Start with the recommended hook size and yarn from your pattern. Chain enough stitches to create about 6 inches of width – this usually means chaining 6-8 more stitches than your gauge calls for. Work in the exact stitch pattern specified in your pattern, not just single crochet unless that’s what the project uses.
Here’s something many patterns don’t mention: wash and block your gauge swatch the same way you plan to care for your finished project. Yarn can behave very differently after washing. Cotton yarns often tighten up, while wool can relax and grow. I always wash my swatches for garments and blankets, but skip this step for quick accessories.
- Chain Your Foundation
Chain 30-35 stitches for worsted weight yarn, adjusting for thicker or thinner yarns.
- Work Your Rows
Complete at least 30-35 rows in your pattern stitch, creating a square swatch.
- Finish Cleanly
Fasten off and weave in ends, but don’t trim them yet in case you need to adjust.
- Let It Rest
Allow the swatch to relax for at least an hour before measuring.
- Block if Needed
For natural fibers or fitted garments, block your swatch using your intended care method.
Don’t skip the resting step. Yarn has memory, and freshly worked stitches often look different than they will after sitting for a while. This is especially true when working with cotton yarns or other plant fibers that can change shape as they settle.
Adjusting Your Gauge
When your gauge doesn’t match the pattern – and it often won’t on the first try – you have several options for adjustment. The most common solution is changing hook sizes. If your stitches are too small (too many stitches per inch), go up a hook size. If they’re too large (too few stitches per inch), go down a size.
Hook size changes affect gauge predictably, but the relationship isn’t always linear. Moving from a 5mm to 5.5mm hook might give you exactly the adjustment you need, but sometimes you’ll need to go up or down by a full millimeter or more. This is why it’s worth keeping a complete set of hooks in both metric and US sizes.
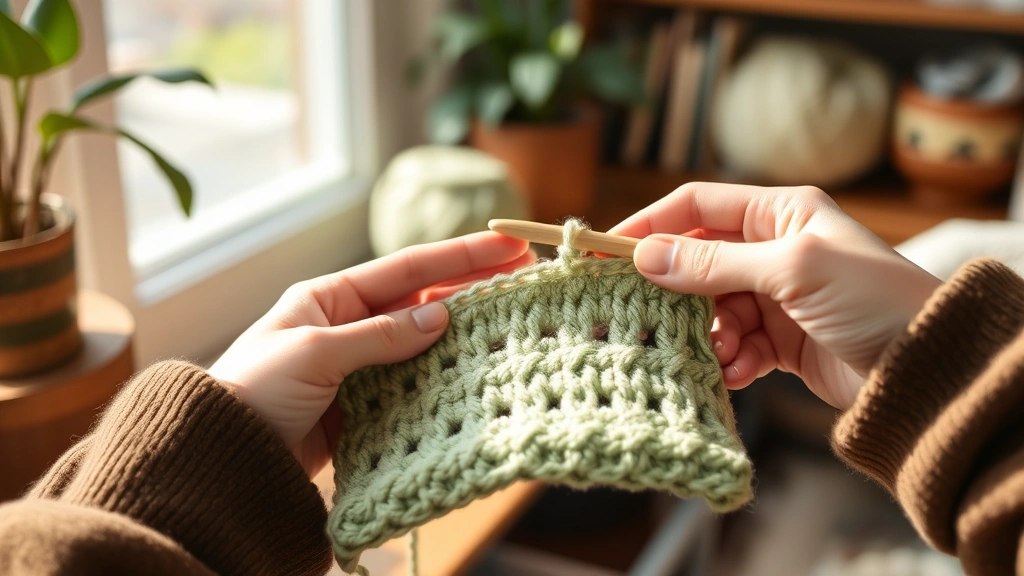
Sometimes the issue isn’t your hook size but your technique. If you’re a tight crocheter by nature, you might need to consciously work to loosen your tension. Practice holding your yarn a bit more loosely, or try a different way of wrapping the yarn around your fingers. The goal isn’t to completely change your natural style, but to make small adjustments that improve your gauge.
I once worked with a student whose gauge was consistently too loose, no matter how small we went with hook sizes. The solution was helping her adjust her yarn hold – she was letting too much yarn flow freely, which created loose, uneven stitches. A small change in hand position fixed everything.
For projects where stitch gauge is perfect but row gauge is off, you have more flexibility. You can often adjust by working fewer or more rows to achieve the correct length, rather than changing your entire gauge. This works well for rectangular projects like baby blankets where the final dimensions matter more than matching exact row counts.
| Your Gauge Issue | Hook Adjustment | Alternative Solution |
|---|---|---|
| Too many stitches per inch | Go up 0.5-1mm | Loosen yarn tension |
| Too few stitches per inch | Go down 0.5-1mm | Tighten yarn hold |
| Rows too short | Usually not needed | Add extra rows |
| Rows too tall | Usually not needed | Work fewer rows |
When You Can Ignore Gauge
Not every project requires precise gauge matching, and knowing when you can be flexible saves time and stress. Decorative items like dishcloths, pot holders, or purely decorative afghans can often work with whatever gauge you naturally produce. If the finished size varies by a few inches, it usually doesn’t affect functionality.
Scarves and shawls also offer gauge flexibility, especially if you’re comfortable adjusting the number of stitches or rows to achieve your desired size. I rarely make gauge swatches for scarves – I just start crocheting and adjust as needed. The same goes for most amigurumi projects, where slight size variations often add character rather than causing problems.
Projects worked in bulky or super bulky yarn are more forgiving of gauge variations. The thick yarn naturally creates more consistent stitch sizes, and small gauge differences have less impact on the overall project dimensions.
When to Skip Gauge: Dishcloths, decorative doilies, practice swatches, most scarves, toys where size isn’t critical, and any project where you’re happy to adjust dimensions as you go.
However, even when exact gauge isn’t critical, it’s still worth doing a small test swatch to see how your yarn and hook combination looks and feels. This helps you catch potential issues like yarn splitting or poor stitch definition before you’re deep into a project.
Common Gauge Problems and Solutions
One of the most frustrating gauge issues is inconsistent tension throughout your work. This often happens when you’re learning a new stitch pattern or working on a project over several days. Your gauge might start perfectly but drift as you get more comfortable with the pattern or as your mood and energy levels change.
The solution is regular gauge checks throughout your project. I measure my work every few inches on important projects, especially garments. If I notice my stitches getting looser or tighter, I make conscious adjustments to get back on track. Sometimes this means frogging back a few rows, but it’s better than ending up with a misshapen finished piece.
Another common problem is different gauge between flat and round work. Many crocheters find their tension changes when working in rounds versus back-and-forth rows. This is particularly important for projects that combine both techniques, like sweaters with flat body panels and round sleeves.
Yarn substitution creates its own gauge challenges. Even within the same weight category, different fibers and yarn constructions can produce different gauges. When substituting yarns, always make a new gauge swatch – never assume your gauge will remain the same. This is especially important when switching between different fiber types or yarn brands.
I learned about yarn substitution gauge issues the hard way when I substituted a cotton yarn for the wool called for in a sweater pattern. Both were worsted weight, but the cotton had no stretch and created a much stiffer fabric than intended. The gauge was close, but the drape was completely wrong.
Environmental factors can also affect gauge. High humidity can make yarn behave differently, and some crocheters find their tension changes with temperature or stress levels. If you’re working on a long-term project, try to maintain consistent working conditions when possible.
When working with variegated or self-striping yarns, gauge can appear inconsistent even when your tension is perfect. The color changes can create visual illusions that make stitches look different sizes. Focus on the actual stitch structure rather than what your eyes might be telling you about the colors.
Common Questions
How big should my gauge swatch be?
Make your gauge swatch at least 6 inches square, preferably larger. You need enough fabric to measure from the center area, away from edge distortions. For complex stitch patterns, make it even bigger to ensure you have complete pattern repeats to measure from.
Do I need to wash my gauge swatch?
For garments, blankets, and other items you’ll wash, yes – absolutely wash your gauge swatch using the same method you plan to use for the finished project. Many yarns change significantly after washing. Skip this step only for quick accessories or items that won’t be washed.
What if my stitch gauge is right but my row gauge is wrong?
Row gauge is often less critical than stitch gauge. For most projects, you can work more or fewer rows to achieve the correct length. This is especially true for rectangular items like afghans or scarves. Only worry about exact row gauge for fitted garments with specific shaping.
Can I use a different yarn weight if I adjust my hook size?
Generally, no. Different yarn weights create different fabric weights and drapes, even if you can match the gauge. A DK yarn worked tightly will never behave exactly like worsted weight yarn. Stick within the same yarn weight category for best results.
How much can my gauge be off before it matters?
For fitted garments, even half a stitch per inch can significantly affect the final size. For looser items like scarves or decorative pieces, you can usually tolerate 1-2 stitches per inch difference without major issues. When in doubt, calculate how the difference will affect your finished measurements.
Why does my gauge change as I work on a project?
Tension naturally varies as you become more comfortable with a stitch pattern, when you’re tired versus fresh, or even based on your mood and stress levels. Regular gauge checks throughout your project help you catch and correct these variations early.
Do I need different gauge swatches for different stitch patterns?
Yes, if your project uses significantly different stitch patterns. Single crochet, double crochet, and textured stitches all create different gauges even with the same yarn and hook. Make separate swatches for each major stitch pattern in complex projects.
How do I measure gauge on textured or lacy patterns?
Focus on the most consistent, repeating elements of the pattern. For lacy work, you might need to count pattern repeats rather than individual stitches. Block your swatch first, as lace and textured patterns often look very different after blocking than they do fresh off the hook.
Understanding gauge transforms you from someone who follows patterns blindly to someone who can adapt and create with confidence. Yes, it takes a bit more time upfront, but I promise you’ll save hours of frustration and potentially expensive mistakes down the road. Every gauge swatch you make teaches you something new about how your hands work with different yarns and hooks.
The next time you start a new project, embrace the gauge swatch as part of the creative process rather than a chore to rush through. Use it as an opportunity to get familiar with your yarn and stitch pattern before diving into the main event. Your future self – and your yarn budget – will thank you for taking the time to get it right from the start. Happy crocheting, and remember: gauge isn’t about perfection, it’s about understanding your craft well enough to create exactly what you envision.