You know that feeling when you’re halfway through a beautiful crochet project and suddenly realize your edges look wonky? Yeah, I’ve been there too. After years of crocheting everything from delicate doilies to chunky blankets, I’ve learned that understanding how to properly count and work with crochet rows can make or break your project. It’s one of those fundamental skills that seems simple on the surface but has surprising depth once you dig in.
When I first started crocheting, I thought counting rows was just about keeping track of how many you’d done. Boy, was I wrong. Row counting affects everything from your project’s final dimensions to whether your increases and decreases land in the right spots. It’s the difference between a sweater that fits perfectly and one that looks like it was made for someone with completely different proportions.
The thing is, different crochet stitches create different row heights, and this changes how you count and plan your projects. A row of single crochet looks completely different from a row of double crochet, and they definitely don’t take up the same amount of vertical space. Plus, when you’re working with patterns that involve color changes, stitch patterns, or shaping, accurate row counting becomes absolutely critical.
I remember working on my first granny square blanket and getting completely confused about whether the foundation chain counted as a row. Spoiler alert: it doesn’t, but that little detail can throw off your entire project if you don’t know it.
Quick Answer
A crochet row is one complete horizontal line of stitches worked from one side to the other. The foundation chain doesn’t count as a row, but turning chains often count as the first stitch of a new row depending on the stitch height.
What Actually Counts as a Crochet Row
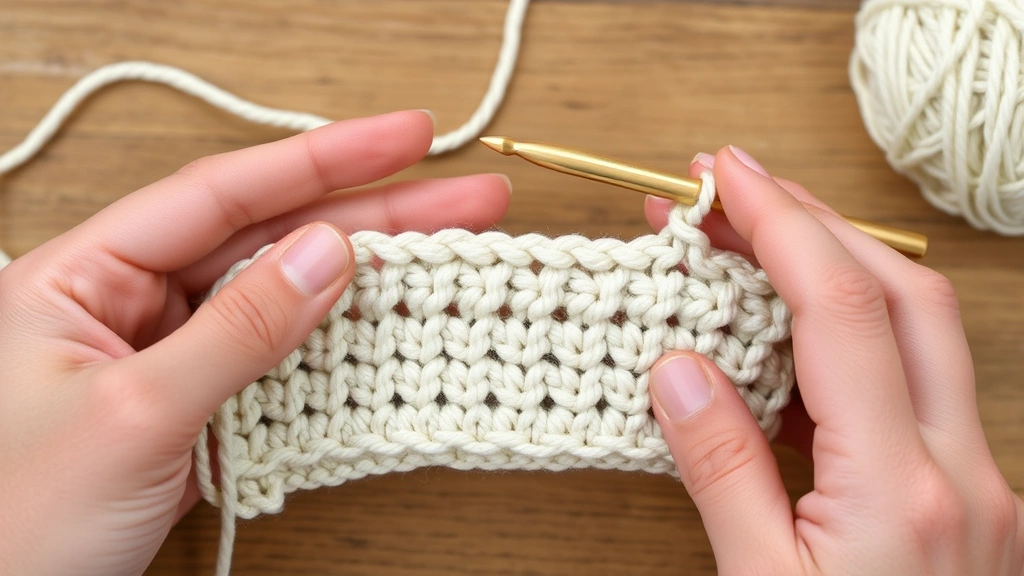
Let’s start with the basics because this trips up so many crocheters. A crochet row is simply one complete horizontal line of stitches that you work from one side of your project to the other. When you finish that line and turn your work to start the next line, you’ve completed one row.
Here’s what I wish someone had told me when I started: the foundation chain is NOT a row. I know, I know – it looks like it should count since it’s that first horizontal line you create. But in crochet terminology, the foundation chain is just the base that you work your first actual row into. Think of it as the foundation of a house – it’s essential, but it’s not the first floor.
The first row is when you work your first stitches into that foundation chain. So if a pattern says “Row 1: Work 20 sc into foundation chain,” that’s your first row, even though you already made the foundation chain.
This distinction matters more than you might think. When you’re following a pattern for something like a baby blanket, the designer has calculated the finished size based on the actual worked rows, not including the foundation chain in that count.
Pro tip: When I’m teaching new crocheters, I tell them to think of the foundation chain as “Row 0” – it exists, but it doesn’t count in your official tally.

Foundation Chain vs First Row
This confusion is so common that I see it in my crochet groups constantly. Someone will post a picture asking why their project is coming out too long, and nine times out of ten, they’ve been counting their foundation chain as Row 1.
Let me walk you through a typical scenario. Say you’re making a simple dishcloth and the pattern says:
- Foundation: Chain 31
- Row 1: Sc in 2nd chain from hook and in each chain across (30 sc)
- Rows 2-30: Ch 1, turn, sc in each sc across
In this example, you’ll end up with 30 rows of actual stitches, not 31. The foundation chain creates the base, Row 1 is your first row of single crochets, and Rows 2-30 give you 29 more rows, totaling 30 rows of stitches.
I’ve seen people add an extra row because they counted the foundation chain, and then wonder why their dishcloth is rectangular instead of square. When working on projects like washcloths, those proportions really matter for both function and appearance.
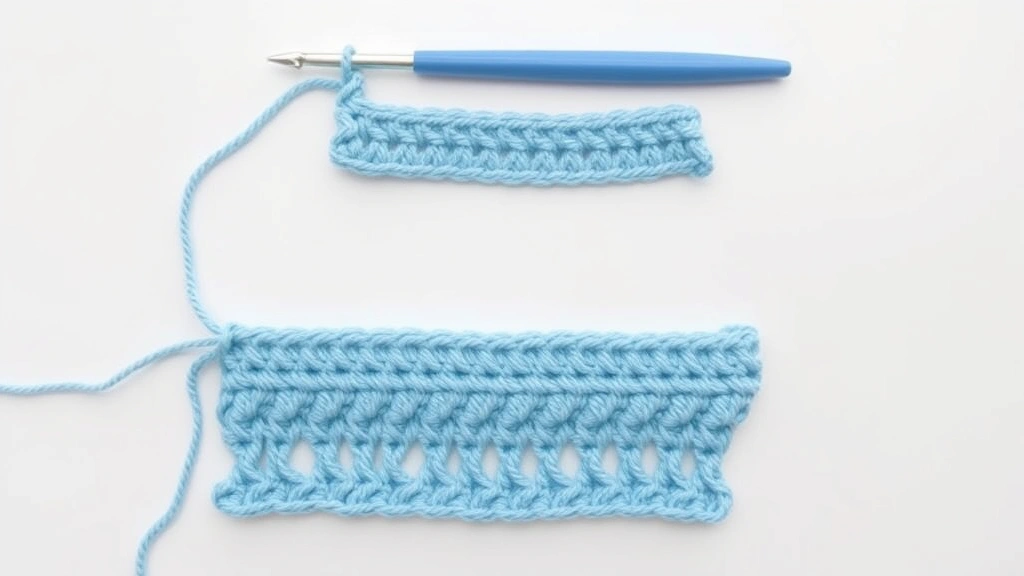
Visual Identification
Here’s a practical way to identify what counts as a row: look at your work from the side. You should be able to see horizontal lines of stitches stacked on top of each other. Each of those horizontal lines is a row. The foundation chain will look different – it’s more like a bumpy line at the bottom rather than a proper row of stitches.
When Turning Chains Count as Stitches
Now we’re getting into slightly trickier territory. Turning chains are those extra chains you make at the beginning of each new row to bring your hook up to the right height for the stitches you’re about to make. Sometimes these turning chains count as the first stitch of the row, and sometimes they don’t.
Here’s the general rule I follow:
| Stitch Type | Turning Chain | Counts as Stitch? |
|---|---|---|
| Single Crochet | Ch 1 | Usually no |
| Half Double Crochet | Ch 2 | Sometimes |
| Double Crochet | Ch 3 | Usually yes |
| Treble Crochet | Ch 4 | Yes |
The pattern will always tell you whether the turning chain counts or not, but understanding the logic helps you catch errors. When I’m working on double crochet projects, I know that Ch 3 at the beginning of each row typically counts as my first double crochet stitch.
This affects how you count stitches within each row, which indirectly affects how you think about your row structure. If your turning chain counts as a stitch, you’ll work one fewer regular stitch in that row to maintain your stitch count.
How Stitch Height Affects Row Counting
Different stitches create different row heights, and this is crucial to understand when you’re planning projects or substituting stitches. A row of single crochet is much shorter than a row of double crochet, which means you’ll need more single crochet rows to achieve the same height.
Here are the approximate height relationships I use in my projects:
- 1 row of treble crochet ≈ 2 rows of double crochet
- 1 row of double crochet ≈ 1.5 rows of half double crochet
- 1 row of half double crochet ≈ 1.5 rows of single crochet
These ratios aren’t exact because they depend on your yarn weight, hook size, and tension, but they’re good starting points. When I’m designing my own patterns or modifying existing ones, I always make a gauge swatch to check these relationships with my specific materials.
This knowledge becomes super important when you’re working on projects like sweaters or fitted garments. If a pattern calls for 20 rows of double crochet to reach the armpit, and you decide to use single crochet instead, you’d need roughly 30 rows to get the same height.
Gauge and Row Height
Your gauge affects not just stitch width but also row height. I learned this the hard way when making a scarf with a yarn substitution. Even though I matched the stitch gauge perfectly, my rows were slightly taller than the pattern expected, and my finished scarf was longer than intended.
Always check both your stitch gauge (stitches per inch horizontally) and your row gauge (rows per inch vertically) when gauge matters for fit.
Practical Methods for Keeping Track
Let’s talk about the practical side of keeping track of your rows. I’ve tried every method under the sun, and different approaches work better for different types of projects.
The Tally Method
For simple projects with lots of identical rows, I just make tally marks on a piece of paper. Every time I complete a row, I make a mark. Group them in fives (four vertical lines with a diagonal line through them) to make counting easier later.
Row Counters
I love my little clicker row counter for projects where I need to track multiple things at once. Some crocheters prefer the ring-style counters that sit on your finger, while others like the barrel-style ones. I’ve found that phone apps work great too, especially when I’m working on complex patterns with multiple stitch counts to track.
Stitch Markers as Row Markers
Here’s a trick I picked up from an experienced crocheter: use different colored stitch markers to mark every 10th row. Put a yellow marker after Row 10, another after Row 20, and so on. This way, if you lose count, you only have to count back to the last marker instead of starting from the beginning.
The Safety Pin Method
For projects where I need to remember specific rows (like where I made increases or color changes), I attach safety pins to those rows with little notes. This is especially helpful when working on amigurumi where you need to remember exactly which row you added arms or changed colors.
I keep a small notebook specifically for crochet projects. For each project, I write down the pattern name, yarn used, hook size, and keep a running tally of rows completed. It’s saved me so many times when I’ve had to put a project down for a few days.
Common Row Counting Mistakes
Let me share the most common row counting mistakes I see, because recognizing these can save you hours of frogging (ripping out your work).
Counting the Foundation Chain
We covered this already, but it’s worth repeating because it’s so common. The foundation chain is not Row 1. I still catch myself doing this sometimes when I’m tired or distracted.
Losing Track During Complex Patterns
When working stitch patterns that repeat every few rows, it’s easy to lose track of where you are in both the pattern repeat and the overall row count. I solve this by keeping two tallies – one for total rows and one for pattern rows.
Not Accounting for Turning Chains
Forgetting whether your turning chain counts as a stitch can throw off your entire project. This is especially problematic in projects like blankets where consistent edges are important for the final appearance.
Miscounting After Breaks
When you put a project down and come back to it later, it’s surprisingly easy to miscount where you left off. I always count my completed rows before I start working again, even if I think I remember.
Reading Patterns and Row Instructions
Pattern writers have different styles, and understanding how they communicate row information can prevent confusion. Most patterns from reputable sources like Yarnspirations or Ravelry designers follow standard conventions, but it’s worth knowing what to look for.
Row Numbering Systems
Some patterns number every single row (Row 1, Row 2, Row 3…), while others group rows by sections or pattern repeats. You might see something like:
- “Rows 1-4: Work in sc”
- “Repeat Rows 3-6 until piece measures 12 inches”
- “Next 20 rows: Continue in established pattern”
Pay attention to these groupings because they affect how you count and track your progress.
Right Side vs Wrong Side Rows
Many patterns distinguish between right side (RS) and wrong side (WS) rows, especially in garment construction. The right side is the side that will show when the item is worn or displayed. Understanding this helps you keep track of where you are in both the row count and the overall construction.
Typically, odd-numbered rows (1, 3, 5…) are right side rows, and even-numbered rows (2, 4, 6…) are wrong side rows, but always check your pattern’s specific instructions.
Fixing Row Counting Problems
So what do you do when you realize you’ve miscounted rows? Don’t panic – this happens to everyone, and it’s usually fixable.
When You Have Too Few Rows
If you discover you’re short on rows, the solution is usually straightforward: keep working until you reach the correct count. However, check your gauge first. If your rows are taller than expected, you might actually be fine even with fewer rows.
When You Have Too Many Rows
This is trickier. If you’re only off by one or two rows and the project is something like a hat or scarf where exact measurements aren’t critical, you might be able to continue with the pattern as written.
For fitted garments, you’ll likely need to frog back to the correct row count. I know it’s painful, but it’s better than ending up with a sweater that doesn’t fit.
Prevention Strategies
The best way to handle row counting problems is to prevent them. I check my row count every 10-15 rows, especially on large projects. For complex patterns, I check every pattern repeat.
Consider using lifelines – these are threads you weave through a completed row that you can easily identify later. If you need to frog, you can rip back to the lifeline instead of starting over completely.
Common Questions
Does the foundation chain count as the first row?
No, the foundation chain does not count as a row. It’s the base that you work your first actual row of stitches into. Row 1 is when you work your first stitches into the foundation chain, not the chain itself.
How do I count rows in single crochet vs double crochet?
The counting method is the same – each horizontal line of completed stitches is one row. However, double crochet rows are taller than single crochet rows, so you’ll need fewer double crochet rows to achieve the same height as single crochet rows.
What if I lose count of my rows?
Count the horizontal ridges on your work from bottom to top. Each ridge represents one completed row. If you’re working in single crochet, you can count the horizontal lines on the front of your work. For taller stitches, look at the side view to count the distinct horizontal layers.
Should I count the turning chain as a row?
No, turning chains are not counted as separate rows. They’re part of the row you’re about to work. However, turning chains sometimes count as the first stitch of a row, depending on the stitch height and pattern instructions.
How do I keep track of rows in a large project like a blanket?
Use a combination of methods: keep a written tally, use stitch markers every 10 rows, or use a row counter app. For very large projects, consider taking progress photos every 25-50 rows as visual checkpoints.
Why do my row counts not match the pattern measurements?
This usually indicates a gauge issue. Your rows might be taller or shorter than the pattern designer’s. Check your row gauge by measuring how many rows you get per inch and compare it to the pattern’s gauge specifications.
Can I fix a project if I have the wrong number of rows?
It depends on the project type and how far off you are. For items like scarves or dishcloths, being off by a few rows usually isn’t critical. For fitted garments, you may need to add rows, remove rows, or adjust the pattern to compensate.
How do I count rows when working in the round?
When working in the round, each complete circle of stitches counts as one row (or round). Use a stitch marker to mark the beginning of each round, and move it up as you complete each round. Count the number of times you’ve moved your marker to track your rounds.
Understanding crochet rows might seem like a small detail, but it’s one of those foundational skills that affects everything else you do. Once you get comfortable with row counting, you’ll find that following patterns becomes much easier, and you’ll be able to troubleshoot problems before they become major issues.
Remember, every experienced crocheter has miscounted rows at some point. It’s part of the learning process. The key is developing good habits early – keep track as you go, check your count regularly, and don’t be afraid to double-check when something doesn’t look right.
The more you practice, the more intuitive this becomes. Soon you’ll be able to look at your work and immediately know how many rows you’ve completed, just by the visual rhythm of the stitches. Until then, keep those row counters handy and don’t hesitate to write things down. Your future self will thank you when you pick up that project after a busy week and know exactly where you left off.