Last weekend, I was teaching my neighbor Sarah how to crochet her first granny square, and she asked me something that stopped me in my tracks: “Why do some people call it a granny square when it’s not always square?” It got me thinking about how we use these terms so casually, but for someone just starting out, the whole granny square world can feel pretty overwhelming.
Here’s the thing – granny squares aren’t just one pattern. They’re an entire category of crochet motifs that share some common DNA but can look wildly different from each other. Some are perfectly square, others are hexagonal, and some aren’t even geometric at all. What makes them “granny squares” is more about the technique and construction method than the final shape.
I’ve been crocheting for over fifteen years, and I still discover new granny square variations that surprise me. Whether you’re a complete beginner wondering what all the fuss is about, or you’ve made a few basic squares and want to understand the bigger picture, let’s dive into what granny squares really are and why they’ve been a crochet staple for generations.
Quick Answer
A granny square is a crochet motif worked in rounds from the center outward, typically featuring clusters of double crochet stitches separated by chain spaces. Traditional granny squares are square-shaped with four sides, but the term now includes various geometric motifs like hexagons, circles, and triangles that use similar construction techniques.
What Makes a Granny Square
At its core, a granny square is defined by its construction method rather than its final shape. The key characteristics that make something a “granny square” include working in rounds from the center outward, using cluster stitches (usually double crochet), and incorporating chain spaces between clusters.
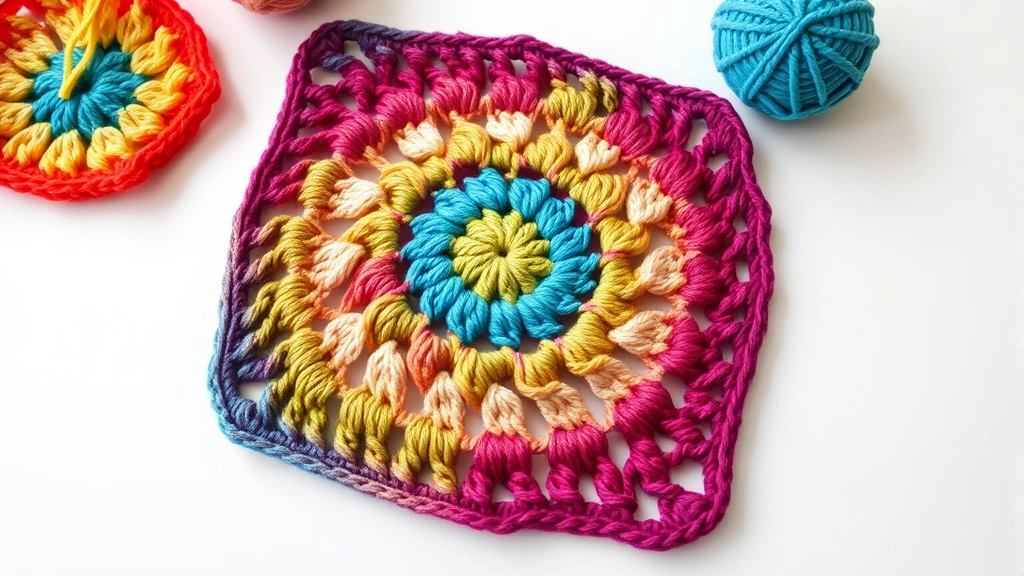
The traditional granny square features groups of three double crochet stitches worked into chain spaces, with corner increases created by working multiple clusters into the same space. This creates the characteristic “holes” or lacework appearance that makes granny squares so recognizable and versatile.
What’s fascinating is how this simple concept has evolved. Modern crocheters have adapted the basic technique to create hexagonal motifs, circular medallions, and even triangular pieces. The unifying factor remains that center-out construction with cluster stitches.
Pro Tip: If you’re working in rounds from the center and using cluster stitches with chain spaces, you’re probably making some variation of a granny square, regardless of the final shape.
The Historical Context
Granny squares became popular during the 1960s and 70s, though the technique itself is much older. The name likely comes from the fact that grandmothers often taught this pattern to younger generations – it was an accessible way to use up yarn scraps and create useful household items.
During the Great Depression and World War II, granny squares were practical. You could make them from leftover yarn bits, and they worked up quickly. A single square might use different colored scraps, making them perfect for times when matching yarn wasn’t always available.
The Classic Granny Square Pattern
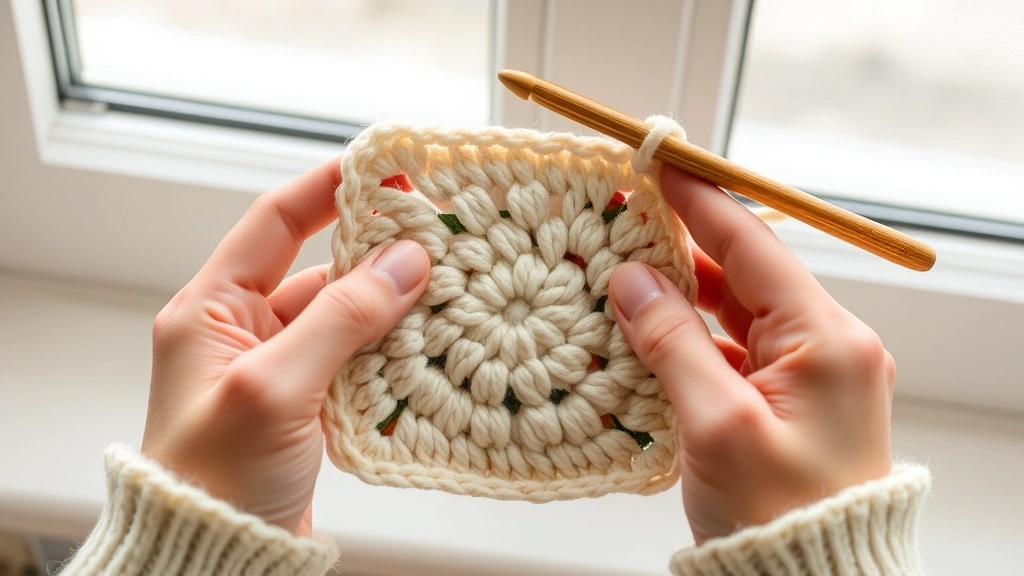
Let me walk you through what most people think of when they hear “granny square” – the traditional version that’s been passed down through generations. This is the pattern I always teach beginners because once you master this, you can tackle almost any variation.
The classic granny square starts with a magic ring (or chain 4 joined with a slip stitch). Round 1 consists of 12 double crochet stitches worked into the center, usually arranged as four groups of 3 dc with chain 2 spaces between them for corners.
Each subsequent round builds on this foundation by working clusters into the chain spaces from the previous round. What makes it “square” is those corner chain spaces – typically chain 2 or chain 3 – that create the 90-degree angles.
| Round | Stitch Pattern | Corner Treatment |
|---|---|---|
| 1 | 4 groups of 3 dc | Ch 2 between groups |
| 2 | 3 dc in each ch-2 space | Ch 2, 3 dc, ch 2 in corners |
| 3+ | 3 dc in each ch-1 space | Continue corner increases |
Understanding the Stitch Count
One thing that confuses new crocheters is how the stitch count works in granny squares. Unlike working in rows where you count every stitch, granny squares are about counting clusters and spaces. A traditional 4-round granny square will have 4 clusters on each side, not counting the corners.
This cluster-based thinking is crucial when you start exploring different motif patterns. Whether you’re making a hexagon or an octagon, you’re still thinking in terms of clusters and the spaces between them.
Beyond the Basic Square
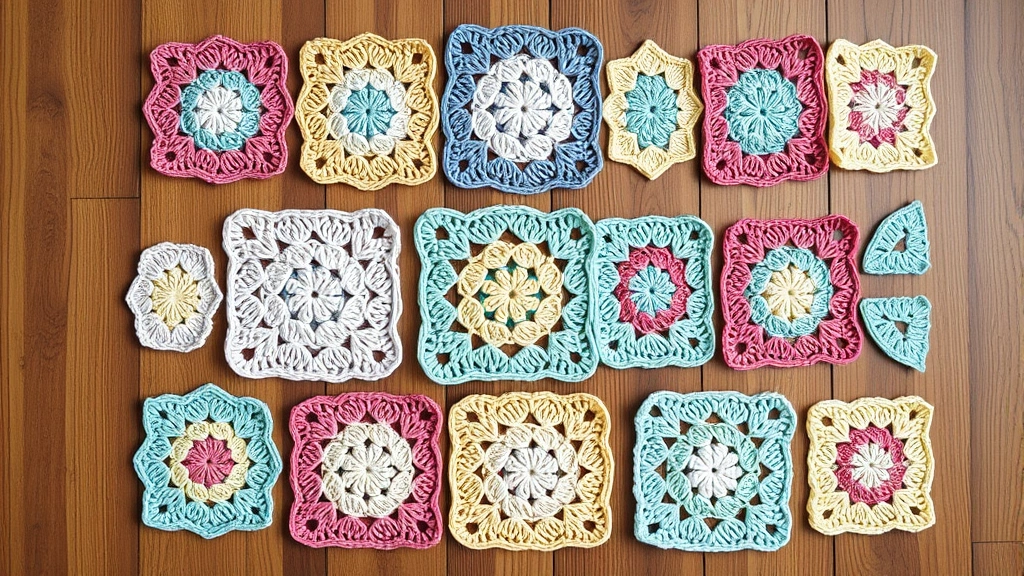
Here’s where things get really interesting. The granny square technique has spawned countless variations that push the boundaries of what we consider a “square.” I’ve collected patterns for granny hexagons, granny triangles, and even granny circles over the years.
Granny hexagons follow the same principle but with six sides instead of four. You start with six clusters in the first round instead of four, and your corner increases happen at six points. The result is a beautiful hexagonal motif that tessellates differently than squares when joined together.
Granny triangles are particularly clever – they start like a regular granny square but only develop three corners. These work wonderfully for creating geometric patterns or filling in spaces between other motifs.
Design Insight: The number of corners you create in your first round determines the final shape. Four corners = square, six corners = hexagon, three corners = triangle.
Solid Granny Squares
Not all granny squares have the characteristic holes. Solid granny squares fill in the chain spaces with additional stitches, creating a denser fabric. These are perfect for projects where you want the granny square construction method but need more coverage, like baby blankets or winter accessories.
The technique remains the same – you’re still working from the center outward in rounds – but instead of chain spaces, you might work single crochet stitches or half double crochet to fill the gaps.
How Granny Squares Are Built
Understanding the construction method is key to mastering granny squares and their variations. Every granny square starts at the center and grows outward, which is fundamentally different from most other crochet techniques that work in rows.
This center-out approach has several advantages. First, it’s incredibly portable – you can work on individual squares anywhere and join them later. Second, it’s perfect for using up yarn scraps since you can change colors every round. Third, it’s forgiving – if you make a mistake, you only need to rip back to the beginning of that round, not the entire project.
The key to even, flat granny squares lies in your increases. Each round must have the right number of stitches to lie flat. Too few stitches and your square will cup. Too many and it’ll ruffle. The traditional pattern achieves this balance through those corner chain spaces and consistent cluster placement.
- Start with the Center
Whether you use a magic ring or chain 4, your center needs to be secure but not too tight. I prefer the magic ring because you can adjust the center opening size.
- Establish Your Corners
The first round is crucial for setting up your corner points. Make sure your corner chain spaces are consistent – usually chain 2 for worsted weight yarn.
- Build Systematically
Each round follows a logical pattern: work clusters in spaces, increase at corners. Don’t skip the chain 1 spaces between clusters on the sides – these keep your square flat.
- Maintain Tension
Consistent tension is more important in granny squares than in many other techniques because uneven stitches will show up as warped squares that won’t join well.
The Mathematics of Granny Squares
There’s actually some elegant math behind granny squares. Each round increases the perimeter by adding one cluster to each side. A 3-round square has 3 clusters per side, a 4-round square has 4 clusters per side, and so on. This predictable growth pattern is why granny squares work so well for planned projects.
Choosing Yarn and Hook Sizes
The beauty of granny squares is that they work with virtually any yarn weight, but your choice of yarn and hook will dramatically affect the final look and feel of your project. I’ve made granny squares with everything from delicate lace weight to chunky wool, and each creates a completely different effect.
For beginners, I always recommend starting with worsted weight yarn (weight 4) and an H/8 (5.0mm) hook. This combination gives you clearly visible stitches, manageable yarn that’s not too splitty, and squares that work up quickly enough to stay motivated.
| Yarn Weight | Recommended Hook | Square Size (4 rounds) | Best For |
|---|---|---|---|
| DK (3) | G/6 (4.0mm) | About 4 inches | Baby items, lightweight throws |
| Worsted (4) | H/8 (5.0mm) | About 5 inches | Afghan squares, general projects |
| Chunky (5) | J/10 (6.0mm) | About 6 inches | Quick projects, warm blankets |
Yarn Fiber Considerations
The fiber content affects how your granny squares behave both during construction and after washing. Cotton yarn creates crisp, defined stitches that hold their shape well – perfect for dishcloths or summer tops. Wool gives you more forgiving tension and excellent stitch definition, plus it blocks beautifully.
Acrylic yarns are budget-friendly and machine washable, making them ideal for afghans and throws that need regular washing. I particularly like Lion Brand Vanna’s Choice for granny square projects because it’s soft, comes in tons of colors, and holds up well over time.
Color Planning Tip: Buy all your yarn at once if possible. Dye lots can vary significantly, and nothing’s more frustrating than running out of a color halfway through your project and not being able to match it.
Connecting Your Squares
Once you’ve made a pile of beautiful granny squares, you need to join them together. There are several methods, each creating a different look and feel in the finished project. The method you choose can dramatically impact both the appearance and the durability of your final piece.
The whip stitch method is probably the most common. You hold two squares with right sides together and whip stitch through the back loops only along the edges. This creates a neat seam that’s barely visible from the right side. It’s sturdy and relatively quick, making it perfect for large projects like blankets.
Join-as-you-go methods are increasingly popular because they eliminate the tedious seaming process. With these techniques, you join squares during the final round of each motif. It requires more planning upfront, but you’ll finish your project as soon as you complete the last square.
Decorative Joining Options
Some joining methods become design elements themselves. A contrasting single crochet join creates visible lines between squares, which can be quite striking with the right color choices. Chain space joins create a lacier effect that works beautifully for lightweight throws or shawls.
I’ve experimented with various joining techniques over the years, and honestly, the “best” method depends entirely on your project goals and personal preferences. For baby blankets, I prioritize durability and use whip stitch. For decorative throws, I might choose a more visible joining method that adds to the overall design.
What You Can Make
Granny squares are incredibly versatile building blocks. The classic application is afghans and blankets – there’s something deeply satisfying about watching individual squares grow into a cozy throw. But granny squares can become so much more than blankets.
I’ve made granny square bags, vests, cardigans, and even home decor items like pillow covers and table runners. The modular nature of granny squares makes them perfect for garments because you can adjust sizing by adding or removing squares, and the construction method creates natural ease that’s comfortable to wear.
For beginners, I always suggest starting with a small project like a dishcloth (just one large granny square) or a baby blanket that needs maybe 20-30 squares. This gives you enough repetition to master the technique without committing to a massive project.
Project Planning: Sketch out your design before you start. Graph paper works great for planning square layouts, and you can experiment with color placement before you commit yarn to hook.
Sizing Considerations
When planning granny square projects, remember that the size of individual squares affects the final drape and appearance. Smaller squares create more detailed, intricate-looking pieces, while larger squares give a bolder, more graphic effect.
For wearables, consider how the square grid will align with your body. You might need partial squares or clever joining techniques to achieve the shaping you want. This is where understanding various crochet stitches beyond the basic granny square becomes valuable.
Common Problems and Solutions
Even experienced crocheters run into issues with granny squares. The most common problem I see is squares that don’t lie flat. This usually happens because of tension issues or incorrect stitch counts. If your squares are cupping (edges curling up), you’re probably working too tightly or missing increases. If they’re ruffling (edges waving), you might be working too loosely or adding extra stitches.
Uneven squares are another frequent issue, especially when you’re changing colors frequently. The key is maintaining consistent tension throughout the project, which takes practice. I always recommend making several practice squares before starting a large project, especially if you’re new to the technique.
Color bleeding can ruin a beautiful granny square project. Always test your yarns for colorfastness before combining them, especially when mixing different brands or fiber types. A simple test involves dampening a small piece of each yarn and pressing it against white fabric to see if any color transfers.
“The secret to perfect granny squares isn’t perfect stitches – it’s consistent stitches. Your squares don’t need to be flawless, they just need to be uniform enough to join together nicely.”
Fixing Mistakes
One advantage of granny squares is that mistakes are relatively easy to fix. If you notice an error in the current round, you can usually rip back just to the beginning of that round. Unlike row-based patterns where a mistake might require ripping back many rows, granny square mistakes are contained to individual rounds.
For squares that are slightly different sizes, blocking can work miracles. The Craft Yarn Council has excellent resources on blocking techniques that can help you achieve uniform square sizes even if your tension varied slightly during construction.
Common Questions
How many granny squares do I need for a throw blanket?
For a standard throw blanket (approximately 50″ x 60″), you’ll need about 80-100 squares if each square finishes at 5-6 inches. The exact number depends on your square size and desired finished dimensions. I always make a few extra squares – you can use them for matching pillows or save them for repairs later.
Can I mix different yarn weights in one granny square project?
It’s possible, but tricky. Different yarn weights will create squares of different sizes, even with the same number of rounds. If you want to mix weights, plan for it by adjusting your round counts or using the different weights as design elements. Stick to similar fiber contents for consistent care instructions.
Why do my granny squares curl at the edges?
Curling usually indicates that you’re working too tightly or missing increases. Check your corner chain spaces – they should be loose enough to create a 90-degree angle. Also verify your stitch count; each round should have the correct number of clusters to lie flat.
How do I calculate yarn amounts for a granny square project?
Make one complete square in your chosen yarn and hook size, then weigh it or measure how much yarn it used. Multiply by your total number of squares and add 10-15% extra for joining and potential mistakes. A typical 5-inch worsted weight granny square uses about 25-30 yards of yarn.
What’s the difference between American and British granny square patterns?
The main difference is terminology – British patterns use “treble crochet” where American patterns say “double crochet.” The construction method is identical, but always check which terminology your pattern uses to avoid confusion. When in doubt, look for a stitch diagram.
Can I make granny squares without the holes?
Absolutely! Solid granny squares fill in the chain spaces with additional stitches like single crochet or half double crochet. You still work from the center outward in rounds, but the finished square has a denser, less lacy appearance. These work great for projects that need more coverage.
How do I keep my squares the same size when changing colors?
Consistent tension is key, but it takes practice to maintain the same tension with different colored yarns. Some yarns feel different in your hands, which can affect tension. Make several practice squares with your color combinations, and consider using the same brand and yarn line for all colors in your project.
What’s the best way to store granny squares while working on a large project?
I use a large plastic storage container with dividers to separate squares by color or completion status. Lay them flat if possible to prevent stretching. Some crocheters string completed squares on yarn to keep them organized. Whatever method you choose, keep them clean and away from pets who might see them as toys!
Ready to Start Your Granny Square Journey
Granny squares represent one of crochet’s most enduring and versatile techniques. Whether you’re drawn to the traditional square format or excited to explore hexagons, triangles, and other variations, you’re tapping into a rich tradition of practical creativity that spans generations.
The beauty of granny squares lies not just in their finished appearance, but in their accessibility. You can start with basic supplies and simple techniques, yet the possibilities for growth and creativity are endless. Every crocheter I know has their own relationship with granny squares – some love the meditative repetition, others enjoy the instant gratification of completing individual motifs, and many appreciate the portability and scrap-busting potential.
Don’t worry about making perfect squares right away. Focus on understanding the basic construction method, maintaining consistent tension, and enjoying the process. Your skills will develop naturally with practice, and before you know it, you’ll be designing your own variations and teaching others the techniques that once seemed mysterious to you.