Picture this: you’re three rows into what was supposed to be a simple dishcloth pattern, and suddenly your neat rectangle looks more like a wonky trapezoid. Sound familiar? I’ve been there more times than I care to admit, and here’s what I’ve learned – most crochet problems aren’t actually about the technique. They’re about understanding what’s happening with your stitches and having the right fixes in your back pocket.
After fifteen years of crocheting (and making pretty much every mistake possible), I’ve realized that troubleshooting is just as important as learning new stitches. Whether you’re dealing with tension issues, dropped stitches, or projects that just won’t lay flat, there’s usually a straightforward solution once you know what to look for.
The thing is, most crochet tutorials focus on perfect execution but skip the messy reality of what happens when things go wrong. Today, I want to change that. We’re going to dig into the most common crochet problems I see beginners and experienced crafters struggle with, plus the practical fixes that actually work.
Quick Answer
Most crochet problems stem from tension issues, stitch count errors, or using the wrong hook size for your yarn. The key is learning to identify what’s causing the issue before trying to fix it – whether it’s too-tight stitches creating curl, missed increases causing wonky shapes, or yarn splitting from a dull hook.
Fixing Tension and Gauge Problems
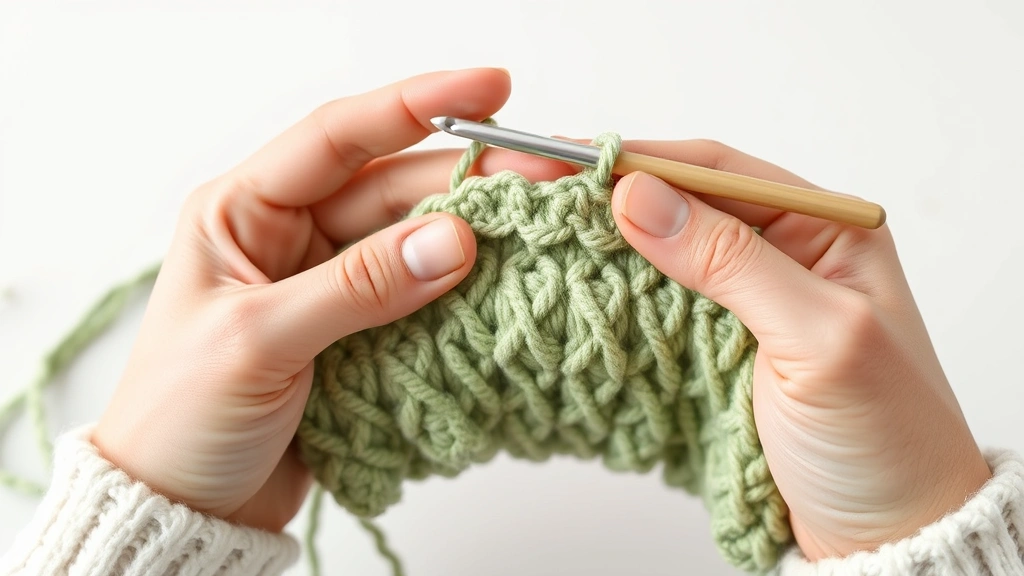
Let’s start with the big one – tension problems. If I had a dollar for every time someone told me their crochet “just doesn’t look right,” I could probably buy a yarn store. Nine times out of ten, it’s a tension issue.
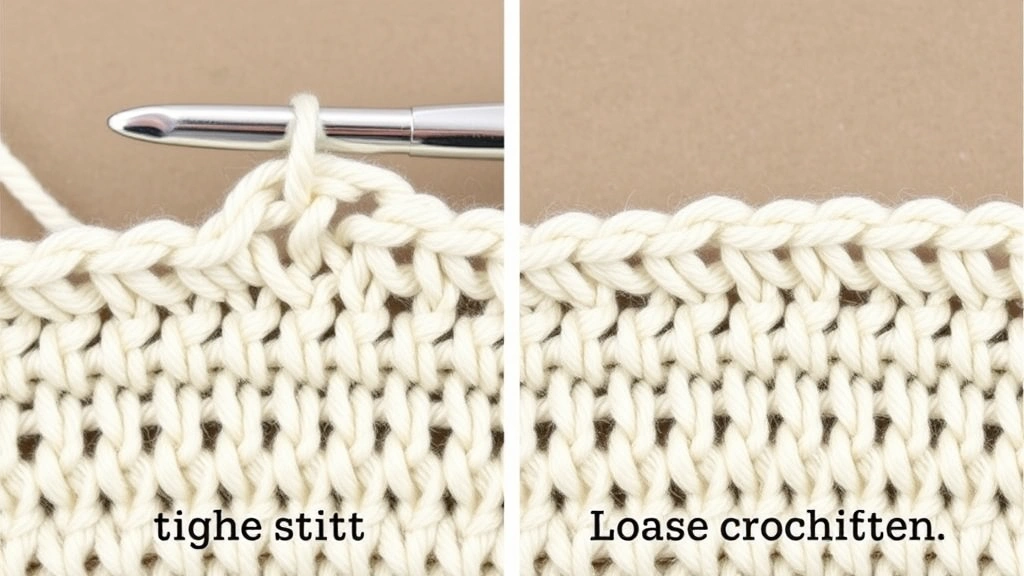
Tight tension shows up as fabric that curls, stitches that are hard to work into, and projects that end up smaller than expected. I see this constantly with new crocheters who grip their hook like they’re trying to strangle it. Your hand should feel relaxed, not like you’re arm-wrestling the yarn.
Here’s what actually works: try going up a hook size or two. I know it feels counterintuitive, but a 5mm hook instead of your usual 4mm can make all the difference. The Craft Yarn Council provides guidelines, but your personal tension matters more than what the yarn label says.
Pro tip: Make a tension square with your normal grip, then make another one while consciously relaxing your hands. The difference will surprise you.
Loose tension creates the opposite problem – stitches that are too open, fabric that won’t hold its shape, and projects that grow beyond your intended size. This often happens when you’re tired or distracted (guilty as charged on those late-night Netflix crochet sessions).
For loose tension, try dropping down a hook size. If you’re using a 5mm, try a 4.5mm or even a 4mm. Also, pay attention to how you hold your yarn. The yarn should have some resistance as it flows through your fingers – not tight enough to snap, but not loose enough to slide freely.
Gauge Swatching That Actually Helps
I used to skip gauge swatches because they felt like homework. Big mistake. Now I make them for every project, and here’s how I make them useful: I crochet a 6-inch square, then measure multiple 4-inch sections within it. This gives me a better average than measuring just one small area.
When working with worsted weight yarn, I expect about 16-18 single crochet stitches across 4 inches with a size H/8 (5mm) hook. If I’m getting 20 stitches, I need a bigger hook. If I’m getting 14, I need a smaller one.
When Your Stitch Count Goes Wrong
Stitch count problems are sneaky. You start with the right number, but somehow by row 10, you’re off by three stitches and have no idea where you went wrong. Been there, done that, bought the t-shirt.
The most common culprit is not counting your turning chain correctly. In single crochet, your turning chain doesn’t count as a stitch – you work into the first actual stitch of the previous row. In double crochet, that chain-3 usually does count as your first stitch, so you skip the first actual stitch and work into the second one.
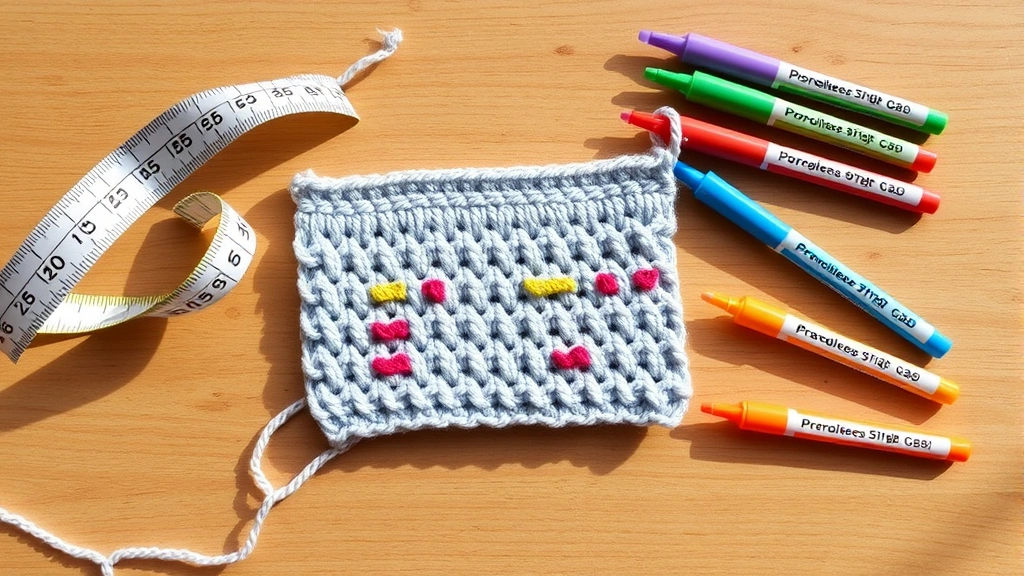
Here’s my foolproof system: I use stitch markers every 10 stitches on long rows. Those little plastic ones from the craft store work fine, but I prefer the removable kind that look like tiny safety pins. When I reach a marker, I count backward to make sure I have 10 stitches since the last marker.
Reality check: If you’re consistently losing stitches in the same spot, you’re probably missing increases or working into the wrong stitch. If you’re gaining stitches, you might be working into the turning chain when you shouldn’t.
For projects worked in the round, the problem is usually at the join. Are you slip stitching into the first stitch or the top of the beginning chain? The pattern should specify, but when in doubt, slip stitch into the first actual stitch you made, not the chain.
Fixing Stitch Count Mid-Project
When you discover you’re off by a few stitches, don’t panic and don’t rip out everything. If you’re short a stitch or two, you can usually add a subtle increase in the next row. If you have too many, work a few stitches together.
The key is spreading these corrections across the row so they’re not obvious. Instead of adding both missing stitches right next to each other, place one increase near the beginning of the row and another near the end.
Solving Shape and Structure Issues
Nothing’s more frustrating than a project that won’t lay flat or hold its intended shape. I’ve made squares that looked like potato chips and circles that resembled ruffled party hats. The good news is these problems usually have clear causes and fixes.
For flat circles that are cupping or ruffling, it’s all about your increase rate. Too few increases create a bowl shape, too many create a wavy ruffle. The standard rule for single crochet circles is to increase by 6 stitches per round, but this can vary based on your tension and yarn choice.
When working with DK weight yarn, I often need to adjust the standard increase pattern slightly. The yarn’s characteristics affect how the fabric behaves, so don’t be afraid to modify the pattern based on what your project is telling you.
| Problem | Cause | Fix |
|---|---|---|
| Circle cups up | Too few increases | Add 1-2 extra increases per round |
| Circle ruffles | Too many increases | Skip 1-2 increases per round |
| Rectangle curves | Uneven tension | Block the piece or adjust hook size |
| Edges curl | Tension too tight | Use larger hook or looser tension |
For rectangular projects like afghans or scarves, curling edges are the main culprit. This usually means your tension is too tight, especially on the foundation chain. I’ve started making my foundation chains with a hook one size larger than what I use for the rest of the project – it makes a huge difference.
Blocking: Your Secret Weapon
Blocking isn’t just for fancy lace projects. It can fix minor shape issues in almost any crochet piece. For acrylic yarn, use steam blocking – hover a steam iron about an inch above your pinned-out project and let the steam relax the fibers. Never let the iron touch the yarn directly.
For natural fibers like cotton or wool, wet blocking works better. Soak your finished piece, gently squeeze out excess water, and pin it to your desired measurements while damp. Let it dry completely before unpinning.
Yarn and Hook Compatibility Problems
Using the wrong hook for your yarn creates a cascade of problems that can make even experienced crocheters question their skills. I’ve seen beautiful cotton yarn projects ruined by hooks that were too small, creating stiff, dense fabric instead of the drape the designer intended.
The yarn label gives you a starting point, but your personal tension and the project type should influence your final choice. For example, when making a summer top, I usually go up a hook size from what the label suggests to create a more breathable fabric.
Yarn splitting is another common issue that’s often blamed on technique when it’s really about equipment. If your yarn keeps splitting, try a hook with a rounder tip. The Ravelry forums are full of discussions about which hook brands work best with different yarn types.
Hook material matters: Aluminum hooks glide smoothly with most yarns, bamboo hooks are gentler on your hands for long sessions, and plastic hooks work well with slippery yarns that might slide off metal.
Reading Your Fabric
Your work will tell you if you’ve got the right hook-yarn combination. The fabric should have good stitch definition – you should be able to see individual stitches clearly. If everything looks muddy and compressed, go up a hook size. If the stitches are so open you can see through them easily, size down.
For chunky yarn projects, this becomes even more critical. A hook that’s too small will make your hands ache and create fabric that’s board-stiff. Too large, and you’ll have a loose, floppy mess that won’t hold its shape.
Common Finishing and Assembly Issues
The most beautiful crochet work can be ruined by poor finishing. I learned this the hard way when I spent weeks on an intricate baby blanket, only to have the border pucker because I didn’t pay attention to my stitch count while adding it.
Seaming problems are incredibly common, especially when joining granny squares or assembling garment pieces. The key is consistent tension in your joining method. Whether you’re using single crochet, slip stitch, or whip stitch, each join should feel the same tension-wise.
When working on granny square patterns, I always lay out all my squares before joining to make sure they’re the same size. If one or two are noticeably different, it’s better to remake them than to try to force them to fit.
Border Troubles
Borders that pucker, wave, or pull are usually the result of working too many or too few stitches along the edge. For straight edges, you typically work one stitch into each stitch of the previous round. For corners, you need extra stitches to turn the corner smoothly – usually 3 stitches into the corner stitch.
Along curved edges, like the neckline of a sweater, you might need to skip stitches occasionally to prevent the border from flaring. This is where experience helps, but a general rule is to work about 2 stitches for every 3 row ends along vertical edges.
Preventing Problems Before They Start
The best crochet problems are the ones that never happen. After years of making mistakes, I’ve developed some habits that save me hours of frogging (rip-it, rip-it – get it?).
First, I always make a gauge swatch, even for simple projects. It takes 20 minutes and can save you from remaking an entire sweater. I keep these swatches in a notebook with notes about the yarn, hook, and pattern – it’s become an invaluable reference.
Second, I count stitches religiously for the first few rows of any new project. Once I’m confident in the pattern repeat, I can relax a bit, but those initial rows set the foundation for everything that follows.
- Read the entire pattern first
I know it’s tempting to dive right in, but reading through helps you understand the construction method and spot potential trouble areas.
- Check your supplies
Make sure you have enough yarn in the same dye lot, and test your hook with the yarn to ensure they work well together.
- Start with good lighting
Poor lighting causes more mistakes than you’d think. I have a daylight lamp at my crochet station that makes a huge difference.
- Take breaks
Tired hands make sloppy stitches. When you start feeling tension in your shoulders or cramping in your fingers, it’s time for a break.
Building Your Troubleshooting Toolkit
Keep these tools handy: a row counter (or just use an app on your phone), stitch markers in multiple sizes, a measuring tape, and good scissors. I also keep a crochet hook that’s one size larger and one size smaller than my project hook – you’d be surprised how often you need them for quick fixes.
When working with specialty techniques like Tunisian crochet basics, having the right tools becomes even more important. The wrong cable length or hook material can turn a relaxing project into a frustrating struggle.
Common Questions
Why does my crochet curl no matter what I do?
Curling is almost always caused by tension that’s too tight, especially in single crochet projects. Try using a hook one or two sizes larger than recommended, and consciously relax your grip. If you’re working in rows, make sure your turning chain is loose enough – many people pull it too tight.
How do I fix a mistake several rows back without starting over?
You don’t always need to rip back to the mistake. For minor issues like a missed stitch, you can often correct it in the current row by adding an increase. For more significant problems, use a smaller crochet hook to carefully unravel just the problem area, then rebuild those few stitches.
My stitches look uneven – what am I doing wrong?
Uneven stitches usually result from inconsistent yarn tension or varying the depth you insert your hook. Focus on maintaining the same grip on your yarn throughout, and always insert your hook completely through both loops of the stitch unless the pattern specifies otherwise. Practice will make this automatic.
Why does my project keep getting wider or narrower?
This happens when you’re accidentally increasing or decreasing stitches. Count your stitches at the end of each row for the first several rows to establish the pattern. Make sure you’re not working into the turning chain when you shouldn’t be, or missing the last stitch of each row.
How tight should my stitches be?
Your stitches should be snug enough to hold their shape but loose enough that you can easily insert your hook through them in the next row. If you’re struggling to get your hook through a stitch, it’s too tight. If stitches look loose and gappy, tighten up slightly.
What’s the best way to fix dropped stitches?
Use a crochet hook smaller than your project hook to pick up the dropped stitch and work it back up through the rows. Work slowly and make sure you’re going through the correct loops. For complex stitches, it might be easier to unravel to the dropped stitch and rework from there.
My yarn keeps splitting – is it the yarn or my technique?
Yarn splitting can be caused by a hook with a sharp or rough tip, inserting your hook at the wrong angle, or using a hook that’s too small for the yarn weight. Try a hook with a more rounded tip, like Lion Brand’s aluminum hooks, or go up a hook size to see if that helps.
How do I know if my gauge is really correct?
Make a swatch at least 6 inches square, then measure multiple 4-inch sections within it rather than just measuring the whole swatch. Wash and block your swatch the same way you’ll care for the finished project – some yarns change significantly after washing. Your gauge should be consistent across the entire swatch.
Here’s the thing about crochet troubleshooting – every “mistake” teaches you something valuable about how yarn and stitches behave. I’ve learned more from my wonky early projects than from any perfect tutorial. The key is approaching problems with curiosity instead of frustration.
Remember, even experienced crocheters deal with these issues. The difference is that we’ve learned to spot problems early and have a toolkit of fixes ready to go. Start building your own troubleshooting skills by paying attention to what your work is telling you, and don’t be afraid to experiment with solutions.
Most importantly, be patient with yourself. Crochet is supposed to be enjoyable, not a source of stress. When a project isn’t cooperating, sometimes the best fix is to set it aside for a day and come back with fresh eyes. You’ve got this!