Last week, I watched my friend Sarah struggle with her first single crochet project. She’d mastered the chain stitch beautifully, but the moment she tried to work into those chains, everything fell apart. Sound familiar? You’re definitely not alone in this struggle.
The single crochet stitch is the foundation of so many gorgeous projects, from cozy beginner-friendly blankets to intricate dishcloths. But here’s the thing – it’s also where most new crocheters hit their first real roadblock. The stitch itself isn’t complicated, but there are so many little details that can trip you up.
I’ve been crocheting for over fifteen years, and I still remember the frustration of those early single crochet attempts. My edges were wonky, my tension was all over the place, and don’t even get me started on trying to count my stitches. But once you get the hang of it, single crochet becomes your reliable friend – the stitch you can do while watching TV or chatting with friends.
Whether you’re working on your first simple scarf pattern or diving into more complex projects, mastering single crochet will open up a whole world of possibilities. Today, I’m going to walk you through everything you need to know, from the basic mechanics to troubleshooting those pesky problems that seem to pop up out of nowhere.
Quick Answer
Single crochet is worked by inserting your hook into a stitch, yarn over, pull through (2 loops on hook), yarn over again, and pull through both loops. It creates a dense, sturdy fabric perfect for dishcloths, amigurumi, and structured garments.
What Is Single Crochet?
Single crochet (abbreviated as “sc” in US patterns) is one of the most fundamental stitches in crochet. It’s shorter than double crochet but taller than slip stitch, creating a dense, sturdy fabric that’s incredibly versatile. In UK patterns, this same stitch is called “double crochet,” which can be confusing if you’re following international patterns.
The beauty of single crochet lies in its simplicity and strength. Each stitch has two loops at the top – the front loop and the back loop – and you’ll typically work under both unless the pattern specifies otherwise. This creates that characteristic interlocked appearance that makes single crochet fabric so durable.
When you’re working single crochet, you’re essentially creating a series of small knots that build upon each other. The stitch height is relatively short, which means your fabric grows slowly but steadily. This makes it perfect for projects where you want a tight, structured fabric that won’t stretch out of shape over time.
Why Single Crochet Matters
I always tell new crocheters to really nail their single crochet before moving on to taller stitches. Here’s why: if you can maintain consistent tension and even edges with single crochet, you’ll have a much easier time with double crochet and beyond. Plus, so many gorgeous patterns rely heavily on single crochet – from amigurumi animals to structured bags and baskets.
The Craft Yarn Council recognizes single crochet as one of the essential stitches every crocheter should master. It’s used in countless traditional and modern patterns, making it a true workhorse stitch.
Step-by-Step Single Crochet Tutorial
Let’s break down the single crochet stitch into manageable steps. I recommend starting with a medium-weight yarn (worsted weight/size 4) and a size H-8 (5mm) hook for practice. This combination gives you good visibility and manageable tension.
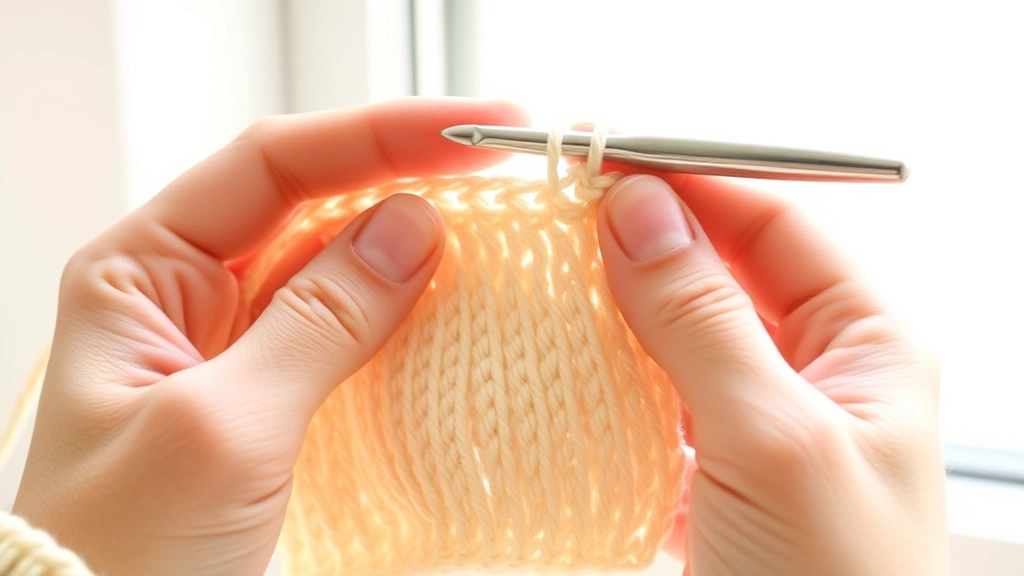
- Insert Your Hook
Push your hook through both loops of the designated stitch from front to back. Your hook should go completely through the stitch, with the working yarn behind your work.
- Yarn Over
Wrap the working yarn around your hook from back to front. This is called a “yarn over” or “yo.” You should now have two loops on your hook.
- Pull Through One Loop
Draw the wrapped yarn through the stitch only (not through the loop that was already on your hook). You’ll still have two loops on your hook at this point.
- Yarn Over Again
Wrap the yarn around your hook once more, from back to front.
- Pull Through Both Loops
Draw the yarn through both loops on your hook in one smooth motion. You should now have just one loop remaining on your hook – this becomes the first loop of your next stitch.
The key to smooth single crochet is developing a rhythm. I like to think of it as “insert, yarn over, pull through one, yarn over, pull through two.” Once you get this rhythm down, you’ll find yourself working much faster and more consistently.
Pro Tip: Practice this motion slowly at first. Many beginners rush through the steps and end up with uneven stitches or dropped loops. Take your time to feel each part of the process.
Working Into Your Foundation Chain
Here’s where things get tricky for most beginners. Working your first row of single crochet into a foundation chain feels completely different from working into actual stitches. The chain stitches are smaller and can be harder to see, especially if you’re working with darker yarn.
When working into a foundation chain, you have a choice: work into the back bump of each chain stitch, or work under the top two loops of each chain. I personally prefer the back bump method because it creates a neater edge and makes it easier to pick up stitches later if you want to add a border.
Finding the Right Chain Stitch
Start by making a foundation chain with one extra chain for turning (so if you want 20 single crochet stitches, chain 21). Skip the first chain closest to your hook – this acts as your turning chain. Insert your hook into the second chain from the hook.
Count carefully as you work across. It’s incredibly easy to accidentally skip a chain or work into the same chain twice. I always place a stitch marker in my first and last stitches of the row to help me keep track.
If you’re struggling to see your chain stitches clearly, try using a lighter colored yarn for practice. The contrast will help you identify each individual chain much more easily.
Maintaining Even Edges and Proper Turning
Even edges are the hallmark of good single crochet work, but they’re also one of the biggest challenges for beginners. The most common problem I see is edges that either slant inward (decreasing) or flare outward (increasing), creating a trapezoid instead of a rectangle.
The culprit is usually the turning chain. In single crochet, you typically chain 1 at the end of each row, then turn your work. This chain 1 does NOT count as a stitch – it’s just there to bring your hook up to the right height for the next row.
The Turning Process
Here’s the correct sequence: complete your last single crochet of the row, chain 1, turn your work clockwise (or counterclockwise – whatever feels natural), then work your first single crochet into the same stitch where you just finished. This is crucial – you’re not skipping that first stitch.
For your last stitch of each row, work into the very last single crochet from the previous row, not into the turning chain. This keeps your stitch count consistent and your edges straight.
| Row Position | Where to Work | Common Mistake |
|---|---|---|
| First stitch of row | Same stitch as last sc | Skipping first stitch |
| Last stitch of row | Last sc of previous row | Working into turning chain |
| Turning chain | Chain 1, doesn’t count | Counting it as a stitch |
Common Problems and Solutions
Let’s talk about the frustrating stuff that happens when you’re learning single crochet. I’ve seen these issues countless times in my local crochet circle, and they’re all totally fixable with a bit of practice and awareness.
Decreasing Edges (Work Getting Narrower)
This is usually caused by missing the first or last stitch of your rows. It’s so easy to do, especially when you’re concentrating hard on your stitch formation. The solution is to use stitch markers religiously until this becomes second nature. Mark your first and last stitches of every row.
Increasing Edges (Work Getting Wider)
If your work is getting wider, you’re probably working into the turning chain or accidentally working two stitches into the same spot. Remember: that chain 1 at the end of your row is just for height, not a working stitch.
Uneven Stitch Height
Sometimes your single crochet stitches look wonky – some tall, some short, some leaning to one side. This usually comes down to inconsistent hook insertion. Make sure you’re going through both loops of each stitch completely, and try to insert your hook at the same angle each time.
Tension Tip: If your stitches are too tight to work into comfortably, try going up a hook size. If they’re too loose and gappy, go down a size. The Lion Brand website has great guidance on achieving proper gauge.
Mastering Tension and Gauge
Tension is probably the most important skill you’ll develop as a crocheter, and single crochet is the perfect stitch for learning it. Your tension affects everything – how your fabric looks, how much yarn you use, and whether your finished project will be the right size.
Good tension means your stitches are even and consistent, not too tight (hard to work into) or too loose (creating gaps). When I’m teaching beginners, I always emphasize that tension comes with practice – don’t stress if yours isn’t perfect right away.
Testing Your Gauge
Most patterns will give you a gauge measurement, like “14 sc and 16 rows = 4 inches.” This might seem tedious, but making a gauge swatch can save you hours of frustration later. Use the recommended yarn and hook size, work a 6-inch square in single crochet, then measure your stitches and rows.
If you’re getting more stitches per inch than the pattern calls for, your tension is too tight – try a larger hook. If you’re getting fewer stitches per inch, your tension is too loose – try a smaller hook. This is especially important for fitted garments where sizing matters.
I learned this lesson the hard way when I made a baby blanket that turned out big enough for a king-size bed. Always, always check your gauge for important projects!
Perfect Projects for Single Crochet
Single crochet is incredibly versatile, and there are so many projects that showcase this stitch beautifully. Here are some of my favorites for different skill levels.
Beginner Projects
Start with dishcloths or washcloths – they’re small, forgiving, and incredibly useful. A basic 8-inch square worked in cotton yarn makes a perfect first project. You’ll practice maintaining even edges without committing to something huge.
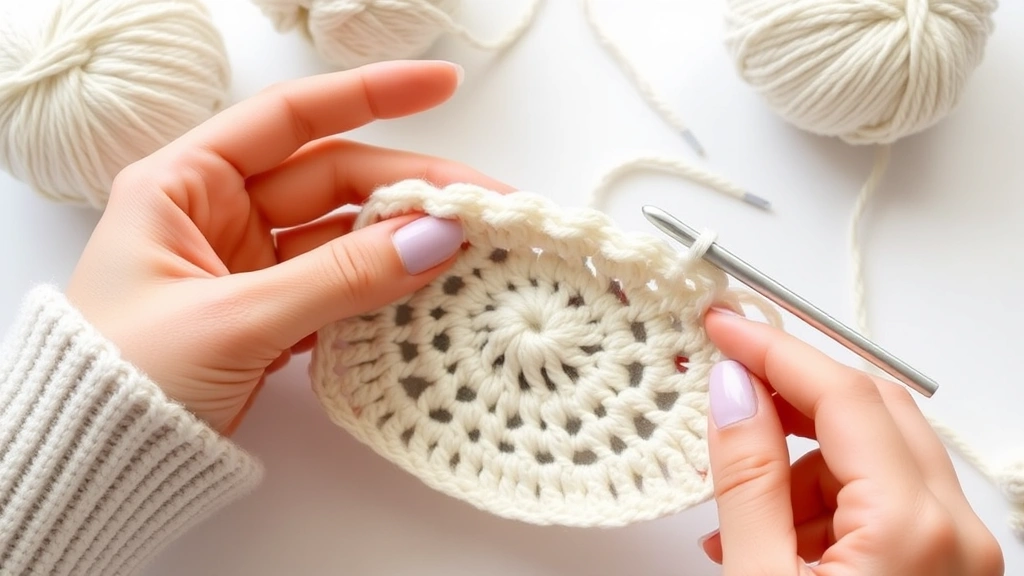
Coasters are another great option. Work them in rounds using the magic ring technique to practice increasing evenly. They make lovely gifts and help you master circular single crochet.
Intermediate Projects
Once you’re comfortable with basic single crochet, try a simple tote bag or market bag. The dense fabric created by single crochet is perfect for bags that need structure. You can experiment with color changes and simple shaping techniques.
Amigurumi projects are fantastic for practicing single crochet in the round. Start with something simple like a ball or basic animal shape. The tight gauge of single crochet is perfect for stuffed projects.
Advanced Applications
Single crochet really shines in garments where you want structure and drape. Cardigans, fitted tops, and structured dresses all benefit from the stability of single crochet fabric. You can also use it for intricate colorwork patterns – the short stitch height makes it perfect for detailed designs.
| Project Type | Yarn Weight | Hook Size | Skill Level |
|---|---|---|---|
| Dishcloths | Worsted cotton | H-8 (5mm) | Beginner |
| Amigurumi | DK or worsted | E-4 to G-6 | Beginner-Int |
| Tote bags | Worsted or chunky | H-8 to J-10 | Intermediate |
| Garments | DK to worsted | F-5 to H-8 | Advanced |
Common Questions
How do I know if I’m working into the right part of the stitch?
Unless your pattern specifies otherwise, always work under both loops at the top of each stitch. You should see your hook go completely through the stitch, with both the front loop and back loop sitting on your hook shaft before you yarn over.
Why does my single crochet fabric curl at the edges?
Some curling is normal with single crochet, especially when you’re working in rows. The fabric has a natural tendency to curl toward the right side. Blocking your finished piece with steam or water can help relax this curl. For projects where curling is problematic, consider adding a border in a different stitch.
How much yarn do I need for a single crochet project?
Single crochet uses more yarn than taller stitches because it creates a denser fabric. As a rough estimate, a worsted weight yarn worked in single crochet will yield about 12-14 stitches per inch and use approximately 15-20% more yarn than the same project worked in double crochet.
Can I fix a mistake several rows back without ripping out everything?
For small mistakes like a missed stitch, you can sometimes work a correction into your current row by increasing or decreasing to get back on track. For bigger errors, it’s usually better to rip back to the mistake – single crochet unravels easily, so it’s not as painful as it seems.
Should I count my stitches every row?
When you’re learning, absolutely yes. Count your stitches at the end of every row until maintaining consistent stitch counts becomes automatic. Use stitch markers to mark your first and last stitches if counting is difficult.
Why are my stitches different sizes even though I’m trying to keep consistent tension?
This often happens when you’re working at different speeds or in different positions. Try to maintain the same posture and rhythm throughout your work session. Also, check that you’re inserting your hook at the same depth and angle for each stitch.
How tight should my stitches be?
Your stitches should be snug but not so tight that you struggle to insert your hook into them on the next row. If you’re having to force your hook through stitches, loosen up your tension. The yarn should slide smoothly through your fingers as you work.
What’s the difference between US and UK single crochet terms?
In US terminology, single crochet is the short stitch we’ve been discussing. In UK terminology, this same stitch is called double crochet. UK single crochet is what Americans call slip stitch. Always check which terminology your pattern uses to avoid confusion.
Mastering single crochet really is like learning to ride a bike – once it clicks, you’ll wonder why it ever seemed difficult. The key is patience with yourself and lots of practice. Don’t worry if your first attempts look a bit wonky; even experienced crocheters had to start somewhere.
Remember that every crocheter develops their own rhythm and style. What works for me might feel awkward for you, and that’s perfectly fine. The most important thing is finding a technique that feels comfortable and produces consistent results for your hands and your projects.
Take your time, be patient with the learning process, and don’t be afraid to rip out work that isn’t meeting your standards. I promise that all those practice stitches are building muscle memory that will serve you well in every future project. Before you know it, you’ll be working single crochet while watching TV and chatting with friends, just like the rest of us yarn addicts.
Happy crocheting, and remember – every expert was once a beginner who refused to give up!