You know that moment when you’re scrolling through Pinterest at 2 AM and stumble across the most gorgeous crochet blanket pattern? Your heart skips a beat, you save it immediately, and then reality hits – the pattern calls for a yarn you’ve never heard of, uses stitches that sound like ancient spells, and somehow expects you to magically know exactly how much yarn to buy.
I’ve been there more times than I care to admit. After fifteen years of crocheting and countless “learning experiences” (aka expensive mistakes), I’ve figured out that the secret to successful blanket-making isn’t just following a pattern – it’s understanding how all the pieces fit together before you even pick up your hook.
Whether you’re eyeing that chunky throw pattern for your living room or dreaming of creating a delicate baby blanket, the fundamentals remain the same. You need to understand yarn weights, calculate yardage, choose the right hook size, and most importantly, pick a pattern that matches both your skill level and your patience level. Because let’s be honest – starting an intermediate pattern when you’re still figuring out basic stitches is a recipe for frustration.
Quick Answer
Choose a simple stitch pattern, calculate 3000-4000 yards for a throw blanket, use worsted weight yarn with a size H (5mm) hook for beginners. Start with granny squares or single crochet patterns, and always make a gauge swatch first.
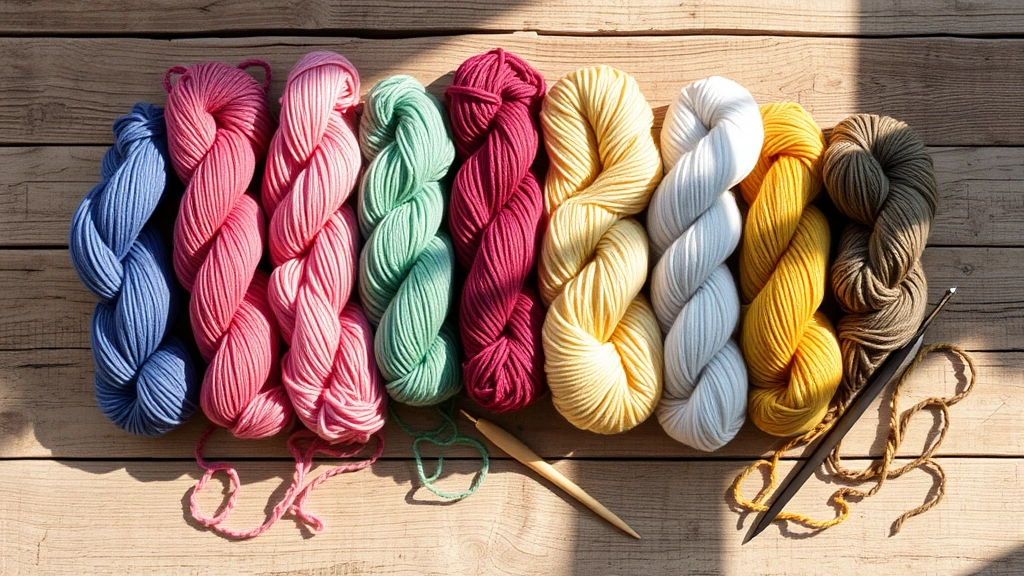
Choosing the Right Yarn Weight and Fiber
Here’s the thing about yarn – it’s not all created equal, and your choice will make or break your blanket project. I learned this the hard way when I spent three months working on a blanket with scratchy acrylic that felt like a hair shirt. Nobody wants to snuggle under that.
For your first blanket, stick with worsted weight yarn (that’s weight 4 on the Craft Yarn Council scale). It’s the goldilocks of yarn weights – not too thick, not too thin, just right for learning. Acrylic yarn might get a bad rap from yarn snobs, but modern acrylics like Red Heart Super Saver or Lion Brand Vanna’s Choice are actually perfect for beginners.
Why acrylic for starters? It’s forgiving, machine washable, and won’t break the bank if you mess up. Plus, you can practice your blocking techniques without worrying about ruining expensive wool.
| Yarn Weight | Hook Size | Best For | Typical Yardage per Skein |
|---|---|---|---|
| DK (3) | 4.5mm (G) | Baby blankets | 280-300 yards |
| Worsted (4) | 5mm (H) | Throw blankets | 190-220 yards |
| Chunky (5) | 6.5mm (K) | Quick projects | 140-160 yards |
| Super Chunky (6) | 8mm (L) | Statement pieces | 80-120 yards |
If you’re making a baby blanket, consider cotton or a cotton blend. Babies have sensitive skin, and cotton is naturally breathable and hypoallergenic. Lion Brand 24/7 Cotton is my go-to for baby projects.
Fiber Content Matters More Than You Think
Acrylic is great for learning, but once you’re comfortable, branch out. Wool blends offer warmth and elasticity, cotton provides structure and breathability, and bamboo adds a silky drape. Each fiber behaves differently, so don’t be surprised if your gauge changes when you switch from acrylic to wool.

How Much Yarn Do You Actually Need?
This is where math meets crafting, and honestly, it used to stress me out until I developed a foolproof system. The amount of yarn you need depends on three main factors: the finished size, your stitch pattern, and your personal tension.
Here’s my rule of thumb for standard blanket sizes:
- Baby blanket (30″ x 36″): 1200-1500 yards
- Lap blanket (36″ x 48″): 2000-2500 yards
- Throw blanket (50″ x 60″): 3000-4000 yards
- Afghan (50″ x 65″): 3500-4500 yards
- Twin bed (66″ x 90″): 5000-6000 yards
These estimates assume worsted weight yarn and medium tension. If you’re using chunky yarn, you’ll need about 30% less yardage. For fingering weight or lace patterns, add 50% more.
The Gauge Swatch is Your Friend
I know, I know – gauge swatches feel like homework when you just want to start your project. But spending 20 minutes making a 4″ x 4″ square will save you hours of frustration later. Use the hook size recommended in your pattern and work up a square using your chosen stitch.
Measure your swatch after letting it rest for a few hours. If your gauge is too tight (fewer stitches per inch than the pattern calls for), go up a hook size. Too loose? Size down. This simple step ensures your blanket will end up the size you expect.
Remember: gauge affects not just size, but also yarn consumption. A looser gauge uses more yarn, while tighter stitches use less. Factor this into your yarn calculations.
Picking Your First Blanket Pattern
Pattern selection can make or break your first blanket experience. I’ve seen too many beginners get excited about an intricate Celtic knot pattern, only to abandon it three rows in because it’s overwhelming.
Start with these beginner-friendly options:
Single Crochet Stripes
This might sound boring, but hear me out. A simple single crochet blanket in alternating colors can be absolutely stunning. You’ll master consistent tension, learn to change colors cleanly, and create something beautiful without complex stitch combinations. Plus, single crochet creates a dense, warm fabric that’s perfect for snuggling.
Granny Square Afghans
The classic granny square is popular for good reason. Each square is a small, manageable project that you can complete in one sitting. You’ll practice working in rounds, changing colors, and joining pieces – all valuable skills for future projects.
Corner-to-Corner (C2C)
This technique creates a diagonal pattern that’s surprisingly addictive. You start with one stitch and gradually increase to the middle, then decrease back down. It’s perfect for color changes and creates a lovely texture. The corner-to-corner method is also great for graphgans (picture blankets) once you’re more experienced.
Essential Tools and Supplies
You don’t need a craft room full of supplies to make a beautiful blanket, but having the right tools makes the process so much more enjoyable. Here’s what I consider essential versus nice-to-have.
Must-Have Tools
- Crochet hooks: Sizes G (4mm) through K (6.5mm) will cover most blanket projects
- Scissors: Sharp fabric scissors for clean cuts
- Tapestry needles: For weaving in ends and joining pieces
- Stitch markers: Removable ones for marking pattern repeats
- Measuring tape: Essential for checking gauge and progress
- Row counter: Your phone’s calculator works, but a dedicated counter is handy
Game-Changing Upgrades
Once you’re hooked (pun intended), these tools will improve your experience:
- Ergonomic hooks: Your hands will thank you during long crochet sessions
- Yarn bowl: Keeps your working yarn tangle-free
- Blocking mats: Essential for professional-looking finished pieces
- Project bag: Keeps everything organized and portable
I started with basic aluminum hooks from the craft store, and they worked fine. But when I upgraded to Clover Amour hooks with their comfortable grips, my hands stopped cramping during long sessions. It’s an investment worth making once you know you love crocheting.
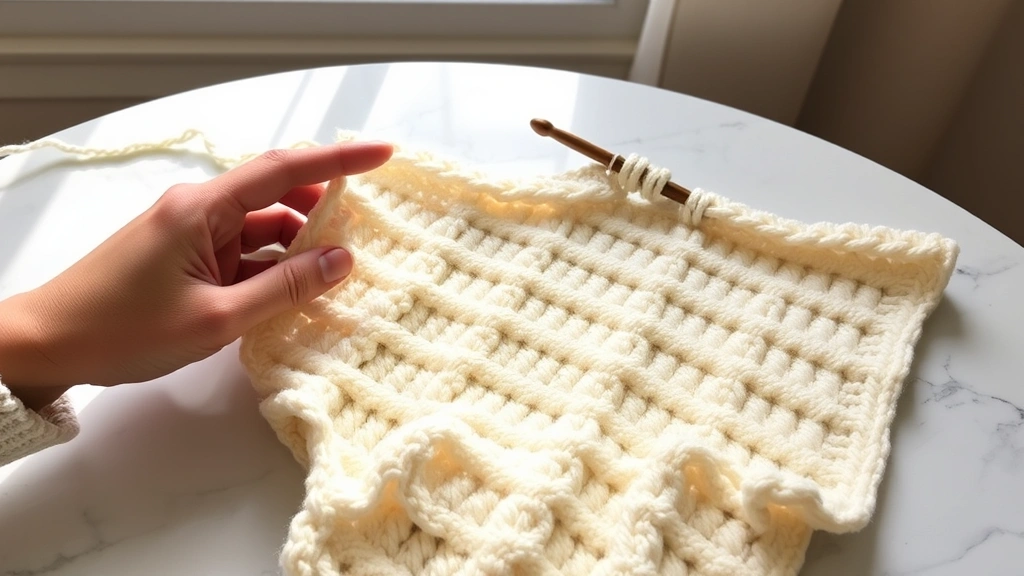
Making Your First Rows Count
The beginning of your blanket sets the tone for the entire project. A wonky foundation chain or inconsistent first few rows will haunt you throughout the entire process. Trust me, I’ve frogged (ripped out) more projects than I care to admit because I rushed this crucial step.
Foundation Chain Mastery
Your foundation chain should be firm but not tight. If you struggle with tight chains (guilty!), go up a hook size just for the foundation, then switch to your working hook for the rest of the project. Count your chains twice – it’s much easier to fix a miscount now than after you’ve worked several rows.
For most blanket patterns, you’ll want your foundation chain to have some stretch. Test it by gently pulling – it should give slightly without distorting. If it feels like a rope, it’s too tight.
Consistent Edge Stitches
Edges make or break the look of a finished blanket. Whether you’re working in rows or joining squares, consistency is key. For row-based patterns, pay special attention to your turning chains. Are they too loose, creating gaps? Too tight, causing the edge to pull in?
I like to place a stitch marker in the last stitch of each row as I work it. This helps me identify exactly where to place my last stitch of the following row, preventing accidental increases or decreases.
- Start with proper posture
Sit comfortably with good lighting. Your shoulders should be relaxed, and your work should be at a comfortable height. Tension in your body translates to tension in your stitches.
- Maintain consistent yarn tension
Hold your yarn the same way throughout the project. I wrap mine around my pinky and over my index finger, but find what works for you and stick with it.
- Count regularly
Count your stitches every few rows, especially in the beginning. It’s easier to fix a mistake early than to discover it twenty rows later.
- Take breaks
Your hands and eyes need rest. Step away every hour or so to prevent fatigue and maintain quality.
Common Problems and Solutions
Every crocheter faces challenges, especially when tackling their first blanket. Here are the issues I see most often and how to fix them without losing your sanity.
Curling Edges
If your blanket edges curl or won’t lie flat, you’re likely dealing with tension issues. Single crochet tends to curl more than other stitches because it’s so dense. The solution? Add a border of taller stitches like double crochet or half double crochet around the entire blanket. This creates the right balance of structure and drape.
Uneven Edges
Wonky edges usually result from inconsistent stitch counts. Either you’re accidentally adding stitches (increases) or losing them (decreases). The fix is simple but tedious – count your stitches more frequently and use stitch markers to identify your edge stitches.
If you’re working double crochet rows, remember that your turning chain counts as the first stitch. Don’t work into the base of that chain, or you’ll create an increase.
Running Out of Yarn
This is every crocheter’s nightmare, especially when you’re 90% done. If you can’t find more yarn in the same dye lot, don’t panic. You have options:
- Use the remaining yarn for a border in a coordinating color
- Work the last few rows in a planned color change
- Add stripes throughout the blanket to incorporate the new dye lot
Holes in Your Work
Unexpected holes usually happen when you accidentally skip stitches or work into the wrong place. In single crochet, make sure you’re working into both loops of each stitch. In double crochet patterns, be careful not to work into the spaces between stitches unless the pattern specifically calls for it.
Finishing Your Blanket Like a Pro
The difference between a handmade blanket and a professionally finished one often comes down to the details. Proper finishing techniques transform your project from “obviously homemade” to “beautifully handcrafted.”
Weaving in Ends
Every color change and new ball of yarn creates loose ends that need to be secured. Don’t just tie knots – they can come undone and create lumps. Instead, use a tapestry needle to weave each end through several stitches in the same color, changing direction at least once.
For extra security, I like to weave ends through about six stitches, then back through three of them in the opposite direction. This creates enough friction to hold the end permanently.
Blocking Your Blanket
Blocking might seem like an extra step, but it’s what makes your stitches look even and professional. For acrylic blankets, steam blocking works well. Lay your blanket flat, hover a steam iron about an inch above the surface, and let the steam relax the fibers. Never press the iron directly onto acrylic – it can melt.
Natural fibers like wool or cotton can be wet blocked. Soak the blanket in cool water with a bit of wool wash, then lay it flat to dry, gently stretching it to the desired dimensions.
Adding a Border
A border isn’t always necessary, but it can elevate your blanket significantly. Simple single crochet borders work well for most projects, but don’t be afraid to try something more decorative once you’re comfortable with basic stitches.
When working a border, you’ll need to figure out how many stitches to work along each edge. For single crochet edges, work one stitch per row end. For taller stitches like double crochet, you might need 2-3 stitches per row end to keep the border flat.
The key to a great border is working the corners correctly. Most patterns will tell you to work 3 stitches in each corner stitch to create a nice 90-degree angle.
Common Questions
How long does it take to crochet a throw blanket?
For a beginner working on a simple single crochet throw blanket (50″ x 60″), expect 60-80 hours of actual crocheting time. If you work 2 hours per day, that’s about 6-8 weeks. Complex patterns with multiple colors or intricate stitches will take longer. Your speed will increase significantly with practice.
What’s the easiest blanket pattern for complete beginners?
Start with a simple single crochet rectangle in one color. Once you’re comfortable with consistent tension and straight edges, try adding stripes or working a basic granny square blanket. Avoid patterns with complex stitch combinations or detailed colorwork until you’ve mastered the basics.
How do I know if I’m buying enough yarn?
Always buy more than the pattern calls for – at least 10% extra, preferably 20%. Yarn consumption varies based on your tension, hook size, and even humidity. For a worsted weight throw blanket, plan on 3500-4000 yards to be safe. Keep receipts and buy from stores with good return policies.
Can I use different yarn weights in the same blanket?
It’s possible but tricky for beginners. Different weights create different drape and texture, which can make your blanket look uneven. If you want to mix weights, stick to adjacent weights (like DK and worsted) and adjust your hook size accordingly. Test with swatches first.
What do I do if my blanket is too small when I’m done?
Add a border! A simple double crochet border can add 4-6 inches to each dimension. You can also add multiple rounds of different stitches for more size. Choose colors that complement your blanket – either matching or contrasting depending on your preference.
How do I fix a hole I discovered several rows later?
For small holes (1-2 missed stitches), you can often fix them with a crochet hook by working new stitches into the gap and securing them to surrounding stitches. For larger mistakes, you might need to frog (rip out) back to the error. This is frustrating but better than living with a flawed blanket.
Should I wash my blanket before giving it as a gift?
Yes, especially if it’s made with acrylic yarn. Washing softens the fibers and removes any manufacturing residue or oils from handling. Use a gentle cycle with cool water and lay flat to dry. This also lets you check for any construction issues before gifting.
What’s the difference between a throw and an afghan?
The terms are often used interchangeably, but traditionally, a throw is smaller (around 50″ x 60″) and meant for draping over furniture or wrapping around yourself. An afghan is larger (typically 50″ x 65″ or bigger) and meant to cover a bed. The construction methods are the same.
Your first crochet blanket is a milestone project that will teach you more about the craft than any other single item. Yes, it requires patience and persistence, but the satisfaction of creating something both beautiful and functional is unmatched. Take your time, enjoy the process, and don’t be afraid to make mistakes – they’re how we learn.
Remember, every expert crocheter started exactly where you are now. That gorgeous blanket you admired on Ravelry? The maker probably frogged their first attempt at least twice. The key is to start with realistic expectations, choose forgiving materials, and celebrate small victories along the way.
Most importantly, make something you’ll love using. Whether it’s a cozy throw for movie nights or a special baby blanket for someone you care about, put love into every stitch. That’s what transforms yarn into something truly special.