Crochet Yarn Weight Guide: Choosing the Right Yarn for Your Projects
You’re standing in the yarn aisle—or scrolling through an online store—and suddenly you’re staring at what feels like a thousand options. Lace weight, fingering, worsted, bulky… it’s enough to make your head spin. Here’s the thing though: understanding yarn weight isn’t actually complicated once you get the hang of it. It’s honestly one of those skills that clicks pretty quickly, and it’ll completely change how confident you feel picking up new projects.
I remember being totally overwhelmed by this myself. I’d grab a yarn because I loved the color, start a project, and then realize halfway through that nothing was working the way it should. The tension felt off, the drape was weird, or I was running through yarn way faster than the pattern suggested. Turns out, I wasn’t paying attention to what the yarn weight actually was. Once I learned to match yarn weight to my project and my hook size, everything got so much easier—and honestly, way more fun.
What Is Yarn Weight and Why It Matters
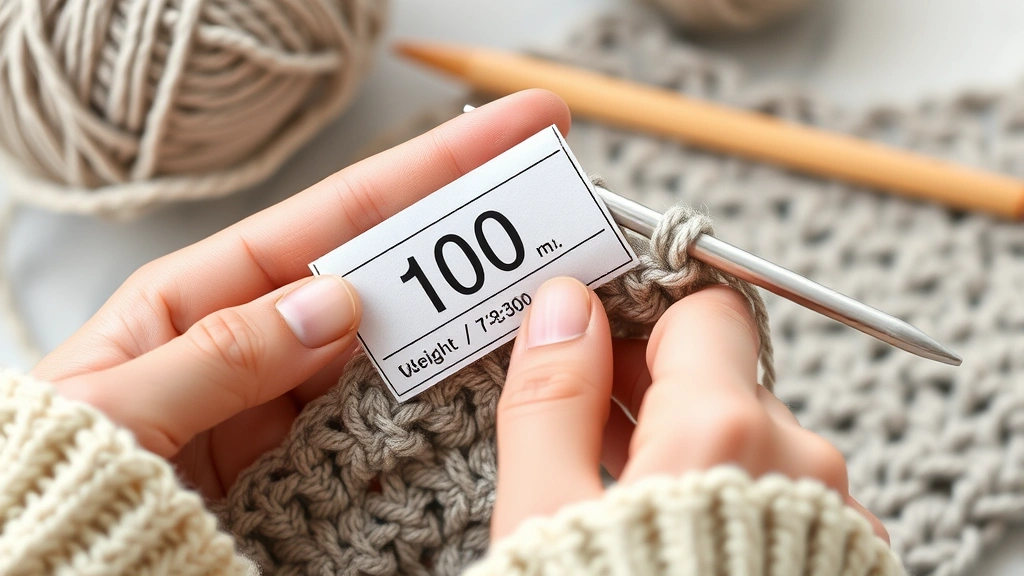
Yarn weight basically refers to how thick or thin your yarn is. It’s measured by how many yards or meters you get in a specific weight of yarn—usually 100 grams. So if you have two different yarns that are both 100 grams, but one gives you 200 yards and the other gives you 400 yards, the one with 400 yards is thinner (lighter weight), and the one with 200 yards is thicker (heavier weight).
Why does this matter so much? Well, yarn weight directly affects everything about your project. It determines how fast you’ll finish (thicker yarn = quicker projects), how much yarn you’ll actually need, what size hook works best, the drape and feel of the finished piece, and whether your project will turn out looking anything like the pattern photo. Using the wrong yarn weight is like trying to bake a cake with the wrong oven temperature—you might end up with something, but it probably won’t be what you were hoping for.
The cool part? Once you understand yarn weight, you can actually substitute yarns in patterns way more confidently. You can adapt a project to use what you have on hand, or switch things up to match your vision. That’s real creative freedom right there.
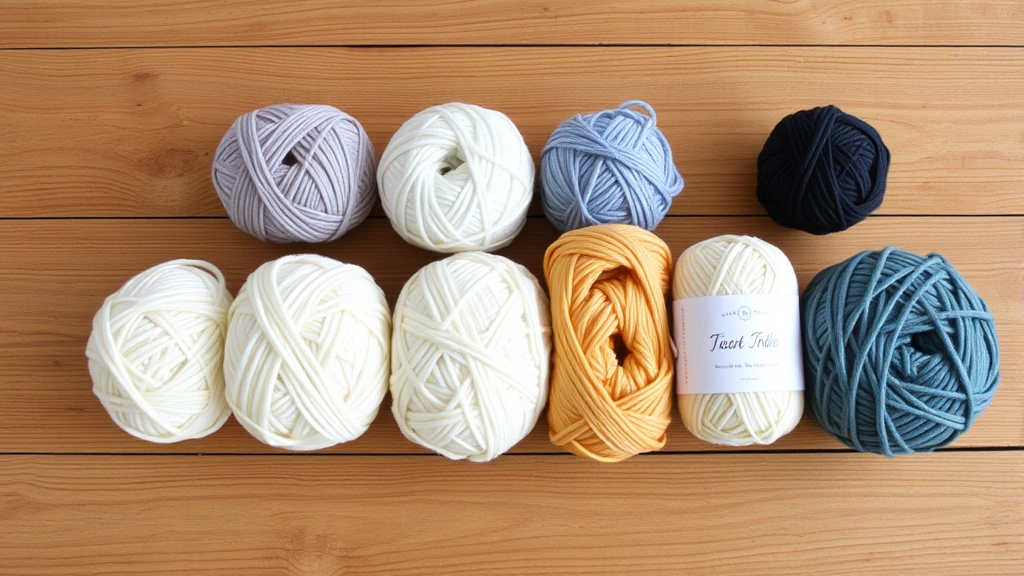
Understanding the Standard Yarn Weight Categories
The Craft Yarn Council established a standard system for yarn weights, numbered 0 through 7. Let me break down each one so you’ve got a solid reference:
- Lace (0): The thinnest of the bunch. You’re looking at 400+ yards per 100 grams. These yarns are delicate and usually call for tiny hooks (steel crochet hooks or size US 000-1). Perfect for intricate lace patterns and shawlettes. Fair warning: these projects take patience, but the results are absolutely stunning.
- Fingering (1): Super thin but slightly thicker than lace. Around 350-450 yards per 100 grams. Works with hooks in the US 1-3 range. Great for socks, amigurumi with fine detail, and projects where you want intricate stitch definition.
- Sport (2): A step up in thickness. You’ll typically get 200-350 yards per 100 grams. Uses US 3-5 hooks. This weight is fantastic for baby items, lightweight garments, and projects that need some drape without being flimsy.
- DK/Light Worsted (3): Right in that sweet spot for many crocheters. Around 200-250 yards per 100 grams. Works with US 5-7 hooks. Super versatile for sweaters, blankets, and most everyday projects.
- Worsted (4): The classic, most common weight you’ll find. Roughly 180-220 yards per 100 grams. US 7-9 hooks are typical. This is your go-to for afghans, amigurumi, hats, and pretty much anything beginner-friendly.
- Bulky (5): Thick and satisfying to work with. Around 90-150 yards per 100 grams. US 9-11 hooks. Projects work up incredibly fast—we’re talking finishing a blanket in a weekend kind of fast.
- Super Bulky (6): Really chunky stuff. 60-90 yards per 100 grams. US 11 and up. Perfect when you want instant gratification or are making oversized, cozy pieces.
- Jumbo (7): The heavyweight champion. Less than 60 yards per 100 grams. Huge hooks or even your fingers. More of a specialty category, but amazing for statement pieces and quick projects.
Here’s something I wish I’d known earlier: you don’t need to memorize all of this. Yarn labels literally tell you the weight category number, so you can always reference this list when you’re shopping or planning a project.
How to Read Yarn Labels
The yarn label is honestly your best friend. It’s got all the information you need to make smart decisions about your project. Let me walk you through what you’re actually looking at:
- Fiber Content: This tells you what the yarn is made from—wool, acrylic, cotton, silk, blends, whatever. Different fibers have different characteristics. Wool’s got great elasticity and warmth. Acrylic is budget-friendly and easy to care for. Cotton breathes beautifully but doesn’t have as much give. Understanding fiber content helps you pick yarn that’ll work for your lifestyle and project type.
- Weight and Yardage: You’ll see something like “100g / 220 yards.” This is crucial information. The yardage tells you how much yarn you’re actually getting, which affects whether you have enough for your project and how long it’ll take to finish.
- Recommended Hook Size: Most labels suggest a hook size range. This is a solid starting point, though you might need to adjust based on your personal tension.
- Yarn Weight Category: Look for that number 0-7, usually with a little visual indicator too. This is your quick reference for which weight category you’re working with.
- Care Instructions: Super important if you’re making something that’ll actually be worn or washed. Some yarns need hand washing, others are machine washable. Some can be dried, others need to lay flat. Don’t skip this part.
- Dye Lot: If you’re buying multiple balls for a project, try to get the same dye lot. Different dye lots can have slightly different colors, and it’ll be noticeable in your finished project.
Pro tip: take a photo of the label before you start your project, or save the label itself. Future you will be so grateful when you need to match yarn for fixing something or adding to a project months later.
Matching Yarn Weight to Your Hook Size
Here’s where it gets really practical. The recommended hook size on your yarn label is there for a reason, but understanding the relationship between yarn weight and hook size gives you way more flexibility.
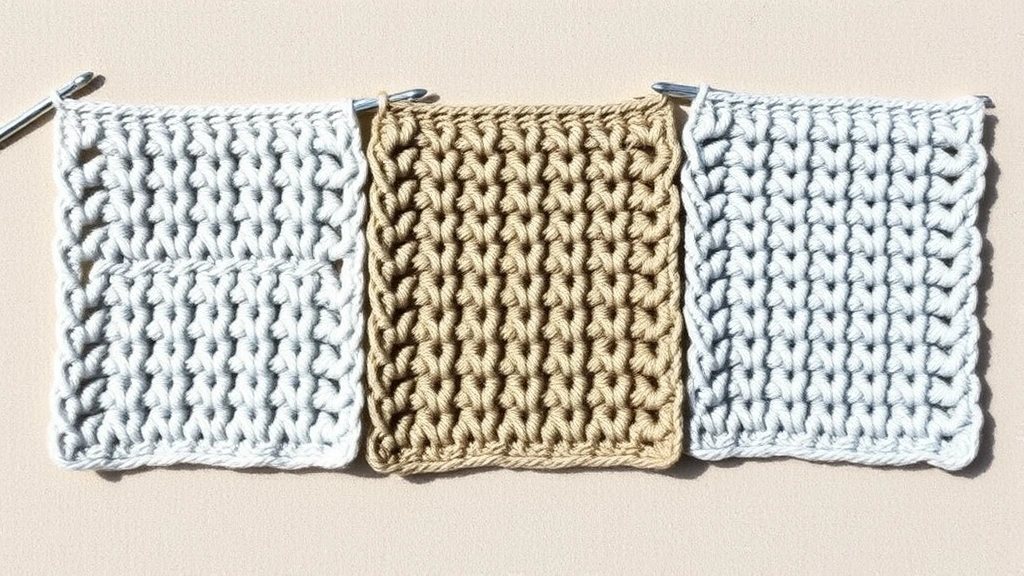
Generally speaking, you want your hook to be proportional to your yarn thickness. Too small a hook for your yarn and you’ll have crazy tight tension, your hands will hurt, and your project will take forever. Too large a hook and your fabric will be loose and floppy, with visible gaps between stitches.
When you’re starting a new project, work up a swatch with the recommended hook size and check your gauge. Gauge is basically how many stitches and rows you get in a given measurement—usually 4 inches. If your gauge matches the pattern’s gauge, you’re golden. If it’s off, you might need to go up or down a hook size.
Let me give you a concrete example. You’ve got a worsted weight yarn that recommends US 8-9 hooks. You start with a US 8 and work up your swatch. You’re getting 16 stitches and 12 rows per 4 inches, but the pattern calls for 18 stitches and 14 rows per 4 inches. Your stitches are too loose. You’d bump up to a US 9, recheck your swatch, and adjust from there. This process takes maybe 15 minutes and saves you from spending hours on a project that won’t fit right.
Also? Your personal tension matters. Some people naturally crochet tighter, others looser. There’s no “right” tension—you just need to know yours and adjust accordingly. Over time, you’ll start to develop an intuition for this, and you won’t even have to think about it.
Yarn Weight and Project Outcomes
Different yarn weights create completely different finished products, even when you’re using the same stitch pattern. This is actually amazing because it means you can adapt patterns to suit your needs.
Let’s say you love a particular shawl pattern. You could crochet it in fingering weight for an intricate, lacy drape that’s perfect for evening wear. Make it again in DK weight and you’ve got something with more structure that works great for everyday. Do it one more time in worsted weight and suddenly you’ve got a cozy, oversized wrap. Same pattern, three totally different outcomes.
Yarn weight also affects how your finished piece feels and behaves. Thinner yarns tend to have more drape and elegance. They’re great for garments that need to move and flow. Heavier yarns create more structure and warmth, making them perfect for blankets, hats, and pieces that need to hold their shape.
The speed factor is real too. Working with super bulky yarn on a large hook? You could finish a throw blanket in a single weekend. That same blanket in fingering weight would take weeks. Neither is better or worse—it depends on what you want from your project.
Common Mistakes and How to Avoid Them
After years of crocheting and helping other people navigate yarn choices, I’ve noticed a few patterns in how people mess up. The good news? They’re all totally avoidable.
Mistake #1: Ignoring the Yardage
Two balls of worsted weight yarn can have totally different yardages. One might be 180 yards, another 220 yards. If your pattern needs 400 yards and you grab two balls of the 180-yard version, you’re short. Always check the actual yardage, not just the weight category. When you’re looking at Ravelry or other pattern sites, they usually list yardage requirements clearly. Use that as your guide, not the weight category alone.
Mistake #2: Substituting Without Checking Gauge
So you want to use a different yarn than what the pattern calls for. That’s awesome and totally doable—but you absolutely have to check your gauge. I can’t stress this enough. A pattern designed for fingering weight won’t work with worsted weight yarn unless you adjust everything, and the only way to know if your adjustments are right is through gauge swatching.
Mistake #3: Not Considering Fiber Content for the Project
Making a summer tank top? Don’t use heavy wool yarn that’ll make you sweat buckets. Creating an outdoor blanket that needs to withstand weather? Skip the delicate lace-weight silk blend. Think about how your finished project will actually be used and choose fiber content accordingly. You can check the Craft Yarn Council for detailed fiber guides if you’re unsure about specific materials.
Mistake #4: Underestimating How Long Projects Take
Thinner yarn = longer projects. It’s just math. If you’re someone who gets frustrated with projects that drag on, maybe steer toward worsted or bulky weights for your regular makes. Save the fingering weight projects for when you’re in the mood for something that’ll keep you busy for a while. There’s nothing wrong with either approach—it’s just about being realistic with yourself.
Mistake #5: Buying Yarn Before You Have a Pattern
I get it. You see gorgeous yarn and you just want it. But buying yarn without a plan is how you end up with drawers full of yarn that doesn’t quite work for anything. Instead, find your pattern first, note the yardage and weight requirements, then hunt for yarn that fits those specs. You’ll actually use what you buy, and you’ll feel so much more purposeful about your projects.
Now, if you’re someone who loves having a yarn stash to pick from—and hey, lots of us are—that’s totally valid too. Just be intentional about it. Maybe set a budget for stash yarn, or limit yourself to weights and colors you know you’ll actually use.
FAQ
Can I use a different yarn weight than what a pattern calls for?
Technically yes, but you’ll need to do some math and definitely check your gauge. If you’re using a thinner yarn, you might need to size up your hook and possibly adjust stitch counts. If you’re using thicker yarn, you’ll go down in hook size. It’s doable, but it requires more attention to detail than following the pattern as written. For beginners, I’d recommend sticking with the recommended weight until you’re really comfortable with how yarn behaves.
What’s the difference between yarn weight and yarn thickness?
They’re basically the same thing. “Weight” refers to how heavy a given length of yarn is—which directly corresponds to how thick it is. Thicker yarn weighs more per yard, thinner yarn weighs less per yard. The terms are used interchangeably in the crochet world.
How do I know if I’m buying enough yarn for my project?
Always check the pattern’s yardage requirement first. Then look at the yardage listed on the yarn label. Make sure you’re buying enough yardage to complete the project, plus maybe 10-20 yards extra for weaving in ends and any mistakes. If you’re doing a project that might need adjustments (like sizing up a sweater), grab a bit extra to be safe.
Does yarn weight affect how long a project takes?
Absolutely. Heavier yarn with larger hooks works up much faster. A bulky weight blanket might take a weekend, while the same blanket in fingering weight could take months. If you’re working toward a deadline or want quick gratification, heavier weights are your friend. If you love the meditative nature of longer projects, thinner weights are perfect.
What yarn weight should beginners start with?
Worsted weight is honestly ideal for beginners. It’s thick enough that you can easily see your stitches and fix mistakes, but not so thick that it’s hard to work with. It’s also super forgiving with tension variations. Once you’re comfortable with worsted, you can explore lighter and heavier weights.
How do I know my hook size if the pattern uses different sizing systems?
Yarn labels and patterns sometimes use US sizing, sometimes metric (millimeters), and sometimes UK sizing. Yarnspirations has great conversion charts, or you can find printable hook size charts online. Keep one handy for reference, and you’ll never get confused about sizing again.