
You know that moment when you’re scrolling through crochet patterns and think, “I could totally make that,” but then reality hits? You start wondering if you’ve got the right yarn, whether your tension’s going to cooperate, and if you’re honestly going to finish before next season. Yeah, that’s the crochet dilemma we’re all living in, and it’s completely valid to feel a little overwhelmed by all the choices.
The truth is, crocheting doesn’t have to be complicated. Whether you’re eyeing a cozy blanket, a wearable that’ll actually look good on your body, or just something to keep your hands busy during coffee dates, there’s a path forward that works for you. I’ve been there—standing in the yarn aisle with decision paralysis, wondering if acrylic or wool was the “right” choice, or staring at a pattern that seemed to speak a different language. But after years of hooking yarn and learning from plenty of mistakes, I’ve figured out some real, practical strategies that actually stick.
Let’s talk about making crochet projects that feel good to make, that turn out the way you’re imagining, and that you’ll actually want to wear, gift, or display. No gatekeeping, no judgment about yarn choices—just honest conversation about what works.
Understanding Your Yarn Choices and What They Mean for Your Project
Okay, let’s start with the yarn itself, because honestly? This is where a lot of people get stuck. There are so many options—acrylic, wool, cotton, bamboo, blends—and each one behaves totally differently. The good news is that there’s no “wrong” choice; there’s just the choice that works best for your specific project and your lifestyle.
Acrylic yarn is the workhorse of the crochet world, and I’m not going to pretend it isn’t. It’s affordable, it comes in a million colors, and it holds up beautifully if you’re making something that needs to survive a lot of washing (hello, baby blankets and kitchen towels). The trade-off? It can feel a bit plasticky, it doesn’t drape quite like natural fibers, and some people find it less pleasant to work with for hours at a time. But here’s the secret: acrylic’s gotten way better over the last decade. Brands like Yarnspirations and Lion Brand have genuinely upgraded their game, and you can find acrylic that feels almost buttery in your hands.
Wool is the sensitive artist of yarns. It’s warm, it’s elastic, it’s got this natural spring that makes your stitches look gorgeous. But it can be itchy (not all wool, though—merino and cashmere blends are softer), it needs gentle care, and it’s pricier. If you’re making a sweater or a cozy shawl that you’re going to treasure, wool might be your person. For a baby gift? Maybe reconsider, unless you’re cool with the parents hand-washing it.
Cotton is perfect if you’re making items for warm weather—tank tops, market bags, dish towels. It’s crisp, it breathes, and it washes like a dream. The downside is that it doesn’t have much stretch, so your gauge needs to be spot-on, and your finished projects might feel a bit stiff until they’ve been washed a few times.
Blends are where things get interesting. A cotton-acrylic blend gives you the durability and softness of both. A wool-acrylic blend is more affordable than pure wool but still gives you that beautiful drape. The key is reading what you’re actually getting and thinking about what matters for your project. Are you making something that needs to hold its shape? Durability? Softness? Washability? Pick your yarn based on what the project actually needs, not what’s trendy or what someone else used.
And here’s a pro tip that’ll save you so much frustration: always, always buy at least one full skein of yarn and do a test swatch before committing to a whole project. Crochet with it, wash it if the pattern involves washing, and see how you feel. Does it irritate your hands? Does it split when you’re trying to insert your hook? Does it feel cheap and plasticky, or does it feel like something you want to spend 20+ hours with? This is non-negotiable for anything you’re going to wear or gift.

Reading Patterns Like You Actually Know What You’re Doing
Crochet patterns can look like they’re written in code if you’re not used to them. Abbreviations, parentheses, asterisks, brackets—it’s a lot. But here’s the thing: once you understand the system, it’s actually pretty logical, and you’ll start to recognize patterns (pun intended) that make reading them way easier.
First, get familiar with the abbreviations. Ch is chain, sc is single crochet, dc is double crochet, inc is increase, dec is decrease. Most patterns have a legend at the top or bottom, so if you’re ever unsure, you can check there. Websites like Ravelry have huge pattern libraries, and if you’re looking at a pattern that doesn’t include a legend, you can usually find one in the comments or from other crafters who’ve made it.
When you’re looking at a pattern for the first time, read through the entire thing before you start. I know that sounds tedious, but trust me—it’ll save you from getting halfway through and realizing you need to have done something different earlier. Look for the finished measurements, the yardage required, the recommended hook size, and any special stitches or techniques. Make a note of anything that seems unfamiliar, and maybe watch a quick YouTube tutorial before you dive in.
Parentheses, asterisks, and brackets are basically instruction shortcuts. When you see *ch 2, sc 2* and it says “repeat from * to *,” that means you’re doing that sequence over and over. Brackets usually indicate a group of stitches that go into the same stitch or space. Parentheses often clarify what you’re doing. It looks complicated, but it’s actually just the pattern writer’s way of being efficient.
If you’re new to crochet, start with patterns that are labeled “beginner” and use basic stitches. As you get more comfortable, you can explore different stitches and techniques that’ll open up more design options. And honestly? There’s no shame in modifying a pattern to suit what you want. Too long? Stop a few rows early. Don’t like the edging? Leave it off or substitute something you do like. Crochet is yours—the pattern is just a suggestion.
Tension, Gauge, and Why Those Boring Numbers Actually Matter
I’m going to be real with you: gauge is the thing that separates “projects that fit” from “projects that don’t.” And I know checking gauge sounds tedious and boring, but it’s genuinely the difference between a sweater that hugs you perfectly and one that’s either a tent or a sausage casing.
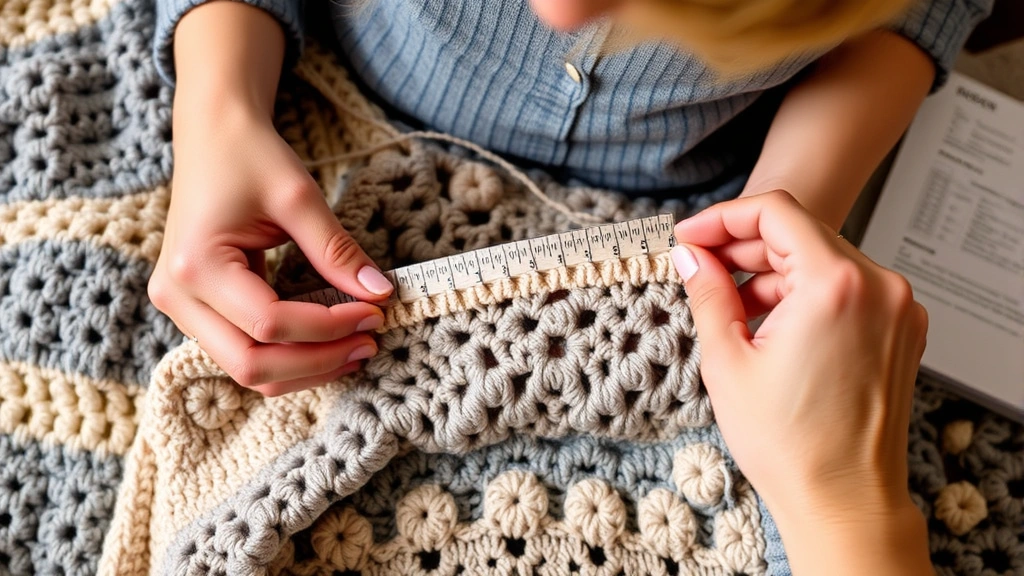
Gauge is basically how many stitches and rows you’re creating per inch of fabric. Every pattern includes a recommended gauge—something like “18 stitches and 12 rows = 4 inches in single crochet.” This tells you how tight or loose you should be crocheting to match the designer’s finished measurements.
Here’s why it matters: if your gauge is tighter than the pattern’s, your finished project will be smaller. If it’s looser, it’ll be bigger. For a blanket? Not the end of the world—it’ll just be a slightly different size. For a sweater? It’s the difference between “this fits” and “I can’t get this over my shoulders.”
To check your gauge, crochet a swatch that’s at least 6 inches square using the yarn, hook, and stitch specified in the pattern. Finish off your yarn and block it the same way you’d block the finished project (if blocking is part of your plan). Then measure it. Count your stitches and rows, and compare them to what the pattern says. If you’re off, you might need to go up or down a hook size. Tighter than the pattern? Try a larger hook. Looser? Go smaller.
I know it feels like extra work, but think of it this way: you’re about to spend 20, 30, maybe 50+ hours on this project. Taking 30 minutes to check gauge is actually a bargain. It’s the difference between a finished project you love and one that ends up in the donation pile.
Choosing the Right Stitches for What You’re Making
Crochet is built on a handful of basic stitches, and once you understand how they work and what they look like, you can basically make anything. Single crochet, half double crochet, double crochet, treble—these are your building blocks, and they create totally different textures and drapes.
Single crochet is dense and sturdy. It’s perfect for amigurumi (those cute stuffed animals), bags, blankets that need to hold their shape, and anything you want to feel substantial. It’s also slow—you’re making a lot of stitches per inch—so be prepared for a longer project timeline.
Double crochet is the middle ground. It’s faster than single crochet, it’s got a nice drape, and it’s forgiving for beginners. A ton of patterns use double crochet because it just works for almost everything. If you’re not sure what stitch to use, double crochet is your friend.
Half double crochet is the slightly looser cousin of single crochet. It’s got a bit more flow than single crochet but more structure than double crochet. It’s great for garments and blankets where you want a balance of drape and durability.
Treble and taller stitches are airier and drape beautifully, which makes them perfect for shawls, lacy blankets, and delicate garments. They’re also faster, which is nice if you’re working with a lot of yardage. The trade-off is that they can feel a bit floppy if you’re not careful, so they’re better once you’ve got some experience under your belt.
Beyond these basics, there are texture stitches like puff stitches, bobble stitches, and popcorn stitches that create visual interest. There are also different ways to insert your hook (through both loops, through just the back loop, through just the front loop) that create different effects. As you get more comfortable with reading patterns, you’ll start exploring these variations and figuring out what you love.
Project Planning That Doesn’t Make You Want to Quit
Here’s where a lot of crocheters trip up: they start a project without really thinking about whether they’re actually going to finish it. And that’s heartbreaking because crochet should be fun, not stressful.
Before you commit to a project, ask yourself some real questions: Do I actually like the finished design, or am I just drawn to it because it’s trending? How much time do I realistically have? If the pattern requires 2,000 yards and you crochet for an hour a day, that’s probably a month-long project minimum—maybe longer if you’re learning a new stitch. Am I okay with that?
Start small if you’re newer to this. A baby blanket, a cowl, a pair of socks—these teach you skills without consuming your entire life. Once you’ve finished a few projects, you’ll get a better sense of your actual pace and what kinds of projects energize you versus drain you.
Break bigger projects into milestones. Instead of thinking “I’m going to crochet this 50-row blanket,” think “I’m going to finish 10 rows this week.” It’s psychologically easier, and you get those little wins that keep you motivated. Plus, if life gets in the way (and it will), you’re not abandoning a huge project—you’re just pausing.
Keep a project journal or notes. Jot down when you started, what hook size you’re using, any modifications you made, and how you’re feeling about it. This sounds extra, but it’s genuinely helpful when you come back to a project after a break, and it’s also useful for future reference. If a project didn’t work out, knowing why helps you make better choices next time.
And here’s the thing that nobody talks about enough: it’s okay to abandon a project. If you’re not enjoying it, if the yarn feels wrong in your hands, if the pattern is frustrating—you’re allowed to stop. Crochet should be something you do because you love it, not because you feel obligated. Life’s too short to spend 30 hours on something that makes you miserable.
Fixing Mistakes Without Frogging Everything
Mistakes happen. You’ll drop a stitch. You’ll crochet into the wrong stitch. You’ll realize three rows in that you miscounted. And instead of panicking, here’s what you actually do about it.
First, figure out whether it actually matters. If you’re one stitch off in a blanket and it’s not visible, leave it. If it’s in a place where it’ll affect the fit or look of the piece, fix it. Sometimes the perfect is the enemy of the done, and you’ve got to make a judgment call about whether fixing it is worth the time investment.
For small mistakes in the current row, you can usually just tink back (that’s knitting spelled backward—you basically undo stitches one at a time). It’s tedious but way faster than frogging (ripping out entire rows). Grab your hook, put it through the loop of the stitch you want to undo, and gently pull the working yarn to unravel. Do this stitch by stitch until you get to where you need to fix things, then pick up your working yarn and keep going.
If you’ve dropped a stitch and it’s several rows back, you can use a smaller hook to “ladder” it back up. This is a lifesaver because you don’t have to rip out everything. Insert your smaller hook through the dropped stitch, then through the horizontal strand above it, and pull the strand through the stitch. Keep going up until you’re back to the current row, then switch back to your regular hook.
For bigger mistakes, sometimes frogging is actually the answer. If you’ve got a fundamental error that’s going to mess up the rest of your piece, it might be faster to rip back a few rows and redo them than to try to patch it. It feels awful in the moment, but it’s often the best long-term choice. Just take a breath, undo the stitches, and start again from a point where things were right. You’ve learned something, and your finished project will be better for it.
The mental shift here is important: mistakes aren’t failures. They’re part of the process. Every single crocheter—even the ones with Instagram-perfect projects—has ripped out stitches and started over. It’s not a sign that you’re doing something wrong; it’s just how crochet works sometimes.
FAQ
What’s the best yarn for beginners?
Acrylic yarn in a light color and medium weight (worsted weight is ideal) is perfect for learning. It’s forgiving, affordable, and you can see your stitches clearly. Once you’re comfortable with the basics, you can experiment with other fibers and weights.
How do I know if a pattern is actually beginner-friendly?
Look for patterns that use basic stitches (single crochet, double crochet), have clear written instructions, and ideally include photos of each step. Avoid patterns with lots of special stitches, color changes, or complicated shaping until you’ve got some experience.
Can I use a different yarn than what the pattern calls for?
Yes, but you need to match the weight and yardage. If a pattern calls for 1,200 yards of worsted weight yarn and you want to use a different brand, get a different brand of worsted weight that totals 1,200 yards. You might need to adjust your hook size and check your gauge, but it can definitely work.
What’s the difference between blocking and not blocking?
Blocking is when you wet (or steam) your finished piece and shape it, then let it dry. It evens out stitches, opens up lacy patterns, and helps garments fit better. Some projects really benefit from blocking (shawls, sweaters, anything delicate), while others (blankets, amigurumi) are fine without it. Check your pattern for recommendations.
How do I know when I’m ready to try more advanced techniques?
When you can crochet a whole project without constantly checking instructions for basic stitches, you’re probably ready to level up. Try a pattern with a new stitch or technique that interests you. You’ll figure it out, and you’ll learn something new.
Is crochet expensive?
It doesn’t have to be. A ball of acrylic yarn costs a few dollars, and a basic hook set is under $20. You can make beautiful projects for pretty cheap. If you want to work with fancy yarns and specialty fibers, it gets pricier, but there’s literally no gatekeeping about what yarn you “should” use. Make what you love with what you can afford.