
How to Choose the Right Yarn for Your Crochet Projects
Listen, I’ve been there—standing in front of a wall of yarn at the craft store, completely overwhelmed by the sheer number of options. Do I go with acrylic or wool? What’s the deal with all these different weights? And why does one skein cost three dollars while another costs thirty? Choosing the right yarn for your crochet projects isn’t just about picking something pretty (though that matters too). It’s about understanding what’ll actually work for your specific project, your budget, your skill level, and honestly, what’s going to make you excited to pick up your hook every single day.
The truth is, yarn choice can make or break a project. I’ve learned this the hard way—watching a beautiful pattern turn into a stiff, uncomfortable sweater because I picked the wrong fiber, or seeing a delicate lace shawl lose all its drape because the yarn didn’t have enough flow. But here’s the good news: once you understand the basics, making smart yarn choices becomes second nature. You’ll know exactly what to grab for a cozy blanket, what’ll work for a structured garment, and what’s going to give you that dream texture you’re imagining.
Understanding Fiber Types and Their Properties
Let’s start with the foundation: what your yarn’s actually made of. This is where everything begins, and honestly, it’s one of the most important decisions you’ll make. Different fibers have completely different personalities, and understanding them means you’re setting yourself up for success before you even hook the first stitch.
Acrylic yarn is probably what you’ll encounter first, and there’s a reason it’s so popular. It’s affordable, durable, comes in basically every color imaginable, and it’s low-maintenance—throw it in the washing machine, no problem. Acrylic works beautifully for blankets, amigurumi, and practice projects. The downside? It can feel a bit plastic-y, it doesn’t breathe as well as natural fibers, and it won’t regulate temperature the way wool does. But for a beginner or someone working on a budget, acrylic is genuinely fantastic. Brands like Lion Brand have made acrylic feel less like a compromise and more like a solid choice.
Wool is the classic for a reason. It’s warm, it’s elastic (which means your stitches stay put), and it has this beautiful natural bounce that makes finished projects feel luxurious. Merino wool is softer than traditional wool, making it less itchy against skin. The catch? Wool can be pricey, it requires careful washing, and if you’re working with someone who has a wool allergy, it’s not an option. But if you’re making a winter sweater or a cozy cardigan, wool is often worth the investment.
Cotton yarn is where it’s at for summer projects. It’s breathable, it drapes beautifully, and it creates this lovely fluid texture that’s perfect for lightweight garments and lacy shawls. Cotton doesn’t have the elasticity of wool though, so your stitches can feel a bit looser and projects might stretch out. It’s also heavier than you’d think—a cotton project can be surprisingly weighty. If you’re making something for warm weather, cotton (or a cotton blend) should definitely be on your radar.
Blended yarns are the sweet spot for a lot of crocheters. A wool-acrylic blend gives you the warmth and elasticity of wool with the durability and affordability of acrylic. A cotton-acrylic blend offers breathability with more structure. These blends are where innovation is happening in the yarn world, and they’re absolutely worth exploring. You get the best of both worlds without the extreme price tag or maintenance headaches.
Then there’s specialty fibers—bamboo, alpaca, silk blends, linen. These are fun to work with and create stunning finished projects, but they’re usually pricier and sometimes trickier to care for. Alpaca is incredibly soft but can be slippery to work with. Linen gets softer with every wash but takes forever to block. Silk creates gorgeous drape but can be delicate. Save these for projects where you really want that special something, and maybe when you’ve got a bit more experience under your belt.
Decoding Yarn Weight and Thickness
Okay, so yarn weight isn’t about how heavy it actually is—it’s about how thick the strand is. This is crucial because yarn weight determines your finished fabric’s texture, how quickly you’ll finish a project, and whether it’ll actually work for what you’re making.
There are standard yarn weight categories that most patterns reference. Lace weight (0) and fingering weight (1) are super thin—think delicate shawls and intricate lacework. These take forever to work up but create absolutely stunning finished pieces. If you’re making a lightweight shawl or delicate garment, these weights are your friend.
Sport weight (2) and DK weight (3) are the sweet spot for many crocheters. They’re thin enough to create nice definition in your stitches but thick enough that projects don’t take six months to complete. These weights work for everything from amigurumi to baby items to lightweight sweaters.
Worsted weight (4) is probably the most common yarn weight you’ll see in patterns. It’s thick enough to work up quickly but not so thick that you lose stitch definition. Most blankets, scarves, and standard garments call for worsted weight. It’s versatile, forgiving, and widely available.
Bulky (5) and super bulky (6) weights are for when you want instant gratification. A blanket that’d take months in worsted weight might be done in a week with bulky yarn. The tradeoff is that you get less stitch definition—the stitches are bigger and sometimes less precise-looking. But sometimes that’s exactly the vibe you’re going for.
Here’s the thing about yarn weight that trips people up: the weight category doesn’t always match the thickness perfectly. Two different worsted weights from different companies might actually feel different in your hands. That’s why checking the yardage per weight is so important. A worsted weight with 190 yards per 100 grams is going to feel different than one with 220 yards per 100 grams. The second one is slightly thinner, even though they’re technically the same weight category.
Calculating Yardage and Project Needs
This is where a lot of beginners stumble, and I get it—yardage math feels complicated. But it’s really not, and understanding it saves you from the heartbreak of running out of yarn three-quarters through a project.
First, always check your pattern’s yardage requirements. This is non-negotiable. A pattern will tell you how many yards you need, and that’s your baseline. Don’t eyeball it. Don’t think “oh, I’ll probably have enough.” Actually calculate it.
Here’s a simple breakdown: if a pattern calls for 1,200 yards and your yarn is labeled as 220 yards per 100 grams, you need to buy at least 545 grams (roughly 6 skeins if each skein is 100 grams). But here’s where it gets real—always buy a little extra. I usually add 10-15% to the yardage requirement because gauge variations, tension differences, and the fact that you might need to frog and restart means you’ll probably use slightly more than the pattern states.
Also consider that different yarn weights have different yardage densities. A worsted weight skein might have 190 yards, while a bulky skein might have 120 yards, and they’re probably similar weights. This is why you can’t just count skeins—you have to count yards.
For seasonal projects like summer garments, you might want to buy even extra because these often need more yardage than you’d expect due to the yarn weight. A lightweight cotton sweater needs more yardage than a wool sweater of the same size because the yarn is thinner.
Pro tip: keep a little notebook or note in your phone with your usual gauge and how much yardage you typically use for different project types. After you’ve made a few sweaters or blankets, you’ll start to recognize patterns. Your typical worsted weight adult sweater might use about 1,400-1,600 yards. Your favorite blanket pattern might use 2,000 yards. Having these benchmarks means you can eyeball new projects and know roughly what you need before you even look at the pattern.
Texture, Drape, and Feel
This is where yarn choice becomes personal and emotional, and honestly, it’s the part that keeps me excited about crochet after all these years.
Drape is how a finished piece moves and flows. Some yarns create stiff, structured fabrics—great for structured garments or items that need to hold their shape. Other yarns create fluid, flowing fabric that moves beautifully—perfect for shawls, wraps, and garments where you want that elegant swoosh. Cotton and silk blends have gorgeous drape. Acrylic and wool tend to be less drapey. If you’re making something where drape matters (like a lightweight cardigan you want to flow over your body), test the yarn in person if you can.
Stitch definition is how clearly your stitches show up in the finished fabric. Smooth, tightly twisted yarns show stitch definition beautifully. Fuzzy, loosely twisted yarns (like mohair or eyelash yarn) obscure your stitches. Neither is bad—it depends on your project. If you’re working a beautiful lace pattern, you want clear stitch definition. If you’re making a cozy, chunky blanket, you might love how fuzzy yarn hides slight tension inconsistencies.
Feel and comfort matter so much more than people realize. You’re going to be holding this yarn for hours. It needs to feel good in your hands. Some yarns are scratchy, some are buttery soft, some feel plasticky. If you hate how it feels, you’re not going to want to work on it. Period. This is why swatching and testing in person (when possible) is worth the effort.
Think about the final wearer too. Are you making a baby blanket? You’ll want something soft and washable. Making a winter hat? Go for something warm and cozy. A summer tank top? You want breathability. The yarn’s personality needs to match the project’s purpose.
Budget-Friendly Yarn Shopping Strategies
Real talk: yarn can get expensive. A single skein of luxury yarn can cost twenty dollars or more. A whole project might cost a hundred-plus dollars in materials alone. That’s a real barrier for a lot of people, and it’s totally valid to factor budget heavily into your yarn choices.
Here’s how to maximize your yarn budget without sacrificing quality:
- Buy acrylic for practice and bulk projects. You’re learning, experimenting, and building skills. Acrylic lets you do that without financial stress. Once you’re confident, you can graduate to pricier fibers.
- Wait for sales and stock up strategically. Yarn goes on sale. Watch for seasonal sales, holiday promotions, and clearance events. Build a stash of colors you love when they’re discounted. This isn’t hoarding—it’s smart planning.
- Check out Ravelry for yarn reviews and recommendations. Other crocheters have already tested these yarns. You can see what people actually think about specific brands and weights before you buy.
- Buy from local yarn shops when you can. Yes, it might be slightly pricier than big box stores, but you get expert advice, you can feel the yarn in person, and you’re supporting small businesses. Plus, many local shops have loyalty programs and sales.
- Consider yarn substitutions carefully. If a pattern calls for a yarn that’s out of budget, you can substitute—but do it thoughtfully. Match the weight, check the yardage, and ideally test the new yarn in a swatch. A pattern designed for wool might not work beautifully in acrylic, even if the weight matches.
- Join a yarn club or subscribe to affordable yarn services. Some companies offer monthly yarn deliveries at discounted prices. It’s fun, you get variety, and it’s usually cheaper than buying individual skeins.
Here’s something important: spending more on yarn doesn’t automatically mean a better project. I’ve made stunning things with affordable acrylic and disappointing things with expensive luxury yarn. What matters is matching the yarn to the project, understanding what you’re buying, and being intentional about your choices.
Matching Yarn to Project Type and Season
Different projects need different yarns, and season matters way more than you might think.
Winter projects (sweaters, scarves, hats, blankets for warmth) call for yarn that insulates. Wool, wool blends, and acrylic are your friends here. You want something with some loft—air pockets that trap warmth. Merino wool is perfect because it’s warm but not itchy. A chunky wool-acrylic blend works beautifully for a quick winter blanket.
Summer projects (lightweight garments, shawls, lacy items) need breathable yarn. Cotton, linen, bamboo, or cotton blends are ideal. You want something that’ll keep you cool and won’t feel heavy. A cotton-acrylic blend offers breathability with structure, making it perfect for summer garments.
Year-round basics (amigurumi, home décor items, blankets you’ll use all year) can go either way. A quality worsted weight acrylic works beautifully. A wool blend is cozy but versatile enough for warmer days.
Gift projects deserve special consideration. Are you making something for someone with sensitive skin? Go with soft, gentle fibers. Making something for someone who travels? Choose something durable and easy to care for. If it’s for a baby, washability is non-negotiable.
The Importance of Testing and Swatching
I know swatching feels tedious. You want to jump straight to your project. But I’m telling you—swatching is the single best investment of time you can make.
Here’s what a swatch does: it shows you how your yarn actually behaves. You’ll see how it feels in your hands, how your tension affects it, how the stitches look, how it drapes. You’ll know if you love it or hate it before you’re committed to a whole project.
Here’s a basic swatch process:
- Use the hook size recommended on your yarn label (or one size up or down—experiment).
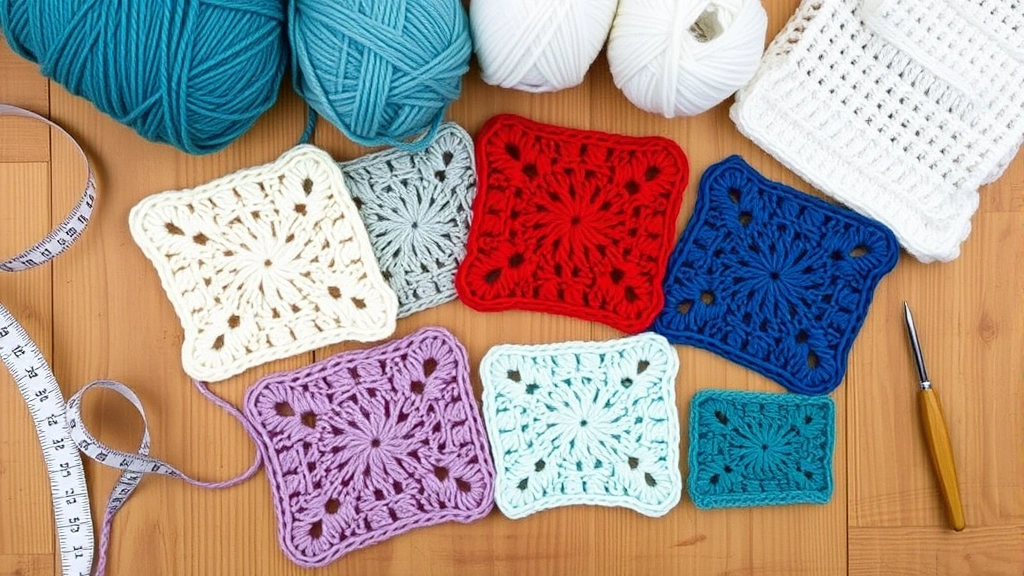
- Crochet a square, roughly 6 inches by 6 inches, using basic single crochet or the stitch from your pattern.
- Don’t bind off. Just stop.
- Measure your gauge (how many stitches and rows per inch).
- Take notes: How does it feel? How does it look? Does it have the drape you want? Does the stitch definition work for your pattern?
- If you’re going to wash the finished project, wash and dry your swatch the same way. See if it shrinks, changes texture, or behaves differently.
This takes maybe 30 minutes, and it’ll save you from making a whole project in a yarn that doesn’t work. That’s not wasted time—that’s preventative genius.
Also, swatching is where you problem-solve. Maybe your first swatch is too loose. Go down a hook size and try again. Maybe the yarn feels scratchy. Now you know before you’ve committed 1,500 yards to a sweater. Swatching gives you permission to experiment without consequences.
Keep your swatches! Label them with the yarn name, weight, hook size, and your honest notes. Over time, you’ll build a little library of yarn references that’s incredibly helpful when you’re choosing yarn for future projects.
FAQ
Can I substitute yarn in a pattern if I can’t find the exact one?
Yes, but carefully. Match the weight and yardage as closely as possible, then swatch and check your gauge. The finished project might look slightly different, but if the gauge matches, it should work. Fiber type matters too—substituting wool for acrylic changes how the project feels and performs, so think about whether that matters for your specific project.
What’s the difference between yarn weight and the weight listed on the label?
Yarn weight (0-6) refers to thickness. The weight on the label (like “100 grams”) refers to how heavy that skein is. A bulky acrylic skein might weigh 100 grams but have only 120 yards. A sport weight merino skein might weigh 50 grams but have 220 yards. Always check yardage, not just weight.
Is it really necessary to buy extra yarn beyond what the pattern calls for?
I’d say yes, 10-15% extra is smart insurance. Gauge variations, tension differences, and the occasional mistake mean you’ll probably use slightly more than expected. Plus, if you love the yarn, having extra for a future project is never a bad thing.
How do I know if yarn will feel itchy?
Feel it in person if you can. If you’re buying online, read reviews on Ravelry—people are honest about itchiness. Also, fiber type matters: merino is softer than traditional wool, acrylic is usually not itchy, and blends often split the difference. If itchiness is a concern (sensitive skin, kids), test a small swatch first.
What’s the best yarn for beginners?
Worsted weight acrylic in a solid, light color. It’s affordable, forgiving of tension variations, easy to see your stitches, and doesn’t require special care. Once you’ve made a few projects and understand how different fibers behave, you can branch out. But starting with quality worsted weight acrylic sets you up for success.
Can I mix different yarns in one project?
Absolutely, but be intentional. Make sure they’re similar weights and have compatible care instructions. Mixing can create beautiful effects—like using a contrasting color for stripes or a special yarn for a particular section. Just swatch first to make sure they work together visually and functionally.