Last week, I was helping my neighbor Sarah with her first crochet project when she held up her work with a frustrated sigh. “Why does this look so wonky?” she asked, pointing to her uneven stitches and loose edges. I recognized that look immediately – it’s the same expression I had when I first started crocheting and couldn’t figure out why my projects looked nothing like the pictures in patterns.
The truth is, most of us dive into crochet thinking it’s just about learning a few basic stitches and following a pattern. But there’s so much more to creating beautiful, professional-looking projects. From understanding how yarn weight affects your finished piece to mastering tension control, these foundational skills make the difference between a project you’re proud to display and one that gets stuffed in a drawer.
I’ve been crocheting for over fifteen years now, and I wish someone had sat me down early on to explain these essential concepts. It would have saved me from so many frogged projects and late-night troubleshooting sessions. Whether you’re completely new to crochet or you’ve been struggling with inconsistent results, understanding these fundamentals will transform your crafting experience.
Quick Answer
Successful crochet depends on mastering five key areas: understanding yarn weights and hook sizes, maintaining consistent tension, reading patterns accurately, choosing appropriate projects for your skill level, and learning proper finishing techniques. These fundamentals create the foundation for every beautiful project you’ll make.
Understanding Yarn and Hook Relationships
The relationship between your yarn and hook is like a dance partnership – when they work well together, everything flows smoothly. When they don’t, you’ll struggle with every stitch. I learned this the hard way when I tried to make a delicate lace shawl with a bulky yarn and wondered why it looked like a fishing net.
The Craft Yarn Council standardized yarn weights to make our lives easier, and understanding this system is crucial. Here’s what you need to know:
| Yarn Weight | Category | Hook Size Range | Best For |
|---|---|---|---|
| 0 – Lace | Fingering | 1.6-2.25mm (B-1 to B) | Delicate shawls, doilies |
| 1 – Super Fine | Sock/Baby | 2.25-3.5mm (B to E-4) | Baby items, lightweight garments |
| 2 – Fine | Sport | 3.5-4.5mm (E-4 to 7) | Baby blankets, light sweaters |
| 3 – Light | DK | 4.5-5.5mm (7 to I-9) | Dishcloths, light afghans |
| 4 – Medium | Worsted | 5.5-6.5mm (I-9 to K-10.5) | Afghans, sweaters, scarves |
| 5 – Bulky | Chunky | 6.5-9mm (K-10.5 to M-13) | Quick projects, winter accessories |
| 6 – Super Bulky | Super Chunky | 9-15mm (M-13 to Q) | Rugs, thick blankets |
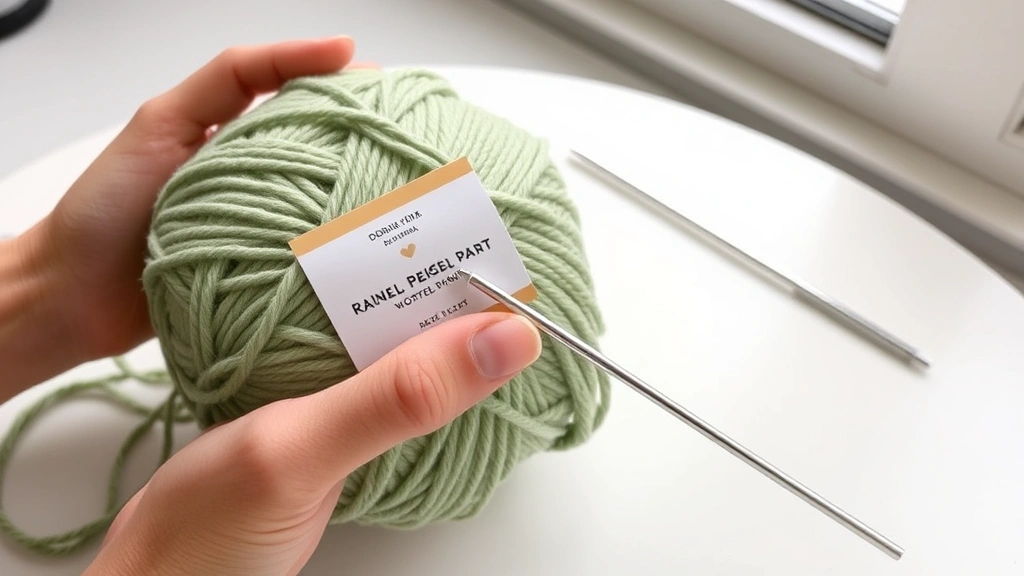
When I’m starting a new project, I always check the yarn label first. Those little symbols aren’t just decoration – they’re your roadmap to success. The suggested hook size is a starting point, but your personal tension might require you to go up or down a size.
Here’s something I wish I’d known earlier: the fiber content affects how your stitches look just as much as the weight does. Lion Brand acrylic yarns work up differently than their cotton blends, even in the same weight category. Acrylic tends to be more forgiving for beginners because it has some stretch, while cotton shows every uneven stitch but creates crisp stitch definition.
Pro tip: Always make a gauge swatch, even for simple projects. I know it seems tedious, but spending 15 minutes on a swatch can save hours of frustration later. Your gauge tells you if your hook and yarn are playing nicely together.
Choosing Your First Yarns
If you’re just starting out, I recommend beginning with a worsted weight acrylic yarn in a light color. Red Heart Super Saver gets a lot of hate in the crochet community, but it’s actually perfect for learning. It’s affordable, durable, and forgiving. Once you’ve mastered basic stitches, you can explore other fibers and weights.
Light colors like cream, pale gray, or soft yellow make it easier to see your stitches. I can’t tell you how many times I’ve watched beginners struggle with black or navy yarn, trying to figure out where to insert their hook. Save the dramatic colors for when you’re more confident with your stitch placement.
Mastering Tension for Consistent Results
Tension control is probably the most challenging aspect of crochet for new crafters, and honestly, it took me about two years to really get the hang of it. Your tension – how tightly or loosely you hold your yarn – affects everything from the size of your finished project to how your stitches look.
I used to grip my yarn like I was afraid it would escape, which created tight, difficult-to-work stitches that made my hand cramp. Then I’d overcompensate and hold it so loosely that my stitches were sloppy and uneven. Finding that sweet spot takes practice, but there are techniques that can help.
Finding Your Yarn Hold
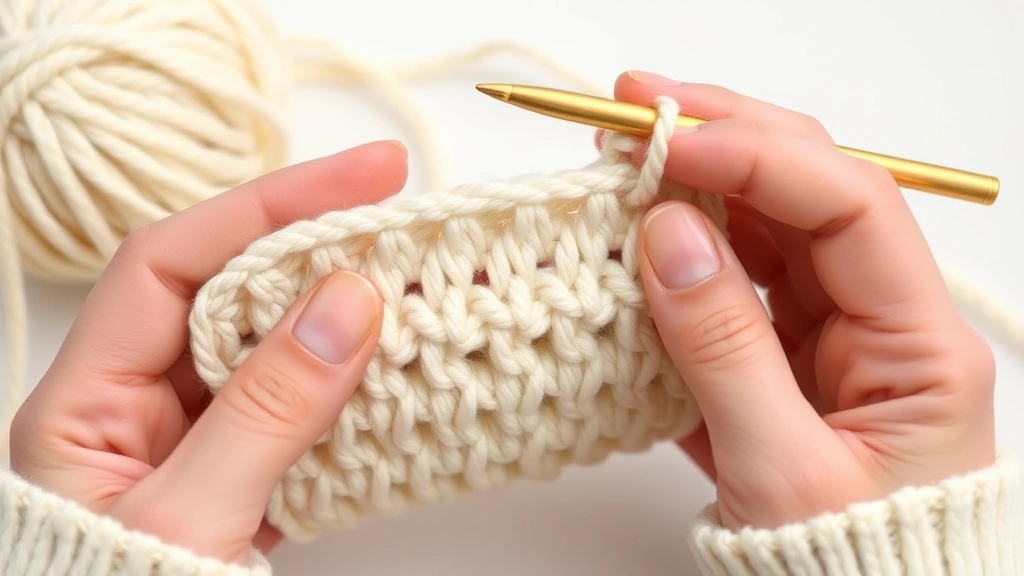
There are several ways to hold your yarn, and what works for me might not work for you. The most common method is to wrap the working yarn around your pinky finger, under your ring and middle fingers, then over your index finger. This creates natural tension control through the wrapping.
Some crocheters prefer the “pencil grip” method, holding the yarn like you’d hold a pencil between your thumb and index finger. Others use a yarn tension ring to maintain consistent control. The key is finding what feels comfortable and gives you consistent results.
Here’s what I tell my students: your tension should be firm enough that your stitches don’t have gaps, but loose enough that you can easily insert your hook into the previous row. If you’re struggling to get your hook through stitches from the previous row, you’re working too tightly.
Recognizing Tension Issues
Uneven tension shows up in several ways. Your work might start narrow and get wider (loosening up as you relax), or it might cup or curl instead of lying flat. Sometimes one edge looks perfect while the other is wavy or tight.
I’ve found that most tension problems come from anxiety or trying to work too quickly. When I’m stressed or watching TV while crocheting, my tension gets erratic. Taking breaks and focusing on the rhythm of your stitches helps maintain consistency.
If you’re working on a large project like an afghan, check your gauge every few inches. It’s normal for your tension to change slightly as you get more comfortable with a pattern, but catching major changes early prevents disappointment later.
Decoding Crochet Patterns Like a Pro
Crochet patterns used to look like secret code to me. All those abbreviations, parentheses, and asterisks seemed designed to confuse rather than help. But once you understand the logic behind pattern writing, they become incredibly useful roadmaps to beautiful projects.
Most patterns follow a standard format that includes the skill level, finished measurements, materials needed, gauge, and then the instructions. The skill level isn’t just about ego – it’s a realistic assessment of what techniques you’ll need to know. Don’t jump from beginner straight to advanced; those intermediate patterns exist for a reason.
Understanding Abbreviations and Symbols
Pattern abbreviations are standardized across most English-language patterns. Here are the ones you’ll see most often:
- ch – chain
- sc – single crochet
- hdc – half double crochet
- dc – double crochet
- tr – treble crochet
- sl st – slip stitch
- yo – yarn over
- sk – skip
- rep – repeat
- beg – beginning
Parentheses indicate stitches that should be worked in the same stitch or space. For example, “(2 dc, ch 1, 2 dc) in corner space” means you’ll work all those stitches in one corner space. Asterisks mark sections to repeat – “*sc in next 3 sts, 2 sc in next st; rep from * across” tells you to repeat that sequence until you reach the end of the row.
Brackets sometimes replace parentheses, and they work the same way. The key is reading slowly and understanding each instruction before you start stitching. I still read through entire pattern sections before I begin, especially for complex stitch patterns.
Gauge: Why It Actually Matters
I used to skip gauge swatches for everything except garments, thinking they were just suggestions. Big mistake. Gauge affects not just the size of your finished project, but also how much yarn you’ll need and how the fabric drapes.
When a pattern says “16 sc and 18 rows = 4 inches,” that’s not a suggestion – it’s the foundation the entire pattern is built on. If your gauge is off, your finished project will be a different size than intended. For a baby blanket, being a few inches off might not matter. For a fitted sweater, it’s the difference between something that fits and something that doesn’t.
Make your gauge swatch with the same yarn and hook you plan to use for the project. Work it in the same stitch pattern if possible. I make my swatches at least 5 inches square, then measure the center 4 inches to avoid edge distortion.
If your gauge is too small (more stitches per inch than the pattern calls for), try a larger hook. If it’s too large (fewer stitches per inch), try a smaller hook. Sometimes you need to go up or down two hook sizes to get the right gauge.
Building Skills Through Smart Project Selection
One of the biggest mistakes I see new crocheters make is jumping into projects that are too advanced for their current skill level. I get it – you see a gorgeous lace shawl on Pinterest and want to make it immediately. But starting with projects that match your skills builds confidence and teaches techniques in a logical progression.
I always recommend that beginners start with simple geometric shapes: dishcloths, scarves, or basic afghans. These projects teach you to maintain consistent edges, count stitches, and develop muscle memory for basic stitches. Plus, they’re forgiving – a slightly wonky dishcloth still works perfectly well.
Beginner Project Progression
Here’s the progression I recommend to my students:
- Chain and Single Crochet Practice
Start with simple dishcloths or washcloths. They’re quick, use basic stitches, and you can practice keeping your edges straight. Make several in different colors to get comfortable with yarn changes.
- Introduction to Height
Move on to projects using half double crochet and double crochet. A simple scarf or baby blanket with stripes teaches you how different stitch heights affect your work and introduces color changes.
- Working in the Round
Try a simple hat or coaster to learn circular construction. This introduces concepts like magic rings, increases, and working spirally versus in joined rounds.
- Basic Shaping
Attempt a simple bag or basket that requires increases and decreases. This teaches you how to shape your work intentionally rather than accidentally.
- Following Complex Patterns
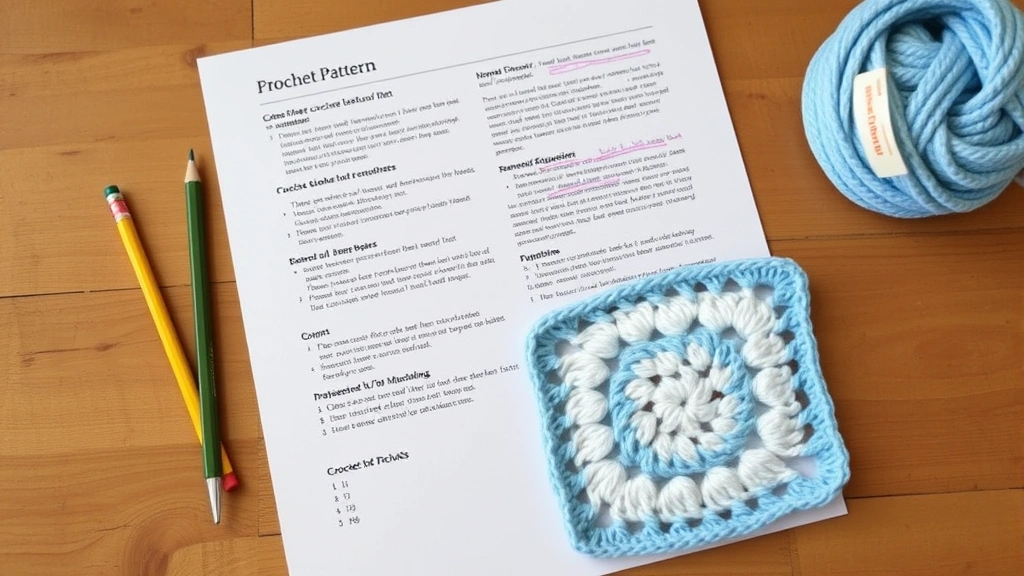
Now you’re ready for patterns with multiple stitch types, stitch pattern repeats, and more complex construction like granny squares or basic garments.
Each level builds on the previous one, and there’s no shame in staying at any level as long as you want. I know crocheters who’ve been making beautiful dishcloths for decades and love every minute of it.
Recognizing When You’re Ready to Level Up
You’ll know you’re ready for more complex projects when current ones feel automatic. If you can work basic stitches while watching TV or having a conversation, you’ve developed the muscle memory needed for more challenging techniques.
Another good indicator is when you start noticing mistakes immediately instead of discovering them rows later. This awareness means you understand how stitches should look and feel, which is crucial for tackling patterns with complex stitch combinations.
Must-Know Techniques for Every Crocheter
Beyond the basic stitches, there are several techniques that will elevate your crochet from functional to fabulous. These aren’t advanced skills – they’re fundamental techniques that make your work look more professional and polished.
The Magic Ring (Adjustable Loop)
If you’re going to learn one “fancy” technique, make it the magic ring. This technique creates a tight, adjustable center for projects worked in the round, eliminating the hole that traditional chain rings leave behind. It’s essential for amigurumi and makes any circular project look more professional.
The magic ring seems intimidating at first, but it’s actually quite simple once you get the hang of it. You create a loop with your yarn tail, work your first round into the loop, then pull the tail to close the center. I use this technique for everything from hats to coasters now.
Invisible Decrease
Standard decreases can create a noticeable lean in your fabric, especially in amigurumi. The invisible decrease technique maintains the shape of your stitches while reducing the stitch count. It involves inserting your hook through only the front loops of the next two stitches, then completing the decrease as normal.
This technique makes a huge difference in the appearance of shaped projects. Once I learned it, I couldn’t go back to regular decreases for visible areas of my work.
Proper Color Changes
Changing colors seems straightforward, but doing it properly makes your color work look seamless. The key is to change colors in the last yarn over of the stitch before you want the new color to appear. This prevents the old color from bleeding into the first stitch of the new color.
For striped projects, carry your unused colors up the side rather than cutting and rejoining them. This saves yarn and time, and creates neater edges. Just be sure to twist the carried yarns around the working yarn every few rows to prevent long loops.
Blocking: The Game-Changer
Blocking transforms your finished projects from homemade-looking to professional. It evens out stitches, opens up lace patterns, and helps pieces lie flat. Many crocheters skip this step, but it’s worth the extra effort.
For acrylic yarns, steam blocking works well. Hold a steam iron a few inches above your work and let the steam relax the fibers, then pat the piece into shape. For natural fibers, wet blocking gives better results. Pin your piece to measurements on a blocking board, mist with water, and let it dry completely.
I keep a set of blocking mats and T-pins specifically for this purpose. The investment pays off in how much more polished my finished projects look.
Professional Finishing That Makes Projects Shine
The difference between a project that looks homemade and one that looks professionally crafted often comes down to the finishing. These final steps might seem tedious after you’ve completed the main construction, but they’re what separate good crochet from great crochet.
Weaving in Ends Properly
I used to just tie off my yarn ends and trim them short, wondering why they’d work loose over time. Proper end weaving secures your work and creates invisible joins. The key is to weave ends through several stitches in different directions, creating a path that can’t easily pull free.
For light-colored yarns, weave ends through stitches of the same color to keep them invisible. With variegated yarns, you have more flexibility since color changes help hide the woven ends. I always weave through at least four stitches, changing direction at least once.
Never just tie knots and trim – knots can work loose and create bumps in your fabric. Take the extra few minutes to weave properly, and your projects will last much longer.
Seaming and Joining
How you join pieces together can make or break a project. For afghans made in squares, the joining method affects both the appearance and the drape of the finished blanket. Whip stitching creates a flat seam but can be bulky. Single crochet joining creates a raised seam that becomes a design element.
I prefer the mattress stitch for side seams on garments because it creates an invisible join that doesn’t add bulk. For decorative joins, single crochet or even a contrasting slip stitch can add visual interest.
Always use the same yarn for joining that you used for the main project, unless you’re intentionally creating contrast. Different yarn weights or fibers can create puckering or uneven seams.
Adding Borders
A well-chosen border can transform a simple project into something special. Borders serve both functional and aesthetic purposes – they can stabilize edges, add visual weight, or introduce new colors and textures.
For beginners, I recommend starting with simple single crochet borders. Work one round of single crochet around your entire project, placing three stitches in each corner to keep the border flat. This simple addition makes any project look more finished.
As you gain confidence, try shell borders, picot edges, or even complex lace edgings. The key is choosing a border that complements your main project rather than competing with it.
Common Problems and Quick Fixes
Every crocheter encounters problems, and knowing how to troubleshoot common issues saves time and frustration. I’ve made every mistake in the book, and I want to share the solutions I’ve learned so you don’t have to figure them out the hard way.
Curling and Cupping
When your flat projects curl up at the edges or cup like a bowl, it’s usually a tension issue. Curling typically means you’re working too tightly, while cupping often indicates loose tension or too many increases.
For curling, try going up a hook size or consciously loosening your grip on the yarn. For cupping, check your stitch count – you might be accidentally increasing. Sometimes switching to a smaller hook helps tighten up loose stitches.
Uneven Edges
Wonky edges are often caused by inconsistent turning chains or missed stitches at the ends of rows. Count your stitches regularly, especially when you’re learning. Mark the first and last stitches of each row with stitch markers if needed.
Remember that turning chains count as stitches in some patterns but not others. Read your pattern carefully to understand whether you should work into the turning chain from the previous row.
Running Out of Yarn
Nothing’s more frustrating than running out of yarn with just a few rows left. Always buy an extra ball or skein, especially for large projects. Dye lots can vary significantly, and finding a perfect match later is often impossible.
If you do run short, consider adding a contrasting border or stripe to use up what you have while completing the project. Sometimes these “mistakes” become your favorite design elements.
Keep a project journal noting how much yarn you actually used for each project. This helps you estimate needs for future similar projects and builds your understanding of yarn requirements.
Common Questions
How long does it take to learn basic crochet skills?
Most people can learn basic stitches (chain, single crochet, double crochet) in a weekend of focused practice. However, developing consistent tension and being able to follow patterns comfortably usually takes 2-3 months of regular practice. Don’t rush it – everyone learns at their own pace, and muscle memory takes time to develop.
What’s the best yarn for absolute beginners?
I always recommend worsted weight acrylic yarn in a light color for beginners. Red Heart Super Saver or Lion Brand Vanna’s Choice are excellent choices. They’re affordable, forgiving, and the light colors make it easy to see your stitches. Avoid dark colors, fuzzy yarns, or anything thinner than worsted weight until you’re more comfortable.
How do I know if my tension is correct?
Good tension feels comfortable in your hands and creates stitches that are easy to work into on the next row. Your fabric should lie flat without curling or cupping, and stitches should be even in size. If you’re struggling to insert your hook into previous stitches, you’re working too tightly. If there are gaps between stitches or your work is getting wider, you might be too loose.
Should I always make a gauge swatch?
For garments, fitted items, or projects where size matters, absolutely yes. For practice projects like dishcloths or scarves where exact size isn’t critical, you can skip it. However, gauge swatches are great practice and help you get familiar with how different yarns and hooks work together. I recommend making them even for simple projects when you’re learning.
What does it mean when a pattern says “skill level: intermediate”?
Skill levels indicate the complexity of techniques you’ll need to know. Beginner projects use basic stitches and simple construction. Intermediate projects might include color changes, basic shaping, working in the round, or following stitch pattern repeats. Advanced projects typically involve complex construction, detailed shaping, or intricate stitch patterns. Don’t skip levels – each builds important skills.
How much yarn do I need for my first project?
This depends entirely on your project choice. A simple dishcloth needs about 100-150 yards of worsted weight yarn. A basic scarf might need 300-500 yards. Always check the pattern requirements and buy a little extra – it’s better to have too much than run out partway through. Most patterns list yardage requirements along with the recommended yarn weight.
Why do my edges look wavy or tight?
Wavy edges usually mean you’re accidentally adding stitches (increasing), while tight edges suggest you’re missing stitches or working too tightly. Count your stitches at the end of each row to catch mistakes early. Make sure you’re working into every stitch, including the last stitch of each row, which is easy to miss. Consistent turning chains also help maintain even edges.
Can I use a different yarn than what the pattern calls for?
Yes, but stick to the same yarn weight category for best results. A pattern written for worsted weight yarn will work with any worsted weight yarn, though different fibers might give slightly different results. Always make a gauge swatch when substituting yarns to ensure your finished project will be the right size. The yardage requirements might also change slightly with different yarns.
Learning crochet is a journey, and every expert was once a beginner who made mistakes and learned from them. Don’t be discouraged if your first projects don’t look perfect – mine certainly didn’t! Focus on enjoying the process and celebrating small victories along the way.
The most important thing is to keep practicing and be patient with yourself. Every stitch you make is building muscle memory and improving your skills. Start with simple projects that excite you, master the basics thoroughly, and gradually challenge yourself with new techniques.
Remember, there’s no crochet police checking your work. If you’re happy with what you’ve made and it serves its purpose, you’ve succeeded. The beauty of handmade items lies not in their perfection, but in the love and care that went into creating them. So pick up your hook, choose a project that makes you smile, and start stitching. You’ve got this!