Last week, I was chatting with my neighbor Sarah about her latest crochet project—a gorgeous baby blanket she’d been working on for months. When she showed me the finished piece, I noticed something that made my heart sink a little. The edges were curling inward, creating an uneven, puckered look that took away from her beautiful stitch work. “I don’t know what went wrong,” she said, clearly frustrated. “I followed the pattern exactly, but it just won’t lay flat.”
This scenario plays out more often than you’d think. You spend hours, maybe weeks, perfecting your stitches, choosing the perfect yarn, and following every instruction to the letter. Then you block your finished piece, step back to admire your work, and… it’s curling. The edges are rolling under, the fabric is bunching up, and your beautiful creation looks more like a wonky hat than the flat project you intended.
Here’s the thing: curling isn’t always your fault, and it’s definitely fixable. Sometimes it’s a tension issue, sometimes it’s the yarn choice, and sometimes it’s just the nature of certain stitch patterns. The good news? Once you understand why fabric curls and learn a few key techniques, you can prevent it from happening and fix it when it does occur.
I’ve been crocheting for over fifteen years, and I’ve dealt with my fair share of curling disasters. From my first wonky dishcloth that looked more like a taco shell to a stunning lace shawl that refused to block properly, I’ve learned these lessons the hard way so you don’t have to.
Quick Answer
Crochet fabric curls due to uneven tension, stitch pattern characteristics, or yarn properties. Fix curling by adjusting hook size, blocking properly, adding borders, or modifying your tension. Prevention involves choosing appropriate yarns and maintaining consistent gauge throughout your project.
Why Crochet Fabric Curls
Understanding why your crochet fabric curls is the first step to preventing and fixing the problem. Unlike knitting, where curling is almost expected with stockinette stitch, crochet curling often catches us off guard because we expect our fabric to lay flat naturally.
The primary culprit is uneven tension. When you crochet too tightly, you’re essentially creating a fabric that’s trying to contract. The stitches pull on each other, causing the edges to roll inward. This is especially common when you’re nervous about a new project or concentrating extra hard on getting your stitches perfect. I’ve noticed this happens a lot when I’m working on intricate granny squares – the focus required can make me unconsciously tighten my grip.
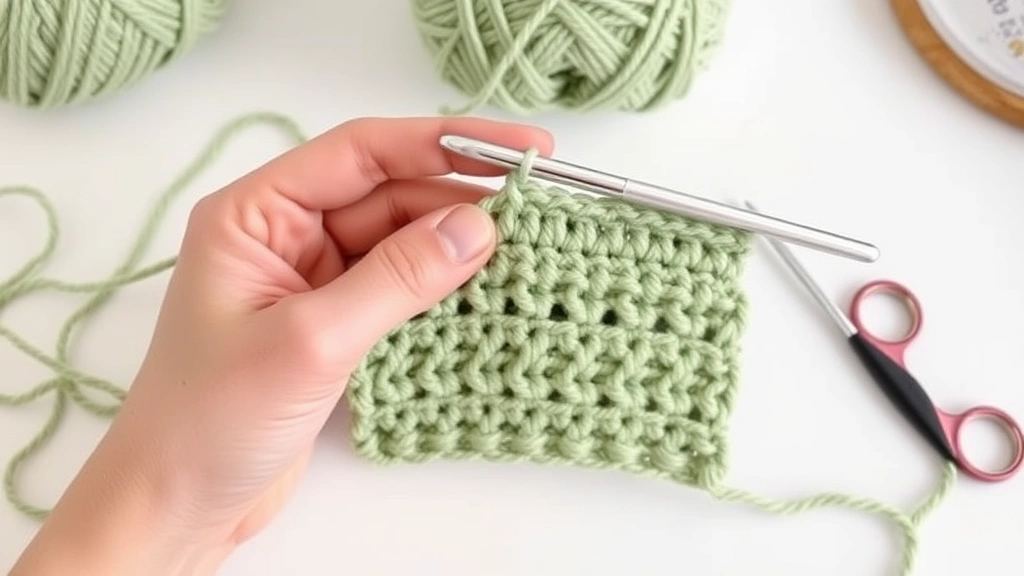
Another major factor is the stitch pattern itself. Some stitches naturally want to curl. Single crochet, for instance, has a tendency to pull inward because of how the yarn loops through the hook. Double crochet tends to be more stable, but even that can curl if your tension is off. When you’re mastering single crochet techniques, you’ll quickly notice how this fundamental stitch behaves differently than taller stitches.
Yarn characteristics play a huge role too. Springy yarns like wool or yarn blends with elastic fibers have more memory – they want to return to their original shape, which can cause curling. Cotton, on the other hand, has less stretch and tends to hold its shape better once blocked. Synthetic yarns fall somewhere in between, depending on their specific composition.
The hook size relative to your yarn weight matters more than most people realize. Using a hook that’s too small for your yarn creates dense, tight fabric that naturally wants to curl. I learned this lesson the hard way when I tried to make a baby blanket with the wrong hook size – the whole thing looked like it was trying to fold itself in half.
Identifying Different Types of Curling
Not all curling is created equal, and identifying what type you’re dealing with will help you choose the right fix. I like to think of curling in three main categories, each with its own personality and solution.
Edge curling is the most common type. This is when just the borders of your project roll under or over, while the center stays relatively flat. You’ll see this a lot in rectangular projects like dishcloths and washcloths, especially if you’ve been inconsistent with your turning chains or edge stitches. The fabric itself isn’t the problem – it’s usually a tension issue at the edges.
Overall fabric curling is when your entire piece wants to curl up like a burrito. This usually indicates a more fundamental issue with your stitch choice, yarn selection, or tension throughout the entire project. I see this most often with single crochet projects worked in tight gauge or with particularly springy yarns.
Directional curling happens when your fabric curls in one specific direction – maybe it rolls from left to right but not top to bottom. This often occurs when you’re working in rows and your tension changes depending on which direction you’re working. It can also happen if you’re consistently starting each row from the same side instead of turning your work.
Pro Tip: Lay your work on a flat surface and step back to assess the curling pattern. Take a photo if needed – sometimes the camera picks up curling patterns that are hard to see up close. This will help you determine which type you’re dealing with and choose the most effective solution.
Prevention Techniques That Actually Work
Prevention is always easier than fixing, and I’ve learned some reliable techniques over the years that will save you hours of frustration later. The key is building good habits from the start of your project.
Consistent tension is your best friend. I know everyone says this, but let me be specific about what it actually means. Your yarn should move smoothly through your fingers without requiring force, but it shouldn’t be so loose that your stitches look sloppy. Practice holding your yarn the same way every time – I wrap mine around my pinky finger and over my index finger, creating consistent tension without thinking about it.
When you’re working on larger projects like blankets, take breaks every 30-45 minutes. Fatigue changes your tension more than you’d think. I learned this during a marathon crochet session where the first half of my blanket looked completely different from the second half – not a mistake I’ll make again.
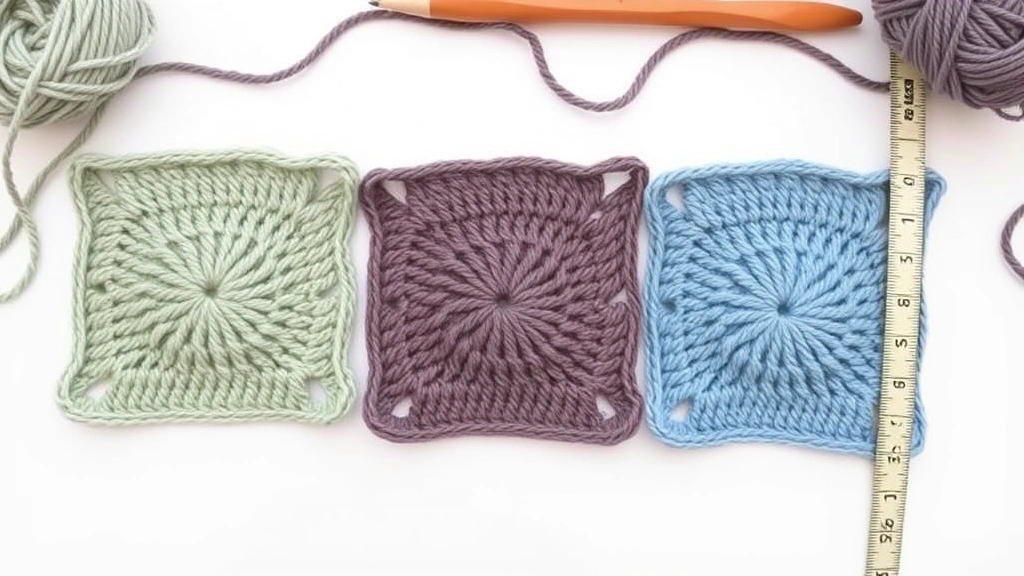
Choose your hook size wisely. The general rule is to go up one hook size from what the yarn label suggests if you tend to crochet tightly. For worsted weight yarn (weight 4), most patterns call for an H/8 (5mm) hook, but I often use an I/9 (5.5mm) for better drape. Don’t be afraid to make a gauge swatch – it takes 15 minutes and can save you weeks of frustration.
| Yarn Weight | Standard Hook Size | For Tight Crocheters | For Loose Crocheters |
|---|---|---|---|
| DK (3) | G/6 (4mm) | H/8 (5mm) | F/5 (3.75mm) |
| Worsted (4) | H/8 (5mm) | I/9 (5.5mm) | G/6 (4mm) |
| Chunky (5) | K/10.5 (6.5mm) | L/11 (8mm) | J/10 (6mm) |
Stitch selection matters more than most patterns acknowledge. If you’re prone to curling issues, avoid long stretches of single crochet in favor of half double crochet or double crochet. These taller stitches create more stable fabric. When I’m designing my own patterns, I often alternate stitch heights to create natural stability.
How to Fix Curling in Finished Projects
So you’ve already finished your project and it’s curling – don’t panic. I’ve rescued plenty of seemingly hopeless pieces, and most curling issues are more fixable than they appear at first glance.
The border solution is often the easiest fix for edge curling. Adding a border in a different stitch can counteract the curling tendency of your main fabric. For projects that curl inward, try a border with taller stitches like double or triple crochet. For outward curling, use shorter stitches or even a reverse single crochet (crab stitch) border.
I fixed a curling baby blanket last year by adding three rounds of alternating single crochet and double crochet. The varying heights created enough structural interest to flatten the edges completely. The Craft Yarn Council has excellent guidance on how different stitch heights affect fabric behavior.
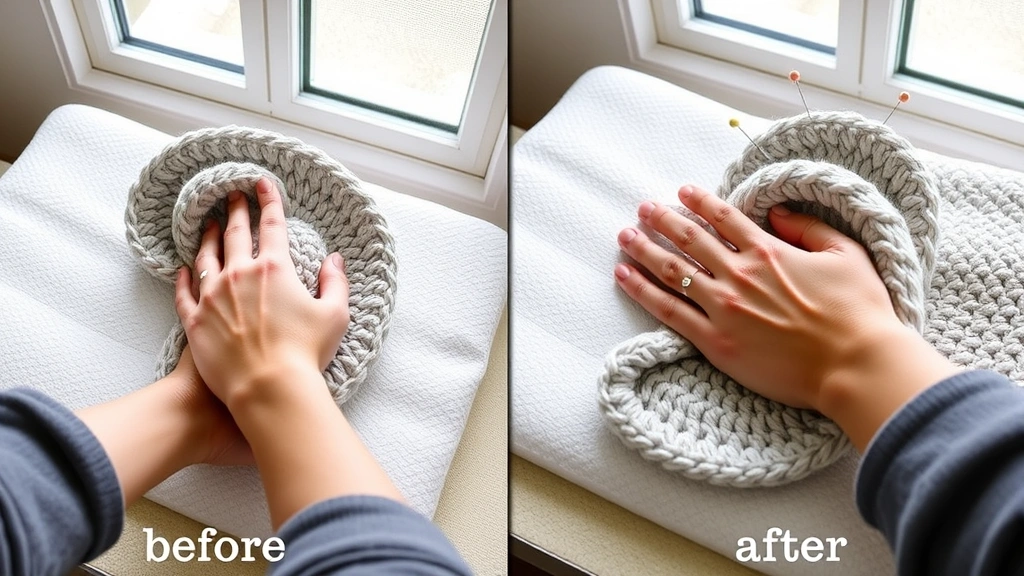
Strategic blocking can work wonders, but it requires patience. Wet blocking is more effective than steam blocking for curling issues. Soak your finished piece in cool water with a small amount of wool wash for 15-20 minutes, then gently squeeze out excess water (never wring). Lay it flat on blocking mats or towels, pin it to the desired dimensions, and let it dry completely.
For stubborn pieces, I use the “progressive blocking” method. Block it once, let it dry, then repeat the process. Sometimes it takes two or three rounds, but I’ve never met a curl that couldn’t be convinced to behave with enough patience.
“I once spent three days blocking and re-blocking a lace shawl that kept curling at the points. The third time was the charm – it finally laid perfectly flat and stayed that way. Sometimes persistence is the only answer.”
Blocking Methods for Stubborn Curls
When regular blocking isn’t enough, you need to bring out the bigger tools. I’ve developed a few techniques over the years for dealing with particularly stubborn curling that refuses to respond to gentle persuasion.
Aggressive pinning sounds harsh, but it’s sometimes necessary. Instead of pinning just the edges, pin every few inches along the entire perimeter. For really difficult pieces, I’ll pin the interior sections too, creating a grid pattern that forces the fabric to lay flat while it dries. Use rust-proof pins – I learned this the hard way when cheap pins left orange spots on a white doily.
The weight method works well for projects that keep springing back to their curled shape. After pinning your piece flat, place clean towels or books on top to add gentle pressure while it dries. Don’t use anything too heavy – you want to encourage the fabric to lay flat, not compress it into cardboard.
Steam blocking with tension is my secret weapon for wool and wool-blend projects. Pin your piece to the desired dimensions, then use a steam iron held about 6 inches above the surface. Never let the iron touch the fabric directly. The steam relaxes the fibers, and the pins hold everything in place as it cools and sets.
For synthetic yarns that don’t respond well to steam, try the spray bottle method. Mix one part fabric softener with three parts water in a spray bottle. Lightly mist your pinned project and let it air dry. The fabric softener helps relax the fibers without the heat that can damage synthetic materials.
Professional Blocking Setup
If you’re serious about blocking, invest in proper tools. Blocking mats with grid lines help you keep everything square and symmetrical. T-pins are better than regular straight pins because they hold more securely and are easier to remove. A good measuring tape is essential – I use a 60-inch quilter’s tape that won’t stretch or distort measurements.
Choosing the Right Yarn and Hook Combinations
Prevention really starts at the yarn store, and I’ve learned to be strategic about my choices based on the project and my personal crochet style. Some yarn and hook combinations are just more prone to curling than others.
Fiber content makes a huge difference in how your finished fabric behaves. Cotton yarns like Lion Brand 24/7 Cotton have excellent stitch definition and minimal curling tendencies, making them perfect for dishcloths and summer tops. Wool yarns have more elasticity, which can contribute to curling but also makes them more forgiving of tension inconsistencies.
Acrylic yarns are middle-of-the-road for curling. Red Heart Super Saver is notorious for being stiff when new, but it actually blocks beautifully once you wash it. The key is understanding that different acrylics behave differently – premium acrylics like Caron Simply Soft have much better drape than budget options.
Yarn weight and hook size relationships are more flexible than most patterns suggest. When I’m working on projects that I know will be prone to curling, I deliberately go up a hook size to create more relaxed fabric. This works especially well for scarves and shawls where drape is more important than structure.
| Project Type | Best Fiber Choice | Hook Size Strategy | Curling Risk |
|---|---|---|---|
| Dishcloths | 100% Cotton | Standard size | Low |
| Baby Blankets | Cotton or Cotton Blend | One size up | Medium |
| Scarves | Wool or Wool Blend | One size up | High |
| Amigurumi | Acrylic | One size down | Low |
I keep a project journal where I note yarn brands, hook sizes, and how the finished fabric behaved. This has saved me countless hours of trial and error on new projects. If I know a particular yarn-hook combination worked well for a similar project, I can replicate that success.
Modifying Stitch Patterns to Reduce Curling
Sometimes the pattern itself is the problem, and you need to make strategic modifications to get the results you want. I’ve learned to read between the lines of patterns and make adjustments based on my experience and the specific materials I’m using.
Adding structure stitches can completely change how a fabric behaves. If a pattern calls for long stretches of single crochet, I’ll often substitute every third or fourth row with half double crochet. This breaks up the uniformity that contributes to curling while maintaining the overall look of the project.
For projects worked in the round, like amigurumi pieces, curling is less common but can still happen at the edges. I’ve found that alternating the direction of your rounds (instead of always starting from the same point) helps distribute tension more evenly and reduces the tendency for edges to curl.
Border modifications are often the easiest way to fix a pattern that’s prone to curling. Instead of ending with the stitch pattern specified in the pattern, add your own border that counteracts the curling tendency. A simple single crochet border can stabilize edges that want to roll, while a shell or fan border can add weight to edges that curl inward.
Designer’s Secret: Many commercial patterns don’t account for different crochet styles and yarn substitutions. Don’t be afraid to modify patterns based on your materials and technique. The pattern is a starting point, not a rigid rule.
When I’m working on larger projects, I’ll often change my turning chain strategy to prevent edge curling. Instead of using the standard chain-1 for single crochet rows, I might use chain-2 and skip the first stitch, or add an extra chain and work into it on the next row. These small modifications can make a huge difference in how the edges behave.
Testing Modifications
Before committing to a modification on your main project, make a small swatch to test how it behaves. I keep a collection of test swatches for different techniques – it’s like having a reference library of what works and what doesn’t. This has saved me from making mistakes on larger projects countless times.
Common Questions
Why does my single crochet fabric always curl?
Single crochet naturally creates dense, compact fabric that tends to curl inward due to the stitch structure. The short height and tight loops pull the fabric together. Try using a larger hook size, maintaining looser tension, or alternating with taller stitches every few rows. Adding a border in double crochet or half double crochet can also counteract the curling.
Can I fix curling without blocking?
Yes, but your options are more limited. Adding a stabilizing border is the most effective non-blocking solution. You can also try the “stretch and pin” method – gently stretch the curled areas and pin them flat for several hours or overnight. However, blocking is usually more permanent and effective for most curling issues.
Will curling get worse over time?
It depends on the yarn and how the item is used and cared for. Natural fibers like wool may relax and curl less over time with wear and washing. Synthetic fibers tend to hold their shape (including curls) more persistently. Regular blocking after washing can help maintain flat fabric, especially for items that get frequent use.
What’s the best yarn for beginners who struggle with curling?
Cotton or cotton-blend yarns in worsted weight are most forgiving for beginners. They have less elasticity than wool, so they’re less likely to curl, and they block beautifully. Lion Brand Comfy Cotton Blend and Bernat Handicrafter Cotton are excellent choices that work up evenly and lay flat naturally.
How do I know if my tension is causing curling?
Make a gauge swatch and measure it against the pattern specifications. If your swatch is significantly smaller than expected, you’re crocheting too tightly. Also, check if your fingers hurt after crocheting or if you have difficulty pulling your hook through stitches – both indicate overly tight tension. Your yarn should glide smoothly without force.
Can I prevent curling when working in the round?
Curling is less common in round projects, but it can happen at the outer edges. Ensure you’re increasing at the correct rate to keep your work flat – too few increases cause cupping, too many cause ruffling. For projects like doilies or mandalas, block them while slightly stretched to encourage flat edges.
Why does only one edge of my project curl?
This usually indicates inconsistent edge stitches or turning chain issues. You might be working your foundation chain too tightly, or your turning chains might be too short or too long for your tension. Try adjusting your turning chain length or adding an extra stitch at the beginning of each row to even out the edges.
How long should I block a curling project?
Most projects need 24-48 hours of blocking time to set properly. Thicker yarns and denser fabrics may need longer. The piece should be completely dry before you remove the pins – rushing this step can cause the curling to return. For stubborn pieces, you may need to repeat the blocking process 2-3 times.
Moving Forward with Confidence
Dealing with curling crochet fabric doesn’t have to be a source of endless frustration. Once you understand the why behind the curl, you can make informed decisions about prevention and treatment that actually work. I’ve seen too many beautiful projects abandoned because of curling issues that were completely fixable with the right approach.
The key is being proactive rather than reactive. Choose your materials thoughtfully, pay attention to your tension, and don’t be afraid to modify patterns when your experience tells you something isn’t going to work. Every project is a learning opportunity, and even the ones that curl teach you something valuable for next time.
Remember that blocking is your friend, not something to be feared or avoided. It’s a normal part of the finishing process for many projects, just like weaving in ends or adding buttons. The more you practice these techniques, the more intuitive they become.
Keep experimenting, keep learning, and don’t let a little curling discourage you from creating beautiful things. Some of my favorite finished projects started out as curling disasters that taught me new techniques. Your crochet journey is exactly that – a journey, complete with challenges that make you a better crafter in the end.