Last week, I was helping my neighbor Sarah with her first crochet project when she held up her wonky rectangle and sighed, “This was supposed to be a square.” I knew exactly what had happened – she’d been crocheting in rows instead of rounds, and her edges were doing that annoying curl thing that happens when tension gets weird. It’s one of those moments every crocheter faces: do I keep going with rows, or should I switch to working in the round?
Here’s the thing – both techniques have their place, and understanding when to use each one will save you hours of frustration and frogging. I’ve been crocheting for over fifteen years, and I still remember the confusion I felt when patterns would randomly switch between the two methods without explaining why.
The choice between rows and rounds isn’t just about personal preference. It affects everything from your project’s structure to how much yarn you’ll use, and even how long it takes to finish. Some projects absolutely require one method over the other, while others give you flexibility to choose based on your skill level or the look you’re going for.
Quick Answer
Crochet in rounds for seamless projects like hats, amigurumi, and circular blankets. Use rows for flat items like scarves, rectangular blankets, and garments that need shaping. Rounds create continuous spirals or joined circles, while rows build flat fabric back and forth.
Understanding the Basics
Let’s start with what these terms actually mean, because I’ve seen too many beginners get confused by pattern language.
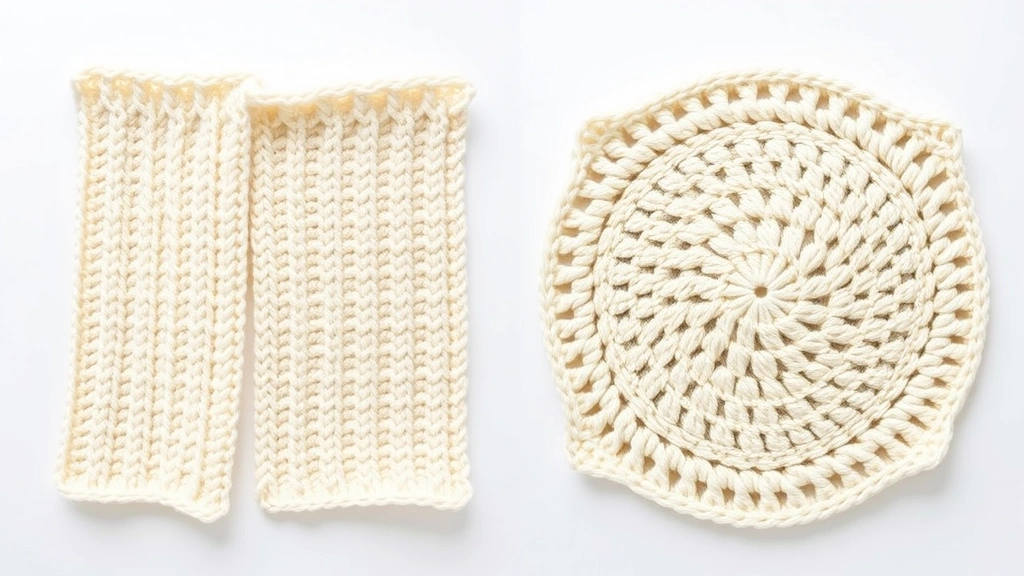
Working in rows means you crochet back and forth across your work. You complete a row, turn your piece, and work back in the opposite direction. Think of it like mowing a lawn – you go one direction, turn around, and come back the other way. Each row builds on top of the previous one, creating flat fabric.
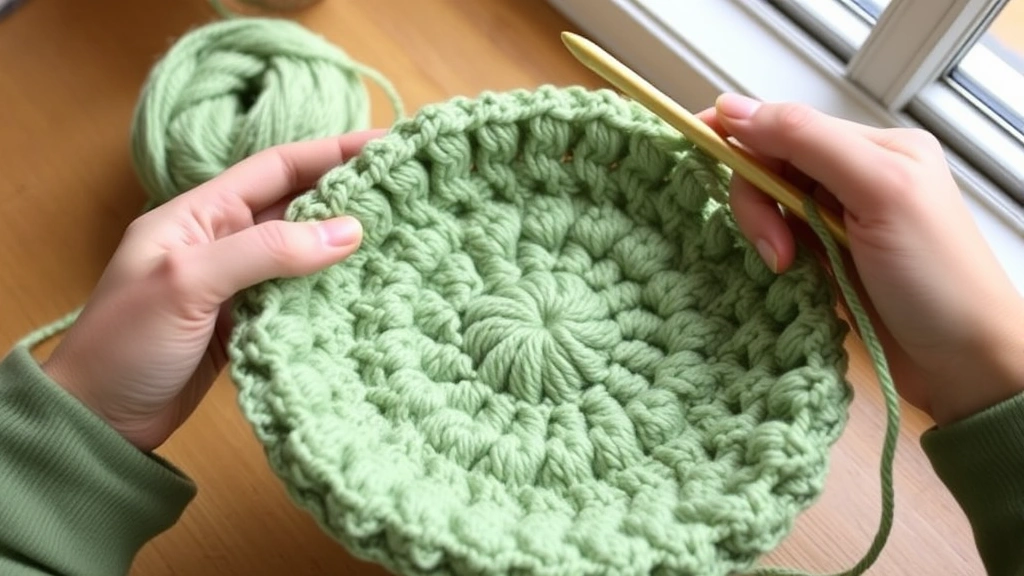
Working in rounds means you crochet in a continuous circle or spiral. You never turn your work – instead, you keep going around and around, building outward or upward. It’s like walking around a track; you complete one lap and immediately start the next.
The Foundation Difference
This is where things get interesting. When you work in rows, you typically start with a foundation chain – that initial chain that determines your project’s width. For rounds, you usually begin with either a magic ring (also called a magic circle) or a small chain joined into a ring.
I remember when I first learned about magic rings – it was a game-changer for my amigurumi projects. No more weird holes in the center of my work! The Craft Yarn Council actually recommends learning both starting methods since they’re fundamental to different project types.
Pro tip: If you’re struggling with magic rings, don’t feel bad about starting with a chain ring. I used chain rings for my first year of crocheting rounds, and my projects turned out just fine.
When to Use Rounds
Rounds are your go-to method when you want seamless, continuous fabric. Here’s when they really shine:
Hats and Beanies
This is probably the most obvious application. Crochet hats worked in rounds eliminate that annoying back seam that can be uncomfortable and look amateur. You start at the crown and work your way down, increasing to shape the head portion, then working even for the brim.
I typically use worsted weight yarn with a 5.5mm hook for adult hats, starting with 12 double crochets in my magic ring. The seamless construction means no bulk at the back of the head – much more comfortable to wear.
Amigurumi and Stuffed Projects
If you’re making any kind of amigurumi, rounds are non-negotiable. These three-dimensional projects require the seamless construction that only continuous rounds can provide. Working in spirals (without joining each round) creates smooth, even fabric perfect for stuffing.
The key difference here is that amigurumi rounds are usually worked in spirals, meaning you don’t join at the end of each round – you just keep going. This eliminates the slight jog you get when joining rounds, creating perfectly smooth fabric.
Circular Blankets and Mandalas
Those gorgeous circular blankets you see on Instagram? All worked in rounds. Each round builds outward from the center, creating intricate patterns that radiate from the middle. Ravelry has thousands of circular blanket patterns that showcase how versatile this technique can be.
| Project Type | Round Method | Best For |
|---|---|---|
| Beanies | Joined rounds | Clean color changes |
| Amigurumi | Spiral rounds | Smooth stuffed shapes |
| Doilies | Joined rounds | Precise stitch placement |
| Granny squares | Joined rounds | Color work patterns |
When to Use Rows
Rows are perfect for creating flat, structured fabric. They’re often easier for beginners because you can see your progress more clearly and count stitches more easily.
Scarves and Shawls
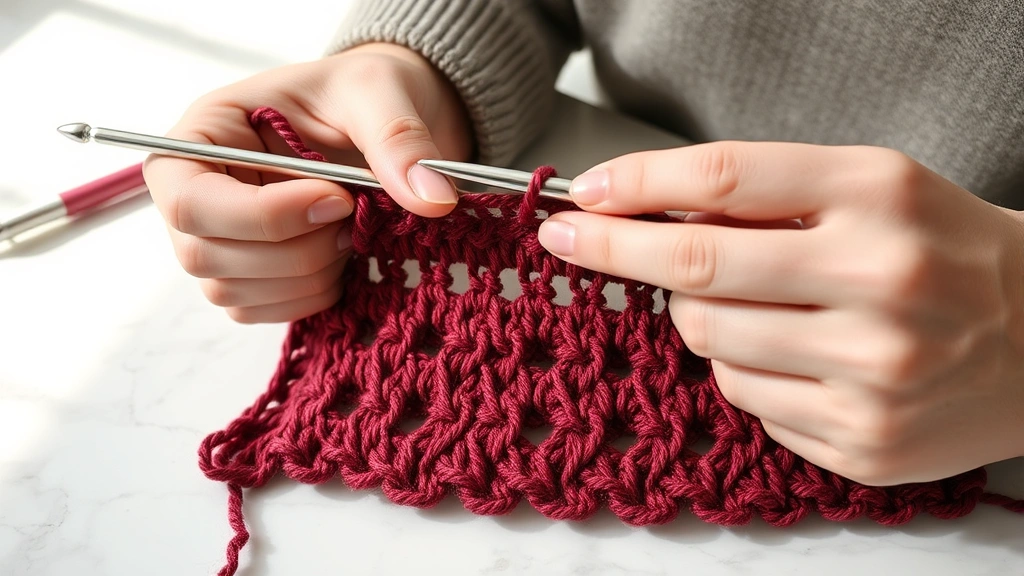
Most crochet scarves are worked in rows because you want a flat, rectangular piece of fabric. The back-and-forth construction creates the perfect drape for wrapping around your neck. Plus, working in rows makes it easy to create interesting stitch patterns and textures.
I love making scarves in rows because you can easily adjust the length as you go. If you want it longer, just keep adding rows. Want to add stripes? Simply change colors at the end of a row.
Rectangular Blankets
Traditional crochet blankets worked in rows are classics for a reason. They create beautiful, flat fabric that drapes perfectly over furniture or people. You can work them as one large piece or create strips that you sew together later.
Corner-to-corner (C2C) blankets are a perfect example of row construction creating something unique. You start with one stitch and increase diagonally, then decrease to create a square or rectangle.
Garment Pieces
Most crochet sweaters and cardigans use rows for the main body pieces. This gives you the flat fabric needed for proper fit and makes it easier to shape armholes and necklines. The structured nature of rows also makes seaming much easier when you’re assembling the final garment.
Technical Differences
Understanding the technical aspects will help you make better decisions about which method to use.
Tension and Gauge
Here’s something many patterns don’t tell you: your gauge might be different between rows and rounds, even with the same yarn and hook. When I work in rows, my stitches tend to be slightly looser because of the turning motion. In rounds, especially tight spirals, my tension naturally gets a bit tighter.
Always make gauge swatches using the same method your project requires. If your pattern uses rounds, swatch in rounds. If it uses rows, swatch in rows.
Yarn Usage
Rounds typically use slightly more yarn than rows for equivalent coverage because of the way stitches are constructed and joined. The joining chains in rounds add up, especially in projects with many small rounds like granny squares.
For example, when I made two identical 12-inch squares – one in continuous rows and one in rounds – the round version used about 15% more yarn. Keep this in mind when calculating yarn requirements.
Stitch Alignment
In rows, your stitches stack directly on top of each other, creating clear vertical lines. In rounds, stitches spiral slightly, which can affect pattern alignment. This is why some colorwork patterns specify row construction even when rounds might seem more logical.
Switching Between Methods
Some advanced projects require switching between rows and rounds, and knowing how to transition smoothly is crucial.
From Rounds to Rows
This transition is common in hat patterns where you work the crown in rounds, then switch to rows for a brim or ear flaps. The key is to end your last round at a logical point (usually the back center) and begin your first row from there.
When making the switch, you’ll typically chain your turning chain, then work across a portion of your round instead of continuing all the way around. Mark this transition point with a stitch marker so you can find it easily.
From Rows to Rounds
This is trickier and less common, but it happens in some cardigan patterns where you work the back in rows, then pick up stitches around the edges to work the fronts in rounds. The secret is to evenly distribute your pickup stitches and maintain consistent tension.
I learned this technique the hard way when making my first cardigan. Take your time with the pickup row – it’s the foundation for everything that follows.
Common Mistakes to Avoid
After years of teaching crochet, I’ve seen the same mistakes over and over. Here’s how to avoid them:
Forgetting to Turn
In rows, you must turn your work at the end of each row. Forgetting creates a twisted mess that’s impossible to fix without frogging. I always say “chain and turn” out loud when I’m working in rows – it becomes automatic after a while.
Joining in the Wrong Place
When working joined rounds, always pay attention to where you’re supposed to join. Some patterns join in the first stitch of the round, others in the top of the beginning chain. Getting this wrong throws off your stitch count and can create visible jogs in your work.
Inconsistent Tension
This is especially problematic when switching between methods mid-project. Your row tension might be different from your round tension, creating visible lines in your finished piece. Practice both methods regularly to develop consistent tension.
Wrong Starting Method
Using a magic ring when the pattern calls for a foundation chain (or vice versa) can throw off your entire project. Magic rings are adjustable and create tight centers, while chain rings are fixed and create small holes. Choose the method that matches your project’s needs.
Real Project Examples
Let me share some specific examples from my own projects to illustrate these concepts.
Baby Blanket Comparison
Last year, I made two identical baby blankets – one using rows and one using rounds. The row version was a simple rectangle worked in single crochet with Lion Brand Babysoft yarn. It took about 12 hours to complete and used exactly 4 skeins.
The round version started from the center and worked outward in a spiral pattern. Same yarn, same finished dimensions, but it took about 14 hours and used 4.5 skeins. The round version had a more interesting visual appeal, but the row version was easier to crochet while watching TV.
Hat Project Breakdown
I recently made matching beanies for my twin nephews. Both used worsted weight acrylic yarn and a 5.5mm hook, but I tried different construction methods:
- Hat 1 (Rounds): Started with magic ring, worked 72 rounds total. Seamless finish, perfect fit, took 3 hours.
- Hat 2 (Rows): Worked flat rectangle, then seamed. Visible back seam, slightly bulky, took 2.5 hours plus seaming time.
The round version was clearly superior in both appearance and comfort, which is why most modern hat patterns use this method.
Granny Square Afghan
My most ambitious project last year was a queen-size granny square afghan. Each square was worked in rounds – 4 rounds per square, 400 squares total. The round construction was essential because it created the classic granny square look with the color radiating from the center.
If I had tried to recreate this look using rows, it would have been impossible to achieve the same visual effect. The round construction is what makes granny squares work.
Common Questions
Can I convert a round pattern to rows or vice versa?
Sometimes, but it’s complicated. Simple patterns might convert, but anything with specific shaping, colorwork, or structural elements probably won’t work. The stitch counts and construction methods are fundamentally different. If you’re a beginner, stick with the pattern as written.
Which method is easier for beginners?
Rows are generally easier for beginners because you can see your progress more clearly and count stitches more easily. You’re also less likely to get lost in your work. However, if you’re making something that requires rounds (like a hat), don’t let fear hold you back – just take it slow and use stitch markers.
Do I need different hooks for rows vs. rounds?
No, you can use the same hooks for both methods. However, some crocheters find that their tension is different between the two methods, so you might need to adjust hook size to maintain the same gauge. Always make a gauge swatch using the same method as your project.
How do I fix a project where I accidentally used the wrong method?
Unfortunately, there’s usually no way to fix this without starting over. The fundamental construction is different, and trying to convert mid-project typically creates more problems than it solves. Learn from the mistake and start fresh – you’ll work faster the second time anyway.
Why do some patterns specify “do not join” for rounds?
This creates spiral rounds instead of joined rounds. In spiral rounds, you work continuously without joining at the end of each round. This eliminates the slight jog that happens when you join, creating smoother fabric. It’s essential for amigurumi and some hat patterns.
Can I use the same yarn for both methods?
Absolutely! The yarn choice depends on your project needs, not the construction method. However, some yarns show stitch definition better in certain constructions. For example, highly textured yarns might obscure intricate stitch patterns whether worked in rows or rounds.
How do I keep track of rounds vs. rows?
Use different counting methods for each. For rows, I count the turning chains along one edge. For rounds, I use stitch markers to mark the beginning of each round, moving the marker up as I complete each round. Row counters work for both methods, but I find physical markers more reliable for rounds.
Which method uses more yarn?
Rounds typically use slightly more yarn due to joining chains and the way stitches are constructed. The difference is usually small (10-15%), but it can add up in large projects. Always buy an extra skein when working large projects in rounds, especially if you’re using a discontinued color.
The choice between rows and rounds really comes down to understanding your project’s needs and your own comfort level. I’ve found that most crocheters naturally gravitate toward one method or the other, but mastering both opens up so many more pattern possibilities.
Don’t be afraid to experiment with both techniques. Make a small swatch in rows, then try the same stitch pattern in rounds. You’ll start to see how each method affects the fabric’s drape, appearance, and construction. And remember – there’s no “wrong” choice if your finished project makes you happy. Whether you’re team rows or team rounds, you’re creating something beautiful with your own two hands, and that’s what really matters.