You know that feeling when you’re halfway through a gorgeous granny square project and suddenly realize your squares are all wonky sizes? I’ve been there, and it’s honestly one of the most frustrating things in crochet. One square measures 4 inches, another barely hits 3.5 inches, and don’t even get me started on that one rogue square that somehow ended up at 4.5 inches. The good news? Getting consistent granny square sizes isn’t rocket science – it just takes understanding a few key factors that most patterns don’t bother explaining.
Here’s what I wish someone had told me when I started making granny squares: size consistency comes down to three main things – your tension, your yarn choice, and knowing exactly when to stop. It sounds simple, but each of these elements can throw off your measurements in ways that’ll make you want to frog the whole project.
I remember spending an entire weekend trying to make matching granny squares for a baby blanket, getting increasingly frustrated as each square came out a different size. Turns out, I was making rookie mistakes that are super common but totally fixable. Once I figured out the tricks I’m about to share with you, my squares started coming out beautifully uniform every single time.
Quick Answer
Consistent granny square sizes depend on maintaining even tension, using the same yarn throughout your project, and stopping at the same round number. Most size variations come from tension changes or switching yarn weights mid-project.
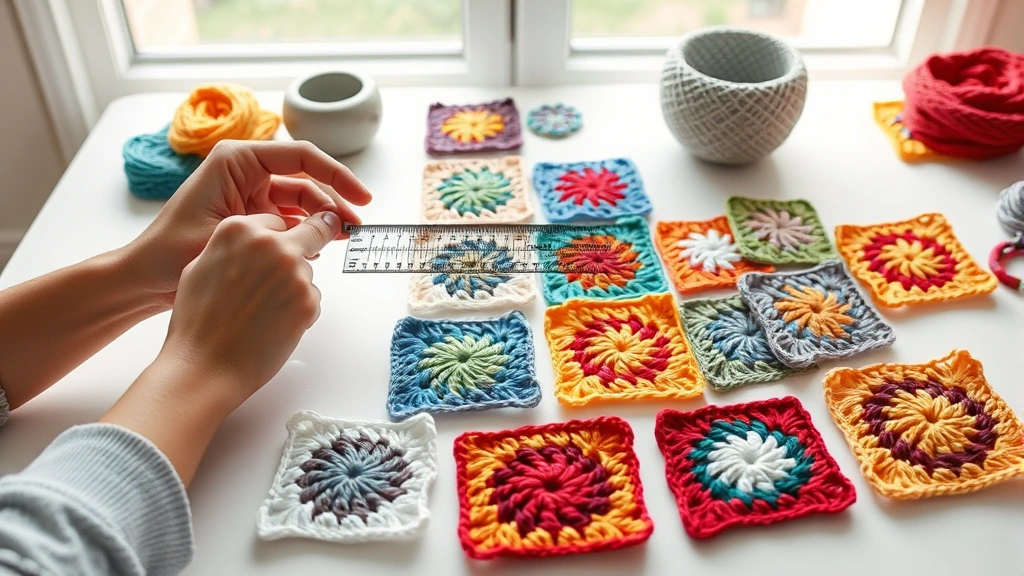
How to Measure Granny Squares Properly
Before we dive into making consistent squares, let’s talk about measuring them correctly. I see so many crocheters measuring wrong, which makes it impossible to tell if their squares are actually the same size or not.
Always measure your granny squares flat, without stretching them. Place your square on a hard surface – not your lap or a soft couch cushion – and use a ruler or measuring tape. Measure from the outermost edge of one corner to the outermost edge of the opposite corner, going straight across. Don’t measure diagonally unless your pattern specifically calls for diagonal measurements.
The timing of when you measure matters too. I always measure my squares after I’ve completed them but before I weave in the ends. If you’re planning to block your squares (which I highly recommend), measure both before and after blocking so you know what to expect.
Pro Tip: Keep a small notebook where you record the measurements of your first few squares. This gives you a target size to aim for with the rest of your squares.
For most granny square patterns, you’ll want your finished squares to measure within 1/8 inch of each other. That might sound super precise, but trust me – when you’re joining dozens of squares together, even small size differences become really obvious in the finished project.
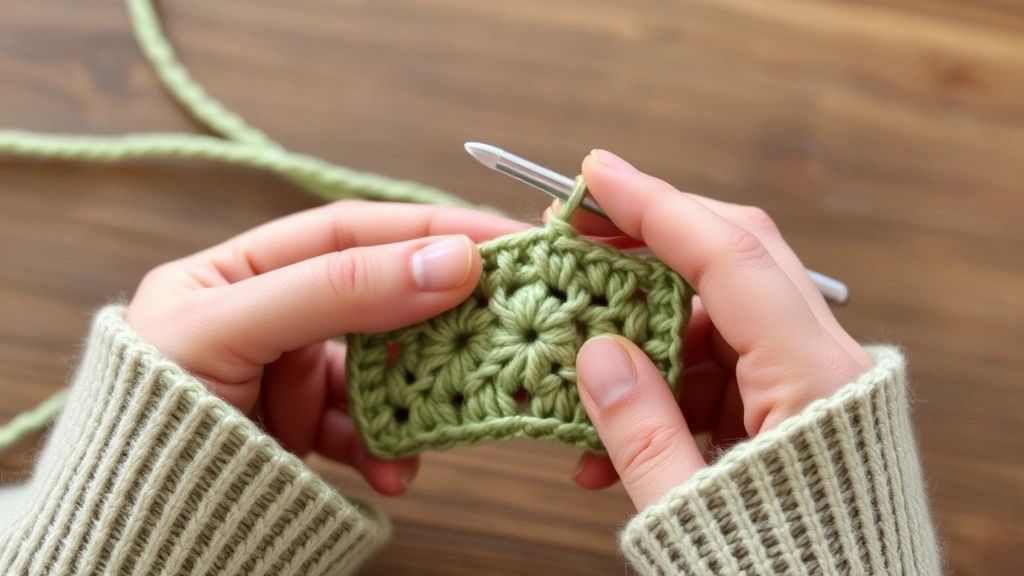
Mastering Tension for Uniform Squares
Tension is hands down the biggest factor affecting granny square size consistency. When I started crocheting, I had no idea how much my grip on the yarn could change the size of my work. Tight tension creates smaller squares, loose tension creates larger ones – it’s that simple.
The tricky part is that our tension naturally changes throughout a project. You might start out tense (literally) because you’re concentrating hard, then relax as you get into a rhythm. Or maybe you’re more relaxed when you’re fresh but grip tighter as you get tired. I’ve noticed my own tension gets looser when I’m watching TV and tighter when I’m having a conversation.
Here’s what works for me: I make my first square when I’m feeling calm and focused, then use that as my “tension template.” Before starting each new square, I take a deep breath and consciously try to match that same relaxed grip on my yarn and hook.
One technique that really helped me was practicing the proper way to hold my hook and yarn. Getting comfortable with the right grip made my tension much more consistent.
If you’re struggling with tension consistency, try this: crochet for shorter periods of time. Instead of marathon sessions, work on squares for 30-45 minutes, then take a break. This prevents the fatigue that often leads to tension changes.
Checking Your Tension Mid-Square
Don’t wait until you finish a square to check if your tension is consistent. After completing the first round (the center ring), measure the diameter. For most worsted weight yarn patterns, this should be about 1.5-2 inches across. If it’s significantly larger or smaller than your previous squares, you’ll know to adjust your tension for the remaining rounds.
Yarn Weight and Fiber Impact on Size
Not all yarns are created equal, even within the same weight category. I learned this the hard way when I switched from one brand of worsted weight yarn to another mid-blanket and suddenly my squares were noticeably different sizes.
Yarn weight standards give us a good starting point, but there’s still variation within each category. A DK weight yarn from one manufacturer might be on the heavier side of the range, while another brand’s DK might be lighter. Even a small difference in actual yarn thickness can change your square size by a quarter inch or more.
| Yarn Weight | Typical Hook Size | Expected Square Size (4 rounds) |
|---|---|---|
| Sport (3) | 4.5mm (G) | 3.5-4 inches |
| DK (3) | 5mm (H) | 4-4.5 inches |
| Worsted (4) | 5.5mm (I) | 4.5-5 inches |
| Chunky (5) | 6.5mm (K) | 5.5-6 inches |
Fiber content affects size too. Cotton yarns tend to be less stretchy than acrylic, so they often produce slightly smaller squares with the same hook size. Wool can be unpredictable – some wools are bouncy and create larger squares, while others felt slightly during working and create smaller ones.
My rule of thumb: buy all the yarn you need for a project at once, preferably from the same dye lot. If you absolutely must substitute yarns, make a test square with the new yarn and compare it to your existing squares before proceeding.
Following Patterns for Size Accuracy
This might seem obvious, but pattern consistency is crucial for uniform squares. I’m not just talking about following the stitch pattern correctly – though that’s important too – but also about being consistent with how you interpret the pattern instructions.
Pay close attention to how you make your corner chains. Some patterns call for chain 2 in corners, others use chain 3. But even within the same pattern, crocheters often vary how tightly they make these corner chains. If your corner chains are loose, your square will be larger. If they’re tight, it’ll be smaller.
The same goes for your starting chain. Whether you’re using a magic ring or a chain 4 joined with a slip stitch, consistency is key. I always make my starting ring the same way every time – same number of chains, same tension when pulling the magic ring tight.
Consistency Check: Count your stitches in each round. It’s easy to accidentally add or skip a stitch, which will throw off your square’s size and shape.
Here’s something most patterns don’t mention: how you join rounds affects size too. If you’re loose with your slip stitches, your squares will be slightly larger. If you pull them tight, they’ll be smaller. Find a comfortable middle ground and stick with it.
Fixing Size Problems Mid-Project
So what do you do when you realize your squares aren’t matching? Don’t panic – there are several ways to fix size issues without starting over completely.
If your newer squares are consistently larger than your earlier ones, you’ve probably relaxed your tension. Try going down a hook size for the remaining squares. I keep multiple hook sizes handy for exactly this reason. Going from a 5.5mm to a 5mm hook can bring an oversized square back in line.
If your squares are too small, try going up a hook size or consciously loosening your tension. Sometimes I’ll even add an extra round to smaller squares, though this only works if your pattern allows for it aesthetically.
The Partial Frog Method
Here’s a technique I use when I catch a size problem early: instead of frogging the entire square, I’ll rip back just the last round or two and redo them with adjusted tension or a different hook size. This saves time while still getting the size right.
For squares that are just slightly off, you might be able to adjust the size during the joining process. Using a slightly looser or tighter joining method can help compensate for small size differences.
Using Blocking to Even Out Squares
Blocking is honestly a game-changer for granny square consistency. Even if your squares vary slightly in size when you finish them, proper blocking can bring them all to the same dimensions.
For cotton squares, I use wet blocking. Soak each square in cool water for about 15 minutes, then gently squeeze out excess water (don’t wring). Lay the squares flat on blocking mats or towels, and gently stretch or compress them to match your target size. Pin in place and let them dry completely.
Acrylic yarns respond better to steam blocking. Hold a steam iron about 6 inches above the square and let the steam relax the fibers, then gently shape the square to size. Never let the iron touch the yarn directly – acrylic can melt.
I learned about proper blocking techniques after years of skipping this step, and it honestly transformed the quality of my finished projects.
When blocking multiple squares, use a template. Cut a piece of cardboard to your desired square size and use it as a guide to ensure all your squares end up exactly the same dimensions.
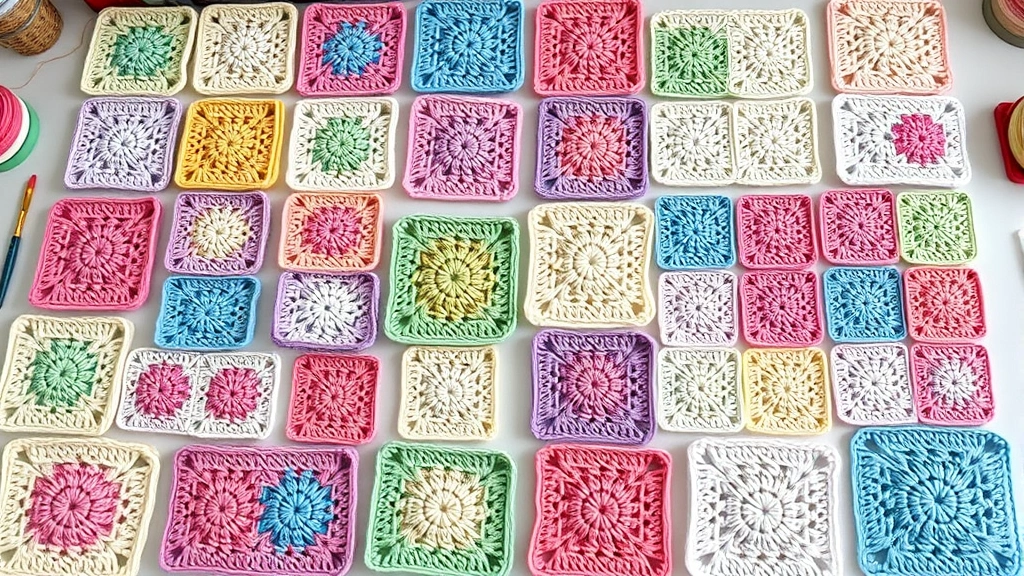
Pro Tips for Perfect Consistency
After making hundreds of granny squares over the years, I’ve picked up some tricks that make consistency so much easier.
First, work on squares in batches rather than making them one at a time. I’ll typically make 5-10 squares in a session, which helps maintain consistent tension and rhythm. Plus, you can easily compare sizes as you go.
Keep detailed notes about your process. I write down which hook size I used, any tension adjustments I made, and even environmental factors like whether I was tired or stressed. It sounds obsessive, but these notes have saved me so much frustration on later projects.
Consider making a few extra squares beyond what your pattern calls for. This gives you backups in case some squares end up the wrong size, and you can choose the most consistent ones for your final project.
Time-Saving Tip: Make all your squares first, then measure and sort them by size. Use the most consistent ones for the center of your project where size differences would be most noticeable.
For projects that require many squares, I sometimes use different stitch combinations to add visual interest while maintaining the same overall square size. This keeps the work interesting while still achieving consistency.
Finally, don’t be afraid to use tools that help with consistency. Stitch markers can help you keep track of where you are in each round, and a row counter can ensure you’re stopping at the same point every time.
Common Questions
Why are my granny squares different sizes even though I’m following the same pattern?
The most common cause is inconsistent tension. Your grip on the yarn and hook naturally changes as you work, especially over long crochet sessions. Environmental factors like stress, fatigue, or distractions can also affect your tension. Try working for shorter periods and consciously checking your grip every few squares.
How much size variation is acceptable in granny squares?
For most projects, squares should be within 1/8 inch of each other. Larger variations (1/4 inch or more) will be noticeable in the finished project and can cause puckering or gaps when you join the squares together. If your squares vary by more than 1/4 inch, it’s worth adjusting your technique.
Can I fix squares that are too big or too small?
Yes! For squares that are slightly too large, try steam blocking with gentle compression. For squares that are too small, wet blocking with gentle stretching often works. If the size difference is significant (more than 1/2 inch), you might need to remake some squares or add/remove rounds to match.
Should I use the same yarn brand throughout my entire project?
Absolutely, if possible. Even within the same yarn weight category, different brands can have slightly different thicknesses, which affects square size. Different fiber contents also behave differently. If you must switch brands, make a test square first to compare sizes.
What’s the best way to measure granny squares accurately?
Measure squares flat on a hard surface, from outer edge to outer edge straight across (not diagonally). Don’t stretch the square while measuring. Take measurements after completing the square but before weaving in ends. If you plan to block, measure both before and after blocking.
How many rounds should a standard granny square have?
There’s no universal standard, but most patterns specify the number of rounds needed for the desired size. A typical 4-inch square in worsted weight yarn usually has 4-5 rounds. The key is stopping at the same round number for all squares in your project, regardless of the total number of rounds.
Why do my squares get bigger as I make more of them?
This usually indicates that your tension is loosening as you become more comfortable with the pattern. It’s natural to start tight when concentrating on new stitches, then relax as the movements become automatic. Try going down a hook size for later squares or consciously maintaining your initial tension.
Can hook size affect granny square consistency?
Definitely. Even a 0.5mm difference in hook size can change your square size by 1/4 inch or more. Make sure you’re using the same hook size throughout your project. If you need to switch hooks due to size issues, test the new size on a practice square first.
Getting consistent granny square sizes really comes down to paying attention to the details that many patterns assume you already know. Your tension, yarn choice, and technique all play important roles in creating uniform squares that’ll make your finished projects look polished and professional.
The most important thing I’ve learned is that consistency comes with practice and mindfulness. Don’t get discouraged if your first few projects have some size variation – even experienced crocheters deal with this challenge. Keep notes about what works for you, invest in good tools like quality hooks and blocking mats, and remember that small adjustments in technique can make a big difference in your results.
Take your time with each square, especially when you’re starting a new project. Those first few squares set the standard for everything that follows, so it’s worth getting them right. And remember, blocking is your friend – it can fix minor size inconsistencies and give your finished project that crisp, professional look that makes all the extra effort worthwhile.