You know that moment when you’re halfway through a gorgeous blanket and realize your edges are doing this weird wavy thing that makes it look like you’re crocheting underwater? Yeah, I’ve been there too. Blocking is one of those techniques that sounds super fancy and intimidating, but it’s honestly just giving your finished crochet work a professional spa day.
I used to skip blocking entirely because I thought it was just for perfectionist crocheters who had way too much time on their hands. Then I blocked my first lace shawl and literally gasped at the transformation. The stitches opened up, the pattern became crystal clear, and suddenly my wonky edges were straight as arrows. It was like watching your project graduate from homemade to heirloom.
The thing is, blocking isn’t just about making things look pretty (though it definitely does that). It’s about helping your yarn fibers relax into their intended shape, evening out your tension, and making sure your measurements are spot-on. Whether you’re working on a delicate doily or a chunky sweater, understanding when and how to block can be the difference between a project you’re proud to gift and one that stays hidden in your craft closet.
I’m going to walk you through everything I wish someone had told me when I was staring at my first blocking mats, wondering if I was about to ruin months of work. Spoiler alert: you’re not going to ruin anything, and your future self will thank you for taking this extra step.
Quick Answer
Blocking is the process of wetting or steaming your finished crochet work and shaping it to the correct dimensions while it dries. It evens out stitches, straightens edges, and helps lace patterns open up beautifully, transforming your handmade pieces into professional-looking finished items.
What Is Blocking and Why Does It Matter
Blocking is essentially giving your crochet work a controlled bath and stretch session. You’re using moisture and gentle tension to coax the yarn fibers into their ideal position, then letting everything dry in that perfect shape. Think of it like setting your hair with rollers – you’re training the fibers to hold a specific form.
The science behind it is pretty cool. Most yarn fibers have some natural elasticity and memory. When you crochet, your personal tension creates slight irregularities – maybe you pull a little tighter when you’re concentrating, or your stitches get looser when you’re relaxed and watching TV. Blocking evens all of that out by allowing the fibers to relax and redistribute.
For natural fibers like wool, cotton, and alpaca, blocking can dramatically change the drape and texture of your finished piece. The Craft Yarn Council explains that these fibers respond beautifully to moisture because they can actually absorb water and reshape themselves at a molecular level.
Here’s what blocking can do for your projects:
- Straighten crooked edges and even out uneven rows
- Open up lace patterns so you can actually see the beautiful design
- Make your finished measurements match the pattern specifications
- Give your work a more polished, professional appearance
- Help seams lay flat when joining pieces
- Improve the drape of garments and accessories
I’ve seen blocking turn a lumpy, sad-looking sweater into something that looks store-bought. It’s honestly like magic, and once you start doing it regularly, you’ll wonder how you ever lived without it.
When Your Project Needs Blocking
Not every crochet project needs blocking, but way more projects benefit from it than most people realize. I used to think blocking was only for fancy lace doilies, but I’ve learned that even simple projects can look dramatically better with a little blocking love.
Projects That Always Need Blocking
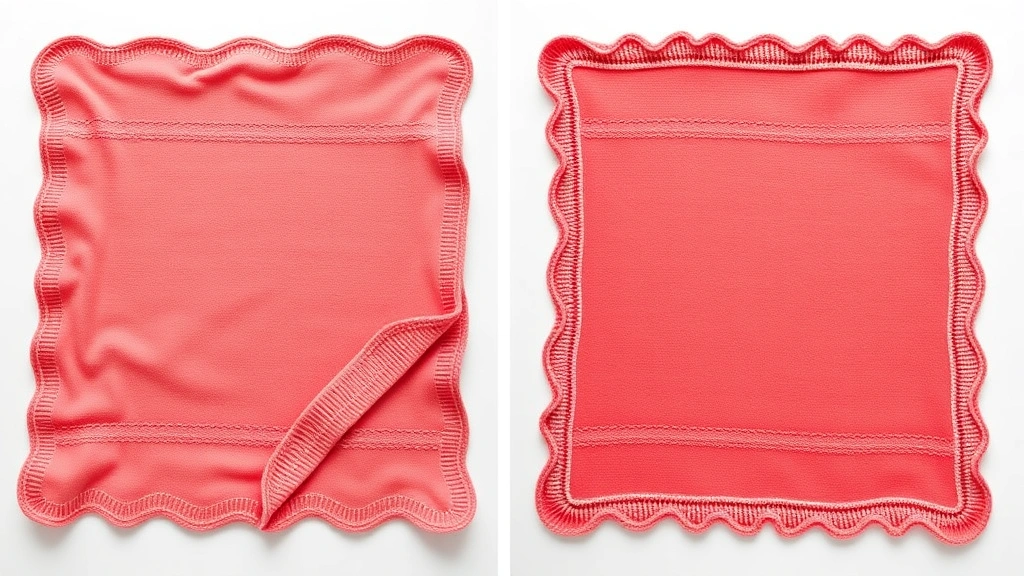
Lace work is the obvious one – those intricate patterns are designed to be opened up and stretched to show off the beautiful negative spaces. Your lace patterns will look completely different after blocking, transforming from a bunched-up mess into an elegant, airy design.
Garments are another must-block category. Whether you’re making a cardigan, sweater, or even a simple tank top, blocking ensures your pieces will fit properly and hang correctly. I learned this the hard way when I spent weeks on a beautiful cardigan that looked homemade and ill-fitting until I blocked it.
Afghans and blankets, especially those with complex stitch patterns or multiple colors, really benefit from blocking. It helps even out any tension differences between colors and makes sure your edges are straight and your corners are square.
Projects That Might Need Blocking
Amigurumi usually doesn’t need blocking since you want those pieces to hold their stuffed shape. But if you’re making flat pieces for amigurumi or working with a particularly uneven tension, a light blocking can help.
Simple scarves and cowls might not need full blocking, but a quick steam can help them drape better and look more polished. I often do a light blocking on infinity scarves to make sure they hang evenly.
Dishcloths and washcloths don’t technically need blocking, but if you want them to lay perfectly flat or if your edges are curling, a quick wet blocking session will sort that right out.
Pro tip: When in doubt, make a small swatch with your yarn and try blocking it. You’ll get a good sense of how your specific yarn responds and whether your finished project would benefit from the process.
Different Blocking Methods Explained
There are three main blocking methods, and choosing the right one depends on your yarn fiber and the type of project you’re working with. I’ve tried them all, and each has its place in my crafting routine.
Wet Blocking
This is my go-to method for most natural fiber projects. You completely soak your finished piece in cool water, gently squeeze out the excess, and then pin it to the correct dimensions while damp. It works beautifully with wool, cotton, linen, and alpaca.
Wet blocking gives you the most dramatic results because you’re fully saturating the fibers and giving them maximum opportunity to relax and reshape. It’s perfect for lace work, where you need to stretch the piece significantly to open up the pattern.
The downside is that it takes longer – you need to allow 12-24 hours for drying depending on your climate and the thickness of your yarn. But the results are worth the wait.
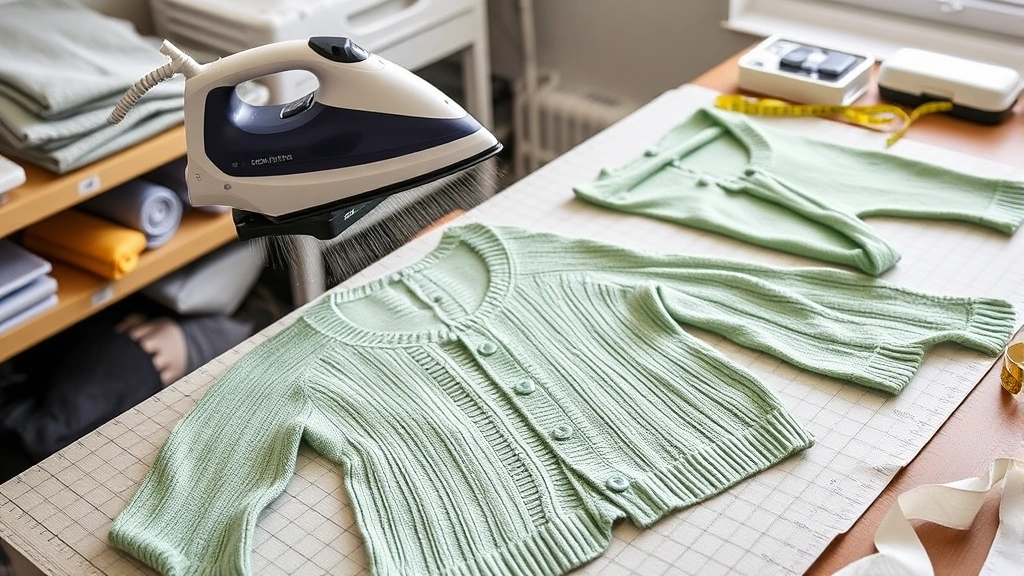
Steam Blocking
Steam blocking uses moist heat to relax the fibers without fully soaking your project. You pin your piece to the correct dimensions first, then hold a steamer or steam iron about an inch above the surface, allowing the steam to penetrate the fibers.
This method is faster than wet blocking and works well with both natural and synthetic fibers. It’s my preferred method for chunky yarn projects that would take forever to air dry, and for pieces where I only need minor adjustments.
Steam blocking is also great for synthetic yarns that might not respond well to soaking. Just be careful with the heat – some synthetic fibers can melt or become permanently deformed if they get too hot.
Spray Blocking
This is the gentlest method, where you pin your piece to the correct dimensions and then lightly mist it with water from a spray bottle. It’s perfect for delicate fibers or when you only need minor adjustments.
I use spray blocking for acrylic projects (though honestly, most acrylic doesn’t need blocking at all), or when I’m just trying to even out some slightly wonky edges on an otherwise well-behaved project.
| Method | Best For | Drying Time | Fiber Types |
|---|---|---|---|
| Wet Blocking | Lace, garments, dramatic reshaping | 12-24 hours | Wool, cotton, linen, alpaca |
| Steam Blocking | Quick fixes, chunky yarns, synthetics | 2-4 hours | Most fibers (be careful with heat-sensitive ones) |
| Spray Blocking | Minor adjustments, delicate fibers | 4-8 hours | All fibers, especially acrylics |
Essential Blocking Supplies
You don’t need to spend a fortune on blocking supplies, but having the right tools makes the process so much easier and more effective. I started with makeshift supplies and gradually upgraded as I realized how much I loved blocking.
Blocking Surface
Blocking mats are the gold standard – those interlocking foam tiles that you can configure to any size you need. KnitPicks makes excellent blocking mats that are marked with a grid, which is incredibly helpful for keeping things square and measuring as you go.
If you’re just starting out, you can absolutely use a clean towel on your bed or a large table. I blocked my first few projects on my dining room table with a thick towel underneath. It worked fine, though the measurements were more of a guessing game.
Some people swear by those cardboard dress forms you can buy at craft stores, but I find them limiting for anything beyond simple rectangular pieces.
Pins and Blocking Tools
Rust-proof T-pins are essential – regular pins will leave rust stains on your beautiful work if they get wet. I learned this lesson the hard way with a white baby blanket that ended up with little orange spots.
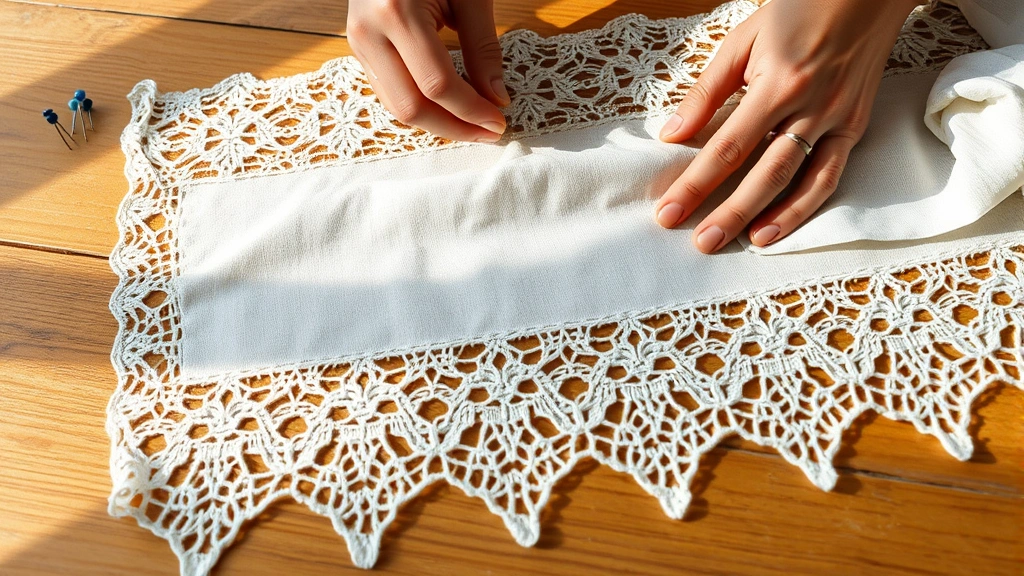
Blocking wires are amazing for long straight edges like the sides of shawls or blankets. You thread the wire through the edge stitches, then pin just the ends of the wire instead of pinning every few inches. It creates perfectly straight lines with minimal effort.
For lace work, you might want blocking combs, which are like little rakes that help you achieve even spacing when opening up intricate patterns.
Additional Supplies
A good tape measure is crucial for getting your dimensions right. I keep a flexible measuring tape in my blocking kit specifically for this purpose.
Wool wash or a gentle detergent designed for handknits will clean your piece during the wet blocking process. Eucalan is my favorite because it doesn’t require rinsing and has a lovely lanolin content that’s great for wool.
A spray bottle for spray blocking, and if you’re planning to do steam blocking, either a handheld steamer or a steam iron that you can use without touching the fabric.
Budget-friendly tip: Start with what you have at home. A clean towel, some rust-proof pins, and a spray bottle will get you started. You can always upgrade your supplies as you discover how much you enjoy the blocking process.
Step-by-Step Wet Blocking
Wet blocking might seem intimidating the first time, but it’s actually pretty straightforward once you get the hang of it. I’ll walk you through exactly how I do it, including the little tricks I’ve picked up over the years.
- Prepare Your Workspace
Set up your blocking mats or lay out clean towels on a flat surface where your project can stay undisturbed for 12-24 hours. Make sure you have enough space – lace projects especially can grow significantly when blocked. I once started blocking a shawl on my coffee table only to realize it needed to be moved to the floor because it was way bigger than expected.
- Fill Your Basin
Use cool water in a clean basin, sink, or even your bathtub for large projects. Add a small amount of wool wash if desired – about a teaspoon per gallon of water. The water should be room temperature or slightly cool, never hot, as hot water can cause wool to felt and other fibers to shrink.
- Soak Your Project
Gently submerge your finished piece in the water. Don’t agitate or wring it – just let it soak and absorb the water naturally. For most projects, 15-20 minutes is plenty. Delicate lace might need a bit longer, while sturdy cotton pieces might be ready in 10 minutes.
- Remove Excess Water
Lift your project out of the water, supporting its weight (wet yarn is heavy!). Gently squeeze – don’t wring or twist. For large pieces, I like to roll them in a clean towel and press gently to absorb excess water. You want it damp but not dripping.
- Pin to Shape
This is where the magic happens. Lay your damp project on your blocking surface and gently stretch it to the correct dimensions. Start with the corners, then work your way along the edges, pinning every few inches. For blanket patterns, pay special attention to keeping the corners square and the edges straight.
- Final Adjustments
Step back and look at your work. Adjust any areas that don’t look quite right. This is your chance to fix any wonky edges or uneven sections. Take your time – this step determines your final results.
- Let It Dry
Now comes the hardest part – waiting! Leave your project pinned until it’s completely dry. Depending on your climate and the yarn weight, this could take anywhere from 12 to 48 hours. Don’t rush it by using heat sources, as this can cause uneven drying and potentially damage some fibers.
The first time I wet blocked a project, I was convinced I was going to ruin it. But watching those stitches even out and seeing my measurements become perfect was absolutely magical. Now it’s one of my favorite parts of finishing a project.
Steam Blocking Techniques
Steam blocking is my secret weapon for quick fixes and projects that don’t need dramatic reshaping. It’s faster than wet blocking and gives you more control over the process, which is why I often prefer it for garments and accessories.
Setting Up for Steam Blocking
Pin your project to your blocking surface in the desired shape first – this is different from wet blocking where you soak first and pin second. Take your time with the pinning because once you apply steam, the fibers will set in whatever position they’re in.
Make sure your steamer or iron is ready to go. If you’re using an iron, set it to the appropriate heat setting for your fiber and make sure the steam function is working well. I prefer a handheld steamer because it’s easier to control the distance from the fabric.
The Steaming Process
Hold your steamer or iron about 1-2 inches above the fabric surface – never let it touch the yarn directly. Work in sections, allowing the steam to penetrate the fibers for about 10-15 seconds per area. You’ll see the yarn relax and conform to its pinned shape almost immediately.
For synthetic yarns, be extra careful with the heat. Some acrylics can melt or become permanently deformed if they get too hot. Test on a corner or swatch first if you’re unsure.
After steaming each section, let it cool completely before moving to the next area. The cooling process is when the fibers actually set in their new shape, so don’t rush this step.
Safety tip: Steam is hot and can cause burns. Keep your hands and arms away from the steam path, and make sure pets and children are out of the area while you’re working.
Steam blocking works particularly well for cardigan patterns where you need the pieces to lay flat for seaming but don’t want to deal with the long drying time of wet blocking.
Common Blocking Problems and Solutions
Even experienced crocheters run into blocking issues sometimes. I’ve made plenty of mistakes over the years, and I want to save you from some of the frustration I’ve experienced.
Over-Stretching Your Project
This is probably the most common beginner mistake – getting excited about blocking and stretching your project way beyond its intended dimensions. I once turned a cozy baby blanket into something that looked like a bedsheet because I got carried away with the stretching.
The fix: Always check your pattern for finished dimensions, and measure carefully as you pin. If you realize you’ve over-stretched, you can usually re-wet the piece and block it again to the correct size.
Uneven Drying and Permanent Creases
Sometimes projects develop weird creases or uneven areas during drying, especially if they’re folded or bunched up somewhere. This usually happens when you don’t have enough space or when the project shifts during drying.
Prevention is key here – make sure you have adequate space and that your project can lay completely flat. If you do end up with creases, you can usually steam them out or re-block the affected area.
Color Bleeding
This is every crocheter’s nightmare – you wet block your beautiful multicolor project and the colors start running into each other. Always test your yarn for colorfastness before blocking, especially with hand-dyed or dark-colored yarns.
If you’re working with variegated yarns or multiple colors, consider doing a test swatch first. If colors do bleed, sometimes you can minimize the damage by immediately rinsing in cold water, but prevention is definitely better than trying to fix it after the fact.
Projects That Won’t Hold Their Shape
Some synthetic yarns, particularly cheap acrylics, just don’t respond well to blocking. They might look better temporarily, but they bounce right back to their original shape once you handle them.
This is one reason why I always recommend investing in quality yarn for projects you plan to keep or gift. Natural fibers and higher-quality synthetic blends hold their blocked shape much better than bargain-bin acrylics.
Remember: blocking is supposed to enhance your project, not stress you out. If something goes wrong, take a deep breath. Most blocking mistakes can be fixed, and even if they can’t, you’ve learned something valuable for next time.
Common Questions
How long does blocking take?
The actual blocking process takes 30-60 minutes depending on your project size, but drying time varies significantly. Wet blocking requires 12-24 hours for drying, steam blocking needs 2-4 hours, and spray blocking takes 4-8 hours. Plan accordingly, especially if you’re working on a gift with a deadline.
Can I block acrylic yarn projects?
Yes, but with limitations. Acrylic doesn’t respond to blocking as dramatically as natural fibers, and some cheap acrylics won’t hold their blocked shape long-term. Steam blocking or spray blocking work better than wet blocking for acrylics. Higher-quality acrylic blends typically block better than pure budget acrylics.
Do I need to block every crochet project?
No, not every project needs blocking. Simple items like dishcloths, basic scarves, or amigurumi usually don’t require it. However, garments, lace work, blankets, and anything with complex stitch patterns will look significantly better when blocked. When in doubt, block it – you’ll rarely regret the extra effort.
What’s the difference between blocking wires and regular pins?
Blocking wires create perfectly straight edges with minimal pinning. You thread the wire through your edge stitches, then pin just the ends of the wire rather than pinning every few inches. This is especially helpful for long edges on shawls or blankets. Regular T-pins are used for curves, corners, and areas where you need more precise control.
Can I use my regular iron for steam blocking?
Yes, but never let the iron touch your crochet work directly. Hold it 1-2 inches above the surface and use only the steam function. Make sure your iron produces good, consistent steam. A handheld steamer often works better because it’s designed to be held away from the surface.
How do I know if my yarn is colorfast before blocking?
Test a small swatch or check an inconspicuous area by dabbing it with a damp white cloth. If any color transfers to the cloth, your yarn may bleed during wet blocking. Consider steam blocking or spray blocking instead, or use cold water and work quickly if you must wet block.
My blocked project looks great but loses its shape when I wear it. Why?
This usually happens with synthetic yarns or when a project is over-stretched during blocking. Natural fibers hold their blocked shape better than synthetics. Also, make sure you’re blocking to the pattern’s specified dimensions, not beyond them. Some relaxation is normal with wear, but dramatic shape loss indicates the blocking was too aggressive.
Should I block individual pieces before seaming a garment?
Absolutely! Block all pieces to their specified dimensions before sewing them together. This ensures proper fit and makes seaming much easier. After seaming, you might want to lightly steam the seam areas to help them lay flat, but the major blocking should happen before assembly.
Blocking really is one of those techniques that separates handmade items from truly professional-looking finished pieces. I know it seems like an extra step when you’re excited to finish your project, but I promise you’ll love the results. That first time you see your stitches even out and your edges straighten, you’ll understand why experienced crocheters swear by this process.
Start with a simple project – maybe a dishcloth or small swatch – just to get comfortable with the process. Once you see the difference blocking makes, you’ll find yourself planning it into every project timeline. Your future self (and anyone lucky enough to receive your handmade gifts) will thank you for taking this extra step to make your beautiful crochet work look absolutely stunning.
Happy blocking, and remember – even if it doesn’t go perfectly the first time, you’re learning a skill that will make every future project look more polished and professional. That’s definitely worth the effort in my book.