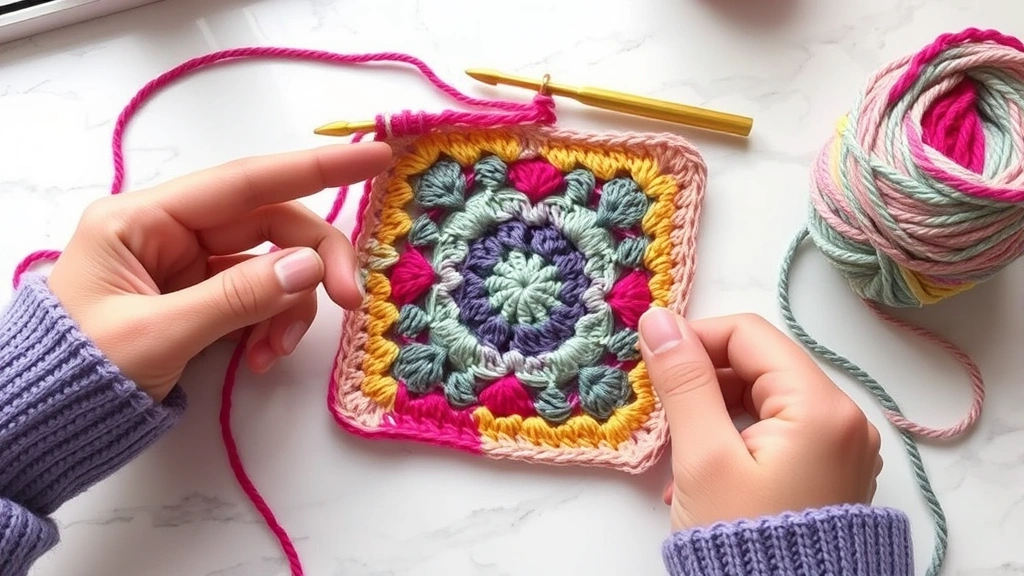
You know that feeling when you’re scrolling through Pinterest at 11 PM and suddenly you’re convinced you need to make a granny square blanket? Yeah, I’ve been there too. But here’s the thing about granny squares – they’re simultaneously the most forgiving and most addictive stitch pattern in crochet. I’ve made everything from coasters to king-size blankets using variations of this classic motif, and I’m still discovering new ways to play with the basic structure.
The beauty of granny squares lies in their flexibility. You can whip up a single square in about 15 minutes using worsted weight yarn, or spend weeks creating an intricate sampler afghan with dozens of different square patterns. I’ve seen beginners master their first granny square in an afternoon, and advanced crocheters still reaching for this reliable pattern when they need something portable and satisfying.
What makes granny squares so special isn’t just their versatility – it’s how they teach you fundamental crochet skills without feeling like homework. Working in rounds, changing colors, joining motifs, and understanding gauge all become second nature when you’re focused on creating these little geometric gems. Plus, there’s something deeply satisfying about watching a pile of individual squares transform into a cohesive finished project.
Quick Answer
A traditional granny square starts with a magic ring, uses double crochet clusters separated by chain spaces, and grows in rounds with corner increases. Most squares use worsted weight yarn and a 5mm (H) hook, taking about 15-20 minutes per square for beginners.

The Basic Granny Square Pattern
Let me start with the foundation – understanding what makes a granny square tick. The traditional granny square is built on a simple concept: clusters of double crochet stitches separated by chain spaces, with strategic increases at the corners to keep your work flat and square.
The magic happens in those corner spaces. Each round, you’ll work two cluster groups into each corner space with a chain-2 between them. This creates the 90-degree angles that give your square its shape. The sides grow by adding single cluster groups into the chain spaces from the previous round.
Here’s what a basic 4-round granny square looks like in terms of structure:
- Round 1: Magic ring with 4 corner clusters
- Round 2: Corner increases plus side clusters
- Round 3: More corner increases, 2 side clusters per side
- Round 4: Continued growth with 3 side clusters per side
The beauty of this pattern is its mathematical precision. Each round adds exactly one more cluster group per side, which means your square grows predictably. This makes it perfect for planning projects where you need consistent sizing.
Pro Tip: Count your cluster groups, not individual stitches. A traditional granny square should have the same number of cluster groups on each side, plus the two corner clusters.
Choosing Your Materials
Your material choices can make or break your granny square experience. I’ve learned this the hard way after frogging more squares than I care to admit because I chose the wrong yarn-and-hook combination.
Yarn Weight Recommendations
| Yarn Weight | Hook Size | Square Size (4 rounds) | Best For |
|---|---|---|---|
| DK (3) | 4.5mm (G) | About 3 inches | Baby items, delicate projects |
| Worsted (4) | 5mm (H) | About 4 inches | Blankets, bags, general use |
| Chunky (5) | 6mm (J) | About 5 inches | Quick projects, thick blankets |
For your first granny squares, I strongly recommend starting with worsted weight yarn and a 5mm hook. This combination gives you good stitch definition without being too tight or too loose. Lion Brand Vanna’s Choice or Red Heart Super Saver are excellent budget-friendly options that hold up well to the handling that comes with learning.
When working with chunky yarn projects, you’ll want to size up your hook to maintain the proper drape. The chain spaces need room to breathe, especially if you’re planning to join squares later.
Color Planning
Here’s where granny squares get really fun. You can work each round in a different color, stick to a monochromatic scheme, or create complex color patterns across multiple squares. I keep a yarn stash organized by color families specifically for granny square projects.
Start with a simple two or three-color palette for your first project. You can always get more adventurous once you’ve mastered the basic technique.
Step-by-Step Instructions
Let me walk you through creating your first traditional granny square. I’m assuming you’re comfortable with basic stitches, but I’ll explain the tricky parts that often trip up beginners.
- Create the Magic Ring
Make a magic ring (adjustable ring) and chain 3. This chain-3 counts as your first double crochet throughout the pattern. If you’re not comfortable with magic rings yet, you can chain 4 and join with a slip stitch, but the magic ring creates a tighter, neater center.
- Work Round 1
Into the ring: *2 double crochet, chain 2* – repeat 3 more times. You should have 4 groups of 3 double crochets (remember, that first chain-3 counts as a DC) with chain-2 spaces between them. Join with slip stitch to the top of beginning chain-3. Pull magic ring tight.
- Start Round 2
Slip stitch into the next chain-2 space. Chain 3 (counts as first DC), then work 2 DC, chain 2, 3 DC all in the same corner space. This creates your first corner of round 2.
- Complete Round 2
*Chain 1, move to next corner space, work (3 DC, chain 2, 3 DC)* – repeat for remaining 3 corners. Chain 1, join to beginning chain-3.
- Continue Building
For each subsequent round, you’ll work corner increases (3 DC, chain 2, 3 DC) in corner spaces and single cluster groups (3 DC) in side spaces, with chain-1 between all groups.
The key to neat granny squares is consistent tension and proper stitch placement. I always work into the chain spaces, not into individual stitches, which keeps the fabric flexible and makes color changes cleaner.
Tension Tip: Your chain spaces should be loose enough to easily insert your hook, but not so loose that they create gaps. Practice will help you find that sweet spot.
Color Change Techniques
Changing colors in granny squares is where the magic really happens, but it’s also where beginners often struggle. The good news is that once you learn the proper technique, color changes become automatic.
The Invisible Join Method
This is my preferred method for changing colors between rounds. Instead of completing your last double crochet of the round with the old color, stop with two loops on your hook, then yarn over with the new color and pull through. This creates a seamless transition.
Here’s the step-by-step:
- Work your last double crochet until you have 2 loops left on hook
- Drop the old color, pick up new color
- Yarn over with new color and pull through both loops
- Chain 3 with new color to begin next round
When working with color work techniques, I always cut my yarn leaving about a 6-inch tail for weaving in later. Don’t be tempted to carry colors up the side – it creates bulk and can show through your work.
Managing Multiple Colors
If you’re working a complex color pattern, organization is key. I use small bowls or yarn bobbins to keep different colors separated and prevent tangling. When planning rainbow patterns, I lay out my color sequence before starting so I don’t have to make decisions mid-project.
Pro tip: Take a photo of your color layout with your phone. It’s easier than trying to remember a complex sequence, especially if you’re working on the project over several days.
Troubleshooting Common Problems
Let’s talk about the issues that make crocheters want to throw their granny squares across the room. I’ve dealt with all of these, and there are usually simple fixes.
Squares That Aren’t Square
If your “squares” look more like rectangles or parallelograms, you’re likely having tension issues or miscounting stitches. Count your cluster groups on each side – they should be equal. Also check that you’re working corner increases in every corner space.
Sometimes the problem is simpler: you might be working too tightly on one side or consistently skipping the same type of stitch. I’ve found that taking breaks helps maintain consistent tension, especially during long crafting sessions.
Curling or Ruffling
Squares that curl up at the edges usually indicate your tension is too tight, while ruffling suggests it’s too loose. This is where understanding gauge importance really pays off. Don’t be afraid to start over with a different hook size if your squares consistently misbehave.
Gaps or Holes
Unwanted holes usually happen when chain spaces are too large or when you accidentally skip stitches. Make sure you’re working into chain spaces consistently, not sometimes into spaces and sometimes into stitches.
Blocking Tip: Many minor shape issues can be resolved with proper blocking. Pin your finished squares to measurements and steam lightly or dampen and let dry.
Popular Variations and Patterns
Once you’ve mastered the basic granny square, a whole world of variations opens up. These aren’t just different for the sake of being different – each variation serves specific purposes or creates different visual effects.
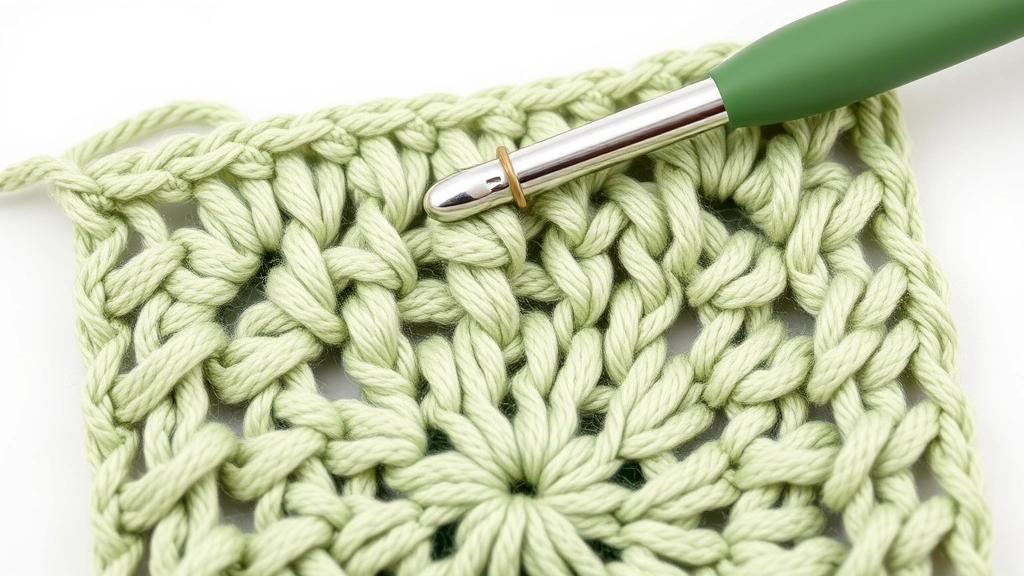
Solid Granny Square
Instead of chain spaces between clusters, solid granny squares use single crochet stitches to fill the gaps. This creates a denser fabric that’s perfect for items that need structure, like bags or placemats. The technique is similar, but you’ll work single crochet stitches into the chain spaces of the previous round.
Flower Granny Square
This variation starts with a flower motif in the center, then transitions to traditional granny square construction in the outer rounds. It’s particularly beautiful in spring projects where you want a garden-inspired look.
Circle in a Square
Starting with rounds of double crochet worked in a circle, then transitioning to corner increases in later rounds creates this hybrid shape. It’s trickier than basic granny squares but creates stunning geometric effects.
| Variation | Difficulty | Best Use | Yarn Recommendation |
|---|---|---|---|
| Traditional Granny | Beginner | Blankets, scarves | Any weight |
| Solid Granny | Beginner+ | Bags, structured items | Worsted or heavier |
| Flower Center | Intermediate | Decorative projects | DK or worsted |
| Circle in Square | Intermediate | Modern blankets | Worsted weight |
Joining Your Squares
This is where many granny square projects live or die. Poor joining can make beautiful individual squares look sloppy, while good joining creates a professional, cohesive finished piece.
Whip Stitch Join
The most straightforward method involves placing squares right sides together and whip stitching through both layers. It’s strong and relatively quick, but creates a ridge on the wrong side that some people find bulky.
Single Crochet Join
Working single crochet stitches through both squares creates a flat, strong seam. I prefer this method for baby blankets because it lies flat and doesn’t create uncomfortable ridges.
Join-as-You-Go
This technique involves joining squares during the final round of each square, eliminating separate seaming. It’s efficient but requires careful planning and consistent square sizing. The Craft Yarn Council has excellent resources on different joining methods.
Planning Tip: Lay out all your squares before joining to ensure you’re happy with the color distribution. It’s much easier to rearrange squares than to undo joined seams.
Project Ideas and Planning
Granny squares are incredibly versatile, but different projects require different approaches. Let me share some insights I’ve gained from various granny square projects over the years.
Blanket Projects
For a throw blanket, plan on 8-12 squares across and 10-14 squares down, depending on your square size. A 4-inch square blanket using this formula will measure approximately 32-48 inches by 40-56 inches – perfect for couch snuggling.
Yarn requirements vary, but for a worsted weight throw using 4-inch squares, expect to need 1,200-1,800 yards total. I always buy extra yarn because running out mid-project with discontinued colors is heartbreaking.
Wearable Projects
Granny square garments require more planning than blankets. You’ll need to consider ease, drape, and how the squares will lay on the body. Sweater patterns using granny squares often call for partial squares or specific joining methods to create proper shaping.
Home Decor Items
Single granny squares make excellent coasters, trivets, or decorative elements. For these projects, consider using cotton yarn for easy care and heat resistance. Ravelry has thousands of free granny square patterns for home decor items.
Start small for your first granny square project. A set of coasters or a small wall hanging lets you practice the technique without committing to a massive blanket project.
Common Questions
How long does it take to make a granny square?
A basic 4-round granny square takes most beginners 15-20 minutes, while experienced crocheters can finish one in 8-10 minutes. Larger squares or complex color patterns will take longer. I can usually complete about 3-4 squares per hour when I’m in a rhythm.
How many granny squares do I need for a blanket?
It depends on your square size and desired blanket dimensions. For 4-inch squares: a baby blanket needs about 48 squares (6×8), a throw needs 80-100 squares (8×10 or 10×10), and a queen-size blanket needs about 225 squares (15×15). Always make a few extra squares for potential repairs or size adjustments.
Can I use different yarn weights in the same project?
Generally, no. Different yarn weights create different square sizes, which makes joining difficult. If you want varied textures, stick to the same weight but experiment with different fiber contents – cotton, wool, and acrylic in the same weight category can work together beautifully.
Why do my granny squares curl at the edges?
Curling usually indicates tension that’s too tight. Try using a larger hook or consciously loosening your grip on the yarn. Sometimes switching to a more comfortable hook helps maintain consistent, relaxed tension.
How do I fix a mistake in the middle of a granny square?
For minor mistakes like a missed stitch, you can often fudge it in the next round by adjusting your stitch placement slightly. For major errors, it’s usually easier to frog back to the mistake rather than trying to work around it. Trust me, the time spent fixing it properly is worth it.
What’s the best way to weave in ends on granny squares?
Weave ends through the back of several stitches in the same color, change direction, and weave through a few more stitches. Trim close to the fabric. For squares that will get heavy use, I sometimes split the yarn and weave each ply separately for extra security.
Can I make granny squares without a magic ring?
Yes! Chain 4, join with slip stitch to form a ring, then work your first round into the center of the ring. The center will be slightly more open than with a magic ring, but it’s perfectly acceptable and some people find it easier.
How do I keep track of rounds in complex color patterns?
I use stitch markers to mark the beginning of each round and keep a simple tally on paper or my phone. For complex patterns, taking progress photos helps me remember where I am in the sequence. Some crocheters use row counters, but I find simple hash marks work just as well.
Granny squares have been bringing joy to crocheters for generations, and there’s a reason they’ve stood the test of time. They’re forgiving enough for beginners, versatile enough for advanced projects, and satisfying enough to keep you coming back for more. Whether you’re making your first square or your thousandth, remember that each one is a small meditation in yarn and rhythm.
The beauty of granny squares isn’t just in their geometric perfection – it’s in their ability to transform simple materials into something both functional and beautiful. So grab your hook, pick your favorite yarn, and start creating. Your first square might not be perfect, but it’ll be yours, and that’s what makes it special.