You know that moment when you’re halfway through a gorgeous granny square blanket and suddenly notice one corner is wonky? Or when you’ve spent hours on what should be a perfect square, only to end up with something that looks more like a trapezoid? Trust me, I’ve been there. After making hundreds of granny squares over the years, I’ve learned that the difference between a sad, wobbly square and a crisp, professional-looking one often comes down to just a few key techniques.
The thing is, most crochet patterns assume you already know how to make your squares perfectly square. They’ll tell you to “work in rounds” and “join with slip stitch,” but they skip the crucial details that actually make the difference. Like how your tension in that final round can make or break the whole piece, or why some squares naturally curl while others lay flat.
I remember my first attempt at a granny square afghan – every single square was a different size, and when I tried to join them, the whole thing puckered like a ruffled potato chip. It was frustrating enough to make me want to give up on granny squares entirely. But here’s what I wish someone had told me back then: making perfect squares isn’t about magic or natural talent. It’s about understanding a few fundamental principles and having the right techniques in your toolkit.
Quick Answer
Perfect crochet squares require consistent tension, proper stitch placement, and strategic blocking. The key is maintaining even spacing in your corner chains and ensuring your final round creates true 90-degree angles through careful stitch distribution.
Foundation and Tension Fundamentals
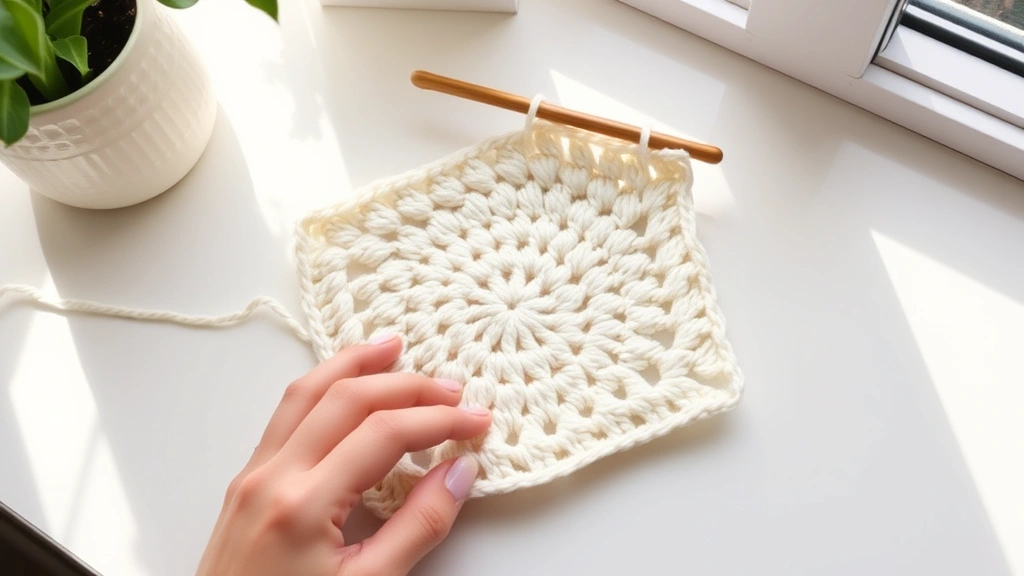
The foundation of any perfect square starts with your very first chain and magic ring. I used to think the beginning didn’t matter much since it gets buried in the center, but boy was I wrong. Your starting tension sets the tone for everything that follows.
When working with different yarn weights, I’ve found that worsted weight (size 4) yarn with a 5.5mm (I/9) hook gives the most forgiving results for beginners. The stitches are large enough to see clearly, but not so loose that they get sloppy. If you’re using DK weight yarn, drop down to a 4.5mm (G/7) hook to maintain similar stitch definition.
Here’s something most patterns don’t tell you: your foundation chain or magic ring should feel slightly snug. Not tight enough to pucker, but definitely not loose. I test this by gently tugging the ring after I’ve made it – it should hold its shape without distorting.
Pro tip: Count your foundation chains out loud, especially for the first few squares. I know it sounds silly, but miscounting at the beginning is one of the most common reasons squares end up wonky.
Tension consistency becomes crucial once you start your first round of double crochets. Each stitch should feel similar as you pull the yarn through. If you’re a tight crocheter (like me), you might need to consciously relax your grip. If you tend to be loose, focus on maintaining a gentle but consistent tension on your working yarn.
Establishing Your Rhythm
I always tell new crocheters to work their first few squares slowly and deliberately. Speed comes with practice, but consistency comes with mindful attention to each stitch. Pay attention to how your hook feels as it goes through each loop – that tactile feedback is your best guide for maintaining even tension.
Mastering Corner Construction
Corners are where most squares go wrong, and honestly, I understand why. The traditional “chain 2, skip 2 stitches” corner method that many patterns use can create either too much or too little space, depending on your natural tension and the yarn you’re using.
For truly square corners, I’ve developed what I call the “measured corner” technique. Instead of blindly following the pattern’s corner instructions, I actually measure my work as I go. After completing each side of a round, I lay my work flat and check that each side measures the same length. This might seem obsessive, but it saves hours of frustration later.
When working traditional granny squares, the corner chain-2 spaces need to be positioned exactly at the 45-degree angle points. I mark these spots with stitch markers on my first round, then make sure each subsequent round’s corners align perfectly with those markers.
| Yarn Weight | Corner Chain Count | Skip Stitches | Best Hook Size |
|---|---|---|---|
| Fingering (1) | Chain 1 | Skip 1 | 3.25mm (D/3) |
| Sport (2) | Chain 2 | Skip 1 | 4mm (G/6) |
| DK (3) | Chain 2 | Skip 2 | 4.5mm (G/7) |
| Worsted (4) | Chain 2 | Skip 2 | 5.5mm (I/9) |
| Bulky (5) | Chain 3 | Skip 2 | 6.5mm (K/10.5) |
The key insight that changed my corner game was realizing that the corner chain-space isn’t just about creating a gap – it’s about creating the exact right amount of ease to allow the square to lay flat while maintaining sharp 90-degree angles.
Testing Your Corner Technique
Here’s a simple test I use: after completing two rounds of any square, I lay it flat and gently stretch it into shape. The corners should form crisp points without any pulling or puckering along the sides. If the sides bow inward, your corners are too tight. If they bow outward, your corners are too loose.
Measuring and Checking as You Go
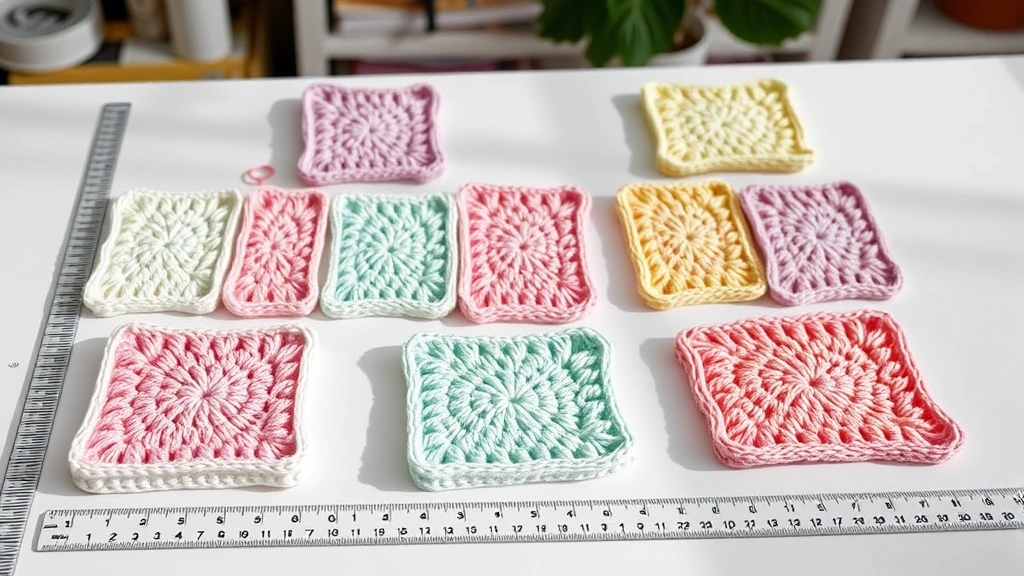
I learned this lesson the hard way after making an entire blanket where every square was a slightly different size. Now I measure obsessively, and my projects turn out so much better. For most projects, I aim for squares that measure exactly the same – usually 4 inches, 5 inches, or 6 inches, depending on the final project size.
The best time to measure is after completing each round, while the square is still on your hook. Lay it flat (don’t stretch it) and measure from corner point to corner point along each edge. All four sides should be identical. If one side is even 1/8 inch different, I’ll often frog back and adjust my tension for that section.
When working on baby blanket squares, consistency becomes even more critical because the finished project will be handled and washed frequently. Uneven squares will create stress points that can lead to distortion over time.
For larger squares (6 inches or more), I also check the diagonal measurements. A true square should have equal diagonals, and this measurement can reveal subtle shaping issues that aren’t obvious when just looking at the sides. The diagonal should measure about 1.4 times the length of one side – so a 4-inch square should have roughly 5.6-inch diagonals.
Creating a Measuring System
I’ve found it helpful to establish a measuring routine for each project. For example, when making squares for an afghan pattern, I measure after rounds 2, 4, and the final round. This catches problems early while they’re still easy to fix.
Troubleshooting Common Issues
Let’s talk about the problems that make us want to throw our projects across the room. I’ve encountered pretty much every square-related disaster you can imagine, and most of them fall into a few predictable categories.
The most common issue is the “saddle” shape – where opposite sides of your square bow inward, making it look like a horse’s saddle. This usually happens when your corner chain-spaces are too small or when you’re not maintaining consistent tension across the sides. The fix is to increase your corner chains by one (so if you were chaining 2, try chaining 3) and pay extra attention to keeping your side stitches relaxed.
Then there’s the opposite problem: squares that bow outward and won’t lay flat. This typically means your corners are too loose or you’re adding too many stitches along the sides. Double-check your stitch count against the pattern, and consider reducing your corner chains or working them more tightly.
Here’s something that took me years to figure out: sometimes the problem isn’t your technique – it’s your yarn. Some yarns have more stretch or memory than others, which can affect how squares behave even when your technique is perfect.
Curling corners are another frustration, especially when working with cotton yarn. Cotton has less give than acrylic, so it’s less forgiving of tension variations. The solution is often to go up one hook size and work with slightly looser tension throughout the entire square.
The Twist Test
When I’m troubleshooting a problematic square, I do what I call the “twist test.” I hold the square by two opposite corners and give it a gentle twist. A well-made square will maintain its shape and return to flat when released. If it stays twisted or develops permanent creases, there are tension issues that need addressing.
Blocking and Finishing Techniques
Even perfectly crocheted squares usually benefit from blocking, and I’ll be honest – I resisted this step for years because it seemed like extra work. But blocking transforms good squares into great squares, and once you see the difference, you’ll never skip it again.
For most squares, I use the spray-blocking method. I pin each square to my blocking mats (foam tiles work great for this), making sure all corners are at true 90-degree angles and all sides are the same length. Then I spray with water until the square is damp but not soaking, and let it dry completely before unpinning.
The key is using enough pins. I use at least 12 pins per square – one at each corner and two or three along each side. This prevents the edges from curving between pin points. T-pins work best because they’re long enough to go through the square and into the blocking surface securely.
When working with acrylic yarn, you can actually use steam blocking to set the stitches permanently. I hold a steam iron about 2 inches above the pinned square and give it several bursts of steam, then let it cool completely before unpinning. This technique works amazingly well for setting the shape of acrylic squares.
Blocking Multiple Squares
When I’m making a large project with many squares, I block them in batches. I’ll make 6-8 squares, then block them all at once. This ensures consistency across the entire project and makes the blocking process more efficient.
Square Joining Methods
The way you join your squares can make or break the overall appearance of your project. I’ve tried every joining method imaginable, and each has its place depending on the project and the look you’re going for.
For invisible joins that create a seamless appearance, I prefer the mattress stitch method. You work from the wrong side, catching only the back loops of corresponding stitches from each square. This creates a join that’s nearly invisible from the right side and adds minimal bulk to the seams.
When working on projects where the joins will be decorative elements, like in some join-as-you-go methods, I use a contrasting color for the joining yarn. This turns the seams into design features rather than trying to hide them.
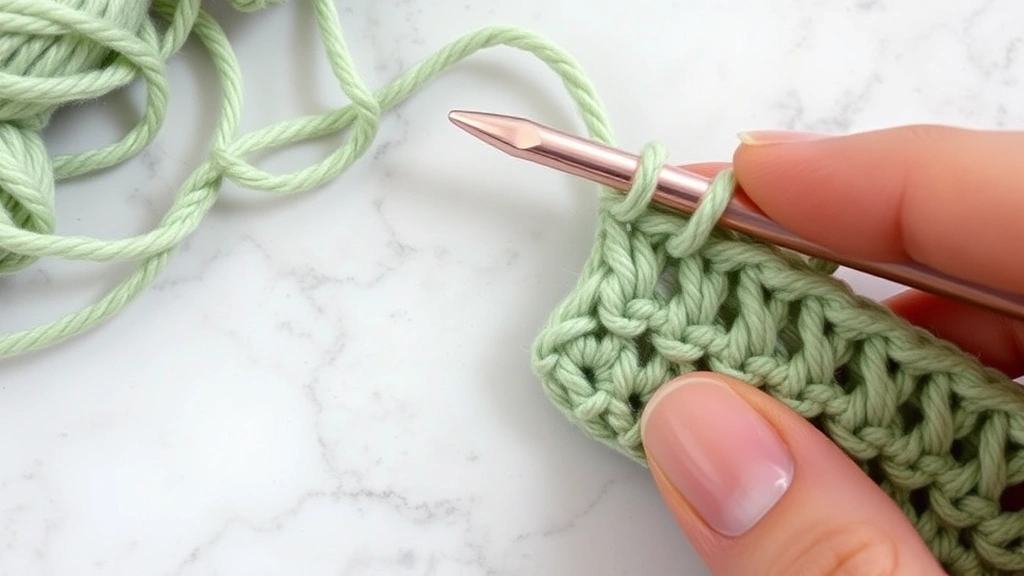
The flat slip stitch join is my go-to for everyday projects. It’s strong, relatively fast, and creates a nice flat seam that won’t add bulk under heavy use. I work with both squares facing right side up, inserting my hook through both layers and working slip stitches along the edge.
- Align Your Squares
Place squares right sides together, matching stitch for stitch along the edge to be joined. Use pins if needed to keep alignment perfect.
- Insert Hook Through Both Layers
Working from right to left, insert your hook through the back loop of the first stitch on both squares simultaneously.
- Work Slip Stitches
Pull yarn through both loops and the loop on your hook in one motion. Continue across the entire edge, checking alignment frequently.
- Secure and Weave Ends
Fasten off securely and weave in ends along the seam line for extra security.
Yarn and Hook Considerations
Not all yarn and hook combinations are created equal when it comes to making perfect squares. Over the years, I’ve developed preferences based on how different materials behave and what results they produce.
For beginners, I always recommend starting with a smooth, worsted-weight acrylic yarn like Lion Brand Vanna’s Choice or Red Heart Super Saver. These yarns are forgiving, affordable, and have consistent thickness that makes it easier to maintain even tension. They also block well and hold their shape after washing.
Cotton yarns create beautiful, crisp squares but require more attention to tension. Cotton has less stretch than acrylic, so any tension variations show up more obviously in the finished work. When using cotton, I typically go up one hook size from what I’d use with acrylic to compensate for the reduced give.
Hook material makes a difference too. I prefer aluminum hooks for most square-making because they glide smoothly through stitches and help maintain consistent tension. Plastic hooks can catch on yarn fibers, while wooden hooks sometimes create too much friction for smooth work flow.
| Yarn Type | Best Hook Material | Tension Notes | Blocking Method |
|---|---|---|---|
| Acrylic | Aluminum | Forgiving, consistent | Steam or spray |
| Cotton | Aluminum or steel | Less stretch, size up hook | Wet blocking preferred |
| Wool | Wood or bamboo | Natural give, blocks beautifully | Wet blocking only |
| Bamboo | Aluminum | Smooth, similar to cotton | Spray blocking |
When working with variegated or self-striping yarns, pay extra attention to how the color changes affect your perception of square shape. Sometimes a perfectly square piece can look wonky because of how the colors fall. In these cases, I rely on measurements rather than visual assessment.
Hook Size Adjustments
I keep multiple hook sizes handy when making squares because sometimes you need to adjust mid-project. If your squares are coming out too small, go up a hook size. If they’re too large or loose, size down. Don’t be afraid to make these adjustments – consistency across your project is more important than sticking rigidly to the pattern’s suggested hook size.
Common Questions
Why do my granny squares curl at the corners even after blocking?
Curling corners usually indicate that your corner chain-spaces are too tight for the yarn you’re using. Try increasing your corner chains by one (if you were chaining 2, try 3) or work the corner chains with slightly looser tension. Cotton yarns are especially prone to this issue and often need an extra chain in each corner compared to acrylic yarns.
How do I fix squares that are different sizes in the same project?
First, measure all your squares and sort them by size. Squares that are within 1/4 inch of each other can often be blocked to match. For larger discrepancies, you can add an extra round to smaller squares using the same stitch pattern, or carefully remove rounds from larger squares. Prevention is easier though – measure every few squares as you work.
What’s the best way to keep track of rounds when making multiple squares?
I use a simple tally system in a notebook, marking each completed round with a tick mark. For larger projects, I also use removable stitch markers to mark my place if I need to put the work down mid-round. Some crocheters prefer row counters or smartphone apps, but I find the physical act of making marks helps me stay focused.
Can I make squares ahead of time and join them months later?
Absolutely! I actually prefer this approach for large projects. Store completed squares flat in a box or large envelope, separated by tissue paper if you’re using light colors. Just make sure to block them before joining – squares can shift shape slightly over time, and blocking ensures they’ll all match perfectly when you’re ready to assemble.
How much yarn do I need for a 4-inch granny square?
A typical 4-inch granny square made with worsted weight yarn uses approximately 15-20 yards, depending on how many rounds you work. For a baby blanket requiring 48 squares (6×8 layout), plan on about 800-1000 yards total, plus extra for joining and borders. Always buy an extra skein to account for dye lot variations and tension differences.
Should I weave in ends as I go or wait until all squares are complete?
I’m firmly in the “weave as you go” camp, especially for projects with many squares. It’s much easier to handle ends when you’re working with individual squares rather than trying to manage them in a large, joined project. Plus, you can check that your ends are secure before moving on to the next square.
Why do some of my squares look perfect while others from the same pattern look wonky?
This is usually a tension consistency issue, often related to your energy level or environment when crocheting. I notice my tension tends to be tighter when I’m stressed or tired, and looser when I’m relaxed. Try to crochet squares under similar conditions, and always measure each one. If you notice significant variations, take a break and come back when you can focus better.
Is it worth investing in expensive hooks for square-making?
Good hooks definitely make the process more enjoyable, but they won’t magically fix technique issues. If you’re just starting out, a basic aluminum hook set will serve you well. As you advance and start working on larger projects, ergonomic hooks can reduce hand fatigue. I’d prioritize consistent practice and good yarn over expensive tools initially.
Making perfect crochet squares is one of those skills that seems mysterious until you understand the underlying principles. Once you grasp the importance of consistent tension, proper corner construction, and regular measuring, you’ll find that your squares improve dramatically. The key is being patient with yourself during the learning process and not being afraid to frog work that isn’t meeting your standards.
Remember, every experienced crocheter has made wonky squares – it’s part of the learning journey. The difference is that we’ve learned to recognize problems early and have developed the techniques to fix them. Start with simple projects, measure obsessively, and don’t skip the blocking step. Your future self will thank you when you’re joining perfect squares into a gorgeous finished project.
Now grab your favorite yarn and hook, and start practicing. Those perfect squares are waiting for you to create them!