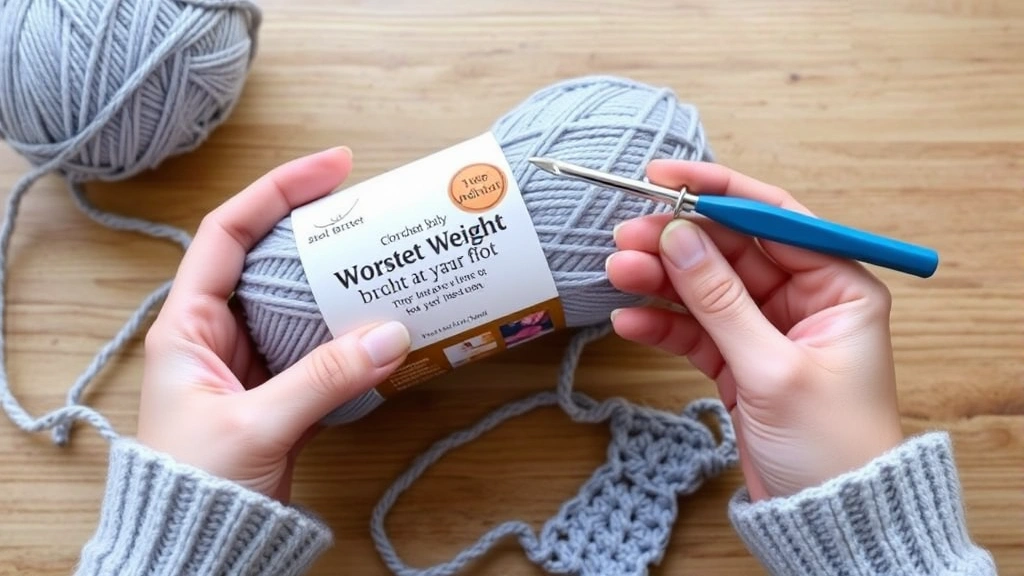
Last week, I was helping my neighbor Sarah with her first amigurumi project when she asked me something I hear constantly: “How do I know which crochet hook to use?” She was holding a package of worsted weight yarn in one hand and three different hooks in the other, looking completely overwhelmed. It’s honestly one of the most common questions I get, and I totally get why it’s confusing.
Here’s the thing – choosing the right hook isn’t just about following the yarn label (though that’s a good starting point). It’s about understanding what you’re making, what effect you want to achieve, and how your personal crochet style affects everything. Some of us are tight crocheters, others are loose, and that makes a huge difference in hook selection.
I’ve been crocheting for over fifteen years, and I still sometimes grab the wrong hook initially. But I’ve learned some reliable methods to figure out the best size quickly, and I want to share those with you. Whether you’re making a delicate lace shawl or a sturdy market bag, getting your hook size right will make your project look professional and feel satisfying to work on.
Quick Answer
Start with the hook size recommended on your yarn label, then make a gauge swatch. If your stitches are too tight, go up a hook size; if they’re too loose, go down a size. The final choice depends on your project type and desired fabric feel.
Understanding Hook Sizes and Systems
Let’s start with the basics – crochet hooks come in different sizing systems, and this confuses a lot of people. In the US, we use letters and numbers (like H/8 or J/10), while metric sizing uses millimeters (5mm, 6mm). Most hooks today show both systems, which is super helpful.
The smaller the number or earlier the letter, the smaller the hook. So a B/1 (2.25mm) is much smaller than a P/15 (10mm). I always recommend learning the metric system because it’s more precise and used internationally. When someone asks me about crochet hook sizes, I tell them to think in millimeters – it makes everything clearer.
| US Size | Metric (mm) | Common Uses |
|---|---|---|
| B/1 | 2.25 | Thread, fine lace |
| E/4 | 3.5 | DK yarn, baby items |
| H/8 | 5.0 | Worsted weight, most projects |
| J/10 | 6.0 | Worsted, chunky yarn |
| N/13 | 9.0 | Bulky yarn, quick projects |
Here’s something I wish someone had told me when I started: hook materials matter for comfort, but they don’t change the size. Whether you’re using aluminum, bamboo, or plastic, a 5mm hook is a 5mm hook. However, the material can affect how smoothly your yarn glides, which might influence your tension slightly.
Pro tip: If you’re just starting out, stick with aluminum hooks in the middle sizes (H/8 through J/10). They’re affordable, durable, and work well with most yarns.
Matching Hook Size to Yarn Weight
Every yarn label includes a recommended hook size range, and this is your starting point. The Craft Yarn Council has standardized these recommendations, making it much easier for us.
For fingering weight yarn (category 1), you’ll typically use a B/1 to E/4 hook. Sport weight (category 2) usually calls for an E/4 to G/6. DK weight yarn works well with F/5 to H/8 hooks, while worsted weight (the most common) pairs with H/8 to K/10.5 hooks.
But here’s where it gets interesting – these are just starting points. When I’m working on amigurumi basics, I often go down a hook size from what the yarn label suggests. This creates a tighter fabric that won’t let stuffing show through. For a lightweight summer top, I might go up a hook size to create a more drapey fabric.
I keep a chart taped inside my project bag that shows these relationships, but after a while, you’ll just know. When I pick up a skein of Lion Brand Heartland (worsted weight), I automatically reach for my H/8 hook because I know it works well for most projects.
Why Gauge Matters More Than You Think
Okay, I know gauge swatches aren’t fun, but they’re crucial for hook selection. Your gauge swatch tells you if your chosen hook is creating the right fabric for your project. I used to skip this step and regret it every time.
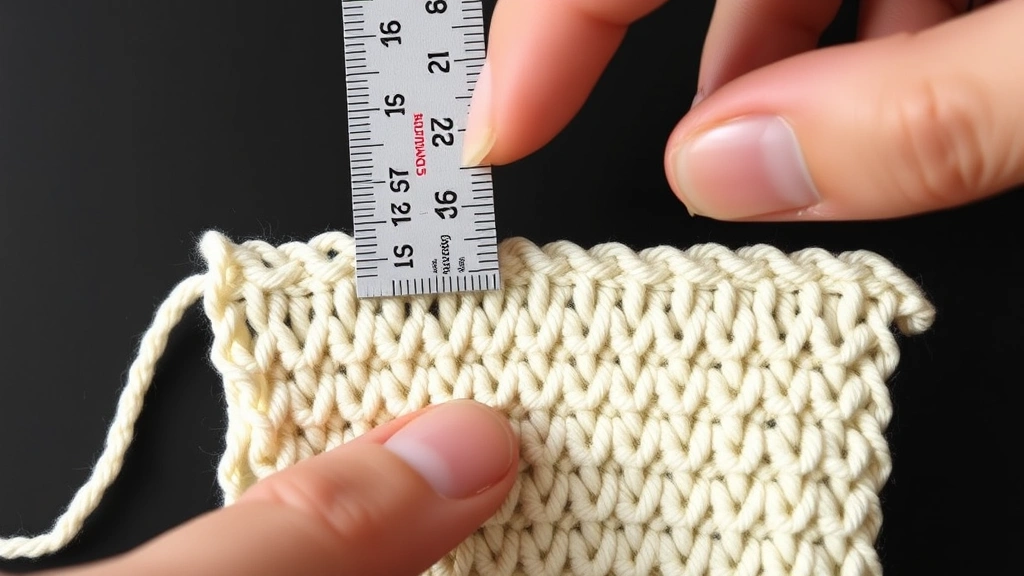
Make a 4×4 inch square in your chosen stitch pattern. Count your stitches and rows, then compare to the pattern requirements. If you have more stitches per inch than called for, your hook is too small. Fewer stitches means your hook is too large.
For garments, being off by even half a stitch per inch can mean the difference between a perfect fit and something unwearable. I learned this the hard way with a cardigan that ended up two sizes too small because I didn’t check my gauge.
- Make Your Swatch
Chain enough stitches for about 5 inches width, then work in your pattern stitch for 5 inches height. This gives you room to measure accurately in the middle.
- Block Your Swatch
Wash and block your swatch the same way you’ll care for your finished project. Yarn behavior can change significantly after washing.
- Measure Carefully
Use a rigid ruler and count stitches over exactly 4 inches, not just any 4 stitches. Measure in multiple spots and average the results.
I always make my gauge swatch at least 6×6 inches. It uses more yarn, but it gives me a much more accurate reading and lets me see how the stitch pattern looks when repeated.
Choosing Hooks for Different Project Types
Different projects need different fabric characteristics, which means different hook choices. This is where understanding your project’s end use becomes crucial.
Garments and Wearables
For sweaters and cardigans, you want a fabric with good drape that won’t be too stiff or too floppy. I usually stick close to the yarn label recommendation, maybe going up half a size for a more relaxed fit. When working with beginner crochet stitches like single crochet for a sweater, the fabric can get quite dense, so a slightly larger hook helps.
Home Decor Items
Blankets and throws need durability but also softness. For most blanket patterns, I follow the recommended hook size exactly. However, if I’m making something that needs to hold its shape well, like a basket or storage container, I’ll go down a hook size for extra structure.
Amigurumi and Stuffed Items
This is where I always size down. Using a hook that’s 1-2 sizes smaller than recommended creates a tight fabric that won’t let stuffing peek through. It makes the work a bit more challenging, but the results are so much better. Your crochet stitch guide might not mention this, but it’s a game-changer for stuffed projects.
Lace and Openwork
Lace patterns often specify exact hook sizes because the openwork depends on precise spacing. However, if you want more dramatic holes, you can go up a size. For more subtle openwork, try going down half a size.
Adjusting for Your Personal Crochet Style
Here’s something that took me years to fully understand: we all crochet differently. Some people naturally create loose stitches, others work tightly. Your personal tension affects everything about hook selection.
I’m a fairly tight crocheter, which means I often need to go up a hook size from what patterns recommend. My friend Lisa is the opposite – she works loosely and usually needs to size down. There’s no right or wrong way, just different approaches that require different adjustments.
To figure out your tendency, make swatches with the same yarn using the recommended hook size and hooks one size up and down. Compare the fabric feel and appearance. The one that matches the pattern photo or description best shows you your natural adjustment.
Pay attention to how your hands feel while working. If you’re straining to get your hook through stitches, you might need to go up a size. If stitches feel loose and sloppy, try sizing down.
Environmental factors affect tension too. I crochet more loosely when I’m relaxed watching TV versus when I’m focused and slightly tense. Humidity can make yarn behave differently. Cold hands create tighter stitches. All of these things influence your hook choice.
Quick Methods to Test Hook Size
Sometimes you don’t have time for a full gauge swatch (though I still recommend them for important projects). Here are some quick tests I use to check if my hook size is working.
The Fabric Feel Test
Work about 20 stitches in your pattern. The fabric should feel substantial but not stiff, with good stitch definition. If individual stitches are hard to see, your hook might be too small. If there are gaps between stitches when you’re not trying to create them, your hook might be too large.
The Drape Test
Hold your small swatch and let it hang. Does it drape the way you want for your project? A dishcloth should feel sturdy and structured. A scarf should have nice movement. This quick test can save you from major disappointment later.
The Stretch Test
Gently stretch your swatch in different directions. Good crochet fabric should have some give but spring back to shape. If it stays stretched out, your hook might be too large. If it barely stretches at all, you might need to size up.
When I’m working on projects that require specific techniques, like those found in comprehensive advanced crochet techniques, I always do these quick tests because complex stitch patterns can behave differently than simple ones.
Common Hook Selection Mistakes
Let me share the mistakes I see most often, because avoiding them will save you time and frustration.
Following the Yarn Label Blindly
The yarn label is a starting point, not a rule. I see beginners get frustrated because their project doesn’t look right, even though they’re using the “correct” hook. Consider your project needs and personal style.
Not Accounting for Stitch Pattern
Different stitches create different fabric densities. Single crochet is much denser than double crochet, even with the same hook and yarn. Complex stitch patterns from resources like free crochet patterns often include specific hook recommendations for this reason.
Ignoring Yarn Fiber Content
Cotton behaves differently than acrylic, which behaves differently than wool. Cotton has no stretch and can feel stiff with too small a hook. Wool is forgiving and often looks good with a range of hook sizes. Acrylic can pill if worked too tightly.
Not Considering the Pattern Designer’s Style
Some designers prefer drapier fabrics, others like more structure. Look at their other patterns and finished project photos to understand their aesthetic. You might need to adjust accordingly.
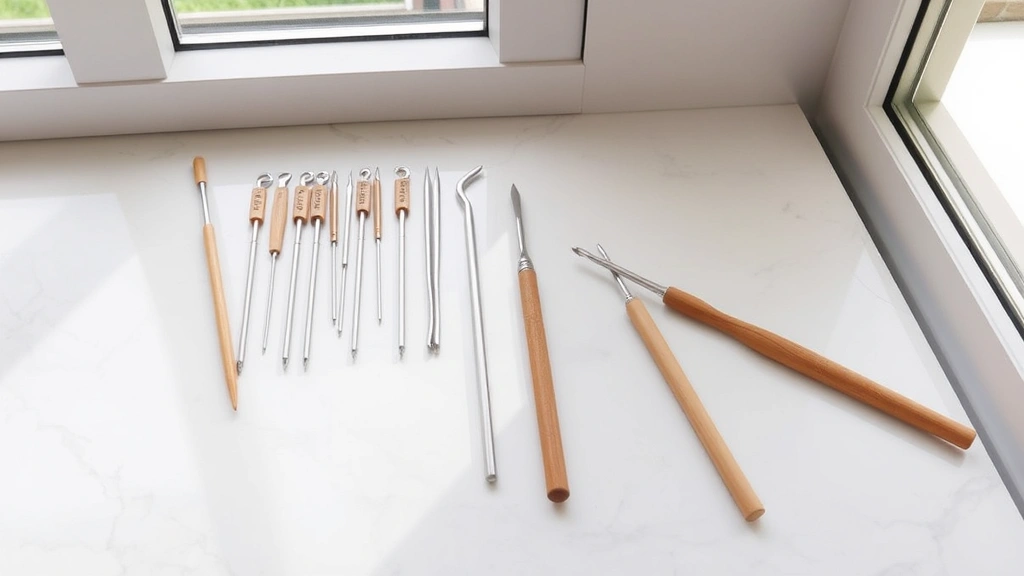
Another common mistake is not having enough hook sizes on hand. I recommend owning hooks from at least D/3 through L/11 if you work with standard yarn weights. KnitPicks and other retailers often sell starter sets that cover this range affordably.
Common Questions
What happens if I use the wrong hook size?
Using too small a hook creates stiff, dense fabric that’s hard to work with and may not drape well. Too large a hook creates loose, potentially gappy fabric that might not hold its shape. For garments, wrong hook size can completely change the fit.
Can I change hook sizes mid-project?
Yes, but be strategic about it. If you realize early that your hook isn’t working, it’s better to restart than continue with poor results. If you must change partway through, do it at a natural break like the end of a section or color change.
How do I choose a hook for variegated or self-striping yarn?
Stick with the yarn label recommendation initially. These yarns are designed to show their color changes best with standard hook sizes. If the fabric isn’t working, adjust up or down gradually while watching how it affects the color pooling.
Should I use different hooks for different parts of the same project?
Absolutely! Many patterns call for different hook sizes for different sections. Ribbing might use a smaller hook, body sections a larger one. Just follow the pattern recommendations and make sure your gauge works for each section.
What’s the difference between inline and tapered hooks?
Inline hooks have a consistent diameter from the throat to the grip, while tapered hooks get gradually larger. This affects how stitches sit on the hook and can influence your tension. Try both styles to see which feels more comfortable for your technique.
How many hooks do I really need as a beginner?
Start with sizes F/5, H/8, and J/10. These three hooks will handle most beginner projects with DK and worsted weight yarns. Add sizes as you try different yarn weights and project types. Quality matters more than quantity when you’re starting out.
Can I use a knitting needle as a crochet hook in a pinch?
Not really – knitting needles don’t have the hook shape needed to grab and pull yarn through loops. In an emergency, you might make something work, but it won’t be comfortable or efficient. Invest in proper crochet hooks for best results.
Why do my stitches look different than the pattern photo even with the right hook?
This usually comes down to tension differences or yarn substitution. Even if you’re using the recommended hook size, your personal crochet style might create different-looking fabric. Make a gauge swatch and adjust your hook size until your fabric matches the pattern description.
Choosing the right crochet hook doesn’t have to be overwhelming once you understand the basics. Start with your yarn label recommendation, consider your project needs, and don’t be afraid to adjust based on how your fabric looks and feels. Remember that gauge swatches are your friend, even when they feel like extra work.
The most important thing is to pay attention to your results and learn from each project. Keep notes about what worked well, and don’t be discouraged if it takes a few tries to get the perfect hook-yarn-project combination. Every experienced crocheter has made these adjustments, and with practice, you’ll develop an intuitive sense for what works.
Happy crocheting, and remember – the “right” hook is the one that gives you the results you want for your specific project and style!