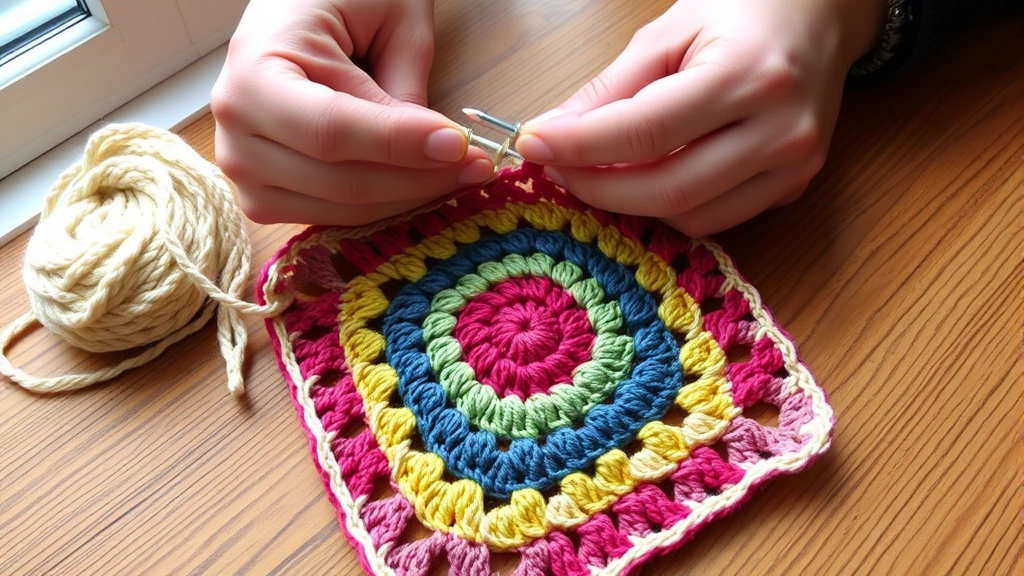
Last week, I was helping my neighbor Sarah with her first crochet project when she held up her work and asked, “Why does this look like a wonky triangle instead of a square?” Her granny square was pulling in weird directions, with some corners tighter than others and edges that curved instead of lying flat. Sound familiar? I’ve been there too, and honestly, most of us have struggled with getting granny squares to behave properly at some point.
The thing is, granny squares should be one of the most relaxing parts of crochet. They’re meant to be portable, mindless projects you can work on while watching TV or chatting with friends. But when they start curling, puckering, or looking lopsided, it takes all the joy out of the process. Plus, if you’re planning to join them into a blanket or bag, wonky squares make everything so much harder down the line.
Here’s what I’ve learned after making probably thousands of granny squares over the years: the problems usually come down to tension, hook size, or technique issues that are totally fixable once you know what to look for. Today, I’m going to walk you through everything I wish someone had told me when I was starting out – from choosing the right materials to troubleshooting the most common issues that make granny squares misbehave.
Quick Answer
Granny squares curl and pucker due to inconsistent tension, wrong hook size for your yarn, or technique issues like pulling chains too tight. Fix it by checking your gauge, using a larger hook if needed, and keeping consistent tension throughout each round.
Why Granny Squares Misbehave
Before we dive into solutions, let’s talk about what’s actually happening when your granny squares start acting up. Understanding the “why” makes it so much easier to prevent problems in the first place.
The most common culprit is tension inconsistency. When you’re working in rounds, even small variations in how tightly you pull your yarn can compound quickly. If your first round is loose and your second round is tight, the square will start to cup. If you’re inconsistent within a single round, you’ll get wavy edges or corners that don’t match.
Hook size plays a huge role too. I can’t tell you how many times I’ve seen someone struggling with a 5mm hook and worsted weight yarn when they really needed a 5.5mm or even 6mm hook. The yarn label suggestions are just starting points – your personal tension might require adjustments. When you’re working with double crochet stitches in granny squares, you need enough space for the yarn to relax and lay flat.
The Physics of Granny Squares
Think about it this way: you’re essentially creating a flat circle that you want to behave like a square. The magic happens in those corner spaces – they need to have just the right amount of ease to allow the fabric to lie flat while still creating defined corners. Too little space and the square cups inward. Too much space and you get ruffled edges.
Chain spaces are crucial here. Those little chain-2 or chain-3 spaces between cluster groups aren’t just decorative – they’re doing structural work. They provide the flexibility that allows your square to expand evenly as you add rounds.
Pro tip: If you’re new to granny squares, make your first few with a light-colored, smooth yarn like cotton or acrylic. It’s easier to see your stitches and catch mistakes early.
Choosing the Right Materials
Let me save you some frustration here: not all yarn and hook combinations work well for granny squares. I’ve learned this the hard way after struggling through projects that could have been so much easier with better material choices.
Yarn Weight Considerations
Worsted weight yarn (weight 4) is your best friend when you’re learning granny squares. It’s forgiving, widely available, and works up quickly. I particularly love Lion Brand Vanna’s Choice or Red Heart Super Saver for practice squares – they’re affordable, machine washable, and come in tons of colors.
If you want to branch out, DK weight (weight 3) creates lovely, refined squares that are perfect for baby items or lighter throws. Just remember you’ll need to adjust your hook size accordingly – usually one size smaller than what you’d use for worsted weight.
| Yarn Weight | Recommended Hook Size | Best For | Considerations |
|---|---|---|---|
| DK (3) | 4.5-5mm (G-H) | Baby blankets, summer tops | More delicate, takes longer |
| Worsted (4) | 5-5.5mm (H-I) | Afghan squares, bags | Most versatile, beginner-friendly |
| Chunky (5) | 6.5-8mm (K-L) | Quick throws, pillows | Works up fast, harder to see mistakes |
Hook Selection
Here’s something I wish I’d known earlier: the hook material matters for granny squares. Aluminum hooks slide through yarn smoothly, which helps maintain consistent tension. Wood hooks can catch slightly on some yarns, which might actually help if you tend to crochet loosely.
Size-wise, I almost always go up one hook size from what the yarn label suggests for granny squares. The extra ease helps prevent that tight, cupped look that’s so common with beginners. If you’re working with chunky yarn projects, this becomes even more important.
Mastering Tension Control
Okay, let’s talk about the elephant in the room: tension. This is where most granny square problems start, and it’s also the trickiest thing to teach because everyone’s hands work differently.
The key insight that changed everything for me was realizing that consistent tension matters more than perfect tension. I used to stress about getting every stitch exactly the same tightness, but what really matters is keeping your tension steady throughout each round.
Finding Your Natural Tension
Start by making a few practice squares with the same yarn and hook. Don’t worry about making them perfect – just focus on how the yarn feels in your hands. Are you gripping it tightly? Does your pinky finger cramp up? Are you pulling hard to get the hook through stitches?
Most tension problems come from holding the yarn too tightly or not allowing enough yarn to flow as you work. Try loosening your grip on the working yarn and see if that helps. Your yarn should slide smoothly through your fingers, not require tugging.
Round-by-Round Consistency
Here’s a technique that’s helped countless students in my local crochet group: before starting each new round, take a moment to check your hand position and yarn tension. It sounds silly, but that little pause helps reset your muscle memory.
Pay special attention to your chain stitches. Chains that are too tight will cause the square to cup inward, while chains that are too loose create floppy, unstable fabric. Your chains should have the same “give” as your double crochet stitches.
If you’re struggling with consistent tension, try working standing up or changing your seating position. Sometimes a slight adjustment in posture can make a huge difference in how naturally your hands move.
Common Technique Mistakes
Let me share some of the most common technique issues I see, along with the fixes that actually work. These are the mistakes that can make even experienced crocheters scratch their heads wondering why their squares aren’t cooperating.
Corner Space Problems
The corners are where granny squares live or die. Each corner should have the same number of chain stitches – usually chain-2 or chain-3, depending on your pattern. But here’s the thing: those chains need to be worked with the same tension as your double crochet stitches.
I see a lot of people pull their corner chains extra tight, thinking it will make the corners more defined. Actually, it does the opposite. Tight corner chains prevent the square from lying flat and create that cupped effect we’re trying to avoid.
When working into corner spaces on subsequent rounds, make sure you’re working into the actual chain space, not just under one loop of the chain. This might seem obvious, but when you’re working with darker yarns or in poor lighting, it’s easy to miss.
Stitch Count Issues
Every round of a granny square should have the same number of stitch groups between corners. If you’re adding or losing stitches randomly, your square will start to look more like a wonky polygon.
Here’s my foolproof method for keeping track: count your stitch groups as you complete each side. A traditional granny square increases by one stitch group per side on each round. So if round 2 has one group per side, round 3 should have two groups per side, and so on.
Joining New Colors
Color changes can introduce tension issues if you’re not careful. When joining a new color, don’t pull that first stitch too tight – it’s tempting because you want to secure the new yarn, but it can distort the shape of your square.
I like to leave about a 6-inch tail when starting a new color, then weave it in later rather than trying to crochet over it immediately. This keeps the stitches more consistent and prevents that tight, puckered look around color changes.
Troubleshooting Specific Problems
Now let’s get into the nitty-gritty of fixing specific issues. I’m going to walk you through the most common problems and give you actionable solutions that actually work.
Cupping and Curling
If your granny square is cupping inward (edges curling up toward the center), your tension is too tight overall, or you need a larger hook. This is especially common when working with cotton yarn, which has less stretch than acrylic.
The fix: Try going up one hook size and paying attention to your chain spaces. Make sure your corner chains have enough ease to allow the fabric to lie flat. If the problem persists, your yarn might be too heavy for the stitch pattern – consider switching to a lighter weight yarn.
Ruffling and Wavy Edges
Ruffled edges usually mean your tension is too loose, or you’re accidentally adding extra stitches. Count your stitch groups carefully and make sure you’re maintaining the proper increase pattern.
Sometimes this happens when people try to “fix” tight corners by making everything else looser. Instead, focus on making your corner chains slightly looser while keeping everything else consistent.
Uneven Corners
If some corners are pointier or more rounded than others, you’re probably inconsistent with your corner chain spaces. One corner might have chain-2 while another has chain-3, or you might be working into different parts of the corner space.
The solution is to be very deliberate about corner placement. I always work my corners the same way: yarn over, insert hook into corner space, yarn over and pull through, then complete the stitch pattern exactly the same way each time.
Loose or Tight Starting Ring
Problems often start right at the beginning with the magic ring or starting chain. If your magic ring is too tight, it will cause the entire square to cup. If it’s too loose, the center will have a hole that’s hard to close neatly.
For magic ring techniques, aim for a ring that you can just barely fit your hook through comfortably. You should be able to close it snugly without it being so tight that it distorts the first round of stitches.
| Problem | Likely Cause | Quick Fix | Long-term Solution |
|---|---|---|---|
| Cupping inward | Too tight tension | Larger hook, looser chains | Practice consistent tension |
| Ruffled edges | Too loose tension | Smaller hook, tighter chains | Count stitches carefully |
| Uneven corners | Inconsistent corner spaces | Use stitch markers | Develop corner routine |
| Wonky shape | Stitch count errors | Count each round | Mark pattern repeats |
Blocking and Finishing Techniques
Here’s something that can save even slightly imperfect granny squares: proper blocking. I used to think blocking was only for fancy lace projects, but it’s actually a game-changer for granny squares, especially if you’re planning to join them.
Wet Blocking Method
For cotton or cotton blend squares, wet blocking works beautifully. Soak your finished squares in cool water for about 15 minutes, then gently squeeze out excess water (don’t wring!). Lay them flat on a blocking mat or clean towels, and pin them to the correct measurements.
This is where having a good blocking setup really pays off. I use interlocking foam mats with a grid pattern – they make it easy to get all your squares exactly the same size.
Let the squares dry completely before unpinning them. This usually takes 12-24 hours depending on humidity and air circulation. The results are worth the wait – your squares will be perfectly flat and uniform.
Steam Blocking for Acrylic
Acrylic yarns respond better to steam blocking than wet blocking. Hold a steam iron about 2 inches above your pinned square and let the steam relax the fibers. Don’t let the iron touch the yarn directly, as this can melt synthetic fibers.
The key with steam blocking is to work in sections and let each area cool completely before moving on. This helps set the fibers in their new, flatter position.
Pressing vs. Blocking
There’s a difference between blocking and pressing, and granny squares usually need blocking, not pressing. Blocking shapes the fabric while maintaining its texture and drape. Pressing flattens everything and can make your squares look lifeless.
If you’re working with natural fibers like wool or cotton, the fibers will actually relax and settle into their new shape during blocking. This is why properly blocked granny squares often look dramatically better than unblocked ones.
Joining Considerations
If you’re making granny squares for a larger project, how they behave individually will affect your entire finished piece. Wonky squares make joining a nightmare, while well-behaved squares practically join themselves.
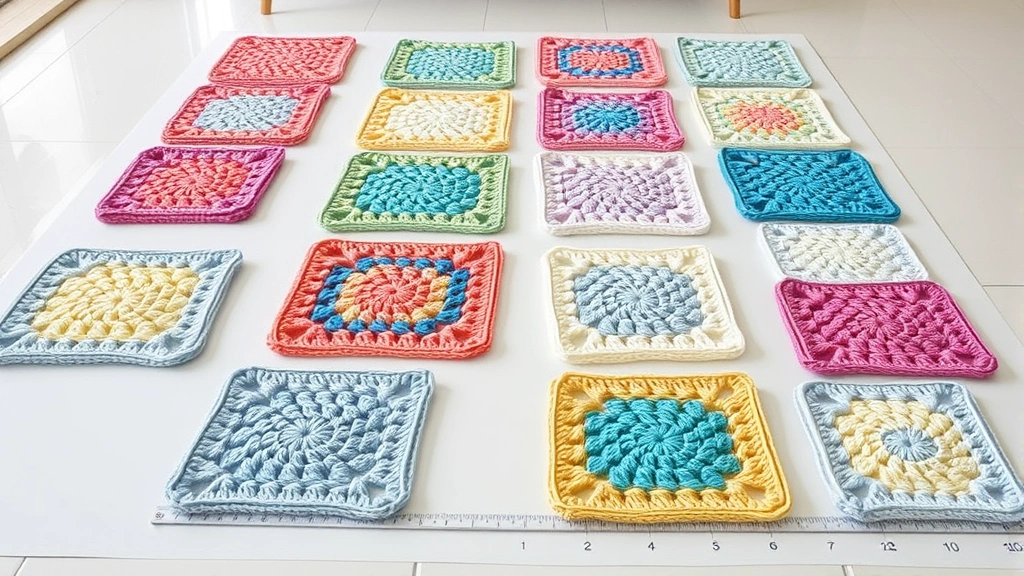
Size Consistency
This is where all that attention to tension and technique pays off. When all your squares are the same size, joining becomes so much easier. I always make a few extra squares beyond what my pattern calls for, then choose the most consistent ones for my final project.
Measure your squares before joining. They should all be within about 1/4 inch of each other. If you have some that are significantly larger or smaller, you can often fix this with blocking or by adjusting them slightly during the joining process.
Edge Preparation
Before joining, take a close look at the edges of your squares. They should lie flat and have consistent stitch definition. If some edges are wavy or puckered, you might need to adjust your joining technique to accommodate the difference.
Sometimes adding a round of single crochet around each square before joining can help even out minor inconsistencies. This creates a uniform border that makes joining much more predictable.
Joining Method Selection
The joining method you choose can actually help compensate for minor issues with individual squares. Whip stitch joining is very forgiving and can ease in slight size differences. Slip stitch joining is less forgiving but creates a flatter seam.
For squares that are slightly different sizes, I often use the join-as-you-go method recommended by many designers on Ravelry. This lets you adjust the tension slightly as you work to accommodate any size variations.
If you’re making a large project like an afghan, join your squares in small sections first (maybe 4×4 blocks), then join the sections. This makes it easier to manage any size inconsistencies without affecting the entire project.
Common Questions
Why do my granny squares curl up at the edges?
Curling edges usually mean your tension is too tight, especially in the chain spaces. Try using a hook one size larger than recommended, and make sure your corner chains aren’t pulled too tight. The chain spaces need enough ease to allow the fabric to lie flat.
How can I fix a granny square that’s already cupping?
If the square isn’t too far along, you can try blocking it aggressively – pin it flat while damp and let it dry completely. For severely cupped squares, you might need to rip back a few rounds and rework them with looser tension or a larger hook.
What’s the best yarn weight for beginner granny squares?
Worsted weight (4) acrylic yarn is perfect for beginners. It’s forgiving, affordable, and easy to see your stitches. I recommend starting with light colors like white or cream so you can clearly see what you’re doing. Avoid dark colors and fuzzy yarns until you’re comfortable with the basic technique.
How do I keep my granny squares the same size?
Measure your first square after completing it, then use that as your template. Count rounds carefully and maintain consistent tension throughout. Using the same yarn and hook for all squares helps, and blocking each square to the same measurements ensures uniformity.
Should I weave in ends as I go or wait until the end?
For granny squares, I recommend weaving in ends as you go, especially when changing colors. It’s much easier to weave in ends while you remember exactly where they came from, and it prevents the overwhelming task of dealing with dozens of ends at once.
Why do some of my squares look more diamond-shaped than square?
This usually happens when your corner increases aren’t consistent. Make sure each corner has the same number of chain stitches and that you’re working into the corner space the same way each time. Uneven corner placement can distort the square shape significantly.
How many rounds should a granny square have?
There’s no set number – it depends on your project needs. Most patterns specify the finished size rather than the number of rounds. A typical 4-inch square in worsted weight yarn usually takes 4-5 rounds, but this can vary based on your tension and hook size.
Can I fix mistakes in granny squares without starting over?
Minor mistakes like missed stitches or incorrect stitch counts can often be fixed by carefully ripping back to the error and reworking from that point. For major structural issues like severely uneven tension, it’s usually faster to start over with the lessons learned from the first attempt.
Getting granny squares to behave properly is one of those skills that clicks suddenly after you’ve been struggling with it for a while. The key is understanding that small adjustments in materials, technique, and tension can make a huge difference in your results.
Remember that every crocheter’s hands work differently, so what works perfectly for your friend might need tweaking for you. Don’t get discouraged if your first few squares aren’t perfect – even experienced crocheters sometimes need to make a few practice squares when switching to new yarn or trying a new pattern.
The most important thing is to pay attention to what your squares are telling you. If they’re cupping, ease up on your tension. If they’re ruffling, tighten things up a bit. If corners are uneven, focus on consistency in your corner technique. With practice and attention to these details, you’ll be making beautiful, well-behaved granny squares that are a joy to work with and join into larger projects.