I still remember the first time I tried to crochet a granny square. I thought it would be simple enough – just a basic square, right? Three hours later, I had a wonky trapezoid that looked more like abstract art than anything my grandmother would recognize. If you’ve ever felt frustrated trying to master this classic crochet staple, you’re definitely not alone.
The granny square has been a cornerstone of crochet for generations, and there’s a good reason it’s stood the test of time. These versatile little squares can become blankets, bags, sweaters, or even wall art. But here’s the thing – most tutorials skip over the details that actually matter. They’ll tell you to “chain 3” but won’t explain why your corners look lopsided, or they’ll assume you know how to keep your tension consistent when you’re still figuring out how to hold your hook properly.
After making hundreds of granny squares over the years, I’ve learned that success comes down to understanding a few key principles: proper foundation setup, consistent tension, and knowing how to troubleshoot when things go sideways. Whether you’re planning a baby blanket project or want to try your hand at wearable crochet, mastering the granny square opens up a world of possibilities.
Quick Answer
A basic granny square starts with a magic ring, followed by rounds of double crochet clusters separated by chain spaces. The key is maintaining consistent tension and proper corner placement to create a perfect square shape every time.
Essential Materials and Setup
Let’s start with the basics – you don’t need fancy supplies to make beautiful granny squares, but choosing the right materials will make your life much easier. I’ve made squares with everything from cotton dishcloth yarn to luxury alpaca, and each has its place.
For beginners, I always recommend starting with worsted weight yarn (that’s weight 4 on the Craft Yarn Council scale). Lion Brand Vanna’s Choice or Red Heart Super Saver are excellent choices – they’re affordable, forgiving, and come in tons of colors. The slight stiffness actually helps maintain your square’s shape as you work.
Hook size matters more than you might think. For worsted weight yarn, start with a 5.5mm (I/9 US) hook. This creates a nice, open fabric that shows off the classic granny square structure. If your squares are coming out too tight or your hands are cramping, try going up a hook size. Too loose and floppy? Go down a size.
Pro tip: Keep a small notebook to track which yarn and hook combinations work best for you. I wish I’d started doing this sooner – it would have saved me from remaking so many projects!
Your yarn choice affects more than just appearance. Cotton yarn like Bernat Handicrafter Cotton creates crisp, defined stitches perfect for dishcloths or summer tops. Acrylic blends are great for afghans since they’re machine washable and durable. If you’re planning to join multiple squares, stick with the same yarn type – mixing cotton and acrylic can lead to uneven shrinkage and puckering after washing.
Creating the Perfect Foundation Ring
Here’s where most people either love or hate the granny square – the foundation ring. You have two main options: the traditional chain ring or the magic ring (also called an adjustable ring). I’m going to be honest with you – the magic ring is superior in almost every way, but it does have a learning curve.
The magic ring eliminates that annoying hole in the center that you get with a chain ring. When you’re making amigurumi projects or anything where a tight center matters, this technique is invaluable. But don’t worry if you’re struggling with it – plenty of gorgeous granny squares have been made with simple chain rings.
For a magic ring, you’ll wrap your yarn around your fingers twice, insert your hook through the loop, and pull up a working loop. The key is keeping that tail yarn accessible so you can tighten the ring later. I see so many people accidentally bury their tail and then wonder why their center won’t close properly.
If you’re going with a chain ring instead, chain 4 and slip stitch to join. This creates a small ring that’s adequate for most projects. The main downside is that permanent hole in the center, but honestly, once your square is part of a larger project, you’ll barely notice it.
“The foundation sets the tone for your entire square. Take your time here, and everything else will fall into place.” – Something I tell myself every time I’m tempted to rush this step!
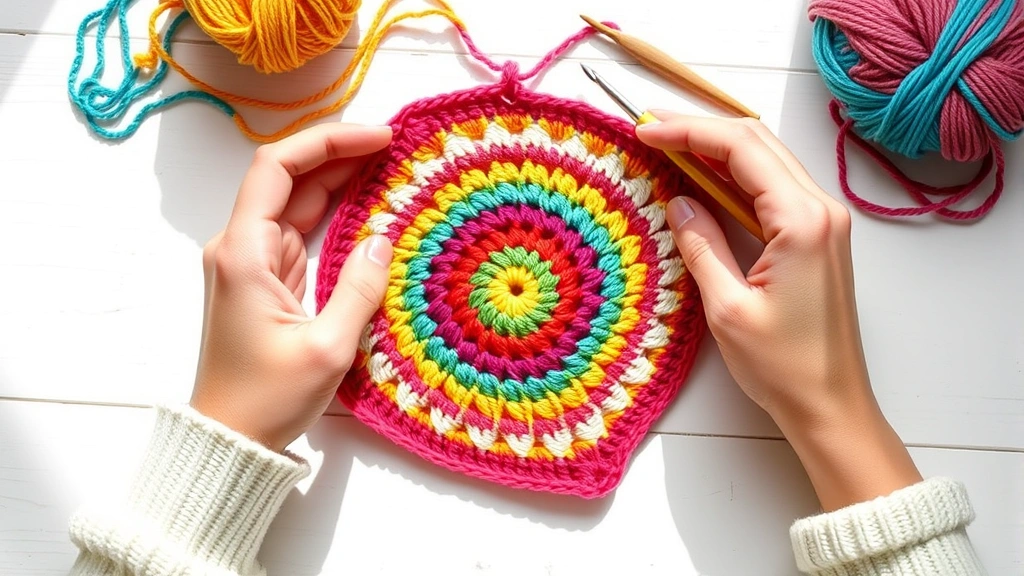
Round 1: Building Your Center
Round 1 is where your granny square really starts to take shape. Whether you used a magic ring or chain ring, you’re now going to create the center cluster that defines the classic granny square look.
Start with a chain 3 – this counts as your first double crochet. Then work 2 more double crochets into the ring, chain 2, and repeat this pattern three more times. You’ll end up with four clusters of 3 double crochets each, separated by chain-2 spaces that will become your corners.
Here’s the critical part that most tutorials gloss over: your tension needs to be consistent, but not tight. Those chain-2 spaces need room to accommodate the corner clusters you’ll add in later rounds. I learned this the hard way when my first afghan turned into a bowl because I was crocheting too tightly.
When you complete the round, you’ll slip stitch to the top of your beginning chain-3, then slip stitch into the first chain-2 space. This positions you perfectly for round 2. If you’re changing colors (and honestly, that’s half the fun of granny squares), this is where you’ll fasten off and join your new color.
Color changing tip: Leave about a 6-inch tail when you fasten off. You’ll weave this in later, but having enough length makes the process much easier and more secure.
Your first round should measure roughly 2.5 inches across if you’re using worsted weight yarn and the recommended hook size. If it’s significantly smaller or larger, adjust your hook size for the next square. Consistency across squares is crucial if you’re planning to join them later.
Rounds 2-4: Growing Your Square
This is where your granny square really starts looking like, well, a square! Each subsequent round follows the same basic principle: clusters in the spaces, with extra clusters at the corners to maintain that square shape.
Round 2: Establishing the Square
Start in any chain-2 space with a slip stitch, then chain 3 (counts as first dc). Work 2 more dc in the same space, chain 2, then 3 dc in the same space again – this creates your corner. Chain 1, then work 3 dc in the next chain-2 space, chain 1, and continue around.
The pattern for round 2 is: (3 dc, ch 2, 3 dc) in corner space, ch 1, 3 dc in next space, ch 1, repeat. You’ll have corners with the chain-2 spaces and sides with chain-1 spaces. This is the foundation of the granny square’s distinctive look.
Round 3: Building the Sides
Round 3 is where things get interesting. You’ll still work corners the same way – (3 dc, ch 2, 3 dc) in each corner space – but now you have two chain-1 spaces along each side. Work 3 dc in each chain-1 space, separated by chain-1.
This is often where beginners run into trouble. If your square is starting to look more like a circle or if the sides are bowing out, check your corner placement. Those corner chain-2 spaces should be exactly at the corners – not slightly to one side or the other.
Round 4 and Beyond
Each additional round follows the same principle: corners get (3 dc, ch 2, 3 dc), and you work 3 dc in each chain-1 space along the sides, always separating clusters with chain-1. The beauty of the granny square is this mathematical precision – once you understand the pattern, you can make squares as large as you want.
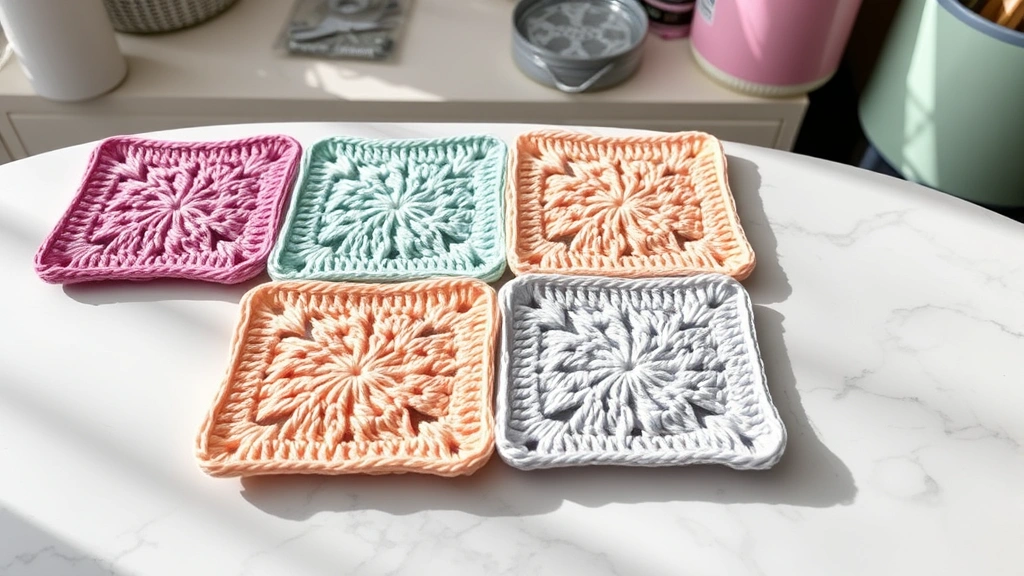
For most projects, a 4-round granny square is perfect. It measures about 4.5 inches square with worsted weight yarn, making it ideal for afghan projects or decorative pillows. If you need larger squares, just keep adding rounds using the same principle.
| Round | Approximate Size | Best For |
|---|---|---|
| 3 rounds | 3.5 inches | Coasters, small motifs |
| 4 rounds | 4.5 inches | Standard afghan squares |
| 5 rounds | 5.5 inches | Large blankets, wall hangings |
| 6+ rounds | 6.5+ inches | Individual squares as art pieces |
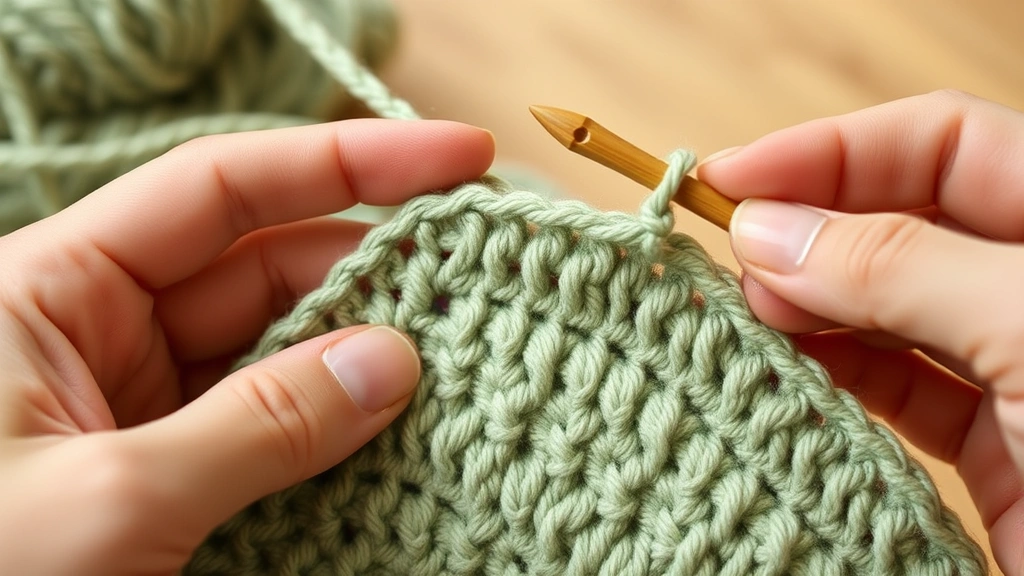
Finishing and Blocking
Finishing your granny square properly makes the difference between a homemade look and a professional appearance. I used to skip this step when I was starting out, and honestly, my early projects showed it.
First, weave in all your ends securely. I use the “back and forth” method – weave the tail through several stitches in one direction, then back through different stitches in the opposite direction. This prevents the ends from working loose over time, especially important if you’re making something that will be washed frequently.
Blocking isn’t just for lace projects – it makes a huge difference with granny squares too. Even if you’re just using steam blocking (my preferred method for acrylic yarns), taking the time to shape your squares will improve the final result dramatically.
For steam blocking, pin your square to your blocking board (or a towel-covered ironing board), making sure the corners are square and the sides are straight. Hold a steam iron about 2 inches above the surface and let the steam penetrate the yarn. Don’t press the iron down – just let the steam do the work. Allow the square to cool and dry completely before unpinning.
Blocking tip: If you don’t have a proper blocking board, a large towel on a flat surface works fine. Just make sure to use rustproof pins – I learned this lesson when I found orange stains on a white baby blanket!
For natural fibers like cotton or wool, wet blocking often gives better results. Soak your finished square in cool water for about 15 minutes, gently squeeze out excess water (never wring!), and pin to shape while damp. This method is particularly effective for evening out tension issues.
Common Problems and Solutions
Let’s talk about the issues that drive crocheters crazy – because I guarantee you’ll encounter at least one of these, and knowing how to fix them will save your sanity.
Wonky Corners
If your corners aren’t staying put or your square is looking more like a circle, the problem is usually in your corner placement or chain count. Make sure you’re working your corner clusters exactly in the chain-2 spaces from the previous round, not in the stitches on either side.
Another common issue is chain tension. If your chain-2 corner spaces are too tight, there isn’t enough room for the corner clusters, causing the square to cup. If they’re too loose, your corners will be floppy and undefined.
Uneven Sides
This usually comes down to counting errors or inconsistent tension. Each side should have the same number of chain-1 spaces between corners. In a 4-round square, you should have 3 chain-1 spaces per side. Count as you go, especially when you’re learning.
Tension inconsistency often shows up as some sides being tighter than others. This is totally normal when you’re learning – your hands are still figuring out the muscle memory. The good news is that blocking can help even out minor tension issues.
Curling Edges
If your square wants to curl up at the edges, you’re probably crocheting too tightly. Try going up a hook size, or consciously relax your grip on the yarn. Remember, crochet should feel comfortable, not like you’re wrestling with your materials.
I once spent an entire weekend remaking squares because I couldn’t figure out why they kept curling. Turns out I was holding my hook like I was trying to stab something. Relaxing my grip fixed everything instantly.
Popular Variations and Modifications
Once you’ve mastered the basic granny square, a whole world of variations opens up. These modifications can add visual interest to your projects or solve specific design challenges.
Solid Granny Squares
Instead of changing colors each round, work the entire square in one color. This creates a more subtle texture that’s perfect for modern, minimalist projects. The stitch pattern still creates beautiful definition, but the overall look is more cohesive.
Solid squares are excellent for cardigan projects where you want texture without busy color changes. They also work up faster since you’re not constantly fastening off and rejoining yarn.
Half Double Crochet Granny Squares
Replace the double crochets with half double crochets for a denser, more compact square. This variation is perfect when you want the granny square look but need something with less drape – think structured bags or home decor items.
The technique is identical, just substitute hdc for dc throughout. Your squares will be slightly smaller and have a different texture, but the construction principle remains the same.
Giant Granny Squares
Instead of joining multiple small squares, work one giant granny square for your entire project. This eliminates seaming and creates a beautiful radiating pattern from the center. I’ve used this technique for shawl projects and it’s absolutely stunning.
The key is planning your color changes carefully. Map out your color sequence before you start, and remember that each round uses significantly more yarn than the last.
Granny Triangles and Hexagons
The same principles apply to other shapes. For triangles, work 3 corners instead of 4. For hexagons, work 6 corners. These shapes can add incredible visual interest to your projects and are perfect for creating tessellated patterns.
| Shape | Corner Count | Best Projects |
|---|---|---|
| Triangle | 3 | Shawls, decorative bunting |
| Square | 4 | Afghans, bags, garments |
| Hexagon | 6 | Blankets, wall art, coasters |
Common Questions
How much yarn do I need for one granny square?
A 4-round granny square in worsted weight yarn uses approximately 25-30 yards total. If you’re changing colors each round, plan for about 6-8 yards for the center, 8-10 yards for round 2, 10-12 yards for round 3, and 12-15 yards for round 4. Always buy extra – running out of a dye lot partway through a project is heartbreaking.
Why do my granny squares curl instead of laying flat?
Curling usually indicates tension that’s too tight. Try using a larger hook size or consciously loosening your grip on the yarn. The chain spaces need room to breathe – if they’re too tight, the fabric will naturally cup. Proper blocking can also help flatten minor curling issues.
Can I mix different yarn weights in one project?
While it’s possible, I don’t recommend it for beginners. Different yarn weights create squares of different sizes, which makes joining them neatly very challenging. If you want to use up scraps, stick to the same weight category. Save the mixed-weight experiments for when you’re more experienced with adjusting patterns.
How do I join granny squares together?
There are several methods, but my favorite is the flat slip stitch join. Hold two squares with right sides together and slip stitch through both layers along the edge. This creates a flat seam that doesn’t add bulk. For a decorative option, try the whip stitch join with contrasting yarn.
What’s the best way to change colors between rounds?
Fasten off your current color at the end of the round, leaving a 6-inch tail. Join your new color in any chain space with a slip stitch, then continue with your pattern. Some crocheters prefer to change colors on the last yarn over of the final stitch, but I find the fasten-off method gives cleaner color lines.
How long does it take to make a granny square?
A 4-round granny square typically takes 20-30 minutes once you’re comfortable with the pattern. Beginners might need 45 minutes to an hour while they’re learning. Color changes add time, and intricate color patterns can double your working time. Don’t rush – consistent tension is more important than speed.
Can I make granny squares with different hook sizes?
Yes, but they’ll end up different sizes, which makes joining them problematic. If you want varied textures, try using different yarn weights with appropriately sized hooks instead. This gives you texture variation while maintaining consistent square dimensions.
Why do some of my squares come out bigger than others?
This is usually a tension consistency issue. Your hands naturally relax as you get into a rhythm, which can make later squares looser than earlier ones. Try to maintain awareness of your tension throughout your project. Blocking can help even out minor size differences, but significant variations need to be addressed at the source.
Mastering the granny square is like learning to ride a bike – once it clicks, you’ll wonder why it ever seemed difficult. These versatile little squares have been bringing joy to crocheters for generations, and there’s something deeply satisfying about creating something beautiful from just yarn and a hook.
Remember, every expert crocheter started exactly where you are now. Those perfectly uniform squares you admire on Ravelry? They’re the result of practice, patience, and probably a few frogged projects along the way. Don’t be afraid to make mistakes – they’re how you learn.
Start with one square, focus on understanding the structure rather than rushing to finish, and soon you’ll have a skill that opens up countless project possibilities. Whether you’re dreaming of a cozy granny square afghan or want to try your hand at a trendy granny square bag, you now have the foundation to make it happen. Happy crocheting!