
I still remember the first time I tried to crochet a corner. What should have been a neat 90-degree turn looked more like a wonky trapezoid, and I was convinced I’d never master the art of shaping my work. Fast forward a few years and countless projects later, and I can tell you that learning to crochet corners properly was one of those game-changing moments that elevated my entire crafting experience.
Whether you’re working on a granny square blanket or trying to create sharp edges on a dishcloth, corners are everywhere in crochet. They’re the foundation of countless patterns, from simple scarves to complex geometric designs. The thing is, most beginners struggle with corners because they seem deceptively simple – until you realize your work is curling, puckering, or looking more like abstract art than the neat squares you were aiming for.
Here’s what I wish someone had told me from the start: corners aren’t just about adding extra stitches or chains. They’re about understanding tension, stitch placement, and how your yarn behaves. Once you grasp these fundamentals, you’ll find yourself confidently tackling everything from basic dishcloths to intricate motifs.
Quick Answer
Crochet corners are created by working multiple stitches into the same stitch or space, with the exact number depending on your stitch type and desired angle. For 90-degree corners in single crochet, work 3 stitches in the corner stitch; for double crochet, work 2 double crochet, chain 2, then 2 more double crochet in the corner space.
Understanding Corner Basics
Before we dive into specific techniques, let’s talk about what makes a corner work. At its core, a corner is simply an increase – you’re adding extra stitches to create the 90-degree turn your fabric needs. But not all increases are created equal, and the type of corner you create depends entirely on what stitch you’re using and what look you’re going for.
The key principle is this: you need to add enough stitches to prevent your work from pulling inward (creating a cup shape) but not so many that it ruffles outward. For most basic stitches, this sweet spot is pretty standard, but it can vary based on your yarn weight and hook size.
Yarn Weight Considerations
Your yarn choice significantly impacts how corners behave. I’ve found that worsted weight yarn is the most forgiving for beginners learning corners – it’s substantial enough to hold its shape but not so thick that your increases become bulky. Here’s what I typically recommend:
| Yarn Weight | Hook Size | Corner Behavior | Best Projects |
|---|---|---|---|
| DK (3) | 4.5mm (G) | Crisp, defined corners | Baby blankets, dishcloths |
| Worsted (4) | 5.5mm (I) | Balanced, easy to work | Afghans, scarves |
| Bulky (5) | 6.5mm (K) | Soft, rounded corners | Quick blankets, baskets |
Pro tip: When you’re learning, stick with cotton yarn in a light color. You’ll be able to see your stitches clearly, and cotton has just enough structure to help your corners hold their shape without being too stiff.
Single Crochet Corners
Single crochet corners are probably the first type you’ll encounter, and they’re wonderfully straightforward once you get the hang of them. The standard approach is to work 3 single crochet stitches into the corner stitch or space. This creates just enough fabric to turn the corner without creating excess bulk.
Here’s how I approach single crochet corners in a typical square or rectangle:
- Identify Your Corner
Work your single crochet stitches along the side until you reach the corner stitch. This is usually the last stitch of the previous row or the corner stitch from your foundation.
- Work the First Corner Stitch
Insert your hook into the corner stitch and work your first single crochet normally. This anchors your corner.
- Add the Corner Stitches
Work 2 more single crochet stitches into that same corner stitch. You now have 3 single crochet stitches in the corner space.
- Continue Along the Next Side
Work your next single crochet into the first stitch of the adjacent side, continuing your pattern as established.
The beauty of this method is its consistency. Whether you’re working on baby blankets or kitchen accessories, this 3-stitch corner works reliably across different yarn weights and hook sizes.
Tension Tips for Single Crochet Corners
One thing I learned the hard way is that corner stitches tend to be tighter than regular stitches. When you’re working 3 stitches into the same space, there’s natural resistance from the yarn. I combat this by loosening my tension slightly on corner stitches – not dramatically, just enough to let the stitches sit comfortably without distorting the fabric.
Double Crochet Corners
Double crochet corners require a different approach because double crochet stitches are taller and create more fabric per stitch. The classic method is to work (2 double crochet, chain 2, 2 double crochet) all in the corner space. This creates a small chain space that allows the corner to pivot cleanly.
I love this type of corner for afghan patterns because it creates a distinctive corner that’s both functional and decorative. Here’s my step-by-step approach:
- Work to the Corner Space
Complete your double crochet stitches along the side until you reach the corner chain space from the previous round.
- Begin the Corner Sequence
Work 2 double crochet stitches into the corner chain space. These stitches should sit snugly but not be cramped.
- Create the Corner Chain
Chain 2. This creates the pivot point for your corner and provides space for the corner stitches in subsequent rounds.
- Complete the Corner
Work 2 more double crochet stitches into the same corner space. You should now have a symmetrical corner with 4 double crochet stitches and a chain-2 space in the center.
This technique works beautifully for both square and rectangular projects. The chain-2 space becomes your new corner space for the next round, creating a consistent corner throughout your project.
Here’s something I wish I’d known earlier: if your double crochet corners are looking too pointy or sharp, try using chain 1 instead of chain 2. For bulkier yarns, you might even skip the chain altogether and just work 4 double crochet stitches in the corner space.
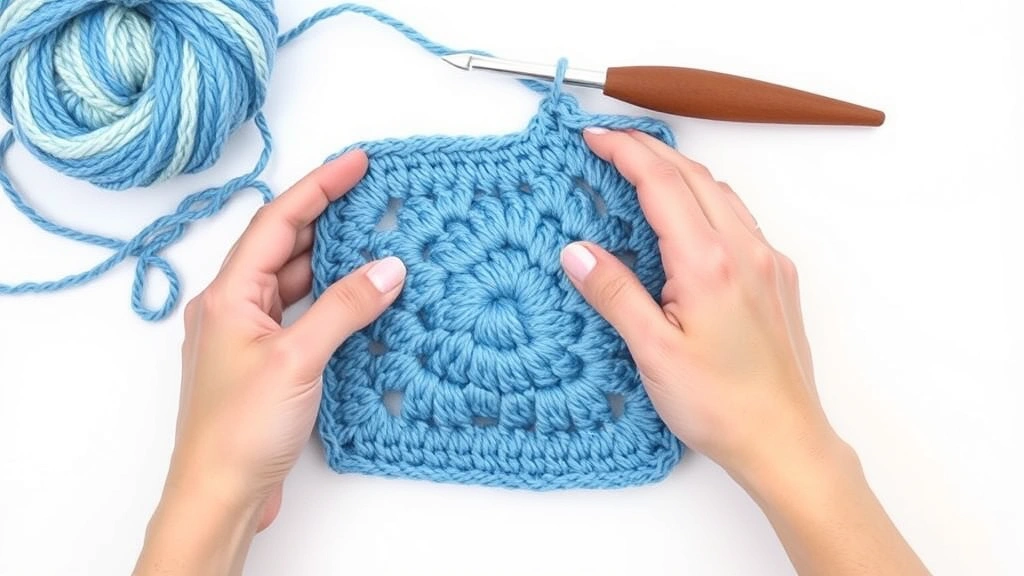
Granny Square Corners
Ah, the beloved granny square corner – probably the most iconic corner in all of crochet! This is where many crocheters first encounter the magic of corner construction, and it’s a technique that opens doors to countless granny square patterns.
The traditional granny square corner follows a specific formula: (3 double crochet, chain 2, 3 double crochet) all worked into the corner chain space. This creates those distinctive clustered corners that make granny squares so recognizable and beloved.
Classic Granny Square Corner Method
Starting with your foundation ring (usually chain 4, joined with a slip stitch), here’s how to create those perfect granny square corners:
- First Round Setup
After your initial chain 3 (counts as first double crochet), work 2 more double crochet into the center ring. Chain 2, then work 3 double crochet. Repeat this sequence 3 more times, ending with chain 2 and joining to the top of your initial chain 3.
- Subsequent Rounds
For each following round, work 3 double crochet in each chain-2 corner space, followed by chain 2, then 3 more double crochet in the same space. Between corners, work your cluster groups in the chain-1 spaces.
What I love about granny square corners is their versatility. You can modify the basic structure by changing the number of double crochets in each cluster or adjusting the corner chain space. Some patterns use chain 3 for larger corners, while others stick with chain 1 for tighter, more compact squares.
The Craft Yarn Council has excellent resources on standard granny square construction that I reference frequently when I’m designing my own variations.
Color Changes in Granny Square Corners
One of the most exciting aspects of granny square corners is how beautifully they showcase color changes. When you’re working with multiple colors, your corners become natural transition points. I typically change colors at the beginning of a round, which means my corner clusters help define each color band.
For clean color changes, I always finish my last stitch of the old color completely before switching to the new yarn. This prevents those muddy color bleeds that can make corners look messy.
Troubleshooting Common Problems
Let’s be honest – corners can be frustrating when they don’t cooperate. I’ve seen every corner disaster imaginable, and most of them come down to a few common issues that are totally fixable once you know what to look for.
Corners That Cup or Curl Inward
This is usually a sign that you’re not adding enough stitches in your corners. Your fabric is trying to lie flat, but there isn’t enough material to make the 90-degree turn, so it cups inward instead. The fix is straightforward: add more stitches to your corner.
For single crochet, try working 4 stitches in the corner instead of 3. For double crochet corners, consider changing your chain space from 2 to 3, or add an extra double crochet stitch to each side of the corner.
Corners That Ruffle or Wave
The opposite problem – too many stitches in the corner. Your fabric has excess material that has nowhere to go except to ruffle up. This is more common when working with larger hook sizes relative to your yarn weight.
Try reducing your corner stitches by one, or if you’re using chain spaces, reduce the chain count. Sometimes the issue is tension-related – if you’re working very loosely, your stitches might be larger than the pattern expects.
Uneven or Lopsided Corners
This often happens when your stitch count is inconsistent from side to side. I always recommend counting your stitches on each side of your square or rectangle to ensure they match. It’s tedious, but it saves so much frustration later.
Another cause of uneven corners is inconsistent tension. If you’re gripping your hook differently as you work around your piece, or if you’re getting tired and your tension is loosening, your corners will reflect those changes.
Advanced Corner Techniques
Once you’ve mastered basic corners, there’s a whole world of advanced techniques that can add sophistication to your projects. These methods require a bit more skill but create stunning results that really set your work apart.
Mitered Corners
Mitered corners create a diagonal seam effect that’s particularly beautiful in geometric scarves and blanket borders. Instead of working increases into a single corner stitch, you create the corner by working decreases on either side of a central corner stitch.
The technique involves working to one stitch before the corner, then working a decrease (like single crochet 2 together) that spans the stitch before the corner, the corner stitch itself, and the stitch after the corner. This creates a neat diagonal line and a very tailored look.
Rounded Corners
Sometimes you want softer, more organic-looking corners rather than sharp 90-degree angles. This is particularly nice for baby items or home decor pieces where you want a gentler aesthetic.
To create rounded corners, you’ll work your increases over several stitches rather than concentrating them all in one corner space. For example, instead of working 3 single crochet in one corner stitch, you might work 2 single crochet in each of the last 2 stitches of one side and the first 2 stitches of the next side.
Popular yarn brands like Lion Brand and Red Heart often feature patterns that showcase these advanced corner techniques in their free pattern collections.
Textured Corners
For projects where you want your corners to be decorative elements rather than just functional necessities, consider incorporating texture stitches into your corner construction. Popcorn stitches, bobbles, or shell stitches can all be worked into corner spaces to create dimensional, eye-catching details.
These textured corners work particularly well in home decor items like pillow covers or decorative throws where the corners become focal points rather than just structural elements.
Common Questions
How many stitches should I work in a single crochet corner?
For most single crochet projects, work 3 single crochet stitches in the corner stitch. This provides enough fabric to turn the corner without creating bulk. If your corners are cupping inward, try 4 stitches; if they’re ruffling, reduce to 2 stitches plus the corner stitch.
Why do my granny square corners look uneven?
Uneven granny square corners usually result from inconsistent stitch counts or tension variations. Count your stitches on each side – they should be equal. Also check that you’re working the same number of double crochet stitches in each corner space (typically 3 double crochet, chain 2, 3 double crochet).
Can I use different corner techniques in the same project?
Absolutely! Mixing corner techniques can create interesting design elements. For example, you might use standard double crochet corners for the body of an afghan but switch to textured corners for the border. Just ensure the stitch counts work mathematically so your edges remain straight.
How do I fix a corner that’s too tight?
Tight corners usually indicate insufficient stitches or overly tight tension. Try adding one more stitch to your corner, or if using chain spaces, increase the chain count by one. You can also consciously loosen your tension slightly when working corner stitches.
What’s the best yarn for practicing corner techniques?
I recommend worsted weight cotton yarn in a light color for learning corners. Cotton has enough structure to hold corner shapes well, and light colors make it easy to see your stitch definition. Brands like Bernat Handicrafter Cotton or Lion Brand 24/7 Cotton are excellent choices.
How do I maintain consistent corners across multiple rounds?
Use stitch markers to mark your corner spaces, and count stitches regularly. I place a marker in each corner chain space or on the center stitch of 3-stitch corners. This prevents you from accidentally working into the wrong space and throwing off your corner placement.
Should corner chains count as stitches?
This depends on your pattern, but generally, corner chains (like the chain-2 in granny squares) are spaces, not stitches. They don’t count toward your stitch total but provide the room needed for the corner to lie flat. Always check your pattern’s specific instructions, as some designers count chains differently.
How do I know if my corner technique is working correctly?
Your finished work should lie completely flat without cupping inward or ruffling outward. The corners should form clean 90-degree angles, and each side should measure the same length. If you’re working in rounds, your corner-to-corner measurements should also be equal.
Mastering crochet corners truly is one of those skills that transforms your entire crafting experience. What once seemed impossibly complex becomes second nature, and you’ll find yourself confidently approaching patterns that would have intimidated you before. Remember, every expert crocheter started exactly where you are now – with wonky corners and plenty of questions.
The key is practice and patience with yourself. Start with simple projects using worsted weight yarn and basic corner techniques. As your confidence grows, experiment with different methods and more complex patterns. Before you know it, you’ll be the one helping other crocheters figure out why their corners aren’t cooperating.
Keep your hooks handy and your yarn basket full – there’s a whole world of beautiful corner techniques waiting for you to explore. Happy crocheting!