Picture this: you’ve just finished a gorgeous granny square blanket, and you’re staring at about fifty loose ends that need weaving in. Your wrist is already protesting, and you haven’t even started. Sound familiar? I’ve been there more times than I care to admit, and let me tell you – there are definitely ways to make this tedious task less painful and more efficient.
Weaving in ends is one of those necessary evils in crochet that can make or break the professional look of your finished project. I used to dread this part so much that I had half-finished projects sitting around for months, just because I couldn’t face dealing with all those tails. But over the years, I’ve picked up some techniques and tools that have completely changed my relationship with finishing work.
The truth is, proper end weaving isn’t just about making your project look neat – it’s about ensuring your hard work doesn’t unravel over time. I learned this lesson the hard way when a baby blanket I’d made started coming apart after just a few washes because I’d rushed through the finishing. Never again!
Whether you’re working with cotton, acrylic, wool, or specialty fibers, each material has its quirks when it comes to securing ends. And depending on your project – from delicate lace patterns to sturdy home decor items – your approach might need to vary. Today, I’m going to walk you through everything I’ve learned about making this process faster, easier, and more reliable.
Quick Answer
Weave ends through at least 3-4 stitches in multiple directions, working through the back loops or yarn overs when possible. Use a sharp tapestry needle and weave immediately after each color change to prevent overwhelming pile-up at the end.
Essential Tools for Weaving Ends
Let’s start with the tools that’ll make your life easier. I can’t stress enough how much the right equipment matters here. For years, I struggled with blunt tapestry needles that would split my yarn and make the process ten times harder than it needed to be.
Your most important tool is a sharp tapestry needle. I prefer the Clover bent-tip needles – the angled tip makes it so much easier to navigate through tight stitches without distorting your fabric. For fingering weight projects, I use a size 24 or 26 needle. For worsted weight and up, a size 20 or 22 works perfectly.
Good lighting is crucial but often overlooked. I have a daylight LED lamp positioned right next to my weaving spot because trying to see where you’re going in dim light is a recipe for frustration. Trust me on this one – your eyes will thank you, especially during those marathon finishing sessions.
Sharp scissors are non-negotiable. Those little embroidery scissors with the curved tips are perfect for trimming ends close to the fabric without accidentally snipping your project. I keep mine on a retractable cord so they’re always within reach.
Pro tip: Keep a small container nearby for collecting trimmed ends. It keeps your workspace tidy and prevents yarn scraps from ending up embedded in your current project.
Some crocheters swear by end weavers – those little plastic tools designed specifically for this task. I’ve tried them, and while they work okay for bulky yarns, I still prefer a good needle for most situations. The control and precision you get with a needle is hard to beat.
The Basic Weaving Technique
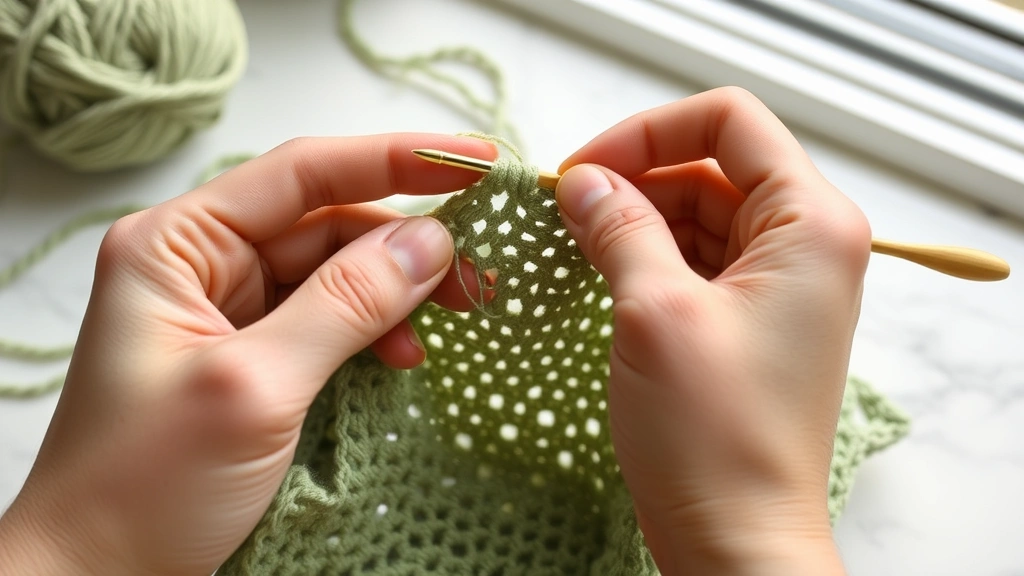
Here’s the foundation technique that works for most situations. Thread your yarn tail onto your tapestry needle, leaving about 6 inches to work with – any shorter and you’ll struggle to maintain control, any longer and it becomes unwieldy.
Start by inserting your needle through the back loops of 3-4 stitches, moving in one direction. I usually go horizontally first, following the natural flow of the stitches. Pull the yarn through, but don’t tug too hard – you don’t want to distort your fabric or create puckers.
Next, change direction and weave through another 3-4 stitches. This back-and-forth motion creates multiple anchor points that distribute the stress and make it much less likely for the end to work loose. For extra security, especially with slippery yarns like bamboo or silk, I’ll do a third pass in yet another direction.
Game changer: Always weave through the yarn fibers themselves, not just around them. This creates friction that helps lock the end in place.
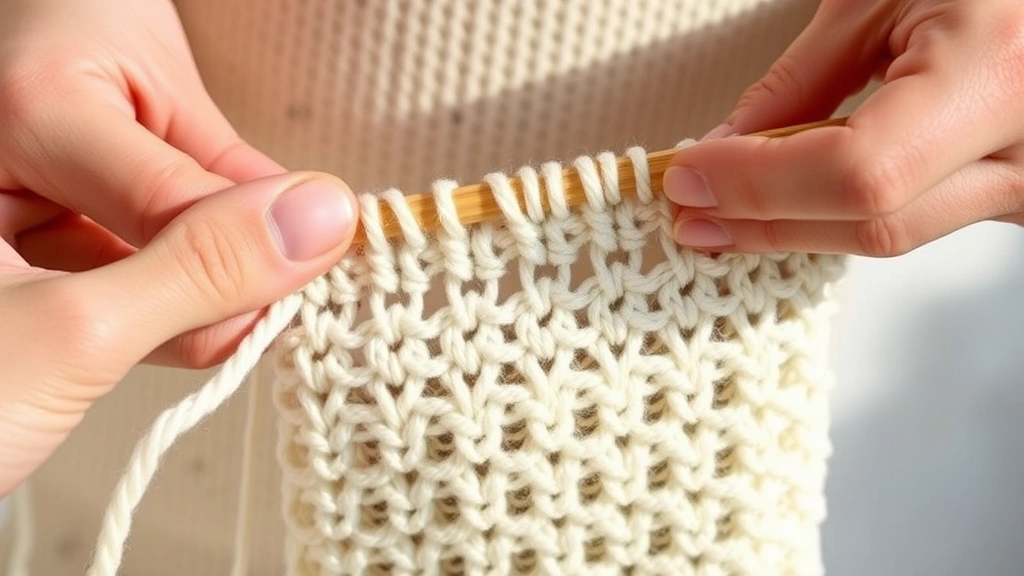
The key is to work with the natural structure of your fabric. In single crochet, I weave through the back loops horizontally, then vertically through the posts. In double crochet, those tall posts give you great vertical weaving opportunities.
Once you’ve secured the end, trim it close to the fabric – but not too close. Leave about 1/8 inch so the end doesn’t pop back through. If you’re working with a yarn that has a tendency to fray, like some cotton blends, you can carefully singe the end with a lighter (test on a swatch first!).
Working with Different Stitch Types
Different stitches present different challenges and opportunities for weaving ends. Let me break down the most common scenarios you’ll encounter.
Single Crochet and Half Double Crochet
These shorter stitches create a dense fabric that’s actually great for hiding ends. The trick is to work horizontally through the back loops, then change direction and go vertically through the stitch posts. The tight structure of these stitches grips the yarn end really well.
For half double crochet, you have the advantage of slightly taller posts, which gives you more room to maneuver your needle. I often weave diagonally through these stitches for extra security.
Double and Treble Crochet
Taller stitches give you more options but can be trickier because the fabric is more open. I focus on weaving through the posts vertically, then horizontally through the top loops. The height of these stitches means you can get a good long weave path, which is excellent for security.
With treble crochet and beyond, be extra careful not to pull too tight as you weave – the open nature of the fabric means distortion is more visible.
Textured Stitches
Bobbles, popcorns, and other textured stitches are actually fantastic for hiding ends because they create natural nooks and crannies. Weave around and through these raised elements – they’ll help camouflage any slight imperfections in your weaving.
For shell stitches, I like to weave through the base of the shell, then up through the fan of stitches. The multiple loops give you plenty of anchor points.
Yarn-Specific Weaving Tips
Not all yarns behave the same way when it comes to staying put. Here’s what I’ve learned about working with different fiber types over the years.
Cotton Yarns
Cotton has very little stretch and can be slippery, especially mercerized cotton. I always do at least two direction changes with cotton, and I make sure to weave through the actual fibers, not just around them. Lion Brand 24/7 Cotton and similar yarns benefit from an extra pass for security.
For cotton dish cloths and other items that’ll see heavy use and washing, I sometimes add a tiny drop of clear fabric glue to the trimmed end after weaving. It’s not traditional, but it works.
Acrylic Yarns
Most acrylic yarns are pretty forgiving when it comes to weaving ends. Red Heart Super Saver, Caron Simply Soft, and similar yarns have enough texture to grip well. The standard technique works great, but don’t skip the direction changes – acrylic can work loose over time if not properly secured.
Wool and Wool Blends
Wool is a dream to work with for end weaving because the fibers naturally want to stick together. A light steam after weaving (if the yarn can handle it) will help the fibers felt slightly and lock everything in place. Knit Picks wool yarns are particularly good for this.
Slippery Yarns
Bamboo, silk, and some cotton blends can be challenging because they’re so smooth. For these, I do extra passes and sometimes tie a tiny knot before weaving – something I normally avoid. The Craft Yarn Council recommends extra care with these fiber types.
| Yarn Type | Weaving Passes | Special Considerations |
|---|---|---|
| Cotton | 3-4 | Weave through fibers, consider fabric glue for high-use items |
| Acrylic | 2-3 | Standard technique works well |
| Wool | 2-3 | Light steaming helps lock ends |
| Bamboo/Silk | 4-5 | May need tiny securing knot |
Advanced Securing Techniques
Sometimes the basic technique isn’t enough, especially for items that’ll see heavy use or washing. Here are some advanced methods I use for extra security.
The Duplicate Stitch Method
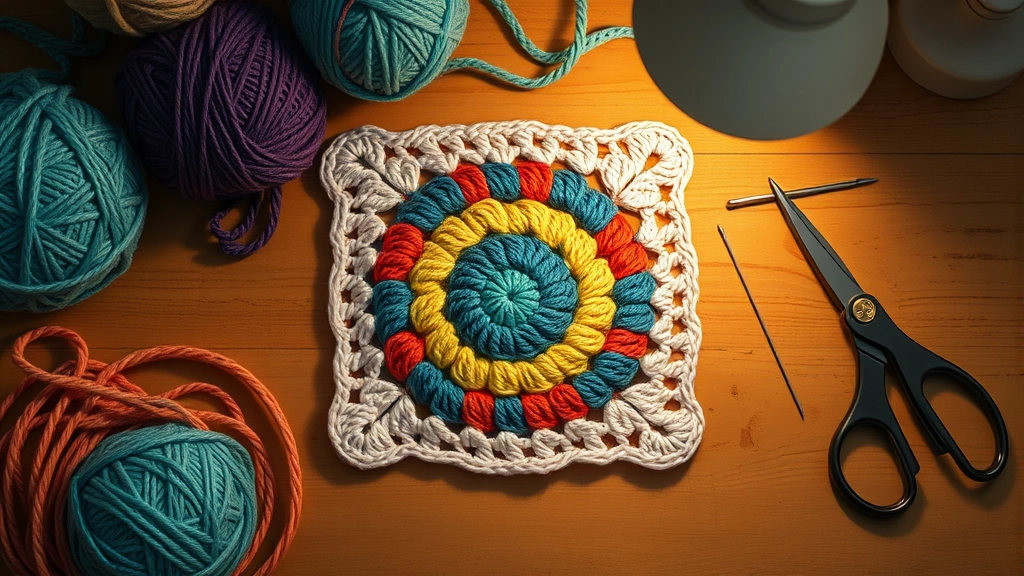
This technique involves following the path of an existing stitch with your yarn end. It’s nearly invisible and incredibly secure. Thread your needle and follow the exact path of a nearby stitch, going under and over exactly where the original yarn went. This works especially well with granny squares and other geometric patterns.
The Split Stitch Technique
For extra security, especially with smooth yarns, you can split the plies of the working yarn as you weave. Use your needle to pierce through the middle of the yarn strands rather than going around them. This creates incredible hold but requires a sharp needle and patience.
The Russian Join Alternative
When you’re dealing with ends from joining new yarn, consider whether you could have used a Russian join instead. But if you’re already at the weaving stage, you can mimic this technique by threading the end back through itself before weaving into the fabric.
When to use advanced techniques: Baby items, blankets, bags, and anything that will be washed frequently or see heavy use. The extra time investment pays off in durability.
Common Mistakes to Avoid
Let me save you from some of the painful lessons I learned the hard way. These mistakes might seem minor, but they can seriously compromise your finished project.
The biggest mistake is weaving all your ends in the same direction. I see this constantly, and it creates a weak point where all the ends converge. Always change directions – it’s not optional if you want your project to last.
Pulling too tight is another common issue. Yes, you want the end secure, but yanking on it will distort your fabric and create puckers that never quite lay flat again. Work with gentle, consistent tension.
Don’t trim too close to the fabric. I know it’s tempting to get that perfectly clean look, but leaving 1/8 inch prevents the end from popping back through. With some yarns, especially those with spring or memory, this is crucial.
Skipping the weaving altogether and just tying knots is a recipe for disaster. Knots create bumps, can work loose, and often pop through to the right side of your work. There are very few situations where a knot is the right answer.
Reality check: If you’re finding excuses to avoid weaving ends, you’re probably making it harder than it needs to be. The right tools and technique make this a meditative, satisfying process rather than a chore.
Project-Specific Advice
Different types of projects have different requirements when it comes to finishing. Here’s how I approach various common scenarios.
Baby Items
Safety is paramount with baby blankets and clothing. I do extra passes, sometimes four or five direction changes, and I’m extra careful about trimming. Babies explore everything with their mouths, so loose ends are not just unsightly – they’re potentially dangerous.
For baby items, I also avoid any techniques that might create scratchy spots on the wrong side. Gentle weaving through back loops and posts works best.
Blankets and Afghans
Large projects like afghans often have dozens of ends to weave. I’ve learned to tackle these as I go rather than saving them all for the end. After each granny square or color section, I immediately weave in those ends. It breaks up the monotony and prevents that overwhelming pile-up at the finish line.
For blankets that will be washed frequently, I use the duplicate stitch method on at least half the ends for extra security.
Wearables
Sweaters and other garments need special attention because they’ll be stretched and moved constantly. I focus on weaving ends in areas that won’t see much stress – avoid shoulder seams and other high-movement areas when possible.
For sweaters, I often weave ends into the seam allowances where they’ll be hidden and reinforced by the seaming.
Amigurumi
Stuffed toys present unique challenges because you’re working in the round and the stuffing can push ends back through. I use extra-long tails (8-10 inches) and do multiple direction changes. Sometimes I’ll weave an end, stuff lightly, then go back and add another pass before final stuffing.
- Prepare Your Workspace
Gather your tapestry needle, sharp scissors, and good lighting. Have a small container ready for trimmed ends.
- Thread and Position
Thread your 6-inch tail onto the needle. Identify the best starting point – usually where the yarn naturally wants to hide.
- First Pass
Weave through 3-4 stitches in one direction, going through back loops or yarn overs when possible.
- Change Direction
Turn and weave through 3-4 more stitches perpendicular to your first pass. This creates the crucial cross-hatch that locks everything in place.
- Final Pass (if needed)
For slippery yarns or high-use items, add a third pass in yet another direction.
- Trim Carefully
Cut the end leaving about 1/8 inch. Check that it doesn’t pop back through.
Common Questions
How many stitches should I weave through?
At minimum, weave through 3-4 stitches in each direction. For slippery yarns or high-use items, go through 4-5 stitches per pass. The key is multiple direction changes rather than just length.
Can I use a crochet hook instead of a needle?
A steel crochet hook can work in a pinch, especially for bulky yarns, but a tapestry needle gives you much better control and precision. The pointed tip makes it easier to navigate through tight spaces without splitting yarn.
Should I weave ends as I go or save them for the end?
Definitely weave as you go when possible! It prevents overwhelming pile-up and ensures you don’t rush through the finishing. I weave ends immediately after each color change or section completion.
What if my yarn end keeps popping back through?
This usually means you’re not weaving through enough stitches or not changing directions enough. Try adding an extra pass in a different direction. For persistent problems, the yarn might be too slippery for basic techniques – consider the split stitch method.
How do I handle very short ends?
If you have less than 4 inches to work with, carefully unravel a few stitches to give yourself more tail. It’s worth the extra effort rather than trying to work with inadequate length.
Is it okay to tie knots when weaving in ends?
Generally no – knots can work loose, create bumps, and may show through on the right side. The only exception might be with very slippery yarns where you tie a tiny knot before weaving, but even then, the weaving does the real securing work.
How do I weave in ends on lace projects?
Lace is tricky because the open fabric shows everything. Focus on weaving through the yarn overs and chain spaces rather than the more visible stitch posts. Work extra carefully to avoid distorting the delicate fabric.
Can I machine wash projects with woven-in ends?
Yes, if you’ve woven them properly! Use at least two direction changes and appropriate techniques for your yarn type. I always do a test swatch for new yarns to see how the ends hold up to washing.
Weaving in ends doesn’t have to be the dreaded final step of your crochet projects. With the right tools, techniques, and mindset, it can actually become a satisfying part of the process – that moment when you transform your work-in-progress into a truly finished, professional-looking piece.
Remember, every expert crocheter has sat exactly where you are now, staring at a pile of yarn tails and wondering if there’s a better way. There is, and you’ve got all the knowledge you need right here. Take your time, use good tools, and don’t skip the direction changes. Your future self will thank you when that beautiful blanket is still looking perfect after years of use and washing.
Now grab that tapestry needle and show those ends who’s boss. You’ve got this!