
I’ll never forget the first time I attempted a crochet border. I had spent weeks working on what I thought was a gorgeous granny square blanket, only to realize it looked completely unfinished without some kind of edging. The problem? I had no clue where to start, what stitches to use, or how to make the corners look neat instead of bunched up and awkward.
If you’ve ever stared at a finished crochet project thinking “something’s missing,” you’re probably looking at a piece that needs a border. Borders aren’t just decorative afterthoughts – they’re the frame that pulls everything together, adds structure, and gives your work that polished, professional look.
Whether you’re working on baby blankets, dishcloths, or intricate doilies, the right border can transform your project from “homemade” to “heirloom quality.” But here’s what nobody tells you: choosing the wrong border can actually make your project look worse. I’ve seen beautiful blankets ruined by borders that were too busy, too plain, or just plain wrong for the piece.
The good news? Once you understand the basics of border construction and learn a handful of reliable patterns, you’ll be able to finish any project with confidence. I’m going to walk you through everything I wish someone had taught me when I was starting out – from the simplest single crochet borders to more complex lace edgings that’ll make people ask where you bought your “expensive” blanket.
Quick Answer
Crochet borders are worked around the perimeter of finished projects using foundation rounds of single crochet, then decorative rounds with various stitch combinations. Start with single crochet borders for beginners, work 3 stitches in each corner, and choose border complexity based on your main project’s style.
Why Borders Make All the Difference
Think of crochet borders like the mat around a picture frame – they create visual boundaries and add that finished look that separates amateur work from professional results. But borders do more than just look pretty. They serve several practical purposes that can make or break your project.
First, borders provide structural stability. If you’ve ever noticed the edges of your granny square blanket curling or stretching out of shape, a well-constructed border will fix that problem. The foundation rounds create a stable edge that helps your project maintain its intended shape over time.
Borders also hide imperfections. Let’s be honest – not every project turns out perfectly. Maybe your tension varied slightly, or you had to fudge a few stitches to make the pattern work. A thoughtfully chosen border can camouflage these little inconsistencies and draw the eye to the overall design instead.
From a design perspective, borders create visual weight and balance. A delicate lace project might need a simple border to avoid overwhelming the main pattern, while a solid-colored baby blanket could benefit from an intricate decorative border that adds interest and personality.
Pro tip: If you’re unsure whether your project needs a border, lay it flat and step back about six feet. If the edges look unfinished or the project seems to “float” without definition, it needs a border.
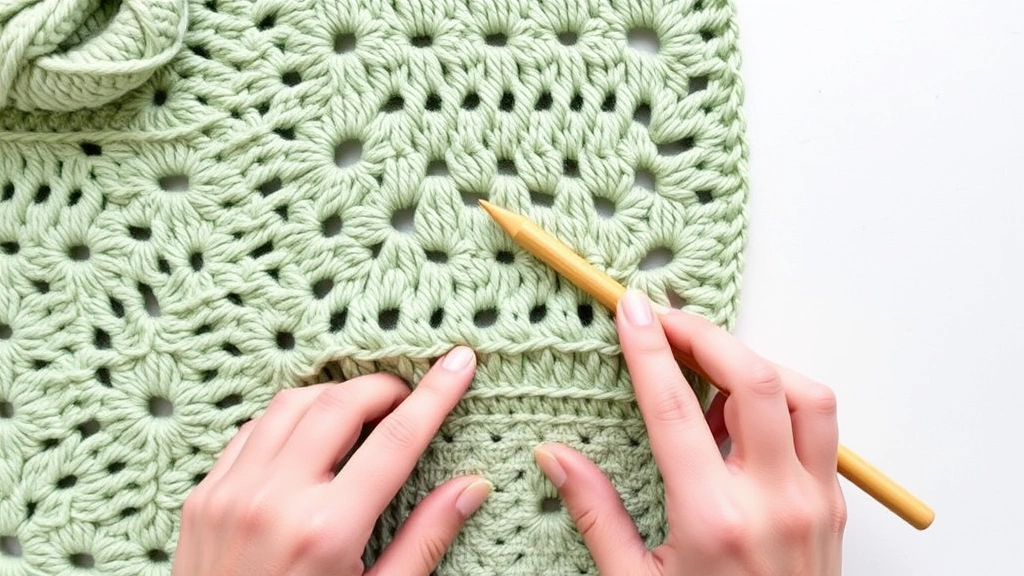
Border Construction Basics
Before diving into specific patterns, you need to understand how borders are constructed. Most crochet borders follow a predictable structure that makes them much less intimidating once you grasp the concept.
Every border starts with a foundation round, typically worked in single crochet. This round serves multiple purposes: it creates a consistent base for decorative rounds, evens out any irregularities in your project’s edge, and establishes the stitch count for subsequent rounds.
When working the foundation round, you’ll need to determine your stitch placement. For projects with clear stitch definition (like those made with worsted weight yarn), work one single crochet in each stitch across the top and bottom edges. For the sides, work one single crochet in the end of each row, adjusting as needed to keep the border flat.
Understanding Stitch Counts
Getting the right stitch count is crucial for a professional-looking border. Too few stitches and your border will pucker inward. Too many stitches and it’ll ruffle outward like a lettuce leaf. Here’s my tried-and-true method for getting it right:
- Work a test section
Start your foundation round on one side and work about 12-15 stitches. Check if the edge lies flat. If it curves inward, you need more stitches. If it ruffles, you need fewer.
- Count and calculate
Once you find the right ratio for your test section, count the stitches and measure the length. Use this to calculate how many stitches you’ll need for each side.
- Adjust at corners
Corners always need extra stitches to accommodate the 90-degree turn. The standard is 3 stitches in the corner space, but this can vary based on your yarn and hook size.
Simple Borders for Beginners
If you’re new to borders, start with these foolproof patterns. They’re forgiving, work up quickly, and look great on almost any project.
Single Crochet Border
The most basic border is also one of the most useful. A simple single crochet border adds structure without competing with your main pattern. It’s perfect for dishcloths, pot holders, and any project where you want a clean, understated finish.
Work your foundation round in single crochet, placing 3 single crochet stitches in each corner. For subsequent rounds, simply repeat this process. Two or three rounds usually provide enough visual weight, but you can add more for thicker borders.
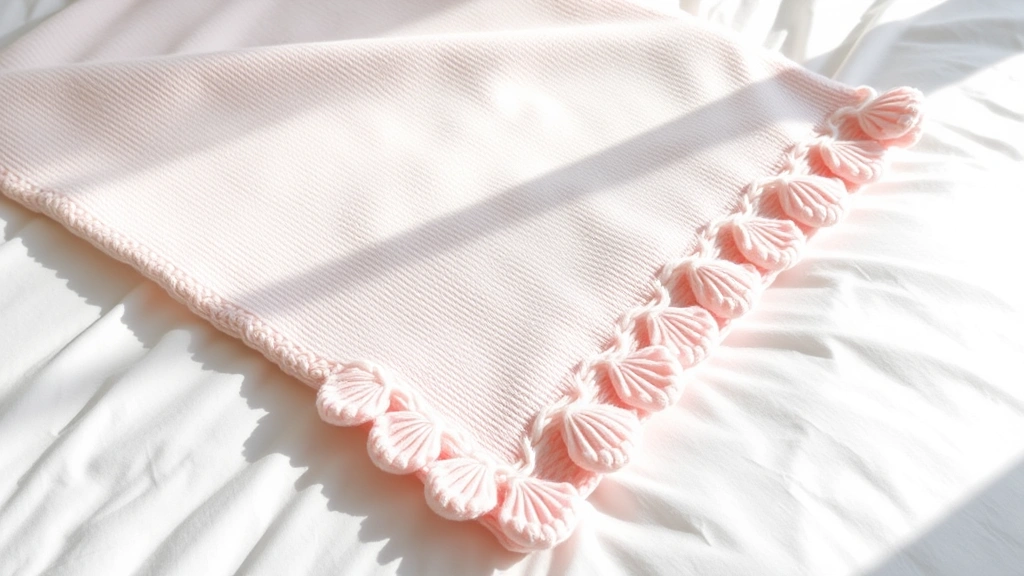
Shell Border
Once you’re comfortable with single crochet borders, try a simple shell border. This creates a lovely scalloped edge that’s feminine without being overly fussy.
After your foundation round, work: *skip 2 stitches, work 5 double crochet in the next stitch, skip 2 stitches, single crochet in the next stitch* repeat around. This creates evenly spaced shells that add texture and visual interest.
Picot Border
Picot borders add a delicate, vintage touch that’s perfect for baby items and feminine projects. The basic picot is surprisingly simple: single crochet, *chain 3, slip stitch in the first chain (picot made), single crochet in next 2 stitches* repeat around.
For a more pronounced effect, try spacing your picots further apart or using longer chains. A 5-chain picot creates a more dramatic point, while 3-chain picots are subtle and sweet.
Mastering Corner Techniques
Corners are where most crocheters struggle with borders. Get them wrong, and your beautiful border will bunch up, pull, or look uneven. But once you understand the principles, corners become much more manageable.
The key to good corners is understanding that you need to add stitches to accommodate the 90-degree turn. How many stitches depends on the height of your border stitches and the specific pattern you’re using.
Standard Corner Increases
For single crochet borders, work 3 single crochet stitches in each corner space. For double crochet borders, you might need 4 or 5 stitches in each corner. The exact number depends on your yarn weight and hook size – thicker yarns typically need more corner stitches.
| Stitch Type | Corner Stitches | Best For |
|---|---|---|
| Single Crochet | 3 stitches | Most projects, stable corners |
| Half Double Crochet | 3-4 stitches | Medium-height borders |
| Double Crochet | 4-5 stitches | Taller borders, dramatic effect |
Mitered Corners
For a more tailored look, try mitered corners. These create sharp, precise angles that look especially good on geometric projects. Instead of working multiple stitches in the corner space, you work the corner stitches at a 45-degree angle.
This technique requires more planning but creates incredibly professional results. It’s particularly effective on projects with straight edges where you want clean, architectural lines.
Test your corner technique on a small swatch before committing to your entire project. It’s much easier to adjust your approach on a practice piece than to rip out an entire border.
Decorative Border Patterns
Once you’ve mastered the basics, decorative borders open up a world of creative possibilities. These patterns can completely transform the look and feel of your project.
Fan Border
Fan borders create an elegant, vintage look that’s perfect for shawls, blankets, and home décor items. The basic fan consists of multiple double crochet stitches worked in the same space, creating a fan-like spread.
A typical fan border pattern: *Single crochet, skip 2 stitches, work 7 double crochet in next stitch (fan made), skip 2 stitches* repeat around. The number of double crochet stitches in each fan can vary – 5 creates a subtle fan, while 9 or more creates a dramatic, statement border.
Bobble Border
Bobble borders add wonderful texture and dimension. They’re particularly striking on solid-colored projects where the texture can really shine. Bobbles are created by working multiple partial double crochet stitches in the same space, then drawing them together at the top.
For a basic bobble border, work your foundation round, then: *Single crochet in next 2 stitches, work bobble in next stitch* repeat around. Space your bobbles evenly for the best effect.
Lace Borders
Lace borders can range from simple to incredibly complex. They’re perfect for adding elegance to special projects like christening gowns, wedding accessories, or heirloom blankets.
A simple lace border might use chain spaces and picots: *Single crochet, chain 5, skip 2 stitches, single crochet, chain 3, slip stitch in first chain (picot), chain 5, skip 2 stitches* repeat around. More complex lace borders incorporate multiple rounds with varying stitch heights and intricate chain combinations.
Choosing the Right Border
Selecting the perfect border for your project is part art, part science. The wrong choice can overwhelm delicate work or look skimpy on a bold project. Here’s how to make the right choice every time.
Consider Your Project’s Style
The border should complement, not compete with, your main pattern. If you’ve spent weeks working on an intricate stitch pattern, a simple border will showcase your work beautifully. Conversely, a plain project in solid colors can handle a more decorative border.
Think about the project’s intended use as well. A baby blanket needs a border that can withstand frequent washing, so avoid overly delicate lace patterns. A decorative wall hanging, on the other hand, can support the most intricate border you can imagine.
Yarn and Color Considerations
Your yarn choice affects which borders will work best. Smooth yarns like cotton or bamboo show off intricate stitch patterns beautifully, while fuzzy yarns like mohair or some acrylics can obscure detailed work.
Color is equally important. A border in the same color as your project creates subtle definition, while a contrasting color makes a bold statement. If you’re unsure, try working a small section in different colors to see which effect you prefer.
Skill Level and Time Constraints
Be realistic about your skill level and available time. A complex lace border might be beautiful, but if you’re a beginner or working under a deadline, a simpler option might be more practical. Remember, a well-executed simple border looks infinitely better than a poorly executed complex one.
When in doubt, go simpler rather than more complex. You can always add additional decorative rounds later, but it’s harder to simplify an overly busy border.
Common Problems and Solutions
Even experienced crocheters encounter border challenges. Here are the most common problems and how to fix them.
Ruffling Borders
If your border ruffles or waves, you have too many stitches. This usually happens when you work too many stitches in the foundation round or add too many corner increases. The fix is to remove the border and rework it with fewer stitches.
To prevent this in future projects, always work a test section first. It’s much easier to adjust your stitch count early than to rework an entire border.
Puckering Borders
Borders that pull inward and cause the project to cup are the opposite problem – too few stitches. This is particularly common when transitioning from a stretchy main fabric to a less stretchy border pattern.
The solution is to add more stitches in your foundation round. You might need to work 2 stitches in some spaces or add extra stitches at regular intervals.
Uneven Corners
Corners that don’t lie flat or look different from each other usually result from inconsistent stitch counts. Count your stitches carefully and make sure you’re working the same number of increases at each corner.
If one corner consistently looks different, check your tension. Many crocheters unconsciously change their tension when working corners, creating uneven results.
Border Separation
Sometimes borders can separate from the main project, especially if there’s a significant difference in yarn weight or fiber content. To prevent this, make sure your foundation round is worked with appropriate tension – not too tight, not too loose.
If you’re changing yarns for the border, choose something with similar care requirements and stretch properties. A cotton border on a wool project, for example, might behave differently during washing and wearing.
Common Questions
How much extra yarn do I need for a border?
For a simple single crochet border, plan on about 10-15% extra yarn. More complex borders can require 25-50% additional yarn, depending on their width and complexity. It’s always better to have too much than to run out mid-border.
Can I add a border to any crochet project?
Most projects can benefit from some type of border, but the style should match the project’s construction. Projects worked in the round might need different border techniques than those worked in rows. Amigurumi projects typically don’t need borders since they’re three-dimensional.
Should I use the same hook size for the border?
Not necessarily. Many crocheters use a hook one size smaller for borders to create better stitch definition and prevent stretching. This is especially important for lace borders or when using different yarn for the border.
How do I work a border on a project with curved edges?
Curved edges require more frequent increases to maintain the curve’s shape. Work increases every few stitches along the curve, testing frequently to ensure the border lies flat. The exact increase frequency depends on how pronounced the curve is.
Can I work borders in different colors?
Absolutely! Contrasting borders can create stunning effects. Just make sure to choose colors that complement your project’s overall design. Consider the Craft Yarn Council’s guidelines for color combinations if you’re unsure.
What’s the best way to join new yarn for a border?
Join new yarn at a corner or other inconspicuous location. Leave 6-inch tails on both the old and new yarn, work a few stitches with the new yarn, then weave in the tails securely. Avoid joining yarn in the middle of a decorative element.
How do I block a project with a decorative border?
Block the entire project as one unit, paying special attention to the border’s shape. Pin out points and scallops to their full extension, and use blocking wires for straight edges. Lace borders particularly benefit from aggressive blocking to open up the stitch patterns.
Can I add multiple border rounds?
Yes! Multiple rounds can create beautiful layered effects. Start with a foundation round in single crochet, then add decorative rounds as desired. Each round should complement the previous one without overwhelming the overall design.
Bringing It All Together
Mastering crochet borders is one of those skills that instantly elevates your work from good to gorgeous. Whether you stick with simple single crochet edgings or venture into complex lace patterns, the key is understanding the fundamentals: proper stitch counts, consistent corner techniques, and choosing borders that complement your project’s style.
Remember that borders are meant to enhance, not overshadow, your beautiful crochet work. Start with simple patterns and work your way up to more complex designs as your confidence grows. Don’t be afraid to experiment with different yarns, colors, and techniques – some of the most beautiful borders come from happy accidents and creative experimentation.
The next time you finish a project and feel like something’s missing, you’ll know exactly what to do. Whether it’s a quick single crochet border to stabilize those edges or an elaborate lace edging to create an heirloom piece, you now have the knowledge to choose and execute the perfect finishing touch.
Happy crocheting, and here’s to borders that make people ask where you learned to crochet so beautifully!