Crochet Project Planning: Turn Your Yarn Stash Into Finished Masterpieces
You know that moment when you’re staring at your yarn collection and thinking, “I have SO much yarn, but I have no idea what to actually make with it”? Yeah, I’ve been there too. It’s like having all the ingredients for dinner but no recipe in sight. The truth is, having a solid project plan doesn’t just help you finish things—it makes the entire creative process way more enjoyable. You’ll feel less overwhelmed, more confident, and honestly, you’ll end up with pieces you’re genuinely proud of.
Let’s be real: crochet projects can feel daunting. You might worry about running out of yarn, picking the wrong pattern for your skill level, or investing time in something that won’t turn out right. But here’s the thing—with a little planning and the right approach, you can absolutely nail this. I’m going to walk you through exactly how to take that beautiful yarn stash and turn it into finished projects that actually make you happy.
Assess Your Yarn Stash: Know What You’re Working With
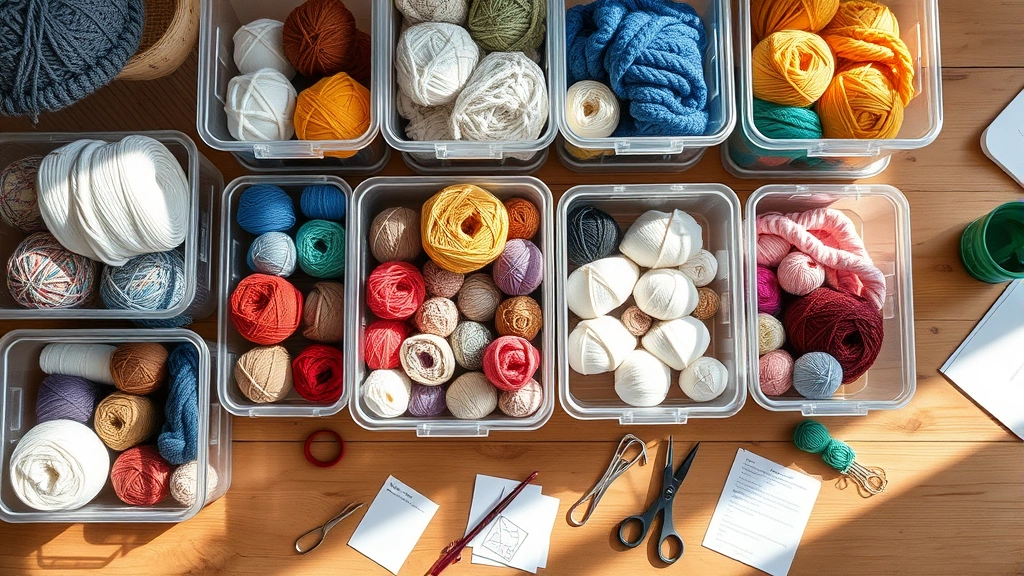
Before you pick a single pattern, you’ve got to honestly look at what you’ve got. I’m not saying you need to weigh every ball (though some people do, and hey, no judgment), but you should at least know the basics: how much yarn you have, what weight it is, and what fiber content you’re dealing with.
Start by gathering everything in one spot. Yes, really. Pull it all out, whether it’s in bins, bags, or mysteriously shoved in the back of your closet. As you’re going through it, jot down:
- Yarn weight (fingering, sport, worsted, bulky, etc.)
- Approximate yardage (the label usually tells you, or you can estimate)
- Fiber content (acrylic, wool, cotton, blends)
- Color and condition (is it still viable, or has it been sitting in sunlight for three years?)
- Quantity (one skein? Five balls? Enough for a whole sweater?)
Here’s a pro tip: create a simple spreadsheet or use an app like Ravelry to catalog everything. I know it sounds like extra work, but honestly, it saves you so much time later. You won’t be buying duplicate yarn, and you’ll have instant clarity when inspiration strikes.
Pay special attention to yardage because that’s what actually determines what you can make. A project that calls for 800 yards needs 800 yards, regardless of how pretty the yarn is. Being realistic about yardage now prevents heartbreak later.
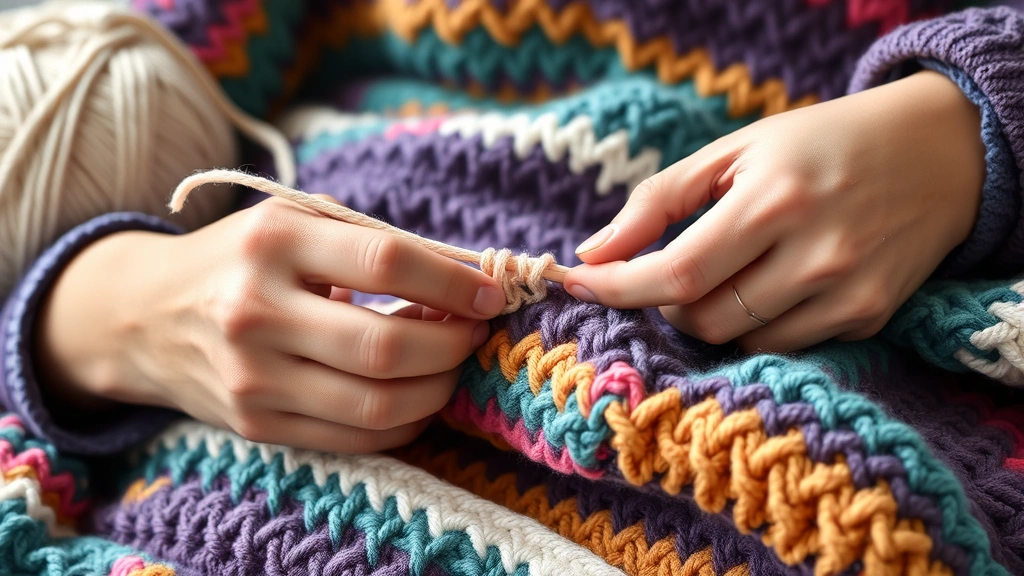
Understand Crochet Patterns and Your Skill Level
Here’s something I wish someone had told me earlier: picking the right pattern difficulty is just as important as picking the right yarn. You don’t want to start a project that’s way beyond your current skill level, but you also don’t want to bore yourself with something too simple.
Most patterns are labeled as beginner, intermediate, or advanced. Here’s what that actually means in practice:
- Beginner patterns typically use basic stitches like single crochet, half double crochet, and double crochet. They usually have simple shaping and minimal color changes. Think dishcloths, scarves, or basic blankets.
- Intermediate patterns might include treble stitches, increases and decreases, basic shaping, or simple color work. Amigurumi, fitted hats, and simple sweaters often fall here.
- Advanced patterns involve complex shaping, intricate stitch patterns, lacework, or detailed colorwork. These require you to really understand how stitches work and how to adjust on the fly.
When you’re considering a pattern, read through the entire thing before you commit. Don’t just glance at the pretty pictures. Actually look at the instructions. If you see terms you don’t recognize, that’s a sign you might need to brush up on your skills first. There’s no shame in that at all—it’s smart planning.
Also think about what kind of crocheter you are. Are you someone who loves following instructions exactly? Or do you like improvising and making changes? Do you enjoy detailed, intricate work, or do you prefer quick, satisfying projects? Your personality matters here. If you’re the type who gets bored easily, a 40-hour granny square blanket might not be your thing, and that’s totally okay.
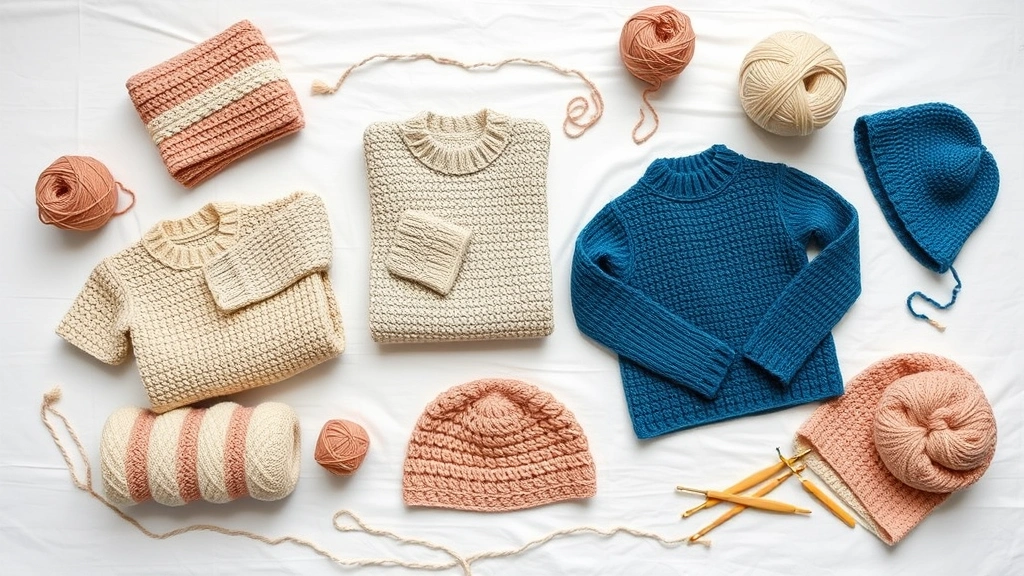
Match Your Yarn to the Right Projects
This is where the magic happens—where your yarn stash meets your project dreams. The key is thinking about what each type of yarn is actually good for.
Worsted weight acrylic is your friend if you want quick projects that are forgiving and affordable. It’s perfect for blankets, hats, scarves, and practice pieces. The downside? It can feel a bit stiff and plasticky, and it shows every tension inconsistency. But honestly, if you’re learning, that’s valuable feedback.
Fingering and sport weight yarns are gorgeous for detailed work, shawls, and garments that need drape. They take longer to work up, but the final product feels more luxe. If you have these in your stash, save them for projects where the yarn itself is the star.
Cotton yarn is perfect for summer garments, dishcloths, and anything that needs structure. It doesn’t stretch much, so it’s great for amigurumi because stuffing won’t distort your stitches over time. The trade-off is that it can be tougher on your hands if you crochet for long stretches.
Wool blends and specialty fibers are usually best for projects where you want warmth and elasticity. Sweaters, cowls, and cozy blankets are ideal. Just remember that wool can be itchy for some people, so think about who’ll wear it.
Here’s a practical exercise: pick three yarn balls from your stash. For each one, ask yourself: “What would make this yarn shine?” Write down at least two project ideas. You don’t have to commit to them right now, but you’re building a mental catalog of possibilities.
When you’re browsing patterns on Ravelry or other instructional platforms, look for patterns that specifically call for the yarn you have. The pattern designer has already done the work of figuring out what works with that particular yarn weight and fiber.
Create a Realistic Timeline for Your Projects
Let’s talk about something that trips up a lot of crocheters: time estimation. You might think a project will take two weeks, but then you actually start it and realize it’s going to take six weeks, and suddenly you’re feeling frustrated.
Here’s how to be more realistic: think about how many hours you actually crochet per week. Not how many hours you want to crochet—how many you actually do. If you work full-time, have kids, or have other hobbies, you might only have five hours a week. If you’re retired or work from home, maybe it’s twenty hours. Be honest.
Now, think about your crochet speed. If you’re not sure, here’s a quick way to figure it out: crochet a 10×10 inch swatch in the stitch and yarn you plan to use for your project. Time yourself. Let’s say it takes you 45 minutes. That’s your baseline. A blanket that’s 50×60 inches would be roughly 30 times that swatch, so about 22.5 hours of actual crochet time. If you crochet five hours a week, that’s about four and a half weeks, plus time for weaving in ends and finishing.
Build in buffer time. Always. You’ll have weeks where you don’t touch your project, or you’ll rip back and redo a section, or you’ll just need a break. A project that theoretically takes four weeks might actually take eight weeks in real life, and that’s completely normal.
Also consider the pattern complexity. Simpler patterns go faster because you get into a rhythm. Complex patterns with lots of stitch changes will slow you down because you’re constantly thinking about what comes next.
Organize Your Supplies for Success
Here’s a game-changer: when you commit to a project, gather absolutely everything you need before you start. Hooks, yarn, stitch markers, scissors, yarn needle, whatever the pattern requires. Put it all in one container or bag.
Why? Because when you’re ready to crochet, you don’t want to spend ten minutes hunting for that one hook size. You want to pick up your project and go. It sounds simple, but this one habit makes people crochet more consistently.
For your overall stash organization, you don’t need anything fancy. Clear plastic bins work great because you can see what’s inside. Label them by yarn weight, color family, or fiber type—whatever makes sense to you. The goal is being able to find what you need without dumping everything out.
Also, protect your yarn from dust, sunlight, and pests. Cedar blocks or lavender sachets are nice for keeping moths away if you’re worried about that. Store finished projects in breathable containers (not plastic bags, which can trap moisture and mildew).
Troubleshoot Common Project Planning Problems
You’re halfway through a beautiful sweater and you realize you’re going to run out of yarn. Or you picked a pattern that’s way harder than you thought. Or you finished something and it doesn’t fit right. These things happen, and they’re not failures—they’re learning opportunities.
Running out of yarn: This is the worst feeling, but it’s also preventable. Always check your yardage before you start. If you’re close on yardage (like, within 50 yards of what the pattern calls for), search for patterns specifically designed for that yardage. Or consider modifying the project—a shorter sweater, a smaller blanket, a different stitch pattern that uses less yarn.
Pattern is too hard: Stop, take a breath, and don’t blame yourself. This just means you’ve found a good skill-building opportunity. Break the pattern down into smaller sections. YouTube is your friend here—search for tutorials on the specific techniques you’re struggling with. Yarnspirations has tons of free video tutorials that can help you understand tricky stitches.
Finished object doesn’t fit: Gauge is usually the culprit. Gauge is basically how many stitches and rows you get per inch, and it’s super important for garments. If your gauge is off, your sweater will be too big or too small. For future projects, always crochet a gauge swatch and measure it. If your gauge is off, go up or down a hook size to fix it.
Lost motivation midway: This happens to literally everyone. If you’re bored with a project, it’s okay to set it aside and work on something else for a while. You don’t have to finish everything in order. Sometimes just having a break and coming back with fresh eyes makes all the difference. Or if you’re genuinely not into it anymore, that’s information too. You don’t have to finish every project you start.
When troubleshooting, community resources are gold. Check out Ravelry forums or local crochet groups. Other crocheters have probably faced the exact same issue, and they’re usually happy to help.
FAQ
How do I know if I have enough yarn for a project?
Check the pattern’s yardage requirement and compare it to your yarn’s yardage. If you’re within 10% (so 720-880 yards for an 800-yard pattern), you’re probably fine. If you’re further off, either find a different pattern or modify the project. Always have a little extra if possible—it’s better to have leftovers than to run short at the end.
Should I always follow a pattern exactly?
Not necessarily! Once you understand the basics, you can make modifications. Change colors, adjust sizing, use a different stitch pattern. But when you’re starting out, following patterns closely helps you learn. As you get more experienced, you’ll develop the intuition to know what changes work and which ones might cause problems.
What’s the best way to store works in progress?
Use a clear bag or container so you can see it and remember you’re working on it. Keep your project, yarn, and current tools all together so everything is ready to go when inspiration strikes. Some people use gallon-size ziplock bags, others prefer small plastic bins. Whatever keeps your project protected and organized works.
How can I avoid the “yarn stash spiral”?
Be intentional about yarn purchases. Before you buy, ask yourself: “Do I have a specific project in mind for this?” If the answer is no, maybe wait. It’s tempting to buy pretty yarn “just because,” but that’s how stashes become overwhelming. That said, having some yarn on hand for spontaneous projects is nice too—just set a limit that works for you.
What should I do if I hate a project partway through?
You have options: take a break and come back to it later, modify it into something you like better, or honestly, frog it (rip it out) and use the yarn for something else. Not every project has to be finished. Sometimes the learning is the point, not the finished object. Give yourself permission to walk away if something’s not bringing you joy.