You know that moment when you’re scrolling through Pinterest at 11 PM and suddenly you’re convinced you need to make a temperature blanket? Yeah, I’ve been there too. The idea sounds amazing – tracking a whole year’s weather through beautiful color changes – but then reality hits. How much yarn do you actually need? Which colors should you pick? And honestly, how do you even start something this massive without losing your mind halfway through?
I made my first temperature blanket three years ago, and let me tell you, I learned some things the hard way. Like buying way too much of some colors and running out of others (hello, unexpected heat wave in October). Or picking colors that looked gorgeous in the skein but created a muddy mess when worked together. But here’s the thing – once you know what you’re doing, temperature blankets become this incredibly satisfying project that tells a real story.
The beauty of a temperature blanket isn’t just in the finished product. It’s in the daily ritual of checking the weather, finding your color, and adding another row to your growing masterpiece. Some days you’ll be working with sunny yellows, other days with stormy grays. By the end of the year, you’ll have this amazing visual record of what Mother Nature threw at you, wrapped up in something cozy you can actually use.
Whether you’re planning to track your local weather, commemorate a special year like a baby’s first year, or just want a project that’ll keep you busy for months, I’m going to walk you through everything you need to know to make this work.
Quick Answer
You’ll need 3,000-4,500 yards of worsted weight yarn in 8-12 colors for a throw-sized temperature blanket. Plan your color scheme first, buy extra yarn for extreme temperatures, and choose a simple stitch pattern you can work while watching TV.
Planning Your Temperature Blanket
Before you buy a single skein of yarn, you need to make some key decisions. Trust me, spending time planning upfront will save you so much frustration later. The first big choice is what you’re actually tracking. Most people go with daily high temperatures, but you could also track lows, or even get creative with rainfall or humidity levels.
Size matters too. A throw blanket (about 50×60 inches) works great for most people – big enough to be useful, but not so massive you’ll never finish it. If you want something smaller, consider a baby blanket size which typically measures around 36×36 inches. For your first temperature blanket, I’d honestly recommend going smaller rather than larger.
Next, decide on your temperature ranges. I like using 10-degree increments because they give you enough color variation without being overwhelming. So you might have ranges like: below 20°F, 20-29°F, 30-39°F, and so on up to 90°F and above. Look at your local weather history to see what ranges actually make sense for your area.
Pro tip: Check your area’s weather history on Weather Underground or NOAA before finalizing your temperature ranges. You don’t want to plan for colors you’ll never use, or realize you need more ranges than you thought.
Think about the story you want to tell too. Are you tracking a special year, like the year you got married or had a baby? Or maybe you want to compare two different locations if you’re moving? Some people even make memorial blankets tracking the weather from a loved one’s hometown. The personal connection makes the whole project more meaningful.
Choosing Your Color Scheme
This is where things get fun – and where I see people make the most mistakes. Your first instinct might be to go with obvious choices: blues for cold, reds for hot. But think about how that’ll look when you’re working with those colors every single day for a year. You’ll get tired of them fast.
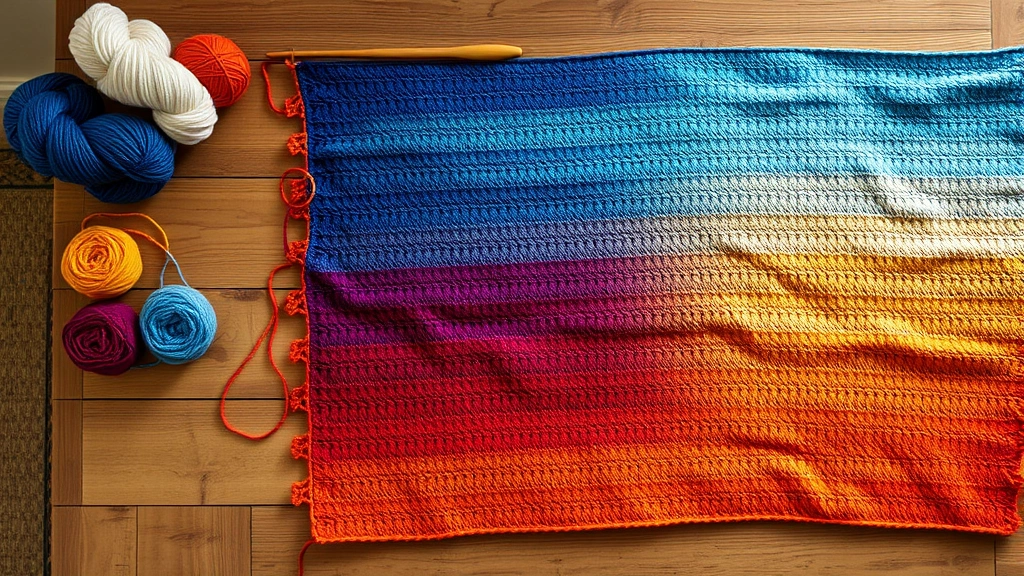
Instead, consider more sophisticated color schemes. I love using a gradient approach – maybe starting with deep purples and blues for the coldest temps, moving through greens and yellows for moderate weather, and ending with warm oranges and corals for hot days. This creates a much more interesting visual flow than the typical blue-to-red progression.
Here’s a color scheme that worked beautifully for me:
- Below 20°F: Deep navy
- 20-29°F: Royal blue
- 30-39°F: Teal
- 40-49°F: Forest green
- 50-59°F: Sage green
- 60-69°F: Golden yellow
- 70-79°F: Warm orange
- 80-89°F: Coral
- 90°F+: Deep red
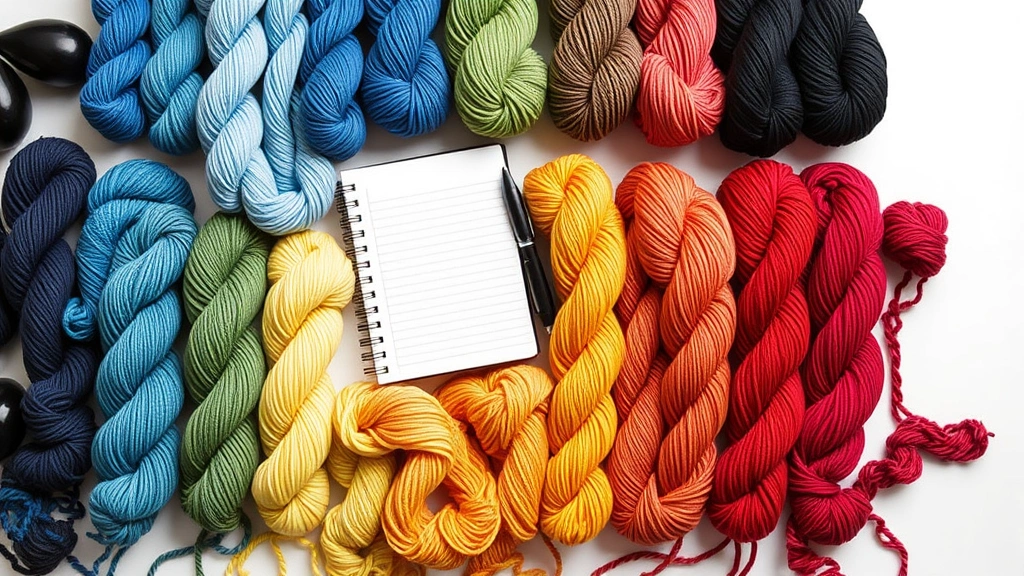
When you’re choosing yarns, buy all your colors at once if possible. Dye lots can vary significantly, and you don’t want to run out of a color mid-year and not be able to match it. Lion Brand and Red Heart both have extensive color lines that work well for temperature blankets.
Consider the practical side too. If you live somewhere with very predictable weather patterns, you might end up with a blanket that’s mostly two or three colors. That’s not necessarily bad, but it might not be the visual impact you’re going for. You could adjust your ranges to create more even distribution, or add secondary elements like tracking precipitation or wind patterns with textured stitches.
Calculating Yarn Amounts
This is where math comes in, but don’t panic – I’ll break it down simply. For a standard throw-sized temperature blanket worked in worsted weight yarn, you’re looking at roughly 3,000-4,500 total yards. The exact amount depends on your stitch pattern, hook size, and final dimensions.
Here’s how I calculate yarn needs for each color. First, figure out roughly how many days each temperature range typically occurs in your area. If you live in a moderate climate, you might have:
| Temperature Range | Expected Days | Percentage | Yarn Needed (4000 yd total) |
|---|---|---|---|
| Below 30°F | 20 days | 5.5% | 220 yards |
| 30-49°F | 80 days | 22% | 880 yards |
| 50-69°F | 120 days | 33% | 1,320 yards |
| 70-89°F | 130 days | 36% | 1,440 yards |
| 90°F+ | 15 days | 4% | 160 yards |
But here’s the thing – weather is unpredictable. That “mild” winter might turn into a polar vortex situation, or you might have an unusually hot summer. I always recommend buying at least 25% more yarn than your calculations suggest, especially for the extreme temperature ranges.
For worsted weight yarn, a typical skein contains 170-200 yards. So for the example above, you’d want:
- 2 skeins each of your extreme colors (very hot/very cold)
- 5-6 skeins each of your moderate colors
- 7-8 skeins each of your most common temperature ranges
If you’re working with DK weight yarn instead, you’ll need about 20% more total yardage since the yarn is thinner. With bulky weight, you’ll need about 30% less, but your blanket will work up much faster.
Money-saving tip: Many yarn stores offer case discounts if you’re buying large quantities. It’s worth asking, especially since you’re likely buying 30+ skeins for this project.
Best Stitch Patterns for Temperature Blankets
You’re going to be working on this project for an entire year, so choose a stitch pattern you can practically do while half-watching Netflix. Seriously. This isn’t the time to practice complex colorwork or intricate lace patterns.
Single crochet is the most popular choice for good reason. It’s mindless, creates a dense fabric that’s perfect for blankets, and works up at a good pace. Each row represents one day, and you can easily see your progress. If you want a bit more texture without adding complexity, try single crochet variations like the waistcoat stitch or single crochet through the back loop only.
Half double crochet is my personal favorite for temperature blankets. It works up faster than single crochet but still gives you that nice, solid fabric. The slight texture is more interesting than plain single crochet, but it’s still simple enough to work without looking at your hands.
If you want something a bit fancier, consider the moss stitch (alternating single crochet and chain 1 spaces) or a simple shell pattern. But honestly, save the fancy stitches for smaller projects. You’ll thank me when you’re six months in and still motivated to keep going.
Some people like to add borders between months or seasons using a neutral color. This can help break up the visual flow and make the finished blanket easier to “read.” If you go this route, add those border rows to your yarn calculations.
Setting Up Your Tracking System
You need a system for tracking daily temperatures that you’ll actually stick with for 365 days. I’ve seen people start strong in January and then realize in March that they have no idea what the temperature was three days ago.
The simplest approach is a basic calendar or notebook where you jot down each day’s high temperature. But there are some great digital options too. Weather apps often save historical data, or you can use a spreadsheet to track temperatures and even calculate running statistics.
Some people get creative with their tracking systems. You could track the temperature where you live plus the temperature in a place that’s meaningful to you – maybe where you grew up or where a loved one lives. This creates interesting patterns when those locations have very different weather.
Here’s what I include in my tracking system:
- Date
- High temperature
- Weather conditions (sunny, rainy, snowy)
- Color used
- Number of stitches in that row
- Any notes about the day
That last point might seem silly, but trust me – when you’re looking at your finished blanket, you’ll love being able to remember that the bright yellow row was the day you got engaged, or that stretch of gray was during that week-long rainy spell in April.
Set up reminders on your phone for the same time each day to record the temperature. Consistency is key, and it’s easier to build the habit if you do it at the same time daily.
If you’re making this as a gift or starting partway through the year, you can find historical weather data online. The National Weather Service keeps detailed records, and many weather websites have historical lookup features.
Solving Common Problems
Let’s talk about the stuff nobody warns you about when you start a temperature blanket. First up: the dreaded color you hate. About three months in, you’re going to get sick of working with certain colors. Maybe it’s that orange you thought was so cheerful in January but now makes you want to scream every time you see it.
Here’s the thing – push through it. The beauty of a temperature blanket is in the complete story, not just the pretty parts. That said, if you absolutely can’t stand a color, it’s okay to substitute something similar. Your blanket, your rules.
Another common issue is running out of yarn mid-project. This is why I’m so insistent about buying extra upfront. But if it happens, don’t panic. Most major yarn brands keep consistent color lines, and online retailers often have older dye lots available. In a pinch, a slightly different shade can actually add character to your finished blanket.
Motivation is the biggest challenge, though. By June, the novelty has worn off. By September, you’re wondering why you thought this was a good idea. This is where having a good project organization system helps. Keep all your supplies in one place, set up a comfortable workspace, and don’t let yourself get behind on daily tracking.
Technical issues pop up too. Your tension might change over the course of a year (mine always gets looser in summer when my hands are more relaxed). Try to maintain consistent gauge, but don’t stress if your blanket gets slightly wider or narrower – it adds character.
Some people worry about their blanket being too long. If you’re working one row per day in single crochet with worsted weight yarn, a year’s worth of rows will be about 60-72 inches long. That’s perfect for a throw blanket, but if it seems too long for your taste, you could work every other day, or switch to a shorter stitch like slip stitch partway through.
Finishing Your Blanket
December 31st finally arrives, and you’ve got this long, skinny rectangle that tells the story of an entire year. Now what? The finishing touches can make or break your temperature blanket, so don’t rush this part.
First, weave in all those ends. Yes, all of them. I know it’s tedious, but a temperature blanket with loose ends everywhere isn’t going to age well. Take your time and do it right. If you’ve been smart about it, you’ve been weaving in ends as you go, but there will still be plenty to deal with.
A border can really elevate your finished blanket. I like a simple single crochet border in a neutral color – maybe a cream or soft gray that complements your color scheme. Work evenly around all four sides, adding extra stitches in the corners to keep things flat. For a more substantial border, try a few rounds of decorative edging.
Consider adding a label or tag with the year and location you tracked. You can embroider this information, or attach a small fabric label. Future you (or whoever inherits this blanket) will appreciate knowing the story behind it.
Blocking isn’t usually necessary for temperature blankets since they’re worked in simple stitches with acrylic yarn, but a gentle steam can help even out any tension irregularities and make the finished blanket lay flat.
Take photos throughout the process, not just of the finished blanket. Progress shots showing the growing length are really satisfying to look back on, and they document the journey as well as the destination.
Think about how you want to display or store your finished blanket too. These become real conversation pieces – people love hearing about the project and seeing how the weather patterns played out visually. Some people frame a section of their blanket, or create a photo book documenting the year alongside the finished piece.
Common Questions
How much does it cost to make a temperature blanket?
Expect to spend $60-120 on yarn for a throw-sized temperature blanket, depending on your yarn choice. Acrylic worsted weight yarn from brands like Red Heart or Lion Brand typically costs $3-4 per skein, and you’ll need 20-30 skeins total. Premium yarns or natural fibers will cost significantly more.
What if I miss a day or forget to track the temperature?
Don’t stress about it! You can look up historical weather data online for missed days. Most weather websites and apps keep records going back several years. The Weather Underground has particularly good historical data that’s easy to search.
Can I make a temperature blanket for a baby?
Absolutely! A baby’s first year temperature blanket makes a meaningful keepsake. Use a smaller size (around 36×36 inches) and consider softer yarn like cotton or bamboo blends. You might want to track the temperature from the day they were born, or even start tracking during pregnancy.
What’s the best yarn weight for temperature blankets?
Worsted weight (weight 4) is the most popular choice because it works up at a good pace and creates a substantial blanket. Worsted weight yarn is also widely available and affordable. DK weight takes longer but creates a more refined fabric, while bulky weight works up very quickly but uses more yarn.
How long does each row take to crochet?
In single crochet with worsted weight yarn, each row takes about 15-20 minutes for a throw-sized blanket. Half double crochet is faster at 10-15 minutes per row. The time adds up – you’re looking at about 80-100 hours total for the entire project, spread over a year.
Should I change colors every row or carry yarn up the side?
Change colors completely for each new temperature. Carrying multiple colors up the side creates bulk and makes the edges messy. Cut your yarn leaving a 6-inch tail, then weave in ends as you go or save them all for the finish.
What if my area doesn’t have much temperature variation?
Consider tracking something else alongside temperature, like precipitation or humidity. You could also use smaller temperature ranges (5-degree increments instead of 10) or track both high and low temperatures each day with different stitches or techniques.
Can I start a temperature blanket partway through the year?
Yes! You can start any time and work for a full year from that date, or use historical weather data to “catch up” to January 1st. Some people start temperature blankets to commemorate specific events like births, weddings, or moves to new cities.
Making a temperature blanket is honestly one of the most rewarding crochet projects you can tackle. Yes, it’s a big commitment, and yes, there will be days when you don’t feel like picking up your hook. But stick with it, and you’ll end up with something truly special – a functional piece of art that tells the story of a whole year in your life.
The daily ritual becomes surprisingly meditative after a while. Checking the weather, finding your color, adding another row to your growing creation. By the end, you’ll have this amazing visual record of what Mother Nature threw at you, wrapped up in something warm and useful.
Start planning now, get your supplies organized, and don’t overthink it too much. The best temperature blanket is the one you actually finish, not the one that exists only in your Pinterest boards. Trust me, future you will be so grateful you took on this project. Now grab your hook and start stitching your year into existence.