You know that moment when you’re halfway through what you thought was going to be a simple scarf, and suddenly you realize it’s looking more like a wonky trapezoid than anything you’d actually want to wear? Yeah, I’ve been there too. The culprit is usually tension – that mysterious force that can make or break your crochet projects.
I used to think tension was just one of those things some people were naturally good at, like being able to whistle really loud or parallel park on the first try. But after years of making everything from dishcloths that could double as pot holders (way too tight) to afghans with holes big enough for a cat to escape through (way too loose), I’ve learned that consistent crochet tension is absolutely something you can master.
Here’s the thing: good tension isn’t about gripping your hook like you’re hanging off a cliff or holding your yarn so loosely it might float away. It’s about finding that sweet spot where your stitches are even, your fabric has nice drape, and your hands don’t cramp up after twenty minutes. And once you get it down, every project becomes so much more enjoyable.
Quick Answer
Consistent crochet tension comes from finding the right grip, maintaining steady yarn flow, and practicing regularly with the same hook and yarn combination. Most tension issues stem from holding the yarn too tightly or inconsistent hand positioning rather than skill level.
Understanding What Tension Really Means
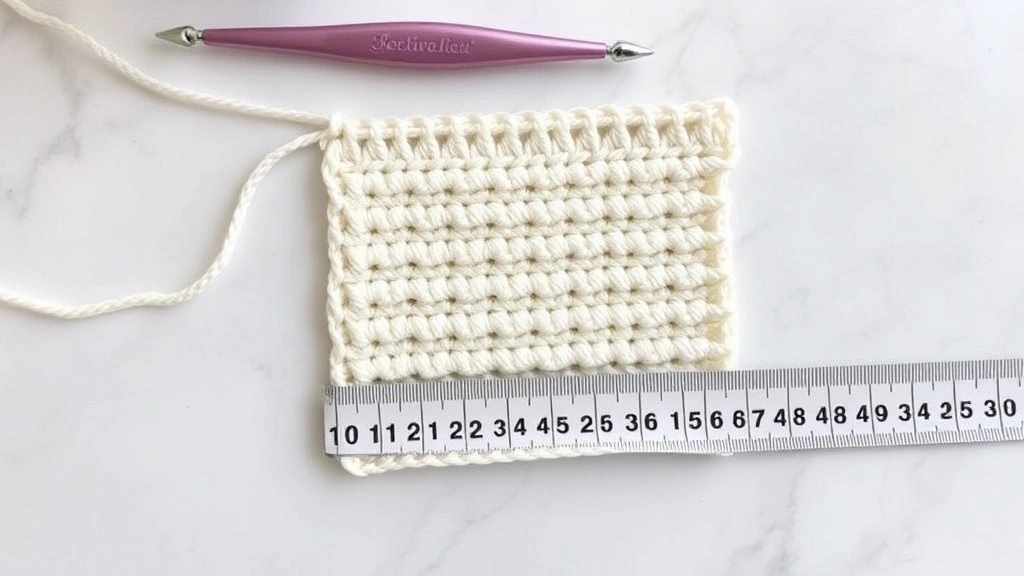
Let’s start with what tension actually is, because it’s not just about how tight or loose your stitches look. Tension in crochet refers to how much yarn you use in each stitch and how that translates to the overall size and drape of your fabric. When your tension is consistent, each stitch uses roughly the same amount of yarn, creating an even fabric that looks professional.
Think of it this way: if you’re making a granny square, every double crochet should be about the same height and width. When your tension is off, some stitches might be tall and loose while others are short and tight, making your square look more like abstract art than a building block for a blanket.
The Craft Yarn Council provides gauge standards that assume consistent tension. When a pattern says “18 stitches = 4 inches using size H hook,” they’re banking on you maintaining steady tension throughout those 18 stitches.
Reality Check: Your tension will naturally vary slightly – that’s normal and human. The goal is to minimize that variation, not achieve robot-like perfection.
I’ve noticed that beginners often focus so hard on making the “right” stitches that they forget about consistency. You might nail a perfect single crochet, then immediately follow it with one that’s twice as tall because you relaxed your grip. This is why understanding common beginner mistakes can help you avoid developing bad habits early on.
Good tension also affects how your finished project behaves. A scarf with inconsistent tension might curl at the edges, lie flat in some spots, and bunch up in others. An easy crochet blanket with uneven tension might not drape nicely or could develop weird ripples over time.
Getting Your Grip Right
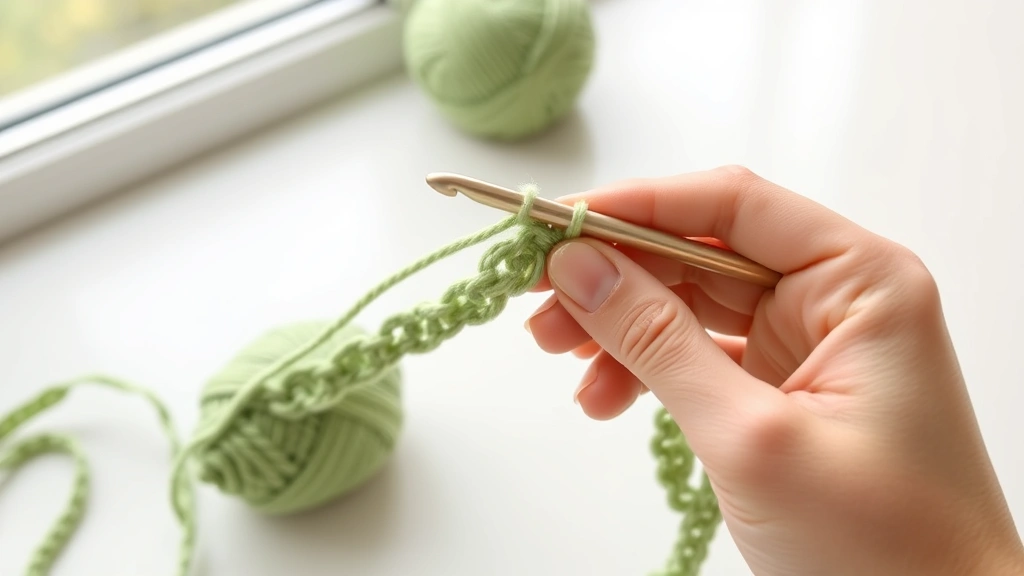
Your hook grip is the foundation of good tension, and there are two main styles that work well: the pencil grip and the knife grip. I’m a pencil grip person myself – I hold my hook like I’m about to write a thank-you note, with my thumb and index finger controlling the hook while my middle finger provides support.
The knife grip involves holding the hook more like you’re cutting vegetables, with your whole hand wrapped around the handle. Both grips can produce beautiful, consistent work, so don’t feel like you need to change if one feels natural to you.
Here’s what matters more than which grip you choose: your hold should be firm enough to control the hook but relaxed enough that your hand doesn’t cramp up. I used to grip my hook so tightly that my knuckles would turn white, and I’d have to take breaks every few rows because my hand would seize up.
Pro tip: If your hand is getting sore, you’re probably gripping too tightly. Your hook should feel secure but not like you’re trying to crush it.
The position of your non-hook hand is just as important. This is the hand that controls your yarn flow and tension. Most people find success with the yarn running over their index finger and under their middle finger, but some prefer wrapping it around their pinky for extra control.
When I’m working on intricate amigurumi projects, I actually adjust my grip slightly to get more precise control. For larger projects like afghans, I can relax my grip a bit more since slight variations won’t be as noticeable.
Mastering Yarn Control and Flow
This is where the magic happens, and honestly, where most people struggle. Your yarn needs to flow smoothly and consistently from your ball to your hook, and your non-hook hand is the traffic controller for this whole operation.
The key is finding the right amount of resistance. Too little, and your yarn will flow too freely, creating loose, floppy stitches. Too much, and you’ll be fighting the yarn with every stitch, leading to tight, cramped fabric that’s hard to work with.
I like to think of my index finger as a yarn guide rather than a yarn clamp. The yarn should slide over it smoothly, with just enough friction to maintain control. If you’re having to tug hard to pull yarn through, you’re holding it too tightly.
| Yarn Weight | Typical Hook Size | Yarn Control Tips |
|---|---|---|
| Fingering (1) | B-E (2.25-3.5mm) | Light touch, yarn flows easily |
| Sport (2) | E-G (3.5-4.5mm) | Gentle guidance, minimal resistance |
| DK (3) | G-I (4.5-5.5mm) | Moderate control, smooth flow |
| Worsted (4) | I-K (5.5-6.5mm) | Firm but flexible guidance |
| Bulky (5) | K-M (6.5-9mm) | More resistance needed for control |
Different yarn types require different approaches too. Cotton yarn tends to have less stretch and can feel stiffer, so you might need to ease up on your tension slightly. Acrylic yarns like Lion Brand or Red Heart are more forgiving and bouncy, so you can maintain a bit more tension without the fabric feeling stiff.
When working with chunky yarn projects, I find I need to consciously relax my yarn hand more. The thickness of the yarn naturally creates more resistance, so if I maintain my usual grip, everything comes out way too tight.
Yarn Flow Test: Your yarn should pull through your fingers smoothly with about the same resistance as pulling a ribbon through your fingers – present but not restrictive.
Common Tension Problems and Quick Fixes
Let’s talk about the stuff that actually goes wrong, because theory is great but real problems need real solutions. The most common issue I see is the “graduation effect” – where your work starts tight and gradually gets looser as you relax, or starts loose and gets tighter as you get tired or stressed.
If your work is getting progressively looser, you’re probably relaxing your yarn control as you get into a rhythm. This isn’t necessarily bad – it means you’re getting more comfortable! But for consistency, try to maintain that initial level of yarn resistance throughout your project.
The opposite problem – work getting tighter as you go – usually happens when you’re concentrating hard or feeling frustrated. I notice this happening to me when I’m trying to follow a complicated pattern or when I’m fixing mistakes and getting annoyed with myself.
The Edge Problem
Edges that pull in or flare out are almost always tension issues. If your edges are pulling in, you’re probably working your turning chains too tightly or not counting them correctly. If they’re flaring out, you might be working too loosely or adding accidental increases.
For scarf patterns, this is especially noticeable because you’re looking at those edges every single row. I always do a tension check after about 10 rows – if the edges aren’t straight, I’ll rip back and adjust rather than hoping it’ll work itself out.
The Stitch Height Shuffle
When your single crochets look like half double crochets, or your double crochets are as tall as trebles, you’ve got a yarn tension issue. This usually comes from pulling too hard when you yarn over, which compresses the stitches and makes them shorter and denser.
Quick fix: Focus on your yarn overs. They should be smooth and relaxed, not yanked tight against the hook.
Practice Techniques That Actually Work
Okay, here’s where I’m going to give you some exercises that actually help, not just busy work. The best way to develop consistent tension is through repetitive practice with immediate feedback, which means making swatches and paying attention to what you’re doing.
Start with a simple single crochet swatch using worsted weight yarn and an H hook. Make a foundation chain of 20 stitches, then work in single crochet for about 20 rows. Don’t worry about making anything useful – this is just for muscle memory.
- The Tension Check Row
Every 5 rows, stop and look at your work. Are the stitches getting bigger or smaller? Are the edges straight? This awareness is half the battle.
- The Grip Reset
Every few stitches, consciously check your grip. Are you squeezing the hook? Is your yarn hand cramped? Reset to a comfortable position.
- The Flow Test
Periodically pull a length of yarn through your fingers. It should feel consistent – not suddenly easier or harder than it was a few minutes ago.
I also recommend practicing with different yarn weights and hook sizes. What feels right with DK weight and a G hook might be completely wrong with bulky yarn and an N hook. The more combinations you try, the better you’ll get at adjusting your tension instinctively.
The Mirror Exercise: Work a few rows while watching your hands in a mirror. You’ll be amazed at what you notice about your grip and yarn control when you can see it from a different angle.
For those working on baby blanket patterns or other large projects, I suggest making a practice square with your actual project yarn and hook before starting the real thing. This gives you a chance to dial in your tension without committing to a huge project.
Troubleshooting Existing Projects
So what do you do when you’re halfway through a project and realize your tension is all over the place? First, don’t panic. Most tension issues can be fixed or at least minimized with some strategic thinking.
If your project is just slightly inconsistent but still functional, consider embracing it as part of the handmade charm. Seriously. Perfect machine-like consistency isn’t always what we’re going for in handmade items.
But if the tension issues are affecting the structure or appearance significantly, you have a few options. For projects like hats where fit is crucial, you might need to start over with better tension control. I know, I know – nobody wants to hear that, but sometimes it’s the right call.
The Blocking Solution
Blocking can work miracles for minor tension inconsistencies, especially with natural fibers. Wet blocking allows you to gently stretch and shape your fabric, evening out small variations in stitch size.
For acrylic projects, steam blocking can help relax overly tight sections. Just be careful not to melt your yarn – use a pressing cloth and keep the iron moving.
Strategic Ripping
If you notice tension problems early, it’s often worth ripping back to where the tension went wonky and starting fresh from there. I used to be stubborn about this, but I’ve learned that an hour of re-crocheting usually saves me from months of being annoyed with a wonky project.
When working on granny square blankets, tension issues in individual squares are less noticeable once they’re joined together. But if whole squares are dramatically different sizes, you’ll want to remake the outliers.
Advanced Tips for Consistent Results
Once you’ve got the basics down, there are some advanced techniques that can help you maintain even better consistency. These are the tricks I wish someone had told me years ago.
First, pay attention to your environment. I crochet differently when I’m relaxed on the couch versus when I’m sitting at a table versus when I’m in a car (as a passenger, obviously). Your posture and comfort level directly affect your tension.
Temperature matters too. Cold hands tend to grip more tightly, while warm, relaxed hands naturally maintain looser tension. I keep a small space heater near my crafting chair in winter because I noticed my tension getting tighter as the temperature dropped.
Advanced tip: Keep notes about your tension with different yarn and hook combinations. I have a little notebook where I jot down what works well together – it’s saved me hours of trial and error.
For complex projects with multiple stitch types, practice transitioning between stitches smoothly. The tension often changes when you switch from single crochet to double crochet, for example, because the yarn overs can throw off your rhythm.
Consider your yarn choice carefully for projects where tension is critical. Yarns with good stitch definition like Cascade 220 show tension inconsistencies more clearly than fuzzy yarns that hide small variations.
The Consistency Check: Take photos of your work in progress from the same angle and distance every few inches. It’s easier to spot tension changes in photos than when you’re looking at the work up close.
When working on large projects, I also recommend taking breaks at regular intervals – not just to rest your hands, but to reset your tension. Sometimes we gradually drift away from our starting tension without realizing it, and a short break helps us recalibrate.
Common Questions
How long does it take to develop consistent tension?
Most people start seeing improvement within a few weeks of regular practice, but developing really consistent tension typically takes 2-3 months of regular crocheting. Don’t get discouraged if it feels awkward at first – muscle memory takes time to develop.
Should I use the same hook size as the pattern recommends?
Not necessarily. Hook size recommendations assume average tension, but everyone’s tension is different. Always make a gauge swatch first and adjust your hook size up or down to match the pattern’s gauge. I often use a size smaller hook than patterns recommend because I tend to crochet loosely.
Why does my tension change when I switch yarn types?
Different yarn fibers behave differently. Cotton has no stretch and can feel stiff, requiring looser tension. Wool has natural elasticity and bounce. Acrylic is somewhere in between. You’ll need to adjust your yarn control for each fiber type to maintain consistent results.
My edges are always too tight – what am I doing wrong?
This is usually caused by working turning chains too tightly or not counting them correctly in your stitch count. Make sure your turning chains are as loose as your regular stitches, and double-check that you’re treating them correctly according to your pattern.
Can ergonomic hooks help with tension control?
Yes, definitely. Hooks with comfortable grips can help you maintain a relaxed hold, which often leads to more consistent tension. I switched to ergonomic hooks a few years ago and noticed an immediate improvement in my comfort and consistency during long crochet sessions.
What’s the best yarn weight for practicing tension?
Worsted weight (size 4) yarn with an H or I hook is ideal for practicing. It’s thick enough to see your stitches clearly but not so bulky that it’s hard to control. Smooth acrylic yarns like Red Heart Super Saver are perfect for practice because they’re consistent and forgiving.
How do I fix tension issues in lace patterns?
Lace requires very consistent tension because the open spaces make any variations obvious. Practice the stitch pattern with worsted weight yarn first to get the tension right, then switch to your lace weight yarn. Work more slowly and check your tension frequently – it’s worth the extra time for clean results.
Should I block every project to fix tension issues?
Blocking helps even out minor inconsistencies, but it shouldn’t be relied on to fix major tension problems. Think of blocking as the final polish, not a magic fix. If your tension is wildly inconsistent, you’re better off improving your technique than hoping blocking will save the project.
Mastering consistent crochet tension is one of those skills that transforms your entire crocheting experience. Once you get it down, you’ll find that your projects look more professional, your gauge swatches actually match the pattern, and you can tackle more complex designs with confidence.
Remember, perfect tension isn’t about being rigid or controlling every millimeter of yarn. It’s about developing a comfortable, sustainable rhythm that you can maintain throughout a project. Some days your tension might be slightly looser, other days a bit tighter – that’s normal and human.
The most important thing is to keep practicing and stay aware of what your hands are doing. Pay attention to how different yarns feel, notice when your tension starts to drift, and don’t be afraid to take breaks when you need them. Your hands and your projects will thank you for it.
Happy crocheting, and remember – every expert was once a beginner who kept practicing!