You know that moment when you’re scrolling through Pinterest at 2 AM and stumble across the most gorgeous crochet blanket you’ve ever seen? Your heart skips a beat, you save it immediately, and then reality hits – you have no clue how to actually make something that beautiful. I’ve been there more times than I care to admit, staring at stunning blanket patterns like they’re written in ancient hieroglyphics.
Here’s the thing about crochet blankets that took me years to figure out: they’re not as intimidating as they look. Sure, that intricate mandala throw might seem impossible now, but every expert crocheter started with the same basic stitches you’re about to learn. The secret isn’t some magical talent – it’s understanding which techniques work best for different blanket styles and having a solid game plan before you start.
I remember my first blanket attempt. I picked the most complicated pattern I could find, bought random yarn without checking the weight, and dove in headfirst. Three frustrated weeks later, I had a lumpy, uneven mess that looked more like a dishrag than a cozy throw. Don’t be me. Let’s do this the smart way.
Quick Answer
The best crochet blanket techniques for beginners include single crochet, double crochet, and granny squares. Start with worsted weight yarn and a size H (5mm) hook, then progress to more complex stitches like the moss stitch or corner-to-corner method as your skills develop.
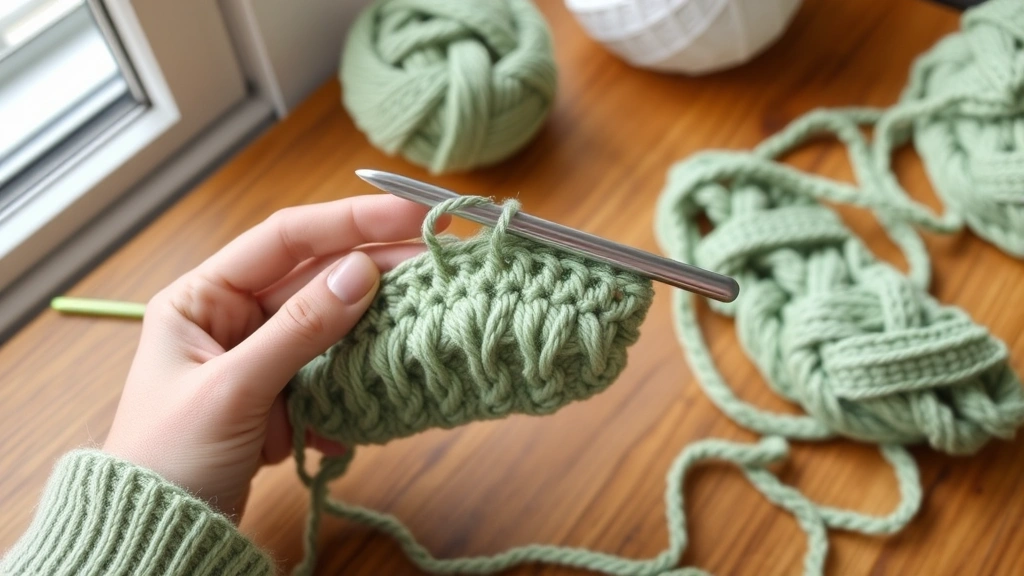
Choosing the Right Yarn and Hook
Let’s start with the foundation – your materials. The yarn you choose will make or break your blanket experience, and I learned this the hard way. My first disaster involved a beautiful but completely wrong cotton yarn that had zero stretch and made my hands cramp after twenty minutes.
For your first blanket, stick with worsted weight yarn (that’s weight 4 on the Craft Yarn Council scale). It’s forgiving, works up quickly, and you can find it everywhere. Red Heart Super Saver gets a bad rap from yarn snobs, but honestly, it’s perfect for learning. It’s cheap, durable, and comes in tons of colors.
When working with chunky yarn projects, you’ll need a larger hook – typically size K (6.5mm) or larger. But for worsted weight, grab a size H (5mm) hook. Aluminum hooks work great and won’t break the bank.
| Yarn Weight | Hook Size | Best For | Blanket Time |
|---|---|---|---|
| DK (3) | G/6 (4mm) | Baby blankets | 2-3 weeks |
| Worsted (4) | H/8 (5mm) | Throw blankets | 3-4 weeks |
| Chunky (5) | K/10.5 (6.5mm) | Quick lap blankets | 1-2 weeks |
| Super Chunky (6) | M/13 (9mm) | Statement pieces | 1 week |
Here’s a pro tip I wish someone had told me: buy all your yarn at once. Dye lots can vary significantly, and nothing’s more heartbreaking than running out of yarn halfway through and not being able to match the color exactly.
Always buy an extra skein or two. You’ll either need it for your current project or you’ll use it for the next one. Yarn has a way of multiplying in your stash anyway.
Essential Basic Techniques
Now let’s talk about the stitches that’ll become your best friends. These four techniques will carry you through probably 80% of all blanket patterns you’ll ever want to make.
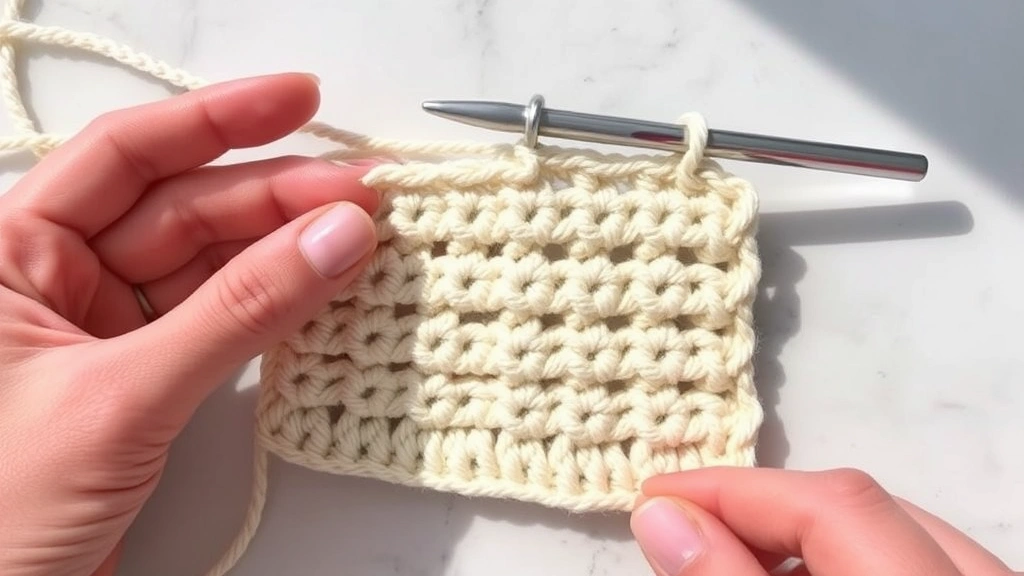
Single Crochet (SC)
Single crochet is your reliable workhorse. It creates a tight, warm fabric that’s perfect for baby blankets or anywhere you want extra durability. The downside? It takes forever. I made a full-size afghan in single crochet once, and I’m pretty sure I aged three years in the process.
The key to good single crochet is maintaining consistent tension. Your stitches should be snug but not tight enough that you can’t get your hook through easily. If you’re a tight crocheter like me, go up a hook size.
Double Crochet (DC)
This is where things get fun. Double crochet works up about twice as fast as single crochet and creates a lovely, open fabric with good drape. It’s my go-to for throw blankets because it gives you that cozy, breathable feel without taking six months to finish.
The trick with double crochet is getting your yarn overs consistent. Each stitch should be the same height, which comes with practice. Don’t get discouraged if your first few rows look wonky – we’ve all been there.
Half Double Crochet (HDC)
Think of half double crochet as the perfect middle ground. It’s faster than single crochet but creates a denser fabric than double crochet. I love using HDC for baby blanket patterns because it gives you that sturdy feel parents love while still working up reasonably quickly.
Treble Crochet (TR)
Treble crochet is tall and dramatic, perfect for creating lacy, open designs. It’s not my first choice for solid blankets, but it’s amazing for summer throws or decorative elements. Just remember – the taller your stitches, the more yarn you’ll use per row.
Intermediate Methods Worth Learning
Once you’ve mastered the basics, these techniques will open up a whole new world of blanket possibilities. Don’t rush into these – make sure you’re comfortable with basic stitches first.
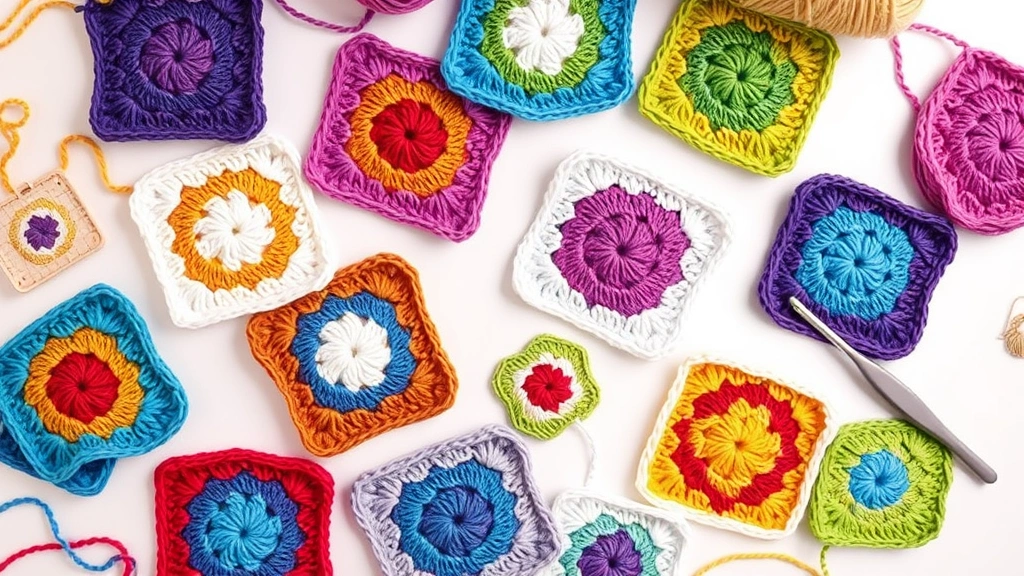
Granny Squares
Ah, granny squares. They’re like potato chips – you can’t make just one. The traditional granny square is worked in rounds, starting with a magic ring and building outward with clusters of double crochet stitches.
What I love about granny squares is their portability. You can make them anywhere – waiting at the doctor’s office, watching TV, riding in the car. Plus, if you mess up one square, you’re not ruining an entire blanket.
For a throw-size blanket, you’ll typically need about 48-64 squares, depending on their size. I usually make mine about 6 inches square, which works perfectly with worsted weight yarn and a size H hook.
Corner-to-Corner (C2C)
Corner-to-corner technique creates a gorgeous diagonal texture that looks way more complicated than it actually is. You start with one stitch in the corner and gradually increase until you reach your desired width, then decrease back down to the opposite corner.
C2C is fantastic for graphgan patterns because each little block can be a different color, making it easy to create pictures or geometric designs. Fair warning though – it uses more yarn than you’d expect because of all those chain spaces.
Moss Stitch
The moss stitch (also called the linen stitch) creates a beautiful woven texture that looks incredibly sophisticated. It’s just alternating single crochet and chain stitches, but the effect is stunning.
This stitch does have a learning curve – it’s easy to get lost and lose track of where you are in the pattern. I recommend using stitch markers liberally when you’re starting out.
Shell Stitch
Shell stitches create those lovely fan-shaped clusters that add instant elegance to any blanket. The basic shell is usually 5 double crochets worked into the same stitch, but variations abound.
What’s great about shell stitches is how quickly they work up. You’re essentially making 5 stitches at once, so your blanket grows fast. Just be prepared for the yarn consumption – shells are hungry for yarn.
When learning new stitches, make a practice swatch first. It’s tempting to dive right into your blanket, but trust me – working out the kinks on a small sample will save you hours of frogging later.
Different Construction Approaches
How you build your blanket is just as important as which stitches you use. Each method has its pros and cons, and choosing the right approach can make the difference between a project you love and one that sits in your WIP basket forever.
Traditional Rows
This is the classic approach – start at one end and work your way to the other in straight rows. It’s straightforward, meditative, and perfect for beginners. You can easily see your progress, and there’s something satisfying about watching your blanket grow row by row.
The downside is that long rows can get boring, especially on larger blankets. I’ve seen many beautiful afghan stitch patterns abandoned because the crocheter got tired of working the same 200-stitch row over and over.
Modular Construction
This includes granny squares, hexagons, and other shapes that you make separately and then join together. I’m a huge fan of modular construction because it keeps things interesting – you’re always finishing something.
The joining process can be tedious, but there are lots of creative ways to connect your pieces. You can sew them together with a tapestry needle, single crochet them together, or use decorative joining methods that become part of the design.
Center-Out Construction
Starting from the center and working outward creates beautiful medallion-style blankets. These often have a mandala feel and can be absolutely stunning when done well.
The challenge with center-out construction is managing the increasing circumference. Your rounds get longer and longer as you work outward, which can test your patience. But the results are often worth it.
Strip Construction
Making long strips and then joining them is a great compromise between traditional rows and modular construction. Each strip is manageable in size, but you still get that satisfying feeling of completing sections.
This method works especially well for temperature blanket projects where each strip represents a different time period or data set.
Planning Your Blanket Size
Nothing’s worse than finishing a blanket and realizing it’s too small for its intended purpose. I learned this lesson with a “throw” blanket that barely covered my lap. Planning your dimensions upfront will save you heartache later.
Here are the standard blanket sizes I use as guidelines:
| Blanket Type | Dimensions | Approximate Stitches (SC) | Yarn Needed |
|---|---|---|---|
| Baby | 30″ x 36″ | 120 x 144 | 1200-1500 yards |
| Lap/Wheelchair | 36″ x 48″ | 144 x 192 | 1800-2200 yards |
| Throw | 50″ x 60″ | 200 x 240 | 2500-3000 yards |
| Twin | 66″ x 90″ | 264 x 360 | 4000-5000 yards |
| Full/Queen | 90″ x 90″ | 360 x 360 | 6000-7500 yards |
These numbers assume worsted weight yarn and single crochet. Double crochet will use slightly more yarn but work up faster, while taller stitches like treble will use even more yarn.
Always make a gauge swatch before starting your blanket. I know it’s tempting to skip this step, but trust me – measuring 10 stitches and 10 rows will save you from massive sizing disasters later. If your gauge is off, adjust your hook size accordingly.
Pro tip: Make your gauge swatch large enough to actually use – at least 6 inches square. Small swatches don’t always give you accurate gauge, especially with stitches that have a lot of stretch or drape.
Common Problems and Solutions
Let’s talk about the stuff that makes you want to throw your project across the room. Every crocheter faces these issues, and knowing how to fix them will save your sanity.
Curling Edges
If your blanket edges are curling, you’re probably working too tightly or not adding enough turning chains. Single crochet needs 1 turning chain, half double crochet needs 2, and double crochet needs 3. Some patterns call for different amounts, but these are good starting points.
Another culprit is inconsistent tension. If some rows are tighter than others, your blanket will pull and distort. This is where those crochet tension techniques really come in handy.
Wonky Shape
If your blanket is getting wider or narrower as you work, you’re either adding or losing stitches. Count your stitches at the end of each row until this becomes second nature. Stitch markers can help you keep track of your first and last stitches.
The turning chain can be tricky – sometimes it counts as a stitch, sometimes it doesn’t. Read your pattern carefully and be consistent with how you treat it.
Holes and Gaps
Unexpected holes usually mean you’ve accidentally skipped a stitch or worked into the wrong place. This is especially common with taller stitches like double or treble crochet where it’s harder to see exactly where your hook should go.
Good lighting is crucial for avoiding this problem. I can’t tell you how many mistakes I’ve made trying to crochet by lamplight in the evening.
Running Out of Yarn
This is heartbreaking, especially when you can’t find the same dye lot. Always buy extra yarn – I typically get 20% more than the pattern calls for. Leftover yarn can always be used for borders, other projects, or donated to fellow crocheters.
If you do run out and can’t match exactly, consider making it a design feature. Add a contrasting border or work the final rows in a complementary color.
Finishing Techniques
The difference between a homemade-looking blanket and a professional-looking one often comes down to the finishing. These final steps are worth the extra effort.
Blocking
Blocking isn’t always necessary for blankets, but it can make a huge difference in the final appearance. Wet blocking works well for natural fibers, while steam blocking is better for acrylics.
For a simple wet block, soak your finished blanket in cool water with a bit of wool wash, gently squeeze out excess water (never wring!), and lay flat to dry. This evens out your stitches and gives everything a more polished look.
Borders
A border can completely transform your blanket. Even a simple single crochet border worked around all four edges will give your project a finished appearance. For something fancier, try a shell border or picot edge.
When working borders, pay special attention to the corners. You’ll typically need to work 3 stitches into each corner space to keep things flat and square.
Weaving in Ends
This is nobody’s favorite part, but it’s crucial for a lasting finished product. Use a tapestry needle and weave each end through several stitches on the back of your work, changing direction at least once to secure it.
Don’t cut your ends too short – leave at least a 1-inch tail after weaving in. Yarn can work loose over time, and you want enough length to re-secure if needed.
Final Inspection
Before you call your blanket finished, give it a thorough once-over. Look for loose stitches, missed ends, or any spots that need touch-ups. It’s much easier to fix these issues now than after the blanket has been used and washed.
Take progress photos as you work on your blanket. Not only is it fun to see the evolution, but photos can help you spot problems you might miss when you’re looking at your work up close.
Common Questions
How much yarn do I need for a throw blanket?
For a standard throw blanket (50″ x 60″) in worsted weight yarn, plan on 2500-3000 yards. This varies significantly based on your stitch choice – single crochet uses less yarn than double crochet, and lacy stitches use less than solid stitches. Always buy an extra skein or two to be safe.
What’s the easiest blanket pattern for beginners?
Start with a simple single crochet or double crochet rectangle. Choose one stitch and stick with it for the entire blanket. Granny squares are also beginner-friendly because each square is small and manageable, plus you can practice your technique as you go.
How long does it take to crochet a blanket?
This depends on the size, stitch complexity, and how much time you dedicate to crocheting. A baby blanket might take 2-3 weeks of evening crocheting, while a full-size afghan could take 2-6 months. Crochet time estimates can help you plan realistic timelines for your projects.
Should I use acrylic or natural fiber yarn?
For your first blanket, acrylic is perfectly fine and much more budget-friendly. Modern acrylics are softer and more durable than ever. Natural fibers like cotton or wool are lovely but require more careful washing and are significantly more expensive for blanket-sized projects.
How do I keep my blanket edges straight?
Count your stitches religiously, especially in the first few rows until you develop a rhythm. Use stitch markers to mark your first and last stitches of each row. Make sure you’re consistent with your turning chains – if the pattern says chain 2 and turn, do exactly that every time.
What if I make a mistake several rows back?
For minor mistakes that don’t affect the overall structure, you can often leave them – no one will notice but you. For major mistakes, you’ll need to frog (rip out) back to the error. This is painful but sometimes necessary. Consider it part of the learning process.
How do I join yarn when I run out mid-project?
The best place to join new yarn is at the beginning of a row. Leave 6-inch tails on both the old and new yarn, then weave them in when you’re finished. If you must join mid-row, use the Russian join method for a nearly invisible connection.
Can I machine wash my finished blanket?
This depends entirely on your yarn choice. Check the yarn label for care instructions. Most acrylics can be machine washed and dried, while natural fibers often require hand washing or gentle machine cycles. When in doubt, hand wash in cool water and lay flat to dry.
Creating your first crochet blanket is such a rewarding experience. Yes, it takes time and patience, but there’s something magical about watching those simple stitches transform into something beautiful and functional. Don’t worry about making it perfect – focus on making it yours.
Remember, every expert crocheter started exactly where you are now. That gorgeous blanket you admired on Pinterest? You can absolutely make something just as beautiful with practice and the right techniques. Start with the basics, be patient with yourself, and don’t be afraid to make mistakes. They’re just learning opportunities in disguise.
Now grab your hook and yarn, and let’s make something amazing together. Your future self, wrapped in that cozy handmade blanket, will thank you for starting today.