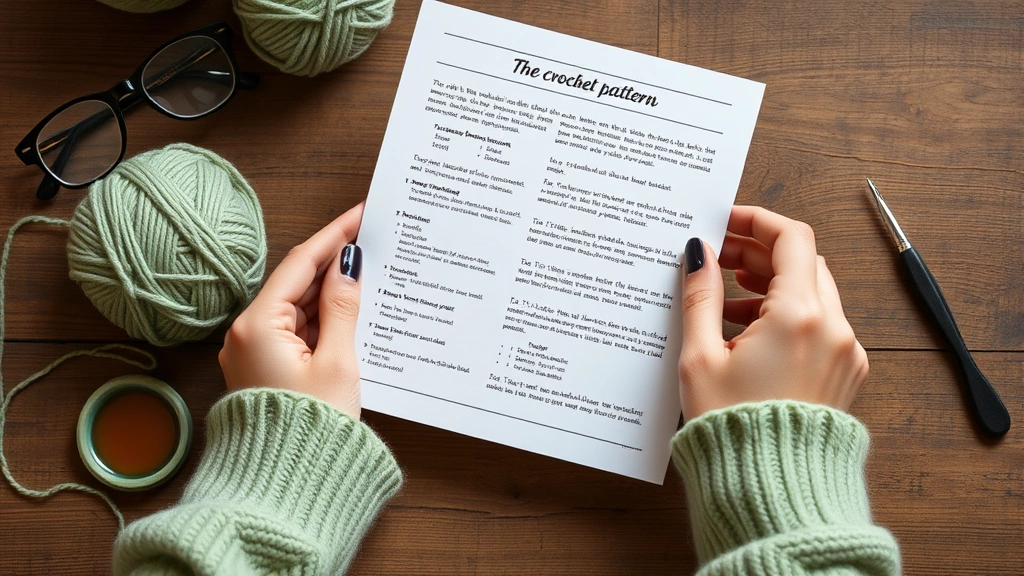
You know that moment when you’re scrolling through Pinterest at 11 PM, and you stumble across the most gorgeous crochet pattern that makes your fingers itch to grab a hook? That happened to me last month with a stunning cable-knit-look blanket. But here’s the thing – I had no clue where to start with reading that pattern. The abbreviations looked like alphabet soup, and don’t even get me started on the chart symbols.
If you’ve ever felt overwhelmed by a crochet pattern, you’re definitely not alone. I’ve been crocheting for over a decade, and I still remember the frustration of staring at my first “real” pattern (not just a basic scarf) and feeling completely lost. The good news? Once you understand the structure and language of crochet patterns, they become your roadmap to creating beautiful projects.
Reading crochet patterns is actually a lot like learning to read music or following a recipe. There’s a specific format, standard abbreviations, and logical flow that makes sense once you get the hang of it. Today, I’m going to walk you through everything you need to know to decode even the most complex patterns with confidence.
Quick Answer
Crochet patterns follow a standard format with abbreviations, stitch counts, and row-by-row instructions. Start by reading the materials list and gauge, then work through each row systematically, checking your stitch count as you go.
Understanding Pattern Structure
Every well-written crochet pattern follows a predictable structure, and once you know what to expect, you’ll feel much more confident diving in. Think of it like the layout of a cookbook – there’s always an ingredients list, prep instructions, and step-by-step cooking directions.
The pattern typically starts with basic information: the skill level, finished measurements, and what materials you’ll need. This section is crucial because it tells you whether you’re ready for this project and what supplies to gather. I always read this part twice before buying yarn – learned that lesson the hard way when I bought sport weight instead of worsted for a baby blanket pattern.
Next comes the gauge section, which many beginners skip (don’t do this!). Then you’ll find any special stitches or techniques explained, followed by the actual pattern instructions. Most patterns end with finishing instructions and sometimes assembly directions if you’re making something with multiple pieces.
Materials and Tools Section
This section lists everything you need, including yarn weight, yardage, hook size, and any notions like stitch markers or tapestry needles. Pay attention to the specific yarn brand mentioned – while you can substitute, the designer chose that yarn for a reason. When I’m working with yarn substitutions, I always check the fiber content and yardage carefully.
Special Notes and Abbreviations
Many patterns include a section explaining any non-standard abbreviations or techniques used. This is where you’ll learn about pattern-specific instructions like “work in pattern” or special stitch combinations. Don’t skip this part – it often contains the key to understanding the entire project.
Decoding Common Abbreviations
Crochet abbreviations can look intimidating at first, but they’re actually designed to save space and make patterns easier to follow once you know them. The Craft Yarn Council has standardized most abbreviations, so they’re consistent across patterns.
Here are the most common ones you’ll encounter in almost every pattern:
| Abbreviation | Meaning | Notes |
|---|---|---|
| ch | chain | Foundation for most projects |
| sc | single crochet | Most basic stitch |
| dc | double crochet | Taller than single crochet |
| hdc | half double crochet | Between sc and dc height |
| sl st | slip stitch | Used for joining and moving |
| yo | yarn over | Wrapping yarn around hook |
| sk | skip | Skip the next stitch |
When you see numbers with abbreviations, they tell you how many stitches to work. For example, “3 dc” means work three double crochet stitches. Parentheses group stitches that should be worked in the same place, like “(2 dc, ch 2, 2 dc) in next st” – that’s a shell stitch worked all in one stitch.
Regional Differences
Here’s something that trips up a lot of crocheters: US and UK patterns use different terms for the same stitches. A US double crochet is called a treble in UK patterns. Always check which terminology the pattern uses, usually noted at the beginning. Most online patterns use US terms, but it’s worth double-checking.
Pro Tip: Keep a reference card handy while you’re learning. I still have one bookmarked on my phone for those moments when I encounter an unfamiliar abbreviation.
Following Row-by-Row Instructions
Once you understand the abbreviations, reading the actual instructions becomes much more manageable. Most patterns break down into rows or rounds, with each clearly numbered or labeled. The key is taking it one step at a time and not getting overwhelmed by looking ahead.
Let’s break down a typical instruction: “Row 3: Ch 2 (does not count as st), dc in each st across, turn. (24 dc)” This tells you to start with a chain 2 that doesn’t count toward your stitch total, work a double crochet in every stitch from the previous row, turn your work, and you should end up with 24 double crochet stitches.
The stitch count in parentheses is your friend – it’s how you know you’re on track. I always count my stitches at the end of each row, especially when I’m learning a new pattern. It might seem tedious, but it saves hours of frogging later when you realize you went wrong six rows back.
Understanding Repeats
Many patterns use asterisks (*) or brackets to indicate sections that repeat. For example: “*dc in next 2 sts, ch 1, sk 1 st; rep from * across.” This means you’ll work that sequence of stitches repeatedly until you reach the end of the row. When working with different stitch patterns, these repeats create the texture and design.
Sometimes you’ll see instructions like “rep from * 4 more times” which means you work the sequence a total of 5 times (the first time plus 4 more). Pay attention to whether it says “rep 4 times” or “rep 4 more times” – there’s a difference!
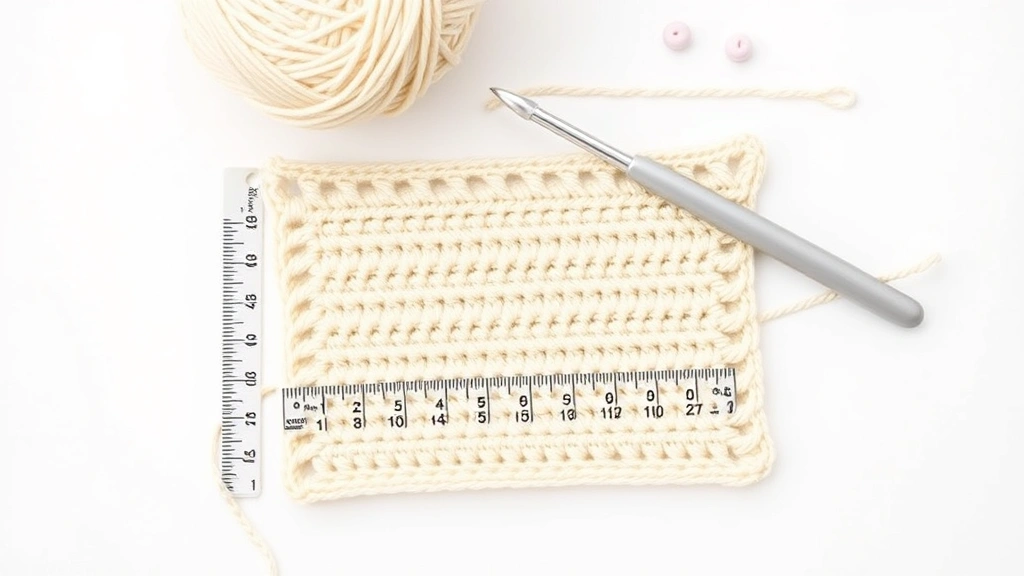
Why Gauge Actually Matters
I used to be one of those crocheters who skipped the gauge swatch. “It’s just a dishcloth,” I’d think, “what could go wrong?” Well, let me tell you about the baby blanket that ended up large enough for a king-size bed. Gauge matters, especially for fitted items like sweaters or when you need specific measurements.
Gauge tells you how many stitches and rows you should have per inch using the recommended yarn and hook size. If your gauge is off, your finished project will be a different size than intended. For a sweater pattern, being off by just half a stitch per inch can mean the difference between a perfect fit and something that’s unwearable.
To check your gauge, make a swatch that’s at least 4 inches square using the pattern stitch. Measure a 4-inch section and count your stitches and rows. If you have too many stitches per inch, try a larger hook. Too few stitches? Go down a hook size.
When Gauge Doesn’t Matter
There are times when exact gauge isn’t critical. Dishcloths, scarves, blankets where approximate size is fine, and decorative items can be more forgiving. But even then, checking your gauge gives you an idea of how much yarn you’ll actually need and helps you avoid surprises.
Remember: Different yarn brands, even in the same weight category, can behave differently. Your gauge might change when you switch from the pattern yarn to your chosen substitute.
Reading Stitch Charts and Symbols
Stitch charts might look like hieroglyphics at first, but they’re actually incredibly helpful once you get the hang of them. Charts show you visually what your stitches should look like, which can be easier to follow than written instructions, especially for complex stitch patterns.
Each symbol represents a specific stitch, and the chart is read from the bottom up, just like you build your crochet work. For flat pieces worked in rows, you read odd-numbered rows (right side) from right to left, and even-numbered rows (wrong side) from left to right. For projects worked in rounds, you always read from right to left.
The most common symbols include a small oval for chain stitches, an X for single crochet, and a T-shape for double crochet. More complex stitches have their own symbols, and every chart should include a legend explaining what each symbol means.
Combining Charts with Written Instructions
Many patterns include both written instructions and charts. I find it helpful to use both – the written instructions for the overall structure and the chart to visualize the stitch pattern. When working on intricate lace patterns, the chart often makes the design logic clearer than written instructions alone.
Chart Reading Tip: Use a sticky note or ruler to keep track of which row you’re working on. It’s easy to lose your place in a complex chart.
Common Pattern Problems
Even well-written patterns can be confusing, and sometimes you’ll encounter issues that aren’t your fault. Here are the most common problems I’ve seen and how to work through them.
Confusing or Missing Instructions
Sometimes patterns have typos or unclear instructions. If something doesn’t make sense, check online forums like Ravelry where other crocheters often discuss pattern issues and solutions. Many designers also have errata pages on their websites with corrections.
When instructions seem impossible or don’t match the stitch count, trust your instincts. If a pattern says to work 25 stitches but you only have 20 from the previous row, something’s not right. Double-check your work first, then look for pattern corrections or community discussions.
Stitch Count Issues
This is probably the most frustrating problem for new pattern readers. You’re following the instructions exactly, but your stitch count is off. First, make sure you’re counting correctly – turning chains usually don’t count as stitches unless specifically stated. Also, check that you’re working in the right part of the stitch (top loops, back loops, etc.).
Sometimes the issue is with increases or decreases that aren’t clearly marked in the pattern. When working amigurumi patterns, this is especially common since the shaping creates the 3D form.
Yarn Behavior Issues
If your project isn’t looking like the pattern photos, it might be a yarn issue. Different fibers behave differently – cotton has no stretch while wool is very forgiving. Acrylic yarns can be splitty, making it harder to see your stitches clearly. When working with cotton yarn projects, expect less drape and more structure than wool alternatives.
Choosing the Right Difficulty
Pattern skill levels aren’t just suggestions – they’re genuinely helpful guides for choosing projects that match your current abilities. Jumping too far ahead can lead to frustration and abandoned projects, while staying too comfortable means you won’t grow your skills.
Beginner patterns typically use basic stitches (single crochet, double crochet) in simple combinations. They have minimal shaping and use worsted weight yarn with a size H/8 (5mm) hook. These are perfect for learning consistent tension and basic techniques.
Easy patterns introduce simple stitch combinations and basic shaping. You might encounter half double crochet, simple increases and decreases, or working in rounds. The instructions are usually very detailed with helpful reminders.
Intermediate patterns assume you’re comfortable with basic techniques and introduce more complex stitches, colorwork, or shaping. You’ll see less detailed explanations and might encounter techniques like post stitches or shell patterns.
Advanced patterns use complex techniques, intricate shaping, or assume knowledge of advanced methods. Instructions might be abbreviated, and you’re expected to understand concepts like “work in pattern” without detailed explanations.
Skill Building Tip: Choose patterns that introduce just one new technique at a time. If you’ve never done colorwork, don’t pick a pattern that also involves complex shaping.
Common Questions
How do I know if a pattern is well-written before starting?
Look for patterns that include a clear materials list, gauge information, and stitch counts for each row or round. Well-written patterns also explain any special techniques and include finished measurements. Check reviews on Ravelry or other platforms where crocheters share their experiences with specific patterns.
What should I do when pattern abbreviations don’t match standard ones?
Always check if the pattern includes its own abbreviation list. Some designers use non-standard abbreviations or create their own for special techniques. When in doubt, look up the designer’s other patterns or contact them directly. Most designers are happy to clarify confusing instructions.
How much yarn should I buy if the pattern doesn’t specify?
This is tricky without yardage information. As a general rule, buy more than you think you need – it’s better to have leftover yarn than to run short with a dye lot that’s no longer available. For worsted weight projects, a simple scarf might need 400-600 yards, while a blanket could require 2000+ yards depending on size.
Why doesn’t my project look like the pattern photo?
Several factors affect the final appearance: yarn choice, hook size, personal tension, and blocking. The pattern photo likely shows the project after blocking, which can dramatically change the appearance, especially for lace or textured stitches. Your yarn choice also makes a huge difference – substituting cotton for wool will create a completely different drape and texture.
How do I fix mistakes without starting over?
Learn to “frog” (rip out) your work strategically. For small mistakes, you can often drop down just a few stitches and rebuild. For larger errors, rip back to the mistake and start again from that point. Keep your pattern handy and count stitches as you rebuild to make sure you’re back on track.
What’s the difference between working in rows versus rounds?
Rows create flat pieces where you turn your work at the end of each row and work back in the opposite direction. Rounds create circular or tube-shaped pieces where you work continuously in the same direction without turning. The instructions will specify which method to use, and it affects how you read both written instructions and charts.
How long should it take to complete a pattern?
This varies enormously based on the project size, stitch complexity, and your speed. A simple dishcloth might take 2-3 hours, while an intricate blanket could take months of regular work. Don’t worry about speed – focus on consistent stitches and enjoying the process. Your speed will naturally increase with practice.
Should I always use the exact yarn specified in the pattern?
Not necessarily, but substitutions require careful consideration. Match the yarn weight, fiber content, and yardage as closely as possible. When working with different yarn weights, you’ll need to adjust hook size and possibly stitch counts. Always make a gauge swatch when substituting yarns.
Reading crochet patterns becomes second nature with practice, just like any other skill. Start with simple patterns that match your current ability level, and don’t be afraid to take your time working through each instruction. Keep reference materials handy, count your stitches regularly, and remember that every experienced crocheter started exactly where you are now.
The most important thing is to be patient with yourself and enjoy the learning process. Those complex patterns that seem impossible now will make perfect sense once you’ve built up your foundation skills. Before you know it, you’ll be confidently tackling intricate designs and maybe even writing your own patterns. Happy crocheting!