Last month, I was teaching my neighbor Sarah how to crochet, and she kept getting frustrated with her yarn constantly tangling. Sound familiar? After watching her struggle for twenty minutes with what looked like a bird’s nest of acrylic yarn, I realized she needed to learn proper yarn management techniques. It’s one of those things experienced crocheters do automatically, but beginners often overlook completely.
Here’s the thing about yarn management – it’s not just about keeping your workspace tidy (though that’s nice too). Good yarn management prevents tension issues, reduces waste, saves you time, and honestly, makes crocheting way more enjoyable. I’ve seen too many people give up on projects because they thought crochet was “too messy” or “too complicated” when really, they just needed better yarn handling skills.
Whether you’re working with a single skein for a dishcloth or juggling multiple colors for a complex blanket, having a system makes all the difference. I’m going to share the techniques I’ve learned over fifteen years of crocheting – the ones that actually work in real life, not just in theory.
Quick Answer
Effective yarn management involves proper storage, tension control, and organization systems that prevent tangling and waste. Use yarn bowls or bags for single skeins, separate containers for multi-color projects, and always pull yarn from the center of the skein when possible.
Choosing the Right Yarn Storage System
Your yarn storage system should match your crocheting style and space. I’ve tried everything from fancy yarn organizers to repurposed household items, and honestly, some of the best solutions are the simplest ones.
Yarn bowls work beautifully for single-skein projects. Look for one with a spiral cutout rather than just a hole – it keeps the yarn secure but allows smooth feeding. I use a ceramic bowl I found at a thrift store for about $3, and it works just as well as the $30 ones marketed to crafters.
For larger projects, yarn bags are game-changers. Those mesh laundry bags work perfectly and cost under $5. Thread your yarn through one of the holes, zip it closed, and you’ve got a tangle-free system that you can toss in your project bag. This is especially helpful when working on granny square blankets where you’re constantly stopping and starting.
Pro Tip: If you’re using multiple skeins of the same color, number them with removable stickers. This helps you rotate through them evenly and avoid dye lot differences showing up in your finished project.
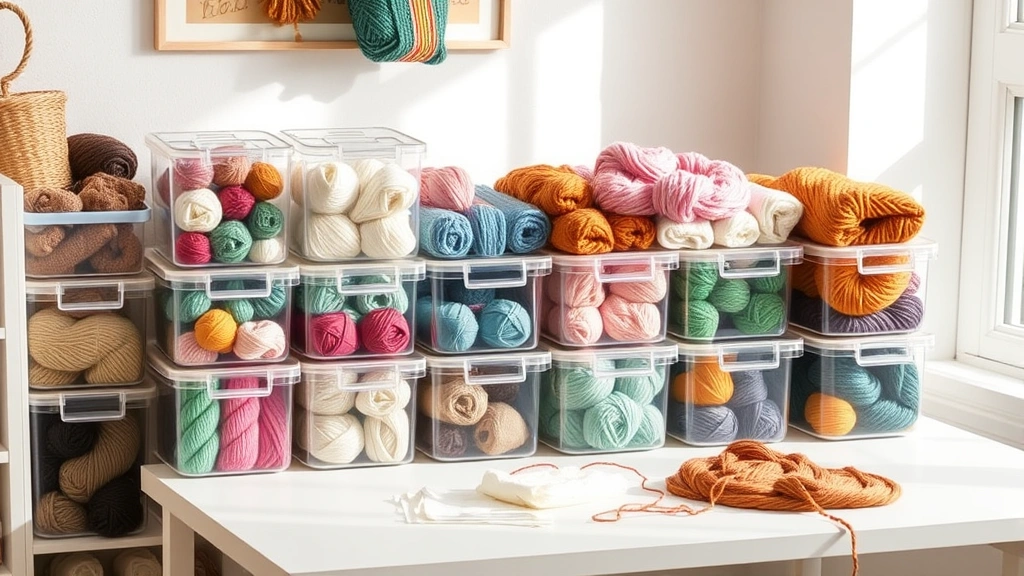
For serious multi-color work, consider a yarn organizer with multiple compartments. I use a clear plastic storage box with dividers – you can see all your colors at once, and each section keeps its yarn contained. The Craft Yarn Council recommends keeping yarns separated by weight and fiber content to prevent tangling and color bleeding.
Budget-Friendly Storage Solutions
You don’t need to spend a fortune on yarn storage. Here are some alternatives I’ve used successfully:
- Large mason jars for single skeins (thread yarn through a hole punched in the lid)
- Shoe boxes with holes cut in the lids for multiple small skeins
- Gallon-size ziplock bags with a corner snipped off for yarn feeding
- Clean coffee cans with plastic lids for heavier yarns
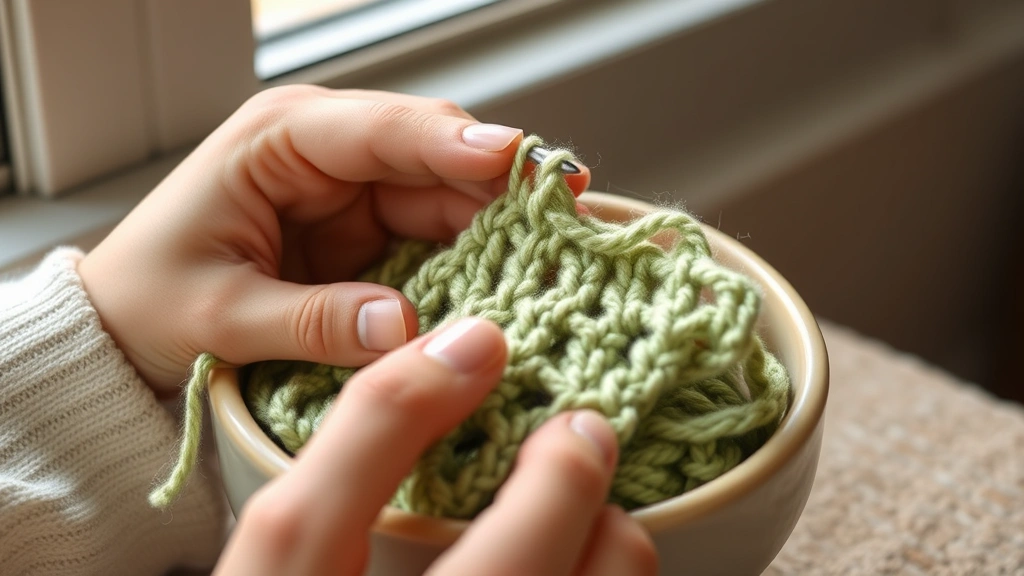
Managing Single Skein Projects
Single-skein projects might seem straightforward, but there are still ways to mess them up. The biggest mistake I see beginners make is pulling yarn from the outside of the skein, which causes it to roll around your workspace like a hyperactive pet.
Always pull from the center when possible. Most skeins have a center-pull end tucked inside – you might need to dig around a bit to find it. Sometimes you’ll pull out a small tangle first (we call this “yarn barf”), but once you get past that, the yarn feeds smoothly.
If you can’t find the center pull, or if you’re working with a ball of yarn, place it in a bowl or container that’s slightly larger than the ball. This keeps it from rolling away while still allowing it to turn freely as you work.
Tension Tip: Keep about 6-12 inches of working yarn between your project and the skein. Too little creates tension issues; too much creates tangling opportunities.
When working on projects like dishcloth patterns, I often wind my yarn into a center-pull ball using a nostepinne or even a paper towel tube. This gives you better control over yarn flow and prevents the skein from getting stretched out of shape.
Dealing with Yarn Splits and Joins
Even with perfect storage, you’ll occasionally need to join new yarn or deal with breaks. When joining yarn in single-crochet projects, I prefer the “spit splice” method for wool yarns – wet the ends slightly, overlap them about 2 inches, and roll them between your palms. For acrylic yarns, a simple knot works, but bury the tails securely.
Multi-Color Project Organization
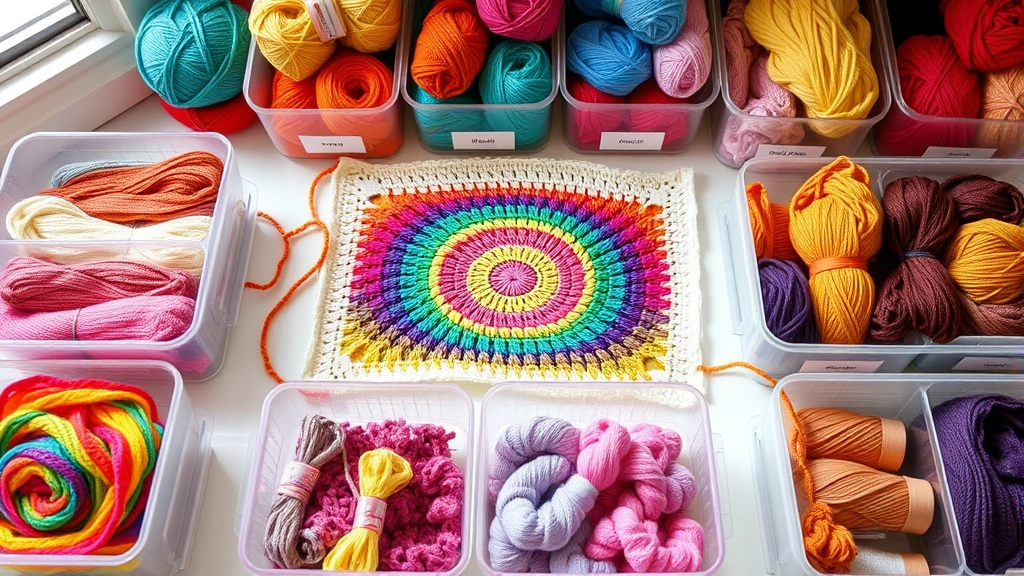
Multi-color projects are where yarn management gets serious. I learned this the hard way during my first tapestry crochet project – what should have been a relaxing evening turned into an hour of untangling yarn that had somehow formed what I can only describe as a yarn pretzel.
The key is separate containers for each color. I use small plastic containers from the dollar store, each labeled with the color name or number. For projects with many colors, a tackle box or craft organizer with multiple compartments works perfectly.
Bobbins are your friend for colorwork. Wind small amounts of each color onto bobbins or even cardboard rectangles. This prevents you from dragging entire skeins around as you work, which inevitably leads to tangles. For intricate colorwork patterns, I’ll pre-wind bobbins for the entire project – it takes extra time upfront but saves hours of frustration later.
| Project Type | Best Storage Method | Yarn Amount per Container |
|---|---|---|
| Granny squares | Small ziplock bags | 50-100 yards |
| Tapestry crochet | Bobbins | 10-25 yards |
| Striped blankets | Yarn bowls with dividers | Full skeins |
| Amigurumi | Mason jars | 25-50 yards |
Color Organization Strategies
Organize your colors logically. For rainbow projects, arrange them in spectrum order. For more complex patterns, group by usage frequency – keep your main colors easily accessible and background colors in secondary positions. I learned this trick from a Ravelry forum discussion, and it’s been a game-changer for large projects.
Preventing and Fixing Yarn Tangles
Tangles happen to everyone, but they’re usually preventable. The most common cause is yarn twist buildup – as you crochet, the yarn naturally twists, and if you always work in the same direction, this twist accumulates until the yarn starts kinking and tangling.
Periodically let your yarn dangle to release twist buildup. Every 20-30 minutes, hold your project up and let the yarn hang freely for a few seconds. You’ll see it spin as the twist releases. This simple habit prevents most tangling issues.
When tangles do occur, resist the urge to pull harder. Instead, work backwards from the tangle, gently loosening loops in reverse order. I keep a tapestry needle handy specifically for teasing apart stubborn knots – the blunt point won’t catch on fibers like your fingers might.
“The best time to fix a tangle is as soon as you notice it starting. What looks like a simple twist can become a nightmare knot if you ignore it for too long.” – This advice from my grandmother saved me countless hours of frustration.
Emergency Tangle Solutions
Sometimes you inherit a project with serious tangle issues, or disaster strikes despite your best efforts. Here’s my triage approach:
- Assess the damage
Spread the tangle out on a flat surface. Identify the main loops and crossing points. Don’t try to fix everything at once.
- Work from the outside in
Start with the loops on the edges of the tangle. These are usually easier to free and give you access to the more complex inner knots.
- Use tools strategically
Tapestry needles, knitting needles, or even a crochet hook can help lift and separate tangled strands without damaging the yarn.
- Know when to cut
If you’ve spent more than 15 minutes on a tangle, consider cutting it out. Your time is worth more than a few yards of yarn, especially with budget-friendly options like Lion Brand or Red Heart.
Maintaining Consistent Yarn Tension
Proper yarn tension starts with how you hold and feed the yarn, but your storage system plays a crucial role too. Yarn that feeds too easily creates loose stitches; yarn that feeds with resistance creates tight ones.
Your yarn position relative to your hands matters more than most people realize. I keep my yarn source slightly behind and to the side of my working area. This creates a natural angle that provides gentle resistance without strain. When working on amigurumi projects, where consistent tension is critical for shape, I’m extra careful about this positioning.
Different yarn weights require different feeding techniques. Fingering weight yarns need very little resistance – a simple yarn bowl works perfectly. Chunky weight yarns can handle more resistance and might even benefit from a weighted yarn bowl or a storage system that provides slight drag.
Consistency Check: Every few rows, hold up your work and check for tension variations. Uneven stitches are easier to fix immediately than after you’ve completed several more rows.
Adjusting for Different Yarn Types
Natural fibers like wool and cotton have different feeding characteristics than synthetic yarns. Wool tends to be “stickier” and feeds with more natural resistance, while acrylic can be slippery and feeds very easily. Adjust your storage system accordingly – wool might work fine in an open basket, while acrylic benefits from a more controlled feeding system.
Setting Up Your Crochet Workspace
Your workspace setup directly impacts your yarn management success. I’ve crocheted in tiny apartments and spacious craft rooms, and the principles remain the same: everything should have a designated place, and yarn should flow smoothly from storage to your hands.
Lighting matters more than you think for yarn management. Poor lighting makes it hard to see tangles developing or to distinguish between similar colors in multi-color projects. Position your primary light source to minimize shadows on your work area.
Keep your yarn storage at the same level as your hands when possible. Yarn that has to feed upward or downward creates uneven tension and increases tangling risk. A side table at the right height works better than storage on the floor or overhead shelves.
For portable projects, invest in a good project bag with internal organization. I use a bag with multiple pockets – one for my current project, one for yarn, and smaller pockets for tools. This keeps everything contained when I’m working on portable crochet projects during commutes or travel.
Essential Workspace Tools
- Scissors or snips within easy reach
- Tapestry needles for weaving in ends and fixing tangles
- Stitch markers to track your progress and reduce the need to handle yarn excessively
- Row counter to minimize handling your work to count rows
- Good lighting – LED desk lamps work well and don’t generate heat
Troubleshooting Common Yarn Issues
Even with perfect management, yarn can be unpredictable. Here are the most common issues I encounter and how to handle them:
Yarn splitting usually indicates either a dull hook or incorrect yarn handling. Make sure you’re inserting your hook through entire stitches, not splitting the yarn strands. If splitting continues, try a hook with a smoother finish or consider that the yarn might not be suitable for your chosen stitch pattern.
Color bleeding can ruin multi-color projects. Always test new yarns by dampening a small piece and pressing it against white paper. If color transfers, either avoid mixing that yarn with lighter colors or treat it with a color-setting solution before use.
Dye lot variations become obvious when you switch skeins mid-project. This is why I always buy extra yarn from the same dye lot and alternate between skeins every few rows when working on large single-color projects like afghan patterns.
Prevention Strategy: Keep a project journal noting yarn brands, dye lots, hook sizes, and any issues you encounter. This reference becomes invaluable for future projects and troubleshooting.
Dealing with Defective Yarn
Sometimes you’ll encounter yarn with manufacturing defects – thick spots, thin spots, or foreign materials woven in. Don’t try to work around these issues; they’ll always show in your finished project. Cut out the defective section and rejoin the yarn properly. Most yarn manufacturers, including Red Heart and Knit Picks, will replace defective skeins if you contact customer service.
Common Questions
How much extra yarn should I buy for a project?
Buy 10-20% more than the pattern calls for, especially for large projects. Dye lots can be discontinued, and it’s better to have leftover yarn than to search desperately for a match. For projects requiring precise color matching, like color-changing patterns, I buy 25% extra.
What’s the best way to store yarn long-term?
Store yarn in breathable containers away from direct sunlight, moisture, and pests. Cedar blocks help deter moths for wool yarns. Avoid plastic bags for long-term storage – they can trap moisture and cause mildew. Clear plastic bins with tight-fitting lids work well, or invest in purpose-made yarn storage systems.
How do I prevent yarn from rolling around while I work?
Use a yarn bowl, place the skein in a container slightly larger than the ball, or put it in a bag with a hole cut for the yarn to feed through. The key is containing the yarn while allowing smooth feeding. Avoid systems that create too much resistance – your stitches will become tight and uneven.
Can I fix a yarn tangle without cutting it?
Most tangles can be fixed with patience and the right technique. Work from the outside edges inward, use blunt tools like tapestry needles to lift and separate strands, and take breaks to prevent frustration from making the tangle worse. However, don’t spend more than 15-20 minutes on a tangle – your time is worth more than a few yards of yarn.
Why does my yarn keep twisting as I crochet?
Yarn twist is natural and happens because crochet stitches create a spiral motion. Periodically let your work dangle to release accumulated twist. If twisting is excessive, check that you’re pulling yarn from the correct end of the skein and that your yarn isn’t catching on rough surfaces as it feeds.
How do I manage multiple colors without tangling?
Keep each color in a separate container, use bobbins for small amounts, and plan your color changes to minimize yarn crossing. For complex colorwork, some crocheters use yarn holders that keep multiple strands separated and organized. Practice with simple two-color projects before attempting complex multi-color patterns.
What should I do if I run out of yarn mid-project?
First, check if you have enough to finish the current section or reach a natural stopping point. Contact the yarn manufacturer or check with local yarn shops for matching dye lots. If exact matches aren’t available, consider incorporating the color change into your design or using the different dye lot in a less visible area.
How do I keep track of multiple projects with different yarns?
Use separate project bags for each work-in-progress, label everything clearly, and keep project notes with each bag. I use clear storage bins so I can see contents at a glance, and each bin contains the pattern, yarn, tools, and any notes specific to that project. This system works whether you’re juggling quick crochet projects or long-term commitments.
Good yarn management isn’t glamorous, but it’s the foundation of enjoyable crocheting. These techniques have saved me countless hours of frustration and helped me complete projects I might have otherwise abandoned. The key is finding systems that work for your space, your projects, and your crocheting style.
Start with one or two techniques that address your biggest current challenges. Maybe that’s finally investing in a proper yarn bowl, or setting up dedicated storage for your multi-color projects. Small improvements in your yarn management will pay dividends in every project you make.
Remember, the goal isn’t perfection – it’s progress. Even experienced crocheters deal with tangles and tension issues sometimes. The difference is having systems and techniques that minimize problems and resolve them quickly when they occur. Happy crocheting!