You know that moment when you’re browsing through crochet patterns and stumble across one that just speaks to your soul? That happened to me last month when I discovered the world of textured crochet stitches. I’d been crocheting for years, mostly sticking to basic single and double crochets, thinking that was enough. Boy, was I wrong.
Textured stitches are like the secret sauce of crochet – they transform ordinary yarn into something that looks professionally made. Whether you’re working on a cozy blanket, a stylish cardigan, or even a simple dishcloth, the right textured stitch can make all the difference between “nice” and “wow, where did you get that?”
The thing is, textured stitches aren’t just about looks. They serve practical purposes too. Some create extra warmth by trapping air between the raised elements. Others provide stretch or structure exactly where you need it. And let’s be honest – they’re just more fun to work up than endless rows of the same basic stitch.
I’ve spent the last few weeks diving deep into textured stitches, trying everything from simple bobbles to complex cable-inspired patterns. Some were easier than I expected, others had me frogging rows at 11 PM (we’ve all been there). But here’s what I learned: most textured stitches are way more approachable than they look, and once you understand the basic principles, you can start creating your own variations.
Quick Answer
Textured crochet stitches create raised, dimensional patterns using techniques like front post/back post stitches, bobbles, popcorns, and clusters. Most work with standard yarn weights and hook sizes, adding visual interest and tactile appeal to any project without requiring advanced skills.
Understanding Textured Stitches
Textured stitches work by manipulating the basic structure of crochet to create raised, recessed, or clustered elements. Think of your regular single crochet fabric as a flat canvas – textured stitches are like adding brushstrokes that pop off the surface.
The magic happens in how you insert your hook and where you work your stitches. Instead of always going through both loops at the top of a stitch, you might work around the post (the vertical part), skip stitches to create clusters, or work multiple stitches into the same space to form bobbles.
When I first started exploring different crochet stitches, I was intimidated by the complex-looking photos in pattern books. But here’s the truth: most textured stitches use the same basic movements you already know. It’s just about combining them in new ways.
Types of Texture
Textured stitches generally fall into a few categories. Raised stitches like front post and back post create vertical lines and cables. Clustered stitches like bobbles and popcorns add dimensional bumps. Shell and fan stitches create wave-like textures. Crossed stitches form X patterns and lattice work.
Each type serves different purposes in design. Raised stitches are perfect for mimicking knitted cables or creating ribbing effects. Clustered stitches add whimsical texture that’s great for baby items or decorative elements. Understanding these categories helps you choose the right texture for your project goals.
Essential Textured Stitch Techniques
Let’s start with the foundation techniques that’ll unlock most textured patterns. Once you master these, you’ll be able to tackle almost any textured stitch pattern you encounter.
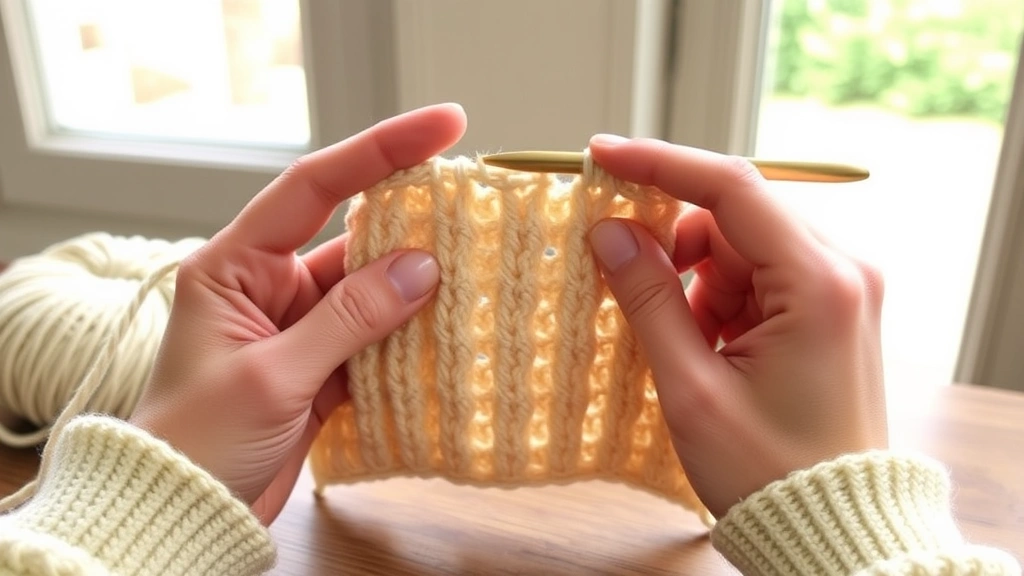
Front Post and Back Post Stitches
These are your gateway to textured crochet. Instead of inserting your hook through the top loops of a stitch, you work around the vertical post. For a front post double crochet (fpdc), insert your hook from right to left around the post, keeping the post in front of your work. For back post (bpdc), keep the post behind your work.
The result? Front post stitches push forward, back post stitches recede, creating instant dimension. I love using these for ribbing effects on sweater cuffs or the borders of blankets.
Pro tip: When working post stitches, your yarn over count stays the same as the base stitch. A front post double crochet still uses two yarn overs, just like a regular double crochet.
Bobble Stitches
Bobbles are created by working multiple incomplete stitches into the same space, then pulling them all together at the top. For a basic 5-dc bobble: work 5 double crochets into the same stitch, but stop before the final yarn over on each one. You’ll have 6 loops on your hook. Yarn over and pull through all 6 loops at once.
The key to neat bobbles is tension control. Keep your stitches loose enough to work with, but not so loose that the bobble looks sloppy. I find that using a hook one size larger than recommended helps with this.
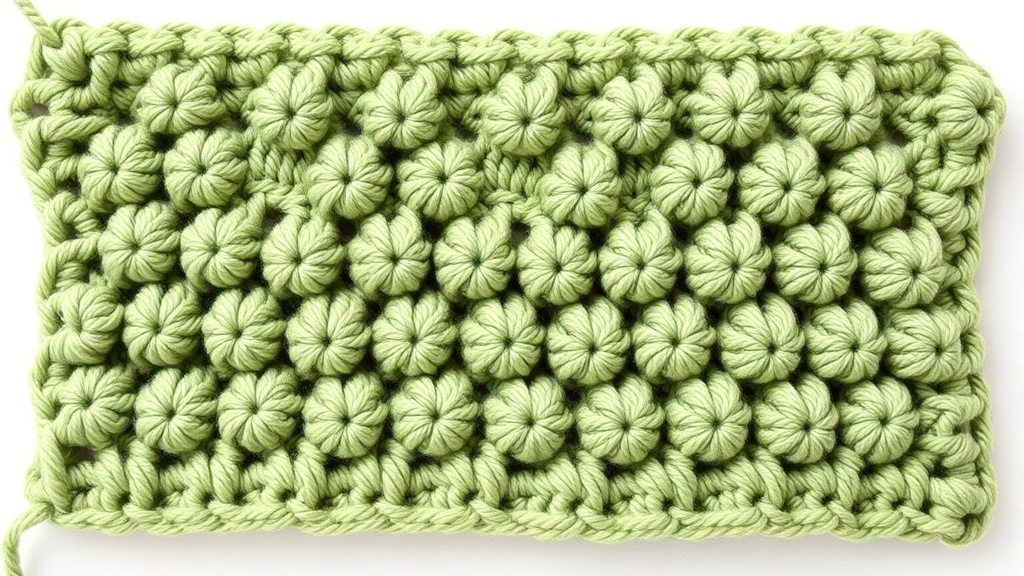
Popcorn Stitches
Similar to bobbles but with a different construction, popcorns are made by working multiple complete stitches into the same space, then folding them together. Work 5 double crochets in the same stitch, remove your hook from the loop, insert it through the top of the first dc, then back through the dropped loop, and pull through.
Popcorns tend to be more prominent than bobbles and work well when you want bold, defined texture points in your work.
Popular Textured Stitch Patterns
Now that you understand the basic techniques, let’s look at some popular patterns that combine these elements beautifully. These are the stitches I find myself reaching for again and again.
Moss Stitch
Don’t let the simple name fool you – moss stitch creates gorgeous texture with minimal effort. It alternates single crochets and chain-1 spaces, offsetting them on each row to create a subtle, all-over texture that looks complex but works up quickly.
I love moss stitch for baby blankets because it’s soft, stretchy, and the texture is gentle against sensitive skin. It also works beautifully in worsted weight cotton for dishcloths or market bags.
Basketweave Stitch
This classic pattern uses front and back post stitches to create the illusion of woven fabric. Typically worked in blocks of 4 or 6 stitches, you alternate between front post and back post sections, then shift the pattern on subsequent rows.
Basketweave is perfect for afghan projects where you want substantial texture and warmth. The interlocking pattern creates extra thickness that’s cozy without being bulky.
Shell Stitch
Shell stitches create fan-like clusters that add feminine, flowing texture to any project. A basic shell might be 5 double crochets worked into the same stitch, separated by single crochets or chain spaces.
What I love about shell stitches is their versatility. Work them close together for dense, ruffled texture, or space them out for a more delicate, lacy effect. They’re stunning in shawls and summer tops.
| Stitch Pattern | Difficulty Level | Best Yarn Weight | Ideal Projects |
|---|---|---|---|
| Moss Stitch | Beginner | DK to Worsted | Blankets, scarves, dishcloths |
| Basketweave | Intermediate | Worsted to Chunky | Afghans, pillow covers |
| Shell Stitch | Beginner | Sport to Worsted | Shawls, summer tops |
| Bobble Stitch | Intermediate | DK to Worsted | Baby items, decorative panels |
Choosing Yarn and Tools
The yarn you choose can make or break your textured stitch project. Some fibers show off texture beautifully, while others can muddy the definition you’re working so hard to create.
Best Yarn Choices for Texture
Cotton is my go-to for textured stitches. It has excellent stitch definition, doesn’t stretch out of shape, and comes in every color imaginable. Lion Brand 24/7 Cotton and Knit Picks Dishie are reliable choices that won’t break the bank.
Wool and wool blends also work beautifully, especially for wearables. The natural elasticity helps textured stitches maintain their shape, and the warmth factor makes heavily textured pieces extra cozy. I particularly love working with wool yarns for cable-inspired patterns.
Avoid highly textured or fuzzy yarns when you’re starting out with textured stitches. Mohair, boucle, and eyelash yarns can hide your beautiful stitch work. Save the fancy fibers for simple stitch patterns where they can be the star.
Hook Considerations
For most textured work, stick with the hook size recommended for your yarn weight. However, there are a few exceptions. When working bobbles or popcorns, I sometimes go up one hook size to make the clustering easier. For very dense textured patterns, a slightly larger hook prevents the fabric from becoming too stiff.
Inline hooks (like Boye) tend to work better for textured stitches than tapered hooks (like Susan Bates) because they grab the yarn more securely during complex maneuvers.
Project Applications and Tips
Knowing where and how to use textured stitches can transform your crochet from hobby-level to heirloom-quality. It’s not just about making things look fancy – strategic texture placement serves real functional purposes too.
Blankets and Afghans
Textured stitches shine in blanket projects where you want visual interest without color changes. A simple two-color design becomes sophisticated when you add textural elements like alternating panels of smooth and bobbled stitches.
Consider the end use when choosing textures. A baby blanket benefits from gentle, soft textures like moss stitch or small shells. A throw for the living room can handle bolder textures like large bobbles or deep basketweave patterns.
For large projects, I recommend working up several swatches first. What looks great in a 4-inch square might become overwhelming across an entire afghan. Trust me, I learned this the hard way with a popcorn stitch blanket that ended up looking like it was covered in golf balls.
Wearables
Textured stitches can add structure and interest to sweaters and cardigans, but placement is key. Use them strategically on fronts, collars, or cuffs rather than all over. This prevents the garment from becoming too bulky and creates focal points that flatter the wearer.
Ribbing effects created with post stitches are particularly useful for sweater edges. They provide stretch and recovery that helps garments maintain their shape, just like in knitted pieces.
Home Decor Items
Pillow covers, placemats, and table runners are perfect canvases for experimenting with textured stitches. These smaller projects let you try bold patterns without the commitment of a large blanket.
For items that will see heavy use, choose textures that lay relatively flat. Raised bobbles might look stunning, but they’re not practical for a placemat that needs to sit smoothly under dishes.
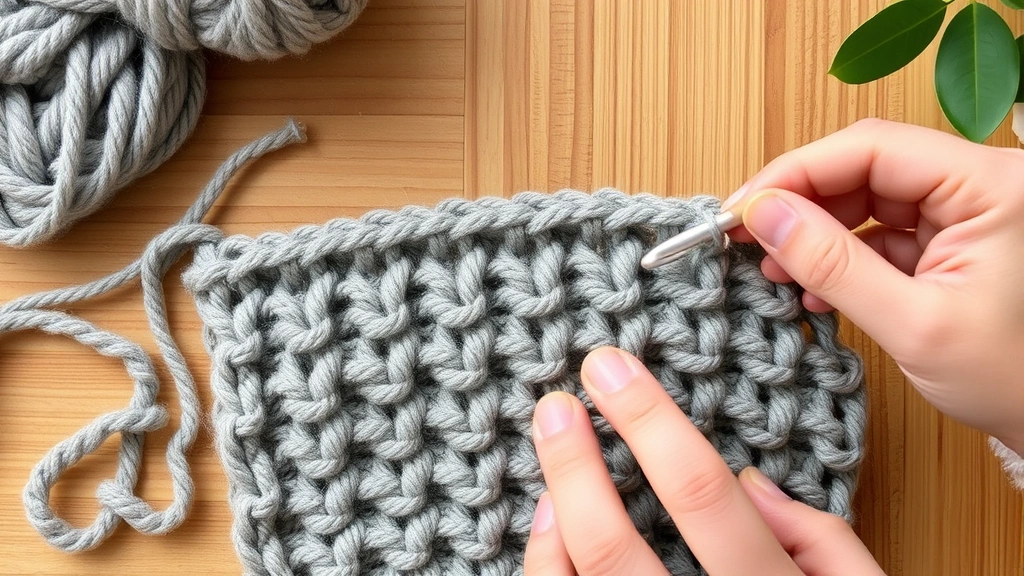
Troubleshooting Common Issues
Even experienced crocheters run into challenges with textured stitches. Here are the most common problems I see (and have experienced myself) along with practical solutions.
Uneven Tension
Textured stitches often require different tensions than basic stitches. Bobbles need to be loose enough to cluster properly, while post stitches need consistent tension to create clean lines.
The fix? Practice swatches are your friend. Work up 6-inch squares of each new textured stitch until your hands learn the rhythm. Don’t skip this step – it saves hours of frustration later.
Lost Stitch Count
Complex textured patterns can make it hard to count stitches accurately. Bobbles and clusters can look like multiple stitches when they’re actually worked into one space.
Use stitch markers liberally, especially when you’re learning. Mark the beginning of each repeat, or place markers every 10 stitches to help you stay on track. I also recommend using a row counter for patterns with long repeats.
Curling Edges
Some textured stitches naturally want to curl, especially those with strong directional elements like post stitches. This isn’t always a problem, but it can be frustrating when you want flat edges.
Add a border of single crochet or another stabilizing stitch around textured panels. For blankets, I often use 2-3 rounds of single crochet to create a flat, stable edge that frames the textured center beautifully.
Remember: blocking can work miracles on textured pieces. The steam and shaping process helps even out tension issues and makes patterns pop more clearly.
Advanced Textured Techniques
Once you’re comfortable with basic textured stitches, these advanced techniques will take your work to the next level. Don’t feel pressured to master everything at once – I’m still learning new variations after years of crocheting.
Cable-Inspired Patterns
Using combinations of front and back post stitches, you can create patterns that look remarkably similar to knitted cables. The key is understanding how to cross stitches and create the illusion of interwoven strands.
Start with simple cable patterns before attempting complex braids. A basic 4-stitch cable cross is a good introduction to the technique and builds confidence for more intricate designs.
Dimensional Flowers and Leaves
Textured techniques can create stunning three-dimensional floral elements. Layered petals using shell stitches, bobble centers, and post stitch stems add beautiful details to garments and accessories.
These elements work particularly well on shawls and wraps where they can be showcased without interfering with the garment’s function.
Combining Multiple Textures
The most sophisticated textured pieces often combine several different stitch patterns. The trick is balancing scale and visual weight so the textures complement rather than compete with each other.
Use smooth stitches to provide rest areas for the eye between heavily textured sections. This prevents the overall piece from looking busy or overwhelming.
Common Questions
What’s the difference between bobbles and popcorns?
Bobbles are made by working incomplete stitches together at the top, while popcorns use complete stitches that are folded together. Bobbles tend to be rounder and more compact, while popcorns are more pronounced and angular. Both create dimensional texture, but popcorns generally stand out more from the fabric surface.
Can I use textured stitches with variegated yarn?
It depends on the yarn and the texture. Subtle textures like moss stitch work well with variegated yarns because they don’t compete with the color changes. Bold textures like large bobbles can get lost in busy color patterns. If you love both, try using variegated yarn for smooth sections and solid colors for heavily textured areas.
How much extra yarn do textured stitches use?
Textured stitches typically use 10-25% more yarn than basic stitches, depending on the pattern complexity. Bobbles and popcorns are particularly yarn-hungry because they use multiple stitches in single spaces. Always buy an extra skein for textured projects, especially if you’re using discontinued colors.
Are textured stitches suitable for beginners?
Many textured stitches are beginner-friendly! Start with simple patterns like moss stitch or basic shells. These use familiar movements in new combinations. Avoid complex cable patterns or multi-step bobbles until you’re comfortable with basic crochet techniques and can maintain consistent tension.
How do I block textured crochet pieces?
Textured pieces benefit greatly from blocking, but the method depends on your yarn fiber. For cotton and acrylic, spray blocking works well – pin the piece to measurements and mist with water. For wool, steam blocking helps the textures pop while maintaining their dimensional quality. Always check your yarn label for care instructions first.
Can I substitute textured stitches in existing patterns?
Sometimes, but it requires careful consideration. Textured stitches often have different heights and widths than basic stitches, which can change the finished size significantly. Start by working swatches to compare gauge, and be prepared to adjust hook sizes or stitch counts. Simple substitutions work better than complex ones.
What’s the best way to learn new textured stitches?
Start with video tutorials from reputable sources like Ravelry or the Craft Yarn Council. Work up practice swatches in light-colored, smooth yarn so you can see your stitches clearly. Don’t try to learn multiple new techniques at once – master one before moving to the next.
How do I fix mistakes in textured stitch patterns?
Prevention is easier than correction with textured stitches. Use stitch markers and count frequently. When you do need to frog back, work slowly and identify each stitch type as you rebuild. For complex patterns, sometimes it’s easier to rip back to the beginning of a pattern repeat rather than trying to fix individual stitches.
Textured crochet stitches have completely changed how I approach my projects. What started as curiosity about those bumpy, interesting patterns in magazines has become one of my favorite aspects of crochet. The dimensional quality they add transforms simple yarn into something that looks professionally crafted and feels amazing to touch.
Don’t feel like you need to master every technique at once. Pick one textured stitch that appeals to you and spend time really getting comfortable with it. Work it in different yarn weights, try it in various projects, and let yourself make mistakes. That’s how you build the muscle memory and understanding that makes textured crochet feel natural.
The beauty of textured stitches is that they’re forgiving – small imperfections often blend into the overall pattern in ways that would be obvious in smooth stockinette. So grab some yarn, pick a pattern that excites you, and start experimenting. Your crochet projects will never look the same, and honestly, your hands will thank you for the variety too.