You know that moment when you’re halfway through what was supposed to be a simple scarf, and suddenly it’s looking more like a wonky triangle? Yeah, I’ve been there too. Understanding gauge in crochet isn’t just about following some mysterious numbers on a pattern – it’s about making sure your finished project actually looks like what you intended to create.
I learned this lesson the hard way when I made my first sweater. The pattern called for worsted weight yarn with a specific gauge, but I figured “close enough” would work. Three weeks later, I had a sweater that could fit my teenage nephew instead of me. That’s when I realized gauge isn’t optional – it’s the foundation that makes everything else work.
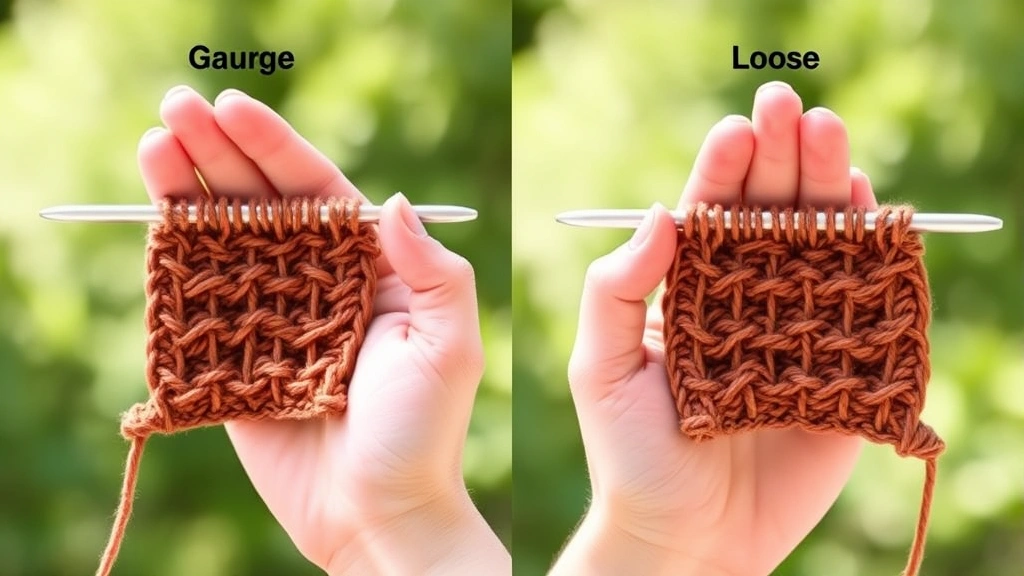
Here’s the thing about crochet gauge that nobody tells beginners: it’s not just about stitch count. It’s about understanding how your hands work, how different yarns behave, and how to adjust when things don’t match up perfectly. Some crocheters naturally work tight, others work loose, and most of us fall somewhere in between depending on the day, our stress level, and whether we’ve had enough coffee.
The good news? Once you understand how gauge works and why it matters, you’ll save yourself countless hours of frogging projects and starting over. You’ll also gain the confidence to substitute yarns, adjust patterns to fit better, and even design your own projects. It’s like having a secret weapon in your crochet toolkit.
Quick Answer
Crochet gauge measures how many stitches and rows you create per inch with specific yarn and hook size. Making a 4×4 inch gauge swatch before starting any project ensures your finished item will match the intended size and prevents frustrating do-overs.
What Is Crochet Gauge
Gauge is simply a measurement of how many stitches and rows you can crochet in a specific area – usually 4 inches by 4 inches – using a particular yarn and hook size. Think of it as your crochet fingerprint. Just like everyone’s handwriting looks different, everyone’s crochet tension creates slightly different sized stitches.
When you see “18 stitches and 24 rows = 4 inches” in a pattern, that’s the designer telling you exactly how their stitches measured when they created the sample. This measurement was taken after the piece was blocked (more on that later), and it’s the foundation for all the sizing calculations in the pattern.
The Two Parts of Gauge
Stitch gauge tells you how many stitches fit horizontally across 4 inches. This affects the width of your finished project. Row gauge measures how many rows stack up vertically in 4 inches, which affects the length. Both matter, but stitch gauge is usually more critical for fit.
Here’s where it gets interesting: your gauge can change based on lots of factors. The yarn you’re using, your mood, how long you’ve been crocheting that day, even the weather can affect your tension. I’ve noticed my stitches get tighter when I’m stressed and looser when I’m relaxed and watching TV.
Pro tip: Always make your gauge swatch at the same time of day and in similar conditions to when you’ll be working on your main project. Your morning coffee gauge might be different from your evening wine gauge!
Why Gauge Actually Matters
Let me paint you a picture. You’re making a baby blanket that should measure 30 inches square. The pattern calls for 18 stitches per 4 inches, but you’re getting 20 stitches in that same space. Your finished blanket will be about 27 inches instead of 30 – not a huge deal for a blanket, but definitely noticeable.
Now imagine you’re making a fitted sweater. That same 2-stitch difference per 4 inches could mean the difference between a size medium and a size small. Suddenly, your carefully planned gift doesn’t fit, and you’re back to square one.
When Gauge Is Critical
Some projects absolutely require accurate gauge. Fitted garments like sweaters, cardigans, and hats top the list. Home decor items that need to fit specific spaces, like pillow covers or curtain panels, also depend on precise measurements.
Other projects are more forgiving. Scarves, dishcloths, and loose-fitting shawls can handle some gauge variation without major problems. But even with these projects, understanding your gauge helps you estimate yarn quantities and finished dimensions.
| Project Type | Gauge Importance | Consequences of Being Off |
|---|---|---|
| Fitted Sweaters | Critical | Wrong size, poor fit |
| Blankets | Moderate | Size variation, yarn shortage |
| Scarves | Low | Length/width differences |
| Amigurumi | High | Shape distortion, stuffing shows |
Making Your Gauge Swatch
I know, I know. Making a gauge swatch feels like homework when you just want to start your project. But trust me on this – spending 30 minutes on a swatch can save you weeks of rework later.
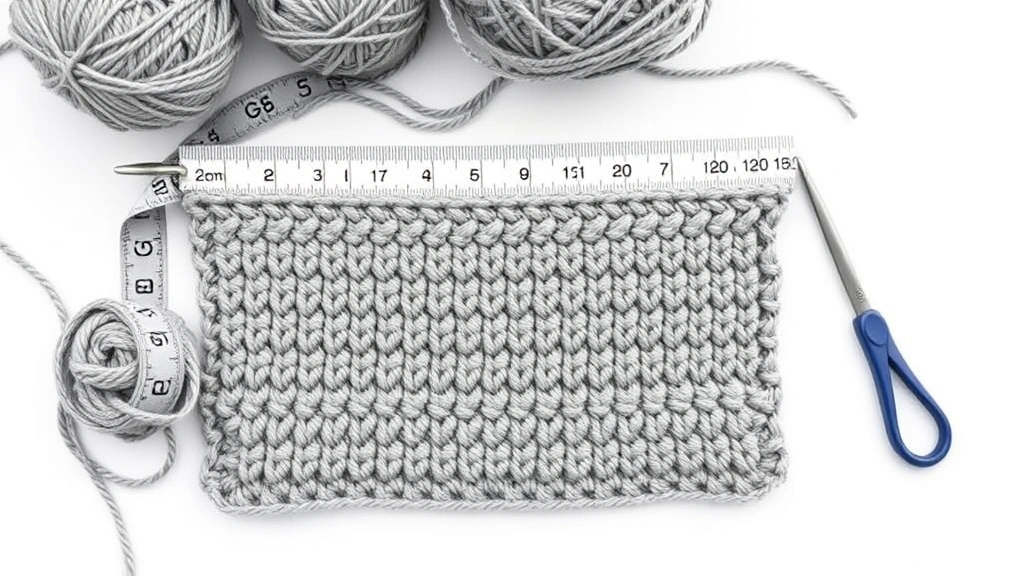
Start by making a swatch that’s larger than 4 inches. I usually aim for about 6 inches square because it gives me more area to measure and accounts for edge distortion. Use the exact yarn and hook size specified in the pattern, and work in the same stitch pattern as the main project.
Step-by-Step Swatch Making
- Chain Your Foundation
Chain enough stitches for about 6 inches width, plus a few extra. If the pattern gauge is 18 stitches = 4 inches, chain about 30-32 stitches.
- Work in Pattern Stitch
Use the same stitch pattern as your main project. If it’s single crochet, work all single crochet. If it’s a complex stitch pattern, work that exact pattern.
- Maintain Consistent Tension
Try to crochet the same way you normally do. Don’t overthink it or try to force a particular tension – you want this to represent your natural stitching.
- Work Enough Rows
Continue until your swatch measures about 6 inches tall. This gives you plenty of area to measure accurately.
Once your swatch is complete, don’t measure it right away. Let it relax for a few minutes, or even better, block it the same way you plan to block your finished project. Many yarns change slightly after blocking, and you want your gauge measurement to reflect the final result.
How to Measure Gauge Correctly
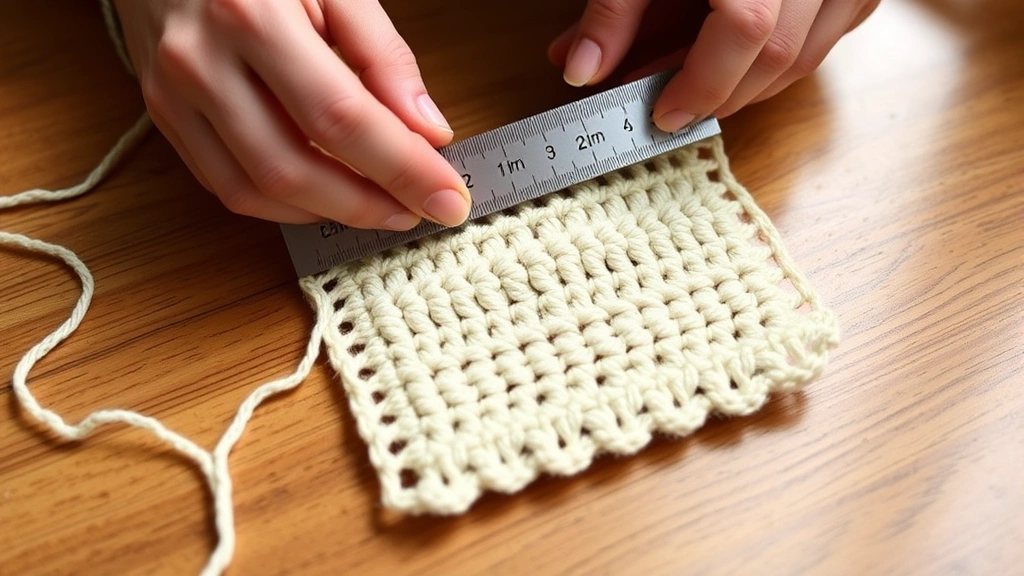
Here’s where a lot of people go wrong with gauge measurement. Don’t measure from edge to edge – those edge stitches are often distorted. Instead, place your ruler or gauge tool in the middle of your swatch, away from the edges.
I use a metal ruler for the most accurate measurements, but a gauge tool works great too. Place your measuring device horizontally across your swatch and count the stitches within a 4-inch span. Don’t stretch or compress the fabric – just let it lie naturally.
Counting Stitches vs. Stitch Posts
This trips up a lot of crocheters. When counting single crochet, count each individual stitch. For taller stitches like double crochet, you’re usually counting the stitch posts (the vertical parts), not the spaces between them.
For row gauge, measure vertically and count the rows within 4 inches. With single crochet, each row is pretty obvious. With taller stitches, you might need to look carefully to distinguish where one row ends and the next begins.
If you’re getting half-stitches in your count (like 17.5 stitches instead of 18), measure over 2 inches and multiply by 2, or measure over 8 inches and divide by 2. This gives you a more accurate average.
Adjusting When Gauge Is Off
So your gauge doesn’t match the pattern – now what? The most straightforward solution is changing your hook size. If you’re getting too many stitches per inch (your stitches are too small), go up a hook size. If you’re getting too few stitches (your stitches are too large), go down a hook size.
Here’s a rough guideline: each hook size change typically affects your gauge by about 1-2 stitches per 4 inches. So if you need to go from 20 stitches per 4 inches down to 18, try going up one hook size.
When Hook Size Changes Aren’t Enough
Sometimes your stitch gauge is perfect but your row gauge is off, or vice versa. This is trickier to fix and might require some pattern adjustments. For projects where row gauge is critical, you might need to work more or fewer rows than the pattern specifies.
If you’re working with a yarn substitution, you might find that no hook size gives you the exact gauge. In this case, you have a few options: choose the closest gauge and adjust the pattern accordingly, or find a different yarn that works better with the pattern requirements.
| Your Gauge Problem | Solution | Next Steps |
|---|---|---|
| Too many stitches | Larger hook | Go up 1-2 sizes |
| Too few stitches | Smaller hook | Go down 1-2 sizes |
| Stitch gauge right, row gauge off | Adjust row count | Calculate new row numbers |
| Can’t match either | Different yarn | Find closer match |
Gauge for Different Project Types
Not all projects treat gauge the same way. Understanding how gauge affects different types of projects helps you decide when to be super precise and when you can be more relaxed about it.
Garments and Fitted Items
For sweater patterns and other fitted garments, gauge is absolutely critical. Even a small difference can affect the fit dramatically. I always make a gauge swatch for garments, even if I’m using the exact yarn specified in the pattern.
When working on fitted items, pay attention to both stitch and row gauge. The stitch gauge affects the circumference measurements (chest, waist, hips), while row gauge affects the length measurements (body length, sleeve length).
Blankets and Afghans
Blankets are more forgiving, but gauge still matters for planning purposes. If your gauge is off, your blanket might end up significantly larger or smaller than expected, and you might run short on yarn or have way too much left over.
For granny square blankets, I recommend making one complete square and measuring it before diving into making dozens of squares. This gives you a good sense of your finished size and helps you plan your layout.
Amigurumi and 3D Projects
Amigurumi has its own gauge considerations. You typically want a tighter gauge than normal to prevent stuffing from showing through. Many amigurumi patterns recommend using a hook size smaller than what the yarn label suggests.
The Craft Yarn Council provides helpful guidelines for standard hook sizes with different yarn weights, but amigurumi often breaks these rules intentionally.
Troubleshooting Common Gauge Problems
Let’s talk about the frustrating stuff that happens with gauge, because it’s not always straightforward. Sometimes you’ll make a perfect gauge swatch, start your project, and find that your gauge has mysteriously changed halfway through. This happens more often than you’d think.
Gauge Drift During Projects
Gauge drift is when your tension gradually changes as you work on a project. Maybe you started out tense and nervous, then relaxed as you got into the rhythm. Or perhaps you began the project fresh in the morning but finished it late at night when you were tired.
For long projects, I check my gauge periodically by measuring sections of the work in progress. If I notice my stitches getting consistently larger or smaller, I’ll adjust my hook size mid-project. It’s better to have a slight variation in texture than to end up with a drastically wrong-sized finished item.
Yarn Behavior Changes
Some yarns behave differently when worked up versus when they’re in a swatch. Cotton yarns, for example, can grow significantly when blocked, while wool yarns might spring back and become smaller. Ravelry project pages are goldmines for seeing how different yarns behave in real projects.
Acrylic yarns usually stay pretty consistent, which is one reason they’re great for beginners. But natural fibers can be trickier to predict, especially if you’re new to working with them.
Pattern vs. Reality
Sometimes the problem isn’t your gauge – it’s the pattern. Occasionally, pattern gauges are incorrect or the sizing runs large or small. This is where checking other people’s project notes becomes invaluable.
Before starting any major project, especially garments, I check Ravelry to see what other makers experienced. Did people consistently need to size up or down? Did anyone mention gauge issues? This research can save you a lot of heartache.
Common Questions
Do I really need to make a gauge swatch for every project?
Not every project, but definitely for anything where size matters. Skip the swatch for dishcloths and scarves if you want, but always make one for garments, fitted accessories, and home decor items that need specific dimensions. The 30 minutes spent on a swatch can save you weeks of rework.
My gauge matches horizontally but not vertically. What should I do?
This is actually pretty common. If your stitch gauge is correct but your row gauge is off, you can often adjust by working more or fewer rows than the pattern specifies. For a sweater, this might mean adding or subtracting rows in the body and sleeves to achieve the right length measurements.
Can I use a different yarn weight if I adjust my hook size?
Sometimes, but it’s tricky. Moving from worsted to DK weight yarn might work with a smaller hook, but the fabric drape and stitch definition will be different. Understanding yarn weights helps you make better substitution decisions. Stick within the same weight category when possible.
How much yarn should I buy if my gauge is different from the pattern?
If your gauge is tighter (more stitches per inch), you’ll need less yarn. If it’s looser (fewer stitches per inch), you’ll need more. A rough estimate: for every 2 stitches per inch difference, adjust your yarn quantity by about 10-15%. When in doubt, buy an extra skein – most shops will let you return unopened skeins.
Why does my gauge change when I switch from single crochet to double crochet?
Different stitches create different tensions naturally. Your single crochet might be perfectly on gauge while your double crochet is loose, or vice versa. This is normal – just adjust your hook size for the specific stitch you’re working. Some crocheters keep multiple hook sizes handy for complex patterns.
Should I block my gauge swatch?
Yes, especially if you plan to block your finished project. Many fibers change significantly after blocking – cotton can grow, wool can shrink and felt slightly, and blends can behave unpredictably. Block your swatch the same way you’ll block the finished item for the most accurate gauge measurement.
My gauge is perfect with the recommended hook, but the fabric feels too stiff. What should I do?
Gauge isn’t just about numbers – fabric feel matters too. If the fabric is too stiff or dense for your project, try going up a hook size and adjusting the pattern accordingly. For baby blanket patterns, you want soft, drapey fabric even if it means recalculating the stitch counts.
How do I measure gauge on textured stitches like shells or clusters?
Focus on the repeat units rather than individual stitches. If a shell pattern has 3 shells per 4 inches, count shells instead of trying to count every single stitch within each shell. The pattern should specify what to count – if it doesn’t, look for clarification in the pattern notes or contact the designer.
Making Gauge Work for You
Here’s the truth about gauge: it’s not about being perfect, it’s about being consistent and knowing how to adapt when things don’t go exactly as planned. I’ve been crocheting for over a decade, and I still sometimes have to make two or three gauge swatches before I get it right.
The key is understanding that gauge is a tool, not a test you can fail. It helps you predict how your finished project will turn out and gives you the information you need to make adjustments along the way. Some of my favorite finished projects came from patterns where I had to adjust the gauge or make modifications based on how my yarn was behaving.
Remember that every crocheter’s hands are different, and that’s not a bug – it’s a feature. Your unique tension and style are part of what makes your handmade items special. Gauge just helps you harness that uniqueness to create projects that fit and look the way you intended.
So next time you see those gauge numbers in a pattern, don’t groan. Think of them as your roadmap to success. Take the time to make that swatch, measure carefully, and adjust as needed. Your future self will thank you when your sweater actually fits and your blanket is exactly the size you planned. Happy crocheting!