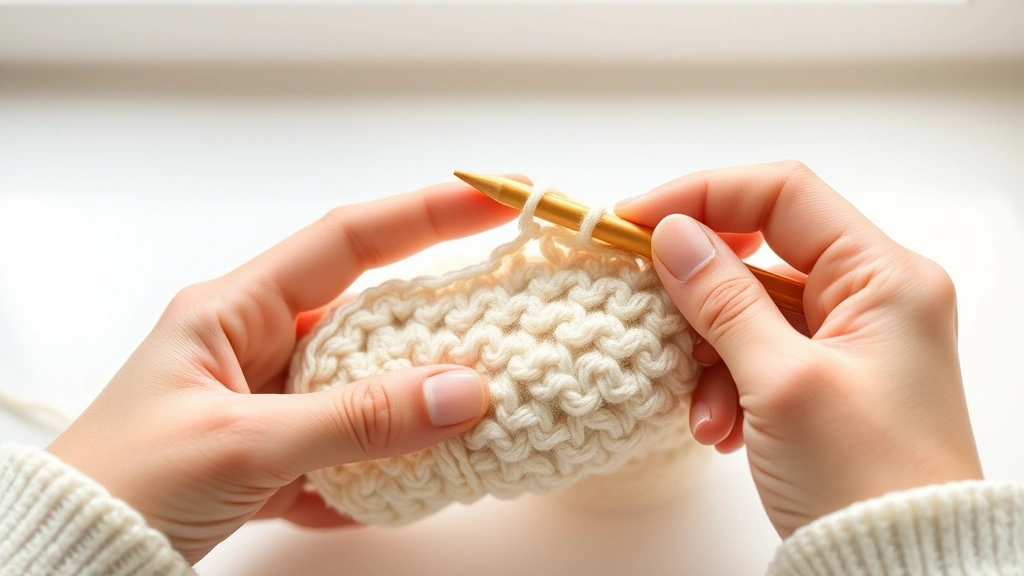
Last weekend, I was helping my neighbor Sarah with her first crochet project when she held up her work with a frustrated sigh. “This looks nothing like the picture,” she said, pointing to her wonky, uneven stitches. I knew exactly what was wrong – she was struggling with maintaining consistent tension, one of the most common challenges new crocheters face.
Here’s the thing about crochet: it’s not just about following a pattern. Your hands need to develop muscle memory, your grip needs to find its sweet spot, and your yarn needs to flow at just the right speed. When any of these elements are off, your project can end up looking more like abstract art than the beautiful blanket you envisioned.
I’ve been crocheting for over fifteen years, and I still remember the frustration of those early projects. My first granny square looked like it had been through a washing machine on the spin cycle. But here’s what I wish someone had told me back then: most crochet problems have surprisingly simple solutions once you know what to look for.
Whether you’re dealing with tight stitches that make your hook squeak, loose loops that could fit a pencil through them, or edges that curve like a smile when they should be straight, I’m going to walk you through the most effective techniques I’ve learned over the years. These aren’t just quick fixes – they’re fundamental skills that will transform your crochet from frustrating to flowing.
Quick Answer
Consistent crochet tension comes from finding the right grip, maintaining steady yarn flow, and practicing regular gauge swatches. Most tension issues can be fixed by adjusting how you hold your yarn and hook, not how tightly you pull.
Understanding What Tension Really Means
Let’s clear up some confusion right away. When crocheters talk about “tension,” we’re not talking about how stressed you feel (though that might be part of it). We’re referring to how consistently you create stitches of the same size. Think of it like handwriting – some people naturally write small, others write large, but the key is keeping it consistent.
Good tension means your stitches are uniform in size, your fabric has an even texture, and your finished measurements match the pattern. It doesn’t mean your stitches need to be tight or loose – just consistent. I’ve seen beautiful work from crocheters who naturally stitch loosely and others who prefer a firmer grip.
The magic happens in three places: how you hold your hook, how you control your yarn, and how you pull through loops. When these work together harmoniously, you’ll notice your gauge swatches start matching patterns, your edges stay straight, and your projects actually look like the photos.
Why Tension Matters More Than You Think
Here’s something that surprised me early on: tension affects way more than just appearance. Inconsistent tension can throw off your stitch counts, make seaming nearly impossible, and even affect how your finished project wears over time. I once made a sweater where my tension got looser as I relaxed into the project – the result was sleeves that grew longer with each row.
When working with double crochet stitches, consistent tension becomes even more critical because the height variations are more noticeable. A tight double crochet next to a loose one creates that bumpy, uneven look that screams “beginner project.”

Common Tension Problems and Quick Fixes
Over the years, I’ve noticed that most tension problems fall into predictable categories. The good news? Once you identify which category you’re in, the solution becomes much clearer.
The Death Grip Problem
This is probably the most common issue I see with new crocheters. You’re holding everything so tightly that your knuckles are white, your hook barely moves through the loops, and your finished work could probably stop a bullet. The irony is that gripping tighter actually makes your stitches less consistent, not more.
The fix starts with relaxing your shoulders and loosening your grip on both the hook and yarn. Your hook should move smoothly through loops without resistance. If you’re fighting the yarn, you’re working too hard.
The Spaghetti Syndrome
On the opposite end, some crocheters hold everything so loosely that their stitches look like they’re melting off the hook. This often happens when you’re trying to overcorrect from being too tight, or when you’re working with slippery yarns like cotton or bamboo.
The solution isn’t to grip tighter everywhere – it’s about finding strategic control points. You want firm control over your yarn feed while keeping your hook grip relaxed.
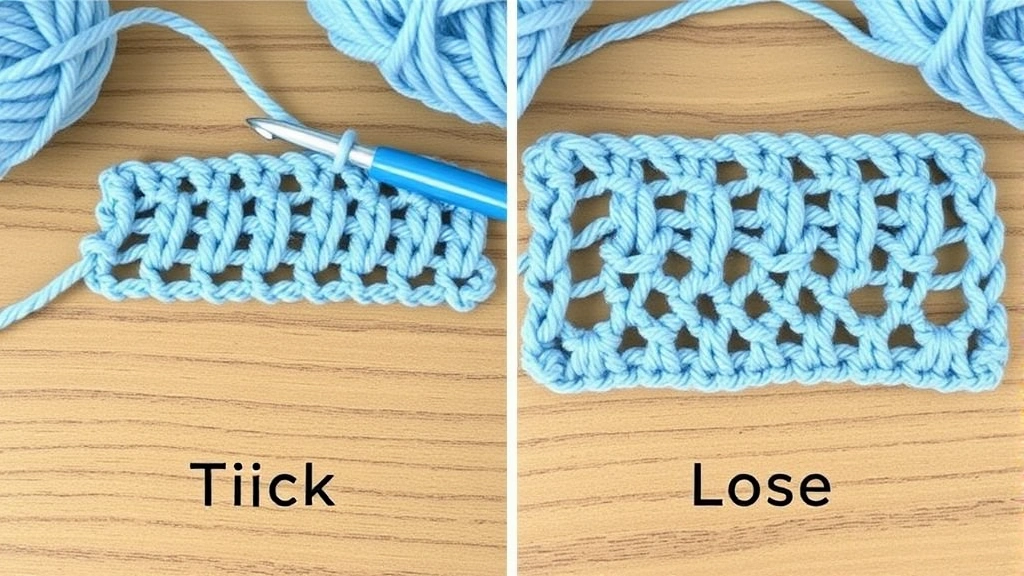
The Inconsistent Edge Disaster
Your project starts out looking great, but somewhere along the way, the edges begin curving, flaring, or pulling in. This usually happens because your tension changes as you get more comfortable (or more tired) during a project.
Pro tip: Take breaks every 30-45 minutes, especially on long projects. Your hands naturally change position as you settle in, which affects tension.
Finding Your Perfect Grip and Hold
There’s no single “correct” way to hold your hook and yarn, but there are definitely more and less effective approaches. I’m going to share the most common methods that work for different hand sizes and comfort levels.
Hook Grips That Actually Work
The pencil grip is what most people start with – hold your hook like you’re writing, with your thumb and index finger controlling the movement. This works well for detailed work and gives you good control, but some people find it tiring during long sessions.
The knife grip involves holding the hook like you’re cutting food, with your whole hand wrapped around the handle. This can be more comfortable for extended crocheting and works especially well with chunky yarn projects where you need more leverage.
Here’s what I’ve learned: your grip might need to change based on what you’re making. When I’m working on intricate amigurumi patterns, I use a pencil grip for precision. For large blankets, I switch to a modified knife grip to reduce hand fatigue.
Yarn Control Methods
The way you feed yarn to your hook is just as important as how you hold the hook itself. Most crocheters use some variation of wrapping the yarn around their non-hook hand fingers to create tension.
The basic method involves threading the yarn over your index finger, under your middle finger, and over your ring finger. This creates natural tension points that help maintain consistency. Some people prefer wrapping around their pinky instead – experiment to see what feels natural.
| Grip Style | Best For | Comfort Level |
|---|---|---|
| Pencil Grip | Detailed work, small projects | High precision, can cause fatigue |
| Knife Grip | Large projects, chunky yarn | Less fatigue, slightly less precision |
| Modified Grip | Personal preference | Varies by individual |
Mastering Yarn Control Techniques
Yarn control is where the magic really happens. You can have the perfect hook grip, but if your yarn isn’t feeding smoothly and consistently, your stitches will still be all over the place.
The Yarn Feed Sweet Spot
Your yarn should flow to your hook with just enough resistance to maintain control, but not so much that you’re fighting it. Think of it like a gentle stream, not a trickle or a flood. When I’m working with worsted weight yarn, I can usually feel when the tension is right – there’s a slight resistance when I pull yarn, but it moves smoothly.
Different yarn weights require different approaches. Lace weight yarns need a very light touch – too much tension and they’ll snap. Bulky yarns need more deliberate control because they have more body and can overwhelm your stitches if not managed properly.
Adjusting for Different Yarn Types
Cotton yarns tend to be less forgiving than wool – they don’t have the natural stretch that helps hide minor tension variations. When I’m working with cotton, I pay extra attention to keeping my yarn feed consistent because every little variation shows up in the finished work.
Acrylic yarns like Lion Brand or Red Heart are generally more forgiving and great for practicing tension control. Wool yarns have natural elasticity that helps even out minor inconsistencies.
Effective Practice Methods for Building Consistency
Like any skill, consistent tension comes from deliberate practice. But you don’t need to crochet for hours every day – focused, intentional practice sessions work better than mindless repetition.
The Swatch Method
Start each practice session by making a 4×4 inch swatch in single crochet. Use worsted weight yarn and a size H (5mm) hook. Focus entirely on making each stitch the same size as the one before it. Don’t worry about speed – consistency first, speed later.
After completing your swatch, hold it up to the light. Consistent tension creates an even fabric where the holes between stitches are uniform. If you see some holes that are noticeably larger or smaller, that’s where your tension varied.
The Row-by-Row Check
As you work, stop every few rows and look at your edge stitches. They should line up vertically – if they’re stepping in or out, your tension is shifting. This is especially important when working on projects like granny squares where even edges are crucial for joining.
- Set Up Your Practice Space
Use good lighting and sit comfortably with your shoulders relaxed. Poor posture leads to tension changes as you compensate.
- Choose Your Practice Yarn
Medium-weight acrylic in a light color works best. You can see your stitches clearly and the yarn is forgiving.
- Focus on One Element
Don’t try to perfect everything at once. Spend one session just on hook grip, another on yarn feed, etc.
- Track Your Progress
Keep your practice swatches and date them. You’ll be amazed how quickly you improve when you can see the progression.
Troubleshooting Specific Tension Issues
Sometimes you’re doing everything “right” but still having problems. These troubleshooting tips address the sneaky issues that can throw off your tension.
When Your Stitches Get Progressively Tighter
This usually happens because you’re unconsciously gripping harder as you concentrate. Set a timer for every 15 minutes and do a quick tension check. Shake out your hands, roll your shoulders, and consciously loosen your grip before continuing.
Another culprit is your working yarn getting shorter. As you get closer to the end of your yarn ball, you might naturally grip tighter to maintain control. Switch to a fresh ball when you have about 6 inches of tail left.
The Dreaded Stitch Count Mystery
You’re following the pattern exactly, but somehow you keep gaining or losing stitches. Often, this isn’t a counting problem – it’s a tension problem creating stitches that are too tight to see clearly or too loose to maintain their structure.
When working half double crochet stitches, inconsistent tension can make it nearly impossible to identify where one stitch ends and the next begins. The solution is to work a few practice rows focusing solely on making each stitch the same height and width.
Seasonal Tension Changes
Here’s something most patterns don’t mention: your tension can change with the weather. In winter, when the air is dry, yarn behaves differently than in humid summer conditions. Your hands might also be drier, affecting your grip.
I keep a small bottle of hand lotion in my crochet bag and use it lightly before starting a session. Just enough to prevent dry, catching skin – too much and you’ll lose yarn control entirely.
Tools and Materials That Actually Help
While good technique is more important than expensive tools, a few key items can make maintaining consistent tension much easier.
Hook Materials That Make a Difference
Aluminum hooks are my go-to for most projects because they have just enough texture to grip yarn without catching. Plastic hooks can be too smooth for good control, while some wooden hooks can be too grabby with certain yarns.
For beginners struggling with tension, I often recommend ergonomic hooks with wider handles. They’re easier to grip consistently and reduce hand fatigue that can lead to tension changes.
Yarn Choices for Learning
Not all yarns are created equal when you’re learning tension control. Medium-weight acrylic yarns are forgiving and show stitches clearly. Avoid fuzzy yarns, slippery cottons, or anything with metallic threads while you’re building muscle memory.
| Yarn Type | Difficulty Level | Best For |
|---|---|---|
| Worsted Weight Acrylic | Beginner-friendly | Learning basic tension |
| Cotton | Intermediate | Testing consistent technique |
| Wool | Forgiving | Hiding minor variations |
| Bamboo/Silk | Advanced | When technique is solid |
Accessories That Actually Help
A good yarn bowl or yarn keeper prevents your ball from rolling around, which can cause tension variations as you chase it across the room. I use a simple ceramic bowl with a yarn guide – nothing fancy, but it keeps my yarn feeding consistently.
Stitch markers aren’t just for marking rounds – use them to mark every 10th stitch while you’re learning. This helps you spot tension problems before they affect your entire project.
Common Questions
How long does it take to develop consistent tension?
Most people see noticeable improvement within 2-3 weeks of regular practice, but developing truly consistent tension takes about 3-6 months. The key is practicing a little bit regularly rather than marathon sessions. Even 15 minutes of focused practice daily will build muscle memory faster than occasional long sessions.
Should my stitches be tight or loose?
Neither – they should be consistent. Some crocheters naturally work tighter, others looser, and both can create beautiful projects. The goal is making each stitch the same size as the others. If your gauge matches the pattern, your tension is correct regardless of whether it feels tight or loose to you.
Why does my tension change during a project?
This is incredibly common and usually happens because you relax as you get into a rhythm, or you unconsciously adjust your grip when you get tired. Take breaks every 30-45 minutes, and do a quick tension check by comparing your current row to your starting rows. Environmental factors like temperature and humidity can also affect yarn behavior.
What’s the best yarn weight for learning tension control?
Worsted weight (size 4) yarn is ideal for beginners. It’s substantial enough that you can clearly see your stitches, but not so bulky that it overwhelms your hook. Light colors show stitch definition better than dark ones. Red Heart Super Saver or Lion Brand Vanna’s Choice are excellent practice yarns.
Can using the wrong hook size affect my tension?
Absolutely. A hook that’s too small for your yarn will force you to work tighter, while a hook that’s too large can make it hard to maintain control. Start with the hook size recommended on your yarn label, then adjust based on your gauge swatch. Most patterns include a suggested hook size for a reason.
How do I fix tension problems in a project I’ve already started?
If the problem is minor and recent, you can often block the finished piece to even things out. For major issues, it’s usually better to frog (rip out) back to where the tension was consistent and restart. I know it’s frustrating, but fixing tension issues early saves time in the long run and results in a much better finished project.
Why do my edges curve even when my tension feels consistent?
Edge curving often happens because your turning chains are a different tension than your regular stitches, or because you’re not working into the correct stitch at the beginning or end of rows. Count your stitches carefully and make sure your turning chains match the height of your working stitches.
Does the way I hold my yarn really matter that much?
Yes, yarn control is actually more important than hook grip for maintaining consistent tension. Your yarn feed needs to be smooth and even – if it’s catching or flowing too freely, your stitches will vary. Experiment with different finger positions until you find one that gives you steady, controlled yarn flow.
Mastering consistent tension isn’t about perfection – it’s about developing the muscle memory and awareness that lets you create the projects you envision. Every crocheter goes through this learning curve, and the frustration you might be feeling right now is completely normal.
Remember that even experienced crocheters occasionally have tension hiccups, especially when trying new techniques or working with unfamiliar yarns. The difference is that with practice, you’ll quickly recognize when something feels off and know how to adjust.
Start with those practice swatches, be patient with yourself, and celebrate the small improvements. Before you know it, you’ll be creating projects with that beautiful, even fabric that makes people ask, “Did you really make this yourself?” Trust me, that moment makes all the practice worth it.