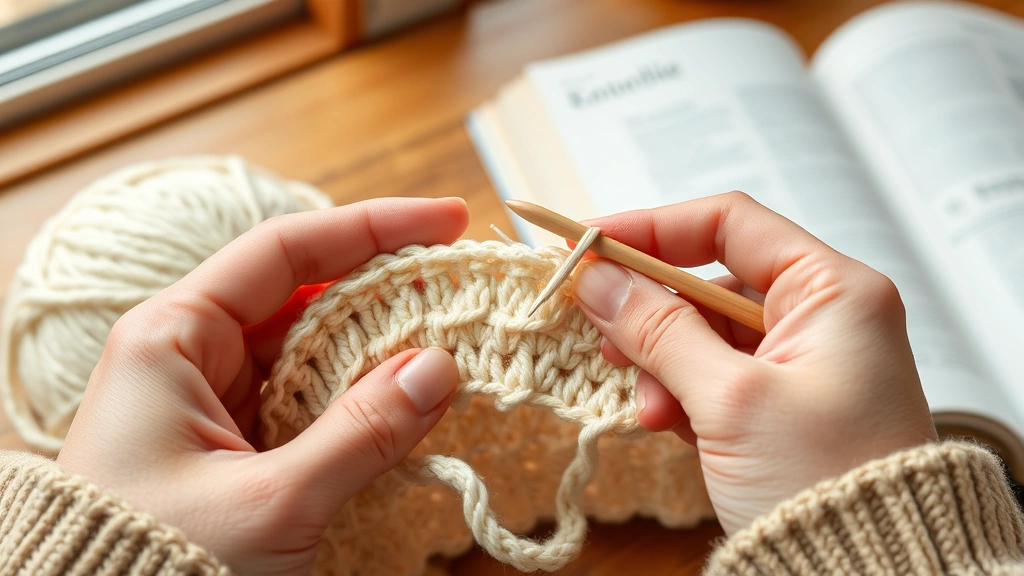
Last week, I was teaching my neighbor Sarah how to make her first granny square, and she looked at me with complete confusion when I mentioned “working in the round.” It hit me that while we crocheters toss around terms like “magic ring” and “turning chain” like they’re common knowledge, these concepts can feel like a foreign language to someone just picking up a hook for the first time.
Understanding crochet terminology isn’t just about sounding like you know what you’re doing (though that’s nice too). It’s about being able to follow patterns without getting lost, troubleshoot problems when they arise, and communicate with other crocheters when you need help. I’ve seen too many beautiful projects abandoned because someone got frustrated trying to decode what felt like cryptic instructions.
The truth is, once you understand the logic behind crochet terms, patterns start making sense. Most terminology describes exactly what you’re doing – where your hook goes, how many times you wrap the yarn, which direction you’re working. It’s actually pretty straightforward once someone explains it in plain English instead of assuming you already know what a “yarn over” means.
Quick Answer
Crochet terminology describes stitch types, techniques, and construction methods using standardized abbreviations and terms. Master the basic stitches (sc, hdc, dc, tr), understand directional terms (right side, wrong side, turning chain), and learn construction vocabulary (magic ring, join, fasten off) to read any pattern confidently.
Essential Stitch Abbreviations
Let’s start with the building blocks – the basic stitches you’ll see in almost every pattern. These abbreviations are standardized, so once you learn them, you can read patterns from any designer or publisher.
Single crochet (sc) is your workhorse stitch. Insert hook, yarn over, pull through (2 loops on hook), yarn over, pull through both loops. It creates a tight, dense fabric that’s perfect for amigurumi projects and structured items like baskets.
Half double crochet (hdc) bridges the gap between single and double crochet. Yarn over first, insert hook, yarn over, pull through (3 loops on hook), yarn over, pull through all three loops. It’s about 1.5 times taller than single crochet and creates a lovely texture that’s not too dense, not too open.
Double crochet (dc) is probably the most versatile stitch in crochet. Yarn over, insert hook, yarn over, pull through (3 loops on hook), yarn over, pull through 2 loops (2 loops remain), yarn over, pull through final 2 loops. This creates an open, airy fabric that works up quickly and uses less yarn than single crochet.
| Stitch | Abbreviation | Height | Best For |
|---|---|---|---|
| Chain | ch | Foundation | Starting chains, spaces |
| Slip Stitch | sl st | Shortest | Joining, moving position |
| Single Crochet | sc | 1 chain tall | Dense fabric, amigurumi |
| Half Double Crochet | hdc | 2 chains tall | Medium density, texture |
| Double Crochet | dc | 3 chains tall | Open fabric, quick projects |
| Treble Crochet | tr | 4 chains tall | Very open, lacy work |
Treble crochet (tr) is the tallest commonly used stitch. Yarn over twice, insert hook, then work through the loops in pairs until one remains. It creates very open fabric and works up extremely quickly, making it popular for large blanket projects.
Memory trick: The number of yarn overs at the beginning equals the number of chains needed for turning. Single crochet = no yarn overs = 1 turning chain. Double crochet = 1 yarn over = 3 turning chains (though many patterns use 2).
Construction and Technique Terms
Now let’s talk about the terms that describe how you’re building your project. These words tell you about structure, not just individual stitches.
Magic ring (or magic circle) is a technique for starting projects worked in the round, like hats or the center of granny squares. Instead of chaining and joining, you create an adjustable loop that can be tightened to eliminate the center hole. It’s intimidating at first, but once you get it, you’ll use it constantly.
Foundation chain is your starting row of chains that everything else builds from. The length of this chain determines the width of your project when working in rows. Getting the tension right here is crucial – too tight and your first row will be a nightmare to work into, too loose and your edges will be wonky.
Turning chain is what you make at the end of each row to bring your hook up to the correct height for the next row. Different stitches need different numbers of chains. This is where a lot of beginners get confused because some patterns count the turning chain as a stitch, others don’t.
Join means to connect your work, usually with a slip stitch. When working in rounds, you’ll join at the end of each round before starting the next. The pattern will specify where to join – sometimes it’s in the first stitch, sometimes in the turning chain.
Fasten off is how you end your work. Cut the yarn leaving a 6-inch tail, pull the tail through the last loop on your hook, and pull tight. Always leave enough tail to weave in securely – nothing’s more frustrating than a project that unravels because you skimped on the tail length.
I learned the hard way that “fasten off” doesn’t mean just cutting the yarn. You need to pull that tail through the loop, or your work will unravel faster than you can say “frogging.”
Understanding Pattern Directions
Patterns use specific language to tell you where to work and which direction to go. This vocabulary is crucial for keeping your project looking the way the designer intended.
Right side (RS) is the “pretty” side of your work – the side that will face out when the project is finished. Wrong side (WS) is the back side. Some stitches look different from each side, so patterns specify which side should be facing you as you work.
Working in rows means you turn your work at the end of each row and work back in the opposite direction. Think of a scarf – you work from one end to the other, turn, then work back.
Working in rounds means you work in a continuous spiral or in joined rounds, never turning your work. Hats, bowls, and the centers of afghans are typically worked in rounds.
Skip means to pass over a stitch without working into it. This creates spaces in your fabric and is essential for lace patterns and decorative elements. When a pattern says “skip 2 stitches,” you literally pretend those stitches don’t exist and work into the next one.
Work into tells you where to insert your hook. You might work into a stitch, a space (like a chain space), or a specific part of a stitch like the back loop only. The Craft Yarn Council has standardized these terms to eliminate confusion.
Special Placement Terms
Front loop only (flo) and back loop only (blo) refer to working into just one loop of the stitch instead of both. This creates ridges and texture effects. Front loop only creates a ridge that faces away from you, while back loop only creates a ridge facing toward you.
Post stitches (front post, back post) involve working around the vertical post of a stitch instead of into the top loops. These create raised and recessed effects, perfect for cables and textured patterns.
Counting and Measurement Terms
Accurate counting and measuring are essential for projects that fit properly and look professional. Let’s break down the terminology that helps you keep track of your progress.
Stitch count refers to the number of stitches in a row or round. Patterns often give you the count in parentheses at the end of instructions, like “(24 sc).” This is your checkpoint – if your count doesn’t match, something went wrong and you need to figure out where.
Gauge is probably the most important measurement term, especially for fitted items like sweaters. It tells you how many stitches and rows you should get per inch with the specified yarn and hook size. If your gauge doesn’t match the pattern, your finished size will be off.
Multiple refers to the number of stitches needed for a pattern repeat. If a stitch pattern is worked over a multiple of 6 plus 2, you need a foundation chain that’s divisible by 6, plus 2 extra stitches. So 14, 20, 26, 32 stitches would all work.
Repeat means to work the same sequence of stitches multiple times. Patterns use asterisks (*) or brackets to show repeats. “*Sc in next 3 sts, ch 1, skip 1 st; repeat from * across” means you do that sequence over and over until you reach the end of the row.
Gauge tip: Always make a gauge swatch, even for simple projects. I’ve seen too many blankets that ended up as wall hangings because someone skipped this step and their gauge was way off.
Increase (inc) means to add stitches, making your work wider. The most common way is to work 2 stitches into the same stitch. Decrease (dec) means to reduce stitches, making your work narrower. You typically work 2 stitches together to create 1 stitch.
Advanced Technique Vocabulary
Once you’re comfortable with basics, you’ll encounter terms for more complex techniques. Don’t let these intimidate you – they’re just combinations of skills you already know.
Cluster stitches involve working multiple incomplete stitches into the same place, then completing them all together at the end. This creates a fan or shell effect. Popcorn stitches are similar but involve completing several stitches in the same place, then pulling them together with a slip stitch.
Bobble stitches create raised bumps by working multiple stitches together in the same place. They add wonderful texture to blankets and accessories. The technique varies slightly between designers, so always check the pattern’s specific instructions.
Color work terms include stripes (changing colors in complete rows or rounds), intarsia (blocks of different colors), and tapestry crochet (carrying multiple colors to create patterns). Each technique has its own rules for managing yarn and maintaining tension.
Blocking is the process of shaping and setting your finished crochet work using moisture and sometimes heat. Wet blocking involves soaking the piece, steam blocking uses steam, and spray blocking uses a spray bottle. Different fibers require different blocking methods.
When working with different yarn weights, you’ll encounter terms like yarn substitution (using a different yarn than specified) and yarn requirements (how much yarn you need). Always check yardage, not just weight, when substituting yarns.
Finishing Terms
Seaming refers to joining pieces together. Mattress stitch creates an invisible seam, while whip stitch is quicker but more visible. Weaving in ends means securing all those yarn tails so they don’t come loose over time.
Edging or border refers to decorative stitching around the perimeter of your project. A simple single crochet border can clean up uneven edges, while fancy shell or picot borders add elegance to baby blankets and doilies.
How to Read Pattern Instructions
Now that you know the vocabulary, let’s talk about how it all comes together in actual pattern instructions. Understanding the structure and conventions will make any pattern much less intimidating.
Most patterns start with a materials list that includes yarn type and amount, hook size, and notions (things like buttons, stitch markers, or tapestry needles). The gauge information comes next – don’t skip this even if it seems boring.
Special stitches or techniques are usually defined before the main instructions. If a pattern uses a “modified double crochet” or a specific type of decrease, the designer will explain exactly how to work it. Read these definitions carefully – they’re not standard abbreviations.
The main instructions typically start with the foundation chain or magic ring, then work through the pattern row by row or round by round. Parentheses usually contain stitch counts or clarifying information. Brackets might indicate size variations or repeats.
Asterisks mark the beginning of a repeat section. When you see “repeat from * across” or “repeat from * around,” you go back to the asterisk and work that sequence again until you reach the end of the row or round.
- Read the entire pattern first
Don’t just dive into Row 1. Understanding the overall structure helps you catch potential problems before you’re 20 rows in and realize you misunderstood something crucial.
- Check your materials
Make sure you have everything you need, including the right hook size. Having to stop mid-project to buy supplies breaks your momentum and can lead to tension changes.
- Make a gauge swatch
Yes, even for that simple dishcloth. It’s better to spend 15 minutes checking gauge than to redo an entire project because it came out the wrong size.
- Mark your place
Use a sticky note or magnetic board to track which row you’re on. Trust me, “I’ll remember” never works when you’re interrupted by life.
Many patterns from Ravelry or major yarn companies include helpful photos and diagrams. Use these visual aids – they often clarify confusing written instructions.
Avoiding Common Terminology Pitfalls
Even experienced crocheters can get tripped up by terminology, especially when switching between designers or working with international patterns. Let me share some common confusion points and how to avoid them.
US vs UK terminology is a major source of confusion. What Americans call “single crochet,” the British call “double crochet.” What we call “double crochet,” they call “treble crochet.” Always check which terminology the pattern uses – it’s usually noted at the beginning.
Turning chain confusion happens because different designers handle turning chains differently. Some count the turning chain as the first stitch of the new row, others don’t. Some skip the first stitch when the turning chain counts as a stitch, others work into it anyway. Always read the specific pattern instructions.
“Work even” means to continue in the established pattern without increasing or decreasing. If you’ve been working single crochet, keep working single crochet. If you’ve been following a stitch pattern, keep following that same pattern.
“At the same time” in patterns means you’re doing two things simultaneously. For example, “decrease 1 stitch at each end every other row 5 times, and at the same time, change to Color B after row 10.” You’re managing both the shaping and the color change together.
Pro tip: When trying a new designer’s patterns, start with something simple to learn their style and terminology preferences. Every designer has slightly different ways of explaining things.
Be careful with stitch placement terms. “Work into next stitch” usually means the top loops, but some patterns specify “work into the stitch” (meaning around the post) or “work into the space” (between stitches). The wrong placement can throw off your entire project.
Size instructions in patterns often use brackets or parentheses to show different sizes. “Ch 150 (170, 190, 210)” means chain 150 for size small, 170 for medium, 190 for large, and 210 for extra-large. Pick your size and stick with it throughout the pattern.
Common Questions
What’s the difference between “work into” and “work around” a stitch?
“Work into” means inserting your hook through the top loops of a stitch (standard placement). “Work around” means inserting your hook around the vertical post of the stitch, creating post stitches. Post stitches create raised or recessed effects and are common in cable patterns.
Why do some patterns say “ch 2” for double crochet and others say “ch 3”?
This depends on whether the turning chain counts as a stitch and the designer’s preference. Ch 3 is traditional because double crochet is 3 chains tall, but many modern patterns use ch 2 because it creates less of a gap. Always follow what the specific pattern says.
What does “multiple of 4 plus 2” mean for foundation chains?
It means your starting chain needs to be divisible by 4, then add 2 more. So 14 (12+2), 18 (16+2), 22 (20+2), etc. would all work. The “plus 2” often accounts for turning chains or edge stitches that aren’t part of the main pattern repeat.
How do I know if I should count my turning chain as a stitch?
The pattern should specify this in the instructions or abbreviations section. If it counts as a stitch, you’ll typically skip the first stitch of the row and work into the turning chain at the end. If it doesn’t count, you’ll work into the first stitch and ignore the turning chain when counting.
What’s the difference between “fasten off” and “break yarn”?
“Fasten off” means to end your work completely – cut the yarn, pull the tail through the last loop, and you’re done with that piece. “Break yarn” usually means to cut the yarn but you’re not finished with the project yet – you might be changing colors or setting aside one piece to work on another.
Why do some patterns use parentheses and others use brackets?
Different publishers and designers have different style preferences. Parentheses might contain stitch counts, size variations, or clarifying information. Brackets might indicate repeats or different sizes. Always read the pattern’s abbreviations section to understand their specific conventions.
What does “work as established” mean?
It means to continue following the stitch pattern you’ve already set up. If you’ve been alternating single crochet and double crochet, keep alternating. If you’ve been following a specific lace pattern, continue that pattern. Look at what you’ve already done and keep doing the same thing.
How much yarn do I need if the pattern calls for “approximately 500 yards”?
Buy a little extra – I’d get at least 550-600 yards to be safe. Yarn dye lots can vary, so it’s better to have too much from the same dye lot than to run short and not be able to find a perfect match. You can always use leftover yarn for small projects later.
Understanding crochet terminology really is like learning a new language, but it’s a language that opens up thousands of beautiful patterns and techniques. Start with the basics – master those essential stitch abbreviations and construction terms – then gradually add more advanced vocabulary as you tackle more complex projects.
The most important thing is to not let unfamiliar terms intimidate you. Every expert crocheter started exactly where you are now, looking up abbreviations and double-checking what “work even” means. Keep a terminology reference handy (bookmark this page!), and don’t be afraid to look things up. Before long, you’ll be reading patterns as easily as your morning news, and maybe even helping other beginners decode their first set of instructions.
Happy crocheting, and remember – every stitch is a step forward in your crochet journey, even when you have to frog back a few rows to fix a mistake. We’ve all been there, and that’s how we learn.