There’s something magical about watching a simple chain transform into a beautiful, structured fabric through the power of single crochet stitches. Whether you’re working on your first dishcloth or tackling an ambitious blanket project, the single crochet stitch is your trusty foundation – but getting those edges to behave can feel like wrestling with a stubborn cat.
I remember my first single crochet project vividly. What started as a neat rectangle somehow morphed into a wonky trapezoid with edges that curved like a smile. Sound familiar? You’re definitely not alone. After years of crocheting and teaching others, I’ve learned that mastering single crochet isn’t just about the basic stitch – it’s about understanding tension, counting, and those sneaky little details that make all the difference.
The beauty of single crochet lies in its versatility. It creates a dense, sturdy fabric that’s perfect for everything from amigurumi projects to cozy blankets. But here’s what most tutorials won’t tell you: the real challenge isn’t learning the stitch itself – it’s maintaining consistent tension, keeping your edges straight, and knowing when to turn your work. These seemingly small details separate okay crochet work from pieces you’ll actually want to show off.
Quick Answer
Single crochet creates dense, sturdy fabric by inserting your hook through both loops of each stitch, yarning over, pulling through, then yarning over and pulling through both loops on your hook. The key to success is consistent tension and proper stitch counting.
Single Crochet Stitch Breakdown
Single crochet is the shortest of the basic crochet stitches, creating a tight, dense fabric that’s incredibly versatile. Unlike double crochet stitches that work up quickly with more height, single crochet builds slowly but creates a sturdy foundation that won’t stretch out of shape.
The stitch itself involves inserting your hook through the designated stitch, catching the yarn, and pulling it through in two distinct steps. This creates one completed single crochet stitch that measures roughly the same height as your hook’s diameter. For most worsted weight yarns with a size H-8 (5mm) hook, each single crochet stitch will be about 1/4 inch tall.
What makes single crochet special is its structure. Each stitch has a clear front loop, back loop, and the space between stitches where you’ll insert your hook for the next row. Understanding this anatomy helps you maintain consistent stitch placement and avoid the frustration of losing or gaining stitches unexpectedly.
Pro Tip: Single crochet uses about 30% more yarn than double crochet for the same coverage area, but the resulting fabric is much more durable and holds its shape better over time.
When to Choose Single Crochet
Single crochet shines in projects where you need structure and durability. It’s perfect for dishcloths and washcloths because the tight weave holds up to repeated washing. Amigurumi creators love single crochet because it prevents stuffing from showing through, and the dense fabric holds three-dimensional shapes beautifully.
For beginners, single crochet offers the advantage of being forgiving. If you make a mistake, it’s easier to see and fix than with taller stitches. The slow build-up also gives you time to develop muscle memory and consistent tension before moving on to more complex techniques.
Setting Up Your Foundation
Your foundation chain determines everything that follows, so it’s worth getting this right from the start. For single crochet, you’ll need to chain one more stitch than your desired finished width. So if you want 20 single crochet stitches across, you’ll chain 21.
Here’s where many beginners get tripped up: that extra chain doesn’t count as a stitch. It’s your turning chain, giving you the height needed to start your first row. I’ve seen too many projects start with wonky edges because someone either counted that turning chain as a stitch or forgot to make it entirely.
| Yarn Weight | Recommended Hook Size | Stitches per Inch | Best For |
|---|---|---|---|
| Worsted (4) | H-8 (5mm) | 4-4.5 sc | Blankets, scarves |
| DK (3) | G-6 (4mm) | 4.5-5 sc | Baby items, dishcloths |
| Sport (2) | F-5 (3.75mm) | 5-5.5 sc | Lightweight garments |
| Bulky (5) | K-10.5 (6.5mm) | 3-3.5 sc | Quick blankets, bags |
The foundation chain should have consistent tension – not so tight that you can’t get your hook through easily, but not so loose that it looks sloppy. I tell my students to imagine they’re shaking hands with each chain stitch: firm but friendly.
Working Into the Foundation Chain
This is where the magic begins, and where many people get frustrated. You’ll insert your hook into the second chain from your hook (not the first – that’s your turning chain). Look for the V-shape on top of each chain stitch, and slide your hook under both strands of that V.
Some crocheters prefer working into the back bump of the foundation chain, which creates a neater edge. To do this, flip your chain over and look for the horizontal lines running along the back. Insert your hook under these bumps instead of the V-shapes on top.
Step-by-Step Single Crochet Method
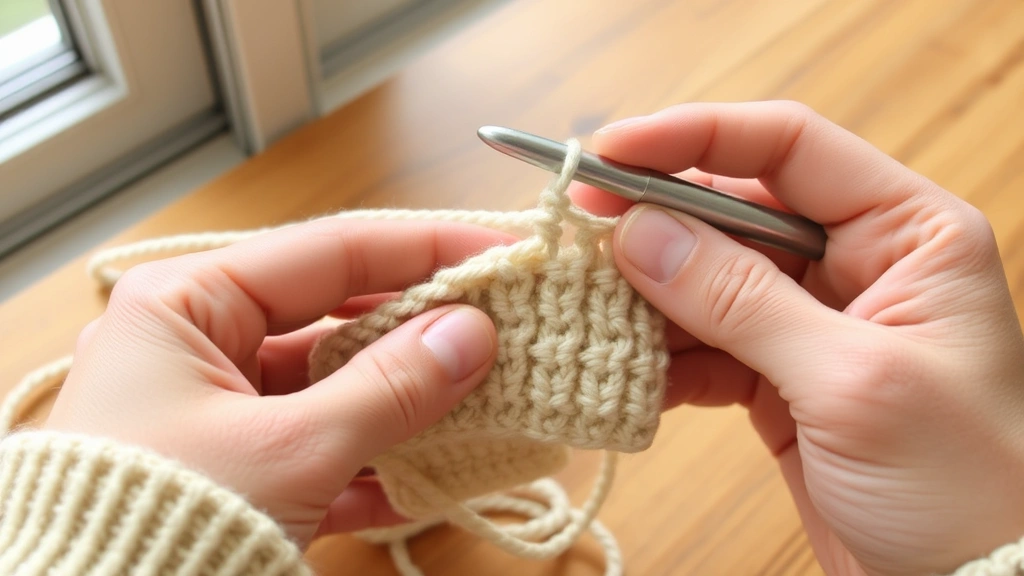
Let me walk you through the single crochet stitch with the same level of detail I’d use if you were sitting next to me. This isn’t just about the mechanics – it’s about developing the rhythm and consistency that separates good crochet from great crochet.
- Insert Your Hook
Push your hook through both loops of the designated stitch from front to back. You should see two horizontal strands on top of each stitch from the previous row – your hook goes under both of these. The hook should slide through easily without forcing.
- Yarn Over and Pull Through
Wrap the working yarn around your hook from back to front (this is called a yarn over), then pull that wrapped yarn back through the stitch. You’ll now have two loops on your hook – the original loop that was already there, plus the new one you just pulled through.
- Yarn Over Again
Make another yarn over, wrapping the yarn around your hook the same way as before. This step is crucial – many beginners rush through it and create uneven stitches.
- Pull Through Both Loops
Draw the yarn through both loops on your hook in one smooth motion. You should now have just one loop remaining on your hook – that’s your completed single crochet stitch.
The key to beautiful single crochet is maintaining consistent tension throughout all four steps. Your yarn overs should be snug but not tight, and your pull-through motions should be deliberate rather than rushed.
Rhythm Tip: Try counting “insert, over-through, over-through” as you work. This helps develop the muscle memory that makes single crochet feel automatic.
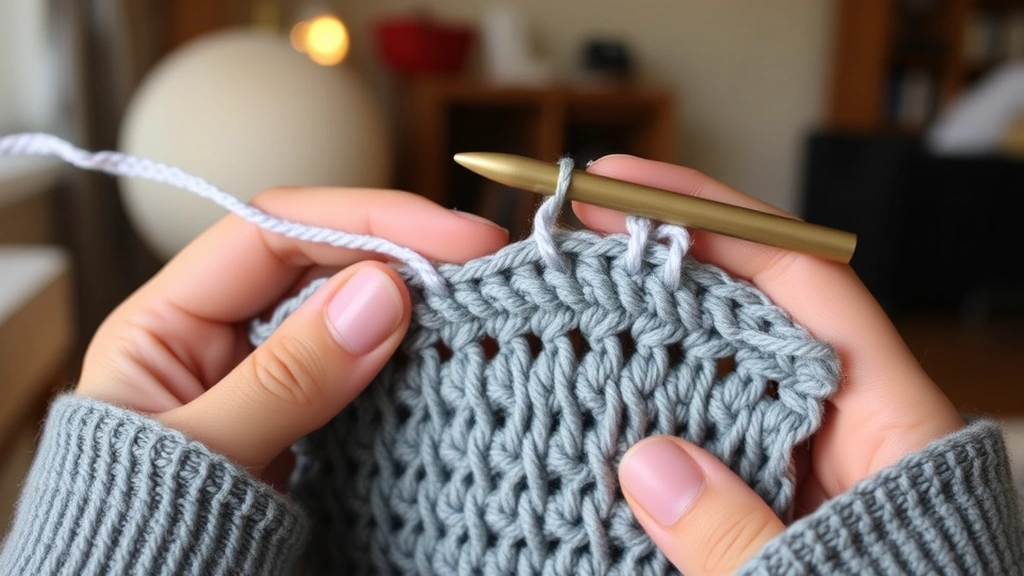
Turning and Starting New Rows
At the end of each row, you’ll chain one and turn your work. This turning chain gives you the height needed for the next row of single crochet stitches. Here’s the critical part: that turning chain doesn’t count as a stitch, so you’ll work your first single crochet into the very first stitch of the previous row.
When you turn your work, make sure you’re turning in the same direction every time. Most crocheters turn clockwise, but consistency matters more than direction. Inconsistent turning can create a subtle spiral effect that throws off your stitch count.
Troubleshooting Common Issues
Every crocheter faces these challenges, and honestly, some of them still catch me off guard occasionally. The difference is knowing how to spot them early and fix them before they become major problems.
Edges That Curve or Slant
If your work is getting wider or narrower with each row, you’re either adding or subtracting stitches without realizing it. This usually happens at the edges – either working into the turning chain (which adds a stitch) or skipping the last stitch of the row (which subtracts one).
The fix is methodical counting. Count your stitches at the end of every few rows until this becomes second nature. If you started with 25 stitches, you should have 25 stitches in every subsequent row. No exceptions.
Inconsistent Stitch Height
Some of your single crochet stitches look taller or shorter than others? This is almost always a tension issue. When you’re tired, stressed, or distracted, your hands naturally grip the yarn differently. I’ve learned to take breaks when I notice my stitches getting uneven – pushing through usually makes it worse.
Another culprit is working into the wrong part of the stitch. Make sure you’re consistently going through both loops of each stitch unless the pattern specifically says otherwise.
Tight Stitches That Are Hard to Work Into
If you’re struggling to get your hook through the stitches from the previous row, you’re likely working too tightly. This is incredibly common among beginners who are afraid their work will fall apart. Trust me, it won’t.
Practice loosening your grip on the yarn slightly. Your stitches should be snug enough to maintain their shape but loose enough that your hook slides through easily. If you’re using cotton yarn, remember that it has less give than acrylic, so you might need to work even more loosely.
Here’s something I wish someone had told me early on: perfect tension comes from your yarn hand, not your hook hand. Focus on how you’re holding and feeding the yarn rather than gripping your hook tighter.
Mastering Consistent Tension
Tension is the secret sauce that transforms amateur-looking crochet into professional-quality work. It’s not about perfection – it’s about consistency. I’d rather see slightly loose stitches that are all the same size than a mix of tight and loose stitches.
Your yarn hand does most of the work here. Whether you wrap the yarn around your pinky finger, hold it between your thumb and index finger, or use some other method, stick with whatever feels comfortable. The important thing is maintaining the same grip and yarn flow throughout your project.
Testing Your Tension
Before starting any major project, work a gauge swatch. This isn’t just for garments – even blankets and bags benefit from knowing your stitch gauge. For single crochet, work a 4-inch by 4-inch square and measure how many stitches and rows you get per inch.
Most patterns will tell you the expected gauge. If your stitches are smaller than expected, try a larger hook. If they’re bigger, go down a hook size. Don’t try to force your tension to match – it’s much easier to change your tool than to change your natural grip.
Consistency Check: Take photos of your work in progress. Sometimes it’s easier to spot tension issues in photos than when you’re looking at your work up close.
Environmental Factors
Your tension can change based on where and how you’re crocheting. I crochet more tightly when I’m watching an intense movie and more loosely when I’m relaxed and chatting with friends. Temperature affects your hands too – cold hands tend to grip tighter.
If you’re working on a long-term project, try to crochet in similar conditions each time. Same chair, same lighting, same time of day if possible. It sounds obsessive, but it really helps maintain consistency across weeks or months of work.
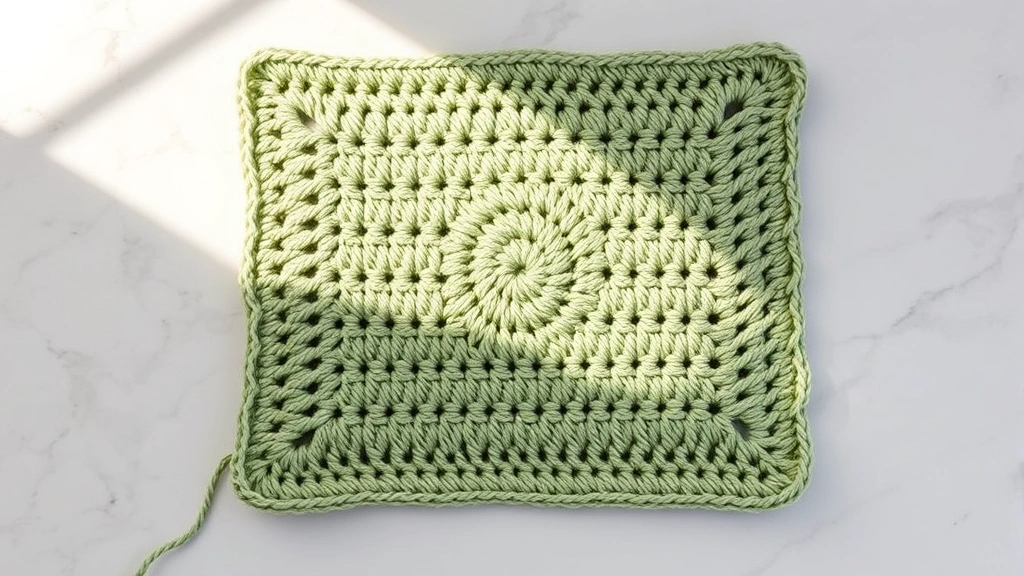
Best Projects for Single Crochet
Single crochet’s dense, sturdy nature makes it perfect for specific types of projects. Understanding when to choose single crochet over other stitches will improve both your results and your enjoyment of the process.
Household Items
Dishcloths and washcloths are single crochet classics for good reason. The tight weave stands up to repeated washing and wringing, and the fabric doesn’t stretch out of shape. I recommend using 100% cotton yarn in worsted weight with an H-8 hook for the perfect balance of absorbency and durability.
Potholders and trivets also benefit from single crochet’s heat-resistant properties. The dense fabric provides good insulation, especially when worked in multiple layers or with heat-resistant yarn.
Amigurumi and 3D Projects
Single crochet is the gold standard for amigurumi work. The tight stitches prevent stuffing from showing through, and the fabric holds three-dimensional shapes without stretching. Most amigurumi patterns are worked in continuous rounds rather than joined rounds, which creates seamless shaping.
For amigurumi, I typically use a hook one size smaller than recommended for the yarn weight. This creates even tighter stitches and a more professional finish. A worsted weight yarn with a G-6 (4mm) hook instead of the usual H-8 (5mm) works beautifully.
Bags and Totes
The structural integrity of single crochet makes it excellent for bags that need to hold weight without stretching. Beach bags, market totes, and laptop cases all benefit from single crochet’s durability.
Consider using a sturdy yarn like Lion Brand 24/7 Cotton or a cotton-blend for bags. These yarns maintain their shape better than pure acrylic when carrying heavy items.
| Project Type | Recommended Yarn | Hook Size | Estimated Time |
|---|---|---|---|
| Dishcloth (8″x8″) | Cotton worsted | H-8 (5mm) | 2-3 hours |
| Small amigurumi | Acrylic worsted | G-6 (4mm) | 3-5 hours |
| Market bag | Cotton blend | H-8 (5mm) | 8-12 hours |
| Baby blanket | Soft acrylic | I-9 (5.5mm) | 25-40 hours |
Taking Your Skills Further
Once you’ve mastered basic single crochet, there are several variations and techniques that can add interest and texture to your projects without significantly increasing the difficulty level.
Working in Back Loops Only
Instead of inserting your hook through both loops of each stitch, work only through the back loop. This creates a subtle ribbed texture and leaves the front loops free, creating horizontal lines across your work. It’s perfect for adding texture to simple scarves or the cuffs of sweaters.
Back loop only single crochet also creates fabric with more stretch, which can be useful for fitted items like hats or sleeves.
Single Crochet Decrease
To decrease stitches for shaping, you’ll work two stitches together. Insert your hook into the first stitch, yarn over and pull through (two loops on hook), then insert into the next stitch, yarn over and pull through (three loops on hook), yarn over and pull through all three loops.
This technique is essential for amigurumi shaping and for creating fitted garments. The decrease creates a subtle lean to the left, so for symmetrical decreasing, you might want to learn the right-leaning version as well.
Color Changes
Single crochet creates clean color changes because of its low height. To change colors, work your last stitch of the old color until you have two loops on your hook, then use the new color for the final yarn over and pull through.
This technique opens up possibilities for tapestry crochet, stripes, and colorwork patterns that would be much more difficult with taller stitches.
Color Change Tip: Always change colors on the last yarn over of a stitch, not at the beginning of the next stitch. This keeps your color changes crisp and even.
Working in Rounds
Single crochet works beautifully in rounds for projects like hats, bags, and amigurumi. You can join each round with a slip stitch and chain one to start the next round, or work in continuous spirals without joining.
The standard increase pattern for single crochet circles is: Round 1: 6 sc in magic ring, Round 2: 2 sc in each stitch (12 stitches), Round 3: *sc, 2 sc in next stitch* repeat (18 stitches), and so on, increasing by 6 stitches each round.
Common Questions
How much yarn do I need for single crochet projects?
Single crochet uses approximately 30% more yarn than double crochet for the same coverage area. For a basic dishcloth (8″x8″), expect to use about 100-150 yards of worsted weight yarn. A throw blanket (50″x60″) typically requires 1,200-1,500 yards, depending on your tension and exact measurements.
Why do my single crochet edges curve inward?
Curving edges usually indicate that you’re missing stitches at the ends of rows. Make sure you’re working into the very first and very last stitches of each row. The first stitch can be tricky to see because it sits right next to your turning chain, but it’s there. Count your stitches regularly to catch this early.
Should I use a smaller hook for tighter single crochet?
Generally, yes. Most crocheters use a hook one size smaller than the yarn label recommends for single crochet projects, especially amigurumi. This creates tighter, more stable fabric. However, don’t go so small that your hands hurt or your stitches become impossible to work into.
How do I keep my single crochet from twisting?
Twisting usually happens when you’re not inserting your hook correctly or when you’re turning your work inconsistently. Always go through both loops of each stitch unless specified otherwise, and turn your work in the same direction every time. If you’re working in rounds, make sure you’re not accidentally working into the back loops only.
Can I use single crochet for garments?
Absolutely, but choose your projects wisely. Single crochet creates a dense, structured fabric that works well for cardigans, vests, and structured tops. It’s less suitable for drapey garments or items that need a lot of stretch. Consider using a lighter weight yarn (DK or sport) with an appropriately sized hook to avoid overly heavy garments.
How long does it take to learn consistent single crochet?
Most people can work basic single crochet stitches within their first session, but developing consistent tension and rhythm typically takes 10-20 hours of practice. Don’t get discouraged if your first few projects look uneven – this is completely normal. Focus on completing small projects like dishcloths or simple scarves to build your skills.
What’s the difference between US and UK single crochet terms?
In US terminology, single crochet is the basic short stitch described in this article. In UK terminology, this same stitch is called “double crochet.” UK single crochet refers to what Americans call a slip stitch. Always check which terminology a pattern uses to avoid confusion.
Should I block single crochet projects?
Blocking can improve the appearance of single crochet projects, especially garments and blankets. The dense nature of single crochet means it responds well to light steam blocking or wet blocking. However, many single crochet items like dishcloths and amigurumi don’t require blocking. Use your judgment based on the project’s intended use and appearance.
Single crochet might seem basic, but mastering it opens doors to countless creative possibilities. From practical household items to adorable amigurumi creatures, this fundamental stitch forms the backbone of so many beloved crochet projects. The key is patience with yourself as you develop consistent tension and rhythm.
Remember, every expert crocheter started exactly where you are now, wrestling with uneven edges and dropped stitches. What separates those who stick with it from those who give up isn’t natural talent – it’s the willingness to embrace the learning process and celebrate small improvements along the way.
Start with something simple and useful, like a dishcloth or a small amigurumi. Focus on consistency rather than speed, and don’t be afraid to rip out sections that don’t look right. Your hands will remember what your mind is still learning, and before you know it, single crochet will feel as natural as breathing. Happy crocheting!