I’ll be honest with you – when I first heard about the thermal stitch, I thought it was just another fancy name for a basic pattern. Boy, was I wrong. After crocheting for over a decade, discovering the thermal stitch completely changed how I approach winter projects. This stitch creates an incredibly thick, insulating fabric that actually traps air between the layers, making it perfect for those cozy blankets and scarves that actually keep you warm.
The thermal stitch gets its name from its unique construction – it literally creates thermal insulation through its layered design. Unlike regular crochet stitches that create a single layer of fabric, the thermal stitch builds up multiple levels that trap warm air. I remember the first time I made a scarf using this technique – my husband kept asking if I’d lined it with fleece because it was so much warmer than my other crocheted scarves.
What makes this stitch special isn’t just the warmth factor, though that’s definitely the main draw. It also creates a beautiful textured fabric that looks complex but is surprisingly straightforward once you get the hang of it. The stitch pattern creates raised ridges that give your finished piece a professional, store-bought appearance that always gets compliments.
Quick Answer
The thermal stitch creates extra-warm fabric by building up layers that trap air for insulation. It uses a combination of single crochet and front post double crochet stitches worked in specific rows to create the thermal effect.
What Makes the Thermal Stitch Special
The thermal stitch works on a simple but brilliant principle: it creates pockets of trapped air that act as natural insulation. The pattern alternates between foundation rows of single crochet and textured rows that use front post double crochet stitches. These raised stitches don’t just sit on top of the fabric – they actually create small air pockets underneath.
When you’re working the thermal stitch, you’re essentially building a double-layer fabric. The base layer provides structure, while the raised stitches create the insulating layer on top. This is why thermal stitch blankets feel so much thicker and warmer than regular single crochet projects, even when using the same yarn weight.
The stitch pattern typically follows a four-row repeat, though there are variations. The beauty of this pattern is that it’s repetitive enough to be relaxing once you learn it, but interesting enough to keep you engaged. I’ve found it’s perfect for those long winter evenings when you want to work on something that doesn’t require constant pattern reading.
Pro tip: The thermal stitch uses about 25% more yarn than regular single crochet due to the raised stitches, so plan accordingly when purchasing yarn for your project.
How It Differs from Other Textured Stitches
While many crochet stitches create texture, the thermal stitch is unique in its functional purpose. Front post double crochet stitches in other patterns are usually decorative, but in the thermal stitch, they serve a practical insulation function. The spacing and placement of these raised stitches is specifically designed to maximize air trapping.
Unlike cable stitches or bobble patterns that create visual interest, every element of the thermal stitch contributes to its warming properties. This makes it ideal for functional items like blankets, scarves, and winter accessories where warmth is the primary goal.
Materials and Tools You’ll Need
Getting the right materials for thermal stitch projects makes a huge difference in your results. Since this stitch is all about creating warmth, your yarn choice is crucial. I’ve experimented with various combinations over the years, and some definitely work better than others.
For hooks, you’ll want to use the size recommended for your yarn weight, or go one size larger if you tend to crochet tightly. The thermal stitch can get dense, and a slightly larger hook helps maintain good drape. I typically use a 5.5mm hook with worsted weight yarn instead of the standard 5mm.
| Yarn Weight | Hook Size | Best For | Warmth Level |
|---|---|---|---|
| DK (3) | 4.5-5mm | Baby blankets, light scarves | Medium |
| Worsted (4) | 5.5-6mm | Adult blankets, winter scarves | High |
| Chunky (5) | 6.5-8mm | Quick throws, thick cowls | Maximum |
Essential Tools
Beyond your hook and yarn, you’ll need a few other items to make your thermal stitch project successful:
- Stitch markers – crucial for keeping track of your pattern repeats
- Yarn needle for weaving in ends
- Measuring tape for checking gauge
- Good lighting – the textured nature of this stitch makes it harder to see your stitches in dim light
I always keep a row counter handy too, especially when I’m starting a new thermal stitch project. The four-row repeat can be easy to lose track of when you’re watching TV or chatting while crocheting.
Step-by-Step Thermal Stitch Tutorial
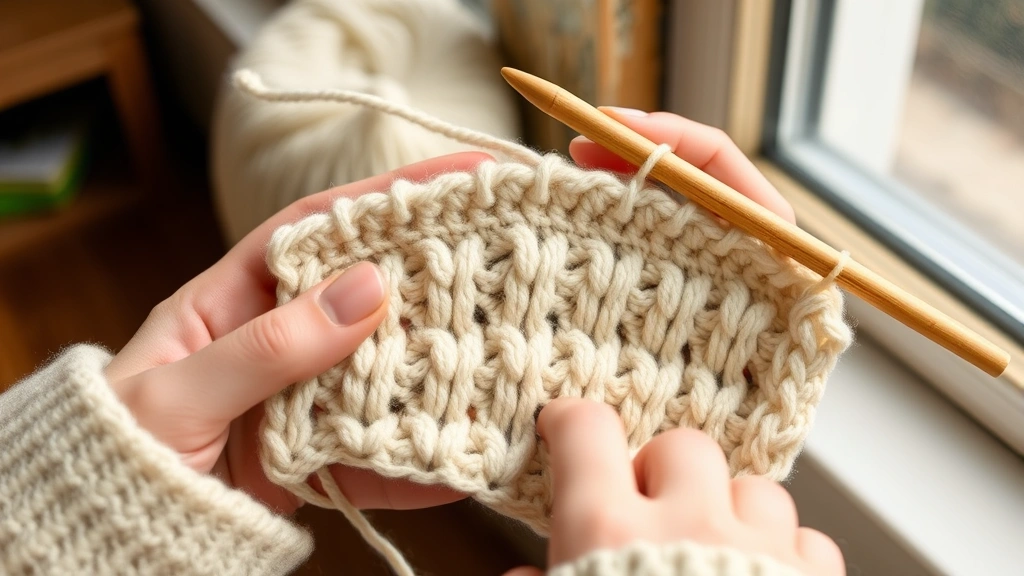
Learning the thermal stitch is easier than it looks, but it does require understanding how double crochet stitches work around posts. If you’re new to post stitches, I’d recommend practicing those first on a small swatch before diving into a full thermal stitch project.
The basic thermal stitch uses a foundation chain plus multiples of 2 stitches. For practice, try starting with a chain of 32 (30 + 2 for turning chain). This will give you a good-sized swatch to see how the pattern develops.
- Foundation Row
Chain your desired length (multiple of 2 + 2). Single crochet in the second chain from hook and in each chain across. This creates your base row that everything else builds on.
- Row 1 (Setup Row)
Chain 1, turn. Single crochet in each stitch across. This row establishes the structure for your first set of front post stitches.
- Row 2 (First Thermal Row)
Chain 2, turn. *Front post double crochet around the next stitch from 2 rows below, single crochet in next stitch* Repeat across, ending with a double crochet in the last stitch.
- Row 3 (Base Row)
Chain 1, turn. Single crochet in each stitch across. This creates the foundation for your next set of thermal stitches.
- Row 4 (Second Thermal Row)
Chain 2, turn. Single crochet in first stitch, *front post double crochet around next stitch from 2 rows below, single crochet in next stitch* Repeat across.
After row 4, you repeat rows 1-4 to continue the pattern. The key is consistency in where you place your front post double crochet stitches – they should always go around the single crochet stitches from two rows below, creating that layered effect.
Reading Your Work
One thing that confused me initially was how to “read” the thermal stitch pattern as I worked. Unlike simple stitches where you can easily see where the next stitch goes, the thermal stitch creates a lot of visual texture that can be overwhelming.
The trick is to focus on the rhythm rather than trying to analyze each individual stitch. Once you’ve completed a few pattern repeats, you’ll start to see the diagonal lines that the front post stitches create, and it becomes much easier to place your stitches correctly.
Best Yarn Choices for Maximum Warmth
Not all yarns are created equal when it comes to thermal properties, and I’ve learned this the hard way through various projects. The fiber content, yarn construction, and even the color can affect how warm your finished thermal stitch project will be.
Wool is hands-down the best choice for thermal stitch projects. It has natural insulating properties that work perfectly with the air-trapping design of this stitch. I particularly love using Lion Brand Wool-Ease for thermal stitch blankets – it’s affordable, machine washable, and creates beautifully warm results.
Acrylic yarns can work well too, especially the newer “wool-like” acrylics that have a bit more loft. Red Heart Super Saver, while not the softest option, actually creates excellent thermal properties in this stitch because of its springy construction. The key with acrylic is choosing yarns that have some bounce rather than the flat, dense varieties.
Fiber Blends for Different Needs
Cotton blends can work for thermal stitch projects, but they won’t be as warm as wool or acrylic. I’ve used cotton for summer-weight thermal stitch cardigans where you want the texture without the heavy insulation. The cotton yarn creates beautiful stitch definition, making the thermal pattern really pop visually.
For luxury thermal projects, alpaca blends are incredible. The natural crimp in alpaca fiber creates even more air pockets, amplifying the thermal effect. Just be prepared for a significant increase in yarn cost – but the results are worth it for special projects like wedding gifts or heirloom blankets.
Avoid slippery yarns like bamboo or silk for your first thermal stitch project. The front post stitches can slide around, making it harder to maintain even tension.
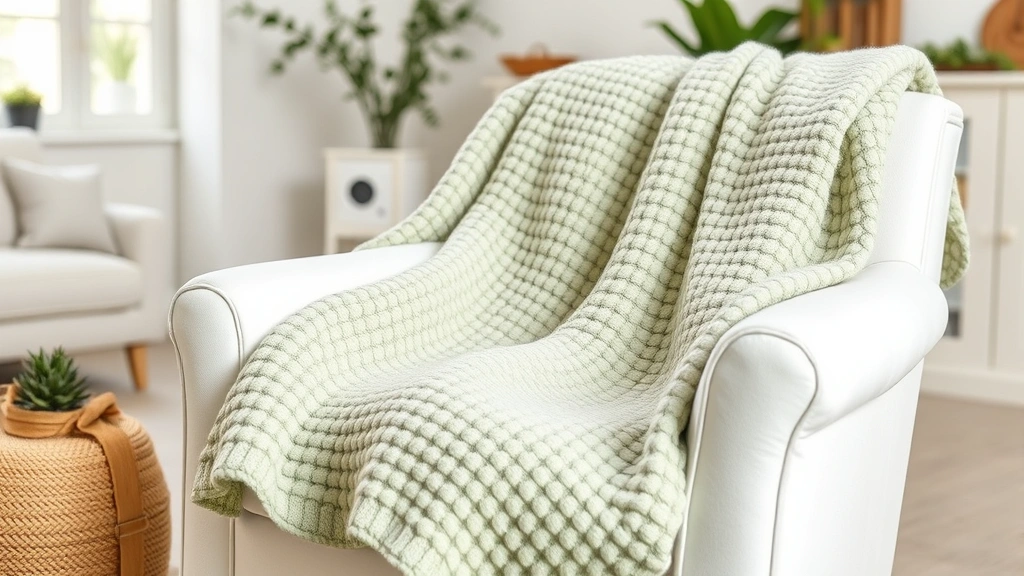
Perfect Projects for the Thermal Stitch
The thermal stitch really shines in projects where warmth and comfort are priorities. I’ve used it for everything from baby blankets to winter accessories, and some applications work much better than others.
Blankets are the obvious choice, and for good reason. A thermal stitch blanket pattern creates that perfect weight and warmth that makes you never want to get up from the couch. I typically use worsted weight yarn and make blankets about 50 inches by 60 inches for adult throws. This size requires approximately 2,000-2,400 yards of yarn, so plan accordingly.
Scarves and cowls are another fantastic application. The thermal stitch creates a scarf that’s warm without being bulky, and the texture adds visual interest that works with both casual and dressier outfits. For scarves, I usually work with a foundation chain of about 30 stitches, which creates a scarf roughly 7 inches wide.
Winter Accessories
I’ve had great success using the thermal stitch for hat patterns, though you need to modify the technique slightly for shaping. The key is working the thermal stitch in the round and adjusting your decreases to maintain the pattern as much as possible.
Mittens and gloves can incorporate thermal stitch panels, though I wouldn’t recommend using it for the entire hand covering since it can get quite thick. Instead, try using it for the back of the hand while keeping the palm in regular single crochet for better dexterity.
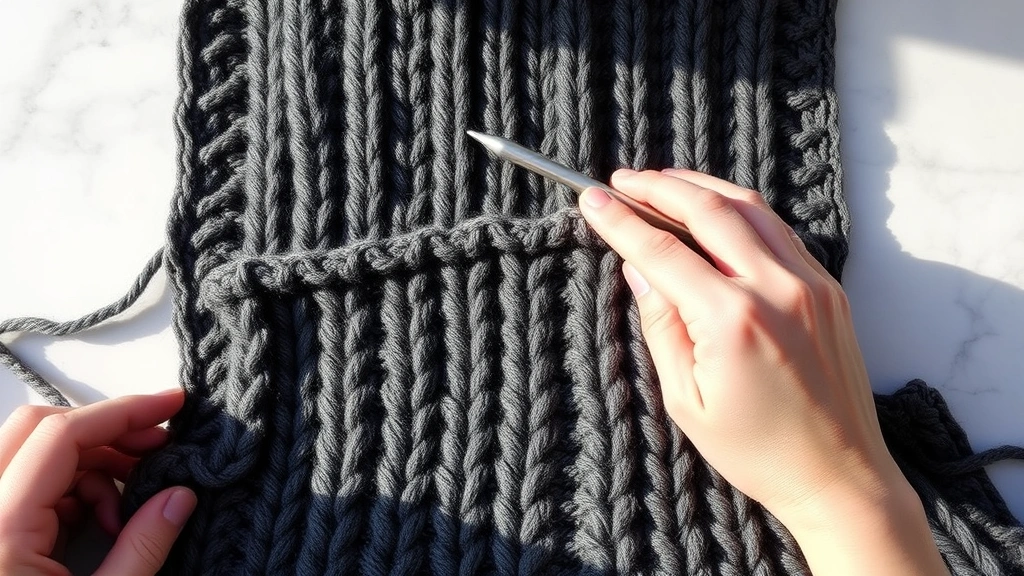
Common Problems and Solutions
Even experienced crocheters run into issues when learning the thermal stitch, and I want to address the problems I see most often. The good news is that most thermal stitch problems have straightforward solutions once you know what to look for.
The biggest issue I see is uneven tension, which shows up as wavy edges or fabric that doesn’t lie flat. This usually happens because people pull their front post double crochet stitches too tight, trying to make them “neat.” The solution is to relax your tension on these stitches – they should have a bit of give to allow for the air pockets that create the thermal effect.
Another common problem is losing track of the pattern repeat. The thermal stitch creates so much visual texture that it can be hard to see where you are in the pattern, especially in the first few rows. I always recommend using stitch markers at the beginning and end of each row until you get comfortable with the rhythm.
Fixing Mistakes
When you do make a mistake in thermal stitch (and you will – we all do), it’s often easier to rip back to the beginning of the problematic row rather than trying to fix individual stitches. The complex construction of this stitch makes spot corrections tricky, and you’ll usually get better results starting the row over.
If your edges are getting wider as you work, check that you’re not accidentally adding extra stitches at the ends of rows. The turning chains in thermal stitch can be confusing, and it’s easy to work into them when you shouldn’t, or skip them when you should work into them.
Keep a lifeline (a piece of contrasting yarn threaded through a completed row) every 10-15 rows when working large thermal stitch projects. If you need to rip back, you’ll only lose a manageable amount of work.
Thermal Stitch Variations
Once you’ve mastered the basic thermal stitch, there are several variations that can add interest to your projects or solve specific design challenges. I’ve experimented with most of these over the years, and each has its own personality and best applications.
The waffle stitch is probably the closest cousin to the thermal stitch, using a similar concept but with a different arrangement of raised stitches. It creates a more geometric look while still providing good insulation properties. The waffle stitch works particularly well for kitchen items like dishcloths and pot holders where you want texture and thickness.
For a more decorative approach, try the thermal stitch with color changes. Working each row in a different color creates beautiful striped effects while maintaining the thermal properties. I love using this technique with gradient yarn sets or complementary colors for modern-looking blankets.
Modified Thermal for Different Shapes
Working thermal stitch in the round requires some modifications, but it’s definitely possible. The key is adjusting your stitch placement to account for the spiral nature of round crochet. Instead of working in joined rounds, I prefer continuous spirals for thermal stitch circles, marking my rounds with a stitch marker.
For triangular shawls, you can incorporate thermal stitch sections by working them in panels between increase points. This creates interesting textural contrast while adding warmth to areas where you need it most, like across the shoulders.
The mini thermal stitch uses single crochet and front post single crochet instead of double crochet, creating a more subtle texture that’s perfect for baby items or when you want thermal properties without quite as much bulk. This variation works beautifully with DK weight yarn for lightweight but warm accessories.
Common Questions
How much yarn do I need for a thermal stitch blanket?
A throw-sized thermal stitch blanket (approximately 50″ x 60″) typically requires 2,000-2,400 yards of worsted weight yarn. This is about 25% more than a regular single crochet blanket of the same size due to the raised stitches. I always buy an extra skein to be safe, especially if I’m using a discontinued color.
Can beginners learn the thermal stitch?
Absolutely! While you should be comfortable with basic stitches like single crochet and double crochet, the thermal stitch is quite beginner-friendly once you understand the pattern. I recommend practicing front post double crochet on a small swatch first, then diving into the thermal stitch pattern.
How long does it take to make a thermal stitch project?
A thermal stitch scarf takes about 15-20 hours of active crocheting time, while a throw blanket typically takes 60-80 hours. The raised stitches do slow down your progress compared to simple stitches, but the results are worth the extra time investment.
Is the thermal stitch suitable for machine washing?
This depends entirely on your yarn choice, not the stitch pattern itself. Thermal stitch items made with machine-washable yarns like acrylic or superwash wool can absolutely go in the washing machine. The stitch structure is quite stable and holds up well to washing.
Why are my edges wavy in thermal stitch?
Wavy edges usually indicate tension issues, specifically pulling the front post double crochet stitches too tight. Try loosening your tension on these raised stitches, and make sure you’re maintaining the correct stitch count at the end of each row. Using a hook one size larger than recommended can also help.
Can I use the thermal stitch for clothing?
Yes, but with considerations. The thermal stitch creates a fairly thick fabric, so it works best for outer layers like cardigans, vests, or poncho-style garments. For fitted clothing, you might want to use thermal stitch as accent panels rather than the entire garment.
What’s the difference between thermal stitch and waffle stitch?
Both create textured, insulating fabrics, but the thermal stitch uses alternating rows while waffle stitch typically works front and back post stitches within the same row. Thermal stitch tends to be slightly more insulating, while waffle stitch creates more geometric visual patterns.
How do I fix dropped stitches in thermal stitch?
Dropped stitches in thermal stitch are tricky to fix because of the layered construction. Your best bet is to carefully rip back to the beginning of the row where the mistake occurred and re-work from there. Trying to pick up individual stitches often creates tension issues that are visible in the finished fabric.
Wrapping Up Your Thermal Stitch Journey
The thermal stitch has become one of my go-to techniques for winter projects, and I think it’ll become one of yours too once you experience how incredibly warm and cozy it makes finished items. Yes, it uses more yarn and takes a bit longer than basic stitches, but the comfort factor is unmatched.
Remember that like any new technique, your first thermal stitch project might not be perfect, and that’s completely okay. I still have my first thermal stitch scarf, and while the tension is a bit uneven and there are a few wonky stitches, it’s still one of the warmest accessories I own. Each project teaches you something new about working with this stitch.
Start with something manageable – a scarf or small throw – to get comfortable with the rhythm and tension. Once you’ve got the basics down, you’ll find yourself reaching for the thermal stitch whenever you want to create something that’s both beautiful and functionally warm. There’s something deeply satisfying about making items that don’t just look good, but actually make life more comfortable.
Happy crocheting, and stay warm!