I’ll never forget the first time I tried to make a granny square. I was following what I thought was a foolproof tutorial, confidently chaining and double crocheting away, only to end up with something that looked more like abstract art than a square. The corners were wonky, the sides were uneven, and don’t even get me started on the color changes. Sound familiar?
Here’s the thing about granny squares – they look deceptively simple, but there are actually quite a few techniques that can make or break your project. After years of making (and fixing) countless squares, I’ve learned that success comes down to understanding the basic structure, mastering a few key techniques, and knowing how to troubleshoot when things go sideways.
Whether you’re planning a granny square blanket or just want to master this classic motif, getting the fundamentals right will save you hours of frustration later. The good news? Once you understand the logic behind granny squares, you’ll be able to tackle any variation with confidence.
Quick Answer
A granny square starts with a magic ring or chain-4 loop, then builds outward in rounds using double crochet clusters separated by chain spaces. Each round adds corner increases (chain-2 spaces) and side chains to maintain the square shape.
What Makes a Granny Square
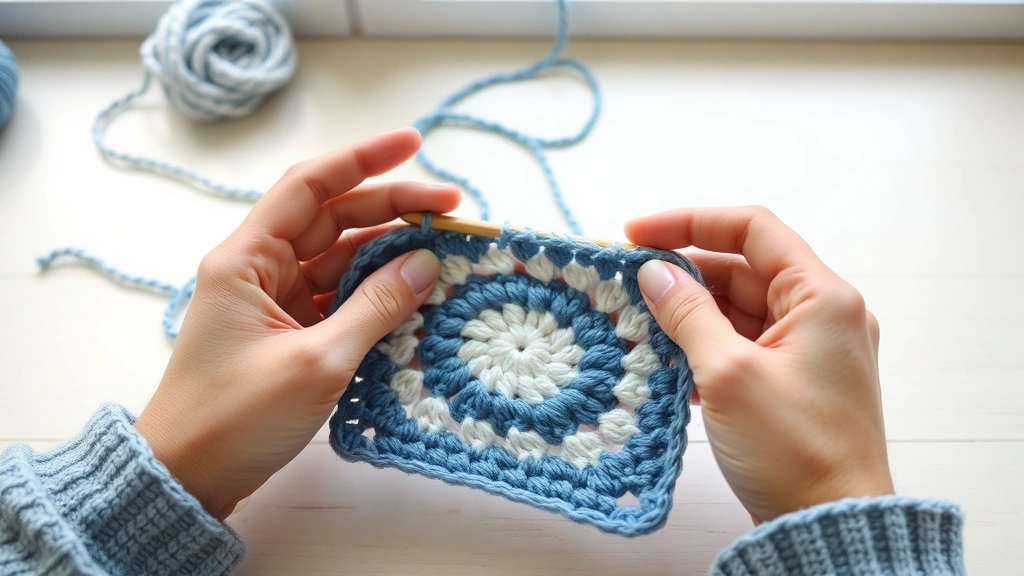
The traditional granny square is built on a simple but brilliant concept: clusters of double crochet stitches separated by chain spaces, with strategic increases at the corners to maintain a square shape. Each round builds on the previous one, creating that distinctive open, lacy appearance that makes granny squares so versatile.
The beauty of this construction is its flexibility. You can work with any yarn weight, change colors as often as you like, and even modify the basic pattern to create different effects. The key structural elements remain the same: corner chain-2 spaces for the increases, and chain-1 spaces along the sides to keep everything square and even.
What sets a well-made granny square apart from a wonky one is consistency. Each round should have the same number of stitches and chains, and your tension should remain even throughout. This is where many beginners struggle – they start tight and gradually loosen up, or vice versa, leading to squares that curl or ruffle.
Pro Tip: Count your stitches at the end of each round. A traditional 4-round granny square should have 12 clusters in the final round – 3 clusters on each side with corner clusters shared between adjacent sides.
Basic Granny Square Technique
The foundation of every granny square is the center ring, and you have two main options: a magic ring or a chain-4 joined with a slip stitch. I personally prefer the magic ring because it creates a tighter, more secure center, but both methods work perfectly fine.
From that center, you’ll work in rounds (not rows), which means you’re always working in the same direction around your square. This is crucial for maintaining even tension and consistent stitch placement. Each round ends with a slip stitch to join, then you’ll either continue with the same color or change colors for the next round.
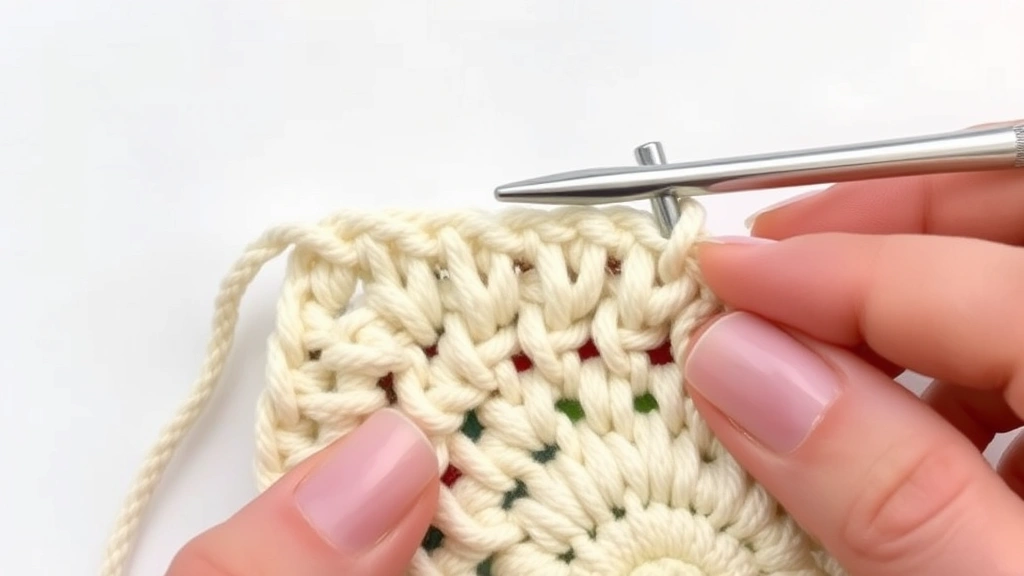
The stitch pattern follows a predictable rhythm: clusters of 3 double crochet stitches, separated by chain spaces. At the corners, you’ll work (3 dc, ch 2, 3 dc) all in the same chain space from the previous round. Along the sides, you’ll work 3 dc clusters in each chain space with ch 1 between them.
Understanding the Structure
Think of each round as adding a “frame” around the previous round. Round 1 creates the basic square shape with four corner chain-2 spaces. Round 2 adds the first side spaces while maintaining the corners. Each subsequent round continues this pattern, adding more side spaces while keeping the corner increases consistent.
This modular approach is what makes granny squares so addictive to make. You can stop after any round and have a complete square, or keep going to make larger squares. The pattern scales beautifully, which is why it’s remained popular for over a century.
Choosing Your Yarn and Hook
Your yarn choice can dramatically affect the look and feel of your finished granny squares. Worsted weight yarn is the most popular choice for beginners because it’s easy to see your stitches and forgiving of minor tension issues. I recommend starting with a smooth acrylic yarn like Red Heart Super Saver or Lion Brand Vanna’s Choice.
| Yarn Weight | Hook Size | Best For | Square Size (4 rounds) |
|---|---|---|---|
| DK (3) | 4.5mm (G) | Baby items, delicate projects | About 4 inches |
| Worsted (4) | 5.5mm (I) | Afghans, general projects | About 5 inches |
| Chunky (5) | 6.5mm (K) | Quick projects, thick blankets | About 6 inches |
Hook size matters more than you might think. Going up a hook size will create looser, more open squares with better drape. Going down a size creates tighter, more structured squares. For most worsted weight yarns, I use a 5.5mm (US I) hook, but don’t be afraid to experiment.
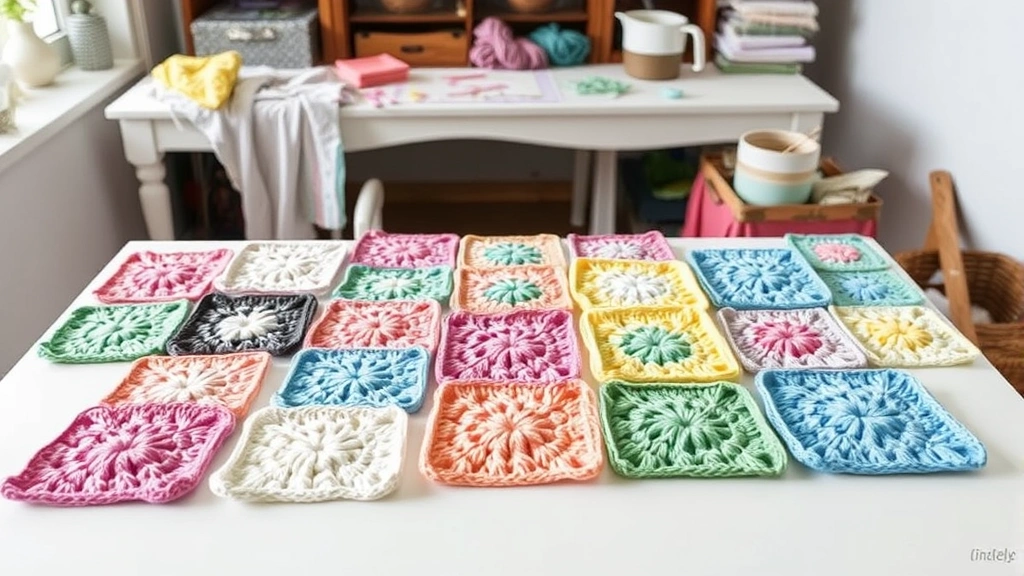
When planning a multi-square project like an afghan, consistency is key. Stick with the same yarn brand and hook size throughout your project, and try to maintain similar tension. Even small variations can become noticeable when squares are joined together.
Yarn Shopping Tip: Buy all your yarn at once if possible. Dye lots can vary significantly, and you don’t want slight color differences showing up in your finished project.
Step-by-Step Tutorial
Let me walk you through making a classic 4-round granny square. I’ll assume you’re using worsted weight yarn and a 5.5mm hook, but adjust as needed for your materials.
- Create the Center Ring
Make a magic ring, or chain 4 and join with a slip stitch to form a ring. Chain 3 (counts as first double crochet), then work 2 more double crochet into the ring. This is your first cluster.
- Complete Round 1
Chain 2 (corner space), then work (3 dc, ch 2) three more times in the ring. Join with a slip stitch to the top of the beginning chain-3. You should have 4 clusters with 4 corner chain-2 spaces.
- Round 2 Setup
Slip stitch to the first corner space. Chain 3, work 2 dc in the same space (beginning corner cluster). Chain 2, then 3 dc in the same corner space (completing the corner). Chain 1.
- Complete Round 2
In the next corner space, work (3 dc, ch 2, 3 dc, ch 1). Repeat for the remaining two corners. Join with slip stitch to beginning chain-3. You now have 8 clusters total.
- Round 3 and Beyond
Continue the same pattern: corners get (3 dc, ch 2, 3 dc) with ch 1 between corners. Side spaces get 3 dc with ch 1 between clusters. Each round adds one more side cluster per side.
The rhythm becomes second nature once you’ve completed a few squares. Corner, side, corner, side – the pattern repeats consistently. If you’re working in multiple colors, this is where you’d change colors between rounds.
Finishing Your Square
After completing your final round, don’t just cut the yarn and call it done. Weave in your ends securely, especially if you’ve changed colors. I like to weave ends through several stitches in different directions to ensure they won’t work loose over time.
Block your squares if you’re planning to join them into a larger project. Even light steaming can help even out any tension variations and make joining much easier. Your squares should lay flat without curling at the edges.
Mastering Color Changes
Color changes are where granny squares really shine, and there are several approaches depending on the look you want. The most common method is changing colors between rounds, which creates distinct color rings. This works beautifully for scrap yarn projects where you want to use up odds and ends.
To change colors between rounds, complete your final slip stitch with the old color, then pull the new color through for the slip stitch. Cut the old color, leaving a 6-inch tail, and start your next round with the new color. This method keeps color changes neat and predictable.
For more complex color patterns, you might change colors within a round. This requires carrying colors or cutting and rejoining, which creates more ends to weave in but allows for intricate designs. I’ve seen stunning granny squares that look like flowers, geometric patterns, or even pixel art using this technique.
Color Planning Strategies
When planning colors for a multi-square project, consider how the squares will be arranged. Random color placement can look vibrant and cheerful, while planned color gradients create sophisticated, modern looks. I keep a notebook with color combinations that work well together – it saves time when starting new projects.
The Craft Yarn Council has excellent resources on color theory for crocheters. Understanding basic color relationships can help you create more cohesive, professional-looking projects.
Color Confidence Tip: If you’re nervous about color choices, start with a simple two or three-color palette. You can always get more adventurous as your confidence grows.
Common Problems and Solutions
Even experienced crocheters run into issues with granny squares sometimes. The most common problem I see is squares that aren’t actually square – they might be rectangular, or have curved sides, or refuse to lay flat. Usually, this comes down to tension issues or stitch count errors.
If your squares are curling at the edges, you’re likely working too tightly. Try going up a hook size, or consciously loosen your grip on the yarn. Conversely, if your squares are ruffling or have wavy edges, you might be working too loosely or have too many stitches in a round.
Uneven sides are almost always a counting problem. Each side should have the same number of clusters (not counting the corner clusters, which are shared). If one side has more clusters than the others, you’ve either added an extra cluster somewhere or missed one on the other sides.
Fixing Wonky Corners
Corner problems usually stem from inconsistent chain-2 spaces. If your corners are too tight, the square will cup. If they’re too loose, you’ll get floppy, oversized corners. The chain-2 should be just loose enough to accommodate the corner increases without creating excess fabric.
Sometimes the issue isn’t your technique but your yarn. Some yarns have more stretch than others, which can affect how your squares hold their shape. This is where blocking becomes crucial – it can often resolve minor shaping issues and make your squares more uniform.
| Problem | Likely Cause | Solution |
|---|---|---|
| Curling edges | Too tight tension | Use larger hook, loosen grip |
| Wavy edges | Too loose tension | Use smaller hook, tighten tension |
| Uneven sides | Incorrect stitch count | Count stitches each round |
| Tight corners | Chain-2 too small | Make looser corner chains |
Popular Granny Square Variations
Once you’ve mastered the basic granny square, a whole world of variations opens up. The solid granny square replaces the chain spaces with additional double crochet stitches, creating a denser, warmer fabric that’s perfect for winter projects.
Circle-in-a-square variations start with a circular motif in the center, then add square rounds around it. These create beautiful, medallion-like squares that work especially well in single colors or subtle color gradients. The contrast between the curved center and square outer rounds is visually striking.
Modern granny squares often incorporate different stitch patterns – maybe treble crochet clusters for height variation, or front post stitches for texture. Some designers have created granny squares with built-in motifs like flowers, stars, or geometric patterns. Ravelry has thousands of free and paid granny square patterns if you want to explore beyond the basics.
Size Variations
Traditional granny squares are usually worked for 4-6 rounds, creating squares roughly 4-6 inches depending on yarn weight and hook size. But there’s no rule saying you have to stop there. Giant granny squares can become the center panel of an afghan, while tiny granny squares can be joined to create intricate, mosaic-like effects.
For baby blankets, I often work smaller squares (3 rounds each) because they’re quicker to complete and create a more delicate look. For adult afghans, larger squares mean fewer pieces to join, which can save significant time in the finishing process.
Common Questions
How much yarn do I need for granny squares?
A 4-round granny square in worsted weight yarn uses approximately 15-20 yards, depending on your tension and hook size. For a throw-size afghan of 6×8 squares (48 total), you’d need about 800-1000 yards. Always buy extra – it’s better to have leftovers than to run short with a discontinued color.
Can I use different yarn weights in the same project?
It’s possible, but tricky. Different yarn weights create different sized squares, so you’d need to adjust your round count to make them match. I’d recommend sticking to one yarn weight per project, especially for beginners. If you want texture variation, try different stitch patterns instead.
What’s the best way to join granny squares?
There are several methods: whip stitch, single crochet join, slip stitch join, and join-as-you-go techniques. For beginners, I recommend the whip stitch – it’s forgiving and creates a flat seam. Place squares right sides together and whip stitch through the back loops only of matching stitches.
Why do my granny squares curl at the edges?
Curling usually indicates tension that’s too tight. Try using a larger hook or consciously loosening your grip on the yarn. Also check that you’re making your chain-2 corner spaces loose enough – tight corners will cause the entire square to cup inward.
How do I keep my color changes neat?
Change colors on the last yarn over of the final stitch in each round. Complete the slip stitch join with the new color, then cut the old color leaving a 6-inch tail. This keeps the color change at the seam line where it’s less noticeable.
Can I make granny squares without a pattern?
Absolutely! Once you understand the basic structure (corner increases, side chains), you can work intuitively. The pattern is: corners get (3 dc, ch 2, 3 dc), sides get 3 dc clusters with ch 1 between them. Each round adds one more side cluster per side.
What’s the difference between American and British granny square patterns?
The main difference is terminology. American patterns use “double crochet” for what British patterns call “treble crochet.” The actual stitches and construction are identical. When following international patterns, always check which terminology system is being used.
How long does it take to make a granny square?
A 4-round granny square typically takes 15-30 minutes for an experienced crocheter, longer for beginners. Factor in time for weaving in ends and blocking. For a full afghan project, plan several weeks to months depending on size and your available crafting time.
Mastering the granny square opens up a world of crochet possibilities. From quick dishcloths to elaborate afghans, this versatile motif has earned its place as a crochet classic. The techniques you’ve learned here – consistent tension, proper stitch placement, neat color changes – will serve you well in countless future projects.
Remember, every expert crocheter started exactly where you are now. Those first few squares might not be perfect, and that’s completely normal. Keep practicing, be patient with yourself, and don’t be afraid to rip out and start over if something isn’t working. Each square teaches you something new about tension, color, and technique.
Now grab your hook and yarn, and start making some squares. Whether you’re planning a massive afghan or just want to master this fundamental technique, you’ve got all the knowledge you need to succeed. Happy crocheting!