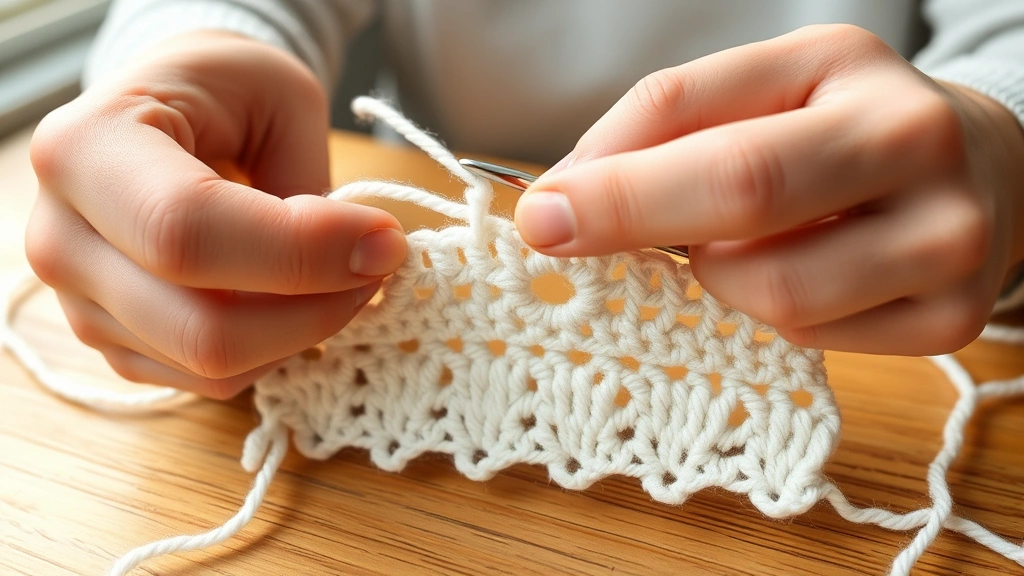
You know that sinking feeling when you’re halfway through what was supposed to be a simple scarf, and suddenly your edges are doing their own thing? One side’s tight as a drum, the other’s loose and wavy, and you’re wondering if you accidentally invented a new stitch pattern. I’ve been there more times than I care to admit, and trust me – uneven crochet edges are one of those universal struggles that make us all question our sanity.
Here’s the thing though: wonky edges aren’t a sign that you’re terrible at crochet. They’re actually pretty normal, especially when you’re still finding your rhythm. The good news? Once you understand what’s causing those uneven edges and learn a few simple techniques to fix them, you’ll wonder why you ever stressed about it.
Whether you’re dealing with edges that curve inward, flare out like a ruffled skirt, or just look generally messy, there are specific reasons why this happens and proven methods to get them straight and neat. Some of the solutions are so simple you’ll kick yourself for not trying them sooner.
Quick Answer
Uneven crochet edges are usually caused by inconsistent tension, incorrect stitch counts, or skipping the turning chain. Fix them by maintaining steady tension, counting your stitches religiously, and always working into the correct stitch at the beginning and end of each row.
Why Crochet Edges Get Wonky
Before we dive into fixes, let’s talk about what’s actually going wrong. Understanding the root cause makes the solution so much clearer, and honestly, it’ll save you from making the same mistakes over and over.
The biggest culprit? Inconsistent tension. When you’re relaxed and watching Netflix, your stitches might be loose and airy. But when you’re concentrating hard or feeling stressed, you naturally grip that hook tighter, creating smaller, tighter stitches. This creates a wavy, uneven fabric that no amount of blocking will completely fix.
Stitch count issues are another major player. Maybe you’re accidentally skipping stitches at the edges, or adding extra ones without realizing it. This is especially common when working with single crochet – those edge stitches can be tricky to identify, and it’s easy to miss them or work into the wrong spot.
Turning chain problems plague almost everyone at some point. Different stitches need different turning chain heights, and if you’re not consistent about whether you count that turning chain as a stitch or not, your edges will reflect that confusion. I’ve seen beautiful scarves completely ruined because the crocheter switched between counting and not counting the turning chain halfway through.
Environmental Factors
Here’s something most people don’t consider: your environment affects your edges too. Working in poor lighting makes it harder to see exactly where to place your stitches. Uncomfortable seating can make you tense up, affecting your grip. Even the yarn itself plays a role – slippery yarns like bamboo or silk can slide around more, making consistent tension harder to maintain.
Pro tip: If you’re noticing your edges getting worse as you work, take a break. Fatigue makes everything harder, including maintaining consistent tension and counting accurately.
Mastering Consistent Tension
Let’s be real – tension control is probably the hardest thing about crochet to master. It’s not something you learn overnight, and even experienced crocheters have days when their tension is all over the place. But there are some concrete strategies that really help.
First, find your grip and stick with it. Some people hold their yarn between their pinky and ring finger, others wrap it around their index finger. There’s no “right” way, but consistency is everything. Once you find a method that feels natural, practice it until it becomes muscle memory.
Your hook grip matters just as much. I prefer the pencil grip for most projects – it gives me better control and doesn’t tire out my hand as quickly. The knife grip works great for some people, especially when working with thicker yarns or doing Tunisian crochet. Experiment and see what feels comfortable for extended periods.
Here’s a game-changer: practice with the same yarn and hook combination for several projects before switching. Different yarn weights and textures require different amounts of tension to look right. Worsted weight cotton needs a firmer grip than chunky wool, and slippery bamboo yarn requires more control than grippy wool.
Tension Exercises
Try this exercise: crochet a swatch using only single crochet, focusing entirely on making each stitch the same size. Don’t worry about speed – just consistency. Count your stitches at the end of each row and measure the width. If it’s staying consistent, you’re on the right track.
The Art of Stitch Counting
I know, I know – counting stitches feels tedious and takes the zen out of crocheting. But here’s the thing: it’s the single most effective way to prevent wonky edges, and once you get in the habit, it becomes automatic.
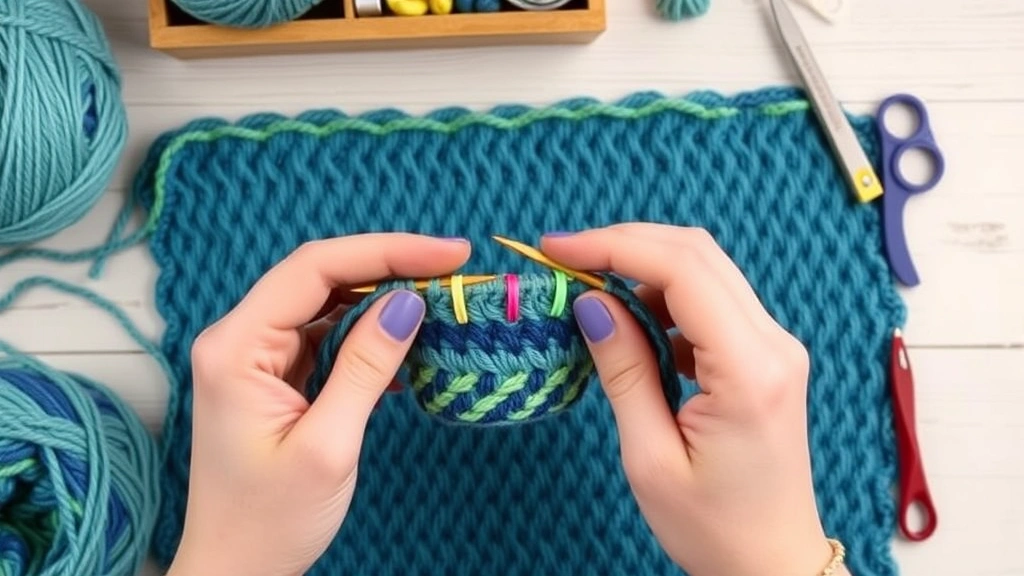
Start by placing a stitch marker in your first and last stitch of each row. This gives you clear visual markers for where each row should begin and end. For longer rows, place markers every 10 or 20 stitches – it makes counting much easier and helps you catch mistakes before they become disasters.
When working in rows, always count your stitches at the end of each row, at least for the first few inches of your project. Once you establish a good rhythm and your edges are staying straight, you can count every few rows instead. But if you notice any waviness creeping in, go back to counting every row.
Different stitches have different challenges when it comes to counting. With single crochet, the edge stitches can be hard to see, especially if your tension varies. Double crochet stitches are easier to identify, but you need to be consistent about whether you’re counting the turning chain as a stitch.
Counting Strategies for Different Stitches
| Stitch Type | Turning Chain | Count as Stitch? | Where to Work First Stitch |
|---|---|---|---|
| Single Crochet | Chain 1 | No | First stitch of previous row |
| Half Double Crochet | Chain 2 | Usually no | First stitch of previous row |
| Double Crochet | Chain 3 | Yes | Second stitch of previous row |
| Treble Crochet | Chain 4 | Yes | Second stitch of previous row |
The Craft Yarn Council has standardized guidelines for turning chains, but honestly, different patterns sometimes do things differently. The key is being consistent within your project.
Getting Turning Chains Right
Turning chains are like the foundation of your edges – get them wrong, and everything else suffers. The height of your turning chain needs to match the height of the stitches you’re working, but there’s more to it than just following the standard formulas.
Here’s what I’ve learned through years of trial and error: the “standard” turning chain heights don’t work for everyone. If you’re a tight crocheter, you might need an extra chain to get the right height. If you crochet loosely, you might need one fewer chain than the pattern suggests.
Make a gauge swatch with different turning chain heights and see what looks best with your tension. For single crochet, try both chain 1 and chain 2 as turning chains. For double crochet, experiment with chain 2 and chain 3. The goal is edges that lay flat and look even with the rest of your stitches.
Consistency is crucial here too. If you decide to count your turning chain as a stitch, you need to do that for the entire project. If you don’t count it as a stitch, stick with that decision. Switching mid-project will create visible inconsistencies in your edges.
Turning Chain Alternatives
Sometimes traditional turning chains just don’t work well for a particular project or yarn. Standing stitches can create neater edges, especially for double crochet and taller stitches. Instead of chaining up, you start your new row with a complete stitch worked into the first stitch of the previous row.
If your turning chains consistently look loose or sloppy compared to your regular stitches, try working them with a hook one size smaller. This simple trick can make a huge difference in how professional your edges look.
Working Perfect Edge Stitches
Edge stitches are where most problems show up, so let’s talk about getting them right. The first and last stitch of each row are critical – mess these up, and your whole edge will look wonky.
For the first stitch of a row, make sure you’re working into the correct stitch from the previous row. With single crochet, this is usually the first actual stitch (not the turning chain). With double crochet, if you counted your turning chain as a stitch, you’ll skip the first stitch and work into the second one.
The last stitch of each row is equally important. Make sure you’re working into the actual last stitch, not missing it. With taller stitches like double crochet, this might mean working into the top of the turning chain from the previous row if you counted it as a stitch.
Here’s a technique that’s saved me countless times: when you finish a row, before turning your work, look at your edge stitches. Do they line up vertically? Is there any pulling or puckering? If something looks off, it’s much easier to fix it now than after you’ve worked several more rows.
Edge Stitch Troubleshooting
If your edges are curving inward, you’re probably working too few stitches in each row. Double-check that you’re not missing the first or last stitch. If they’re flaring outward, you might be adding extra stitches somewhere, possibly by working into the turning chain when you shouldn’t be.
Loose edge stitches are often caused by pulling too hard on your yarn when you turn your work. Try to keep the same tension as you turn that you maintain during regular stitching. Some people find it helpful to adjust their grip slightly when working edge stitches.
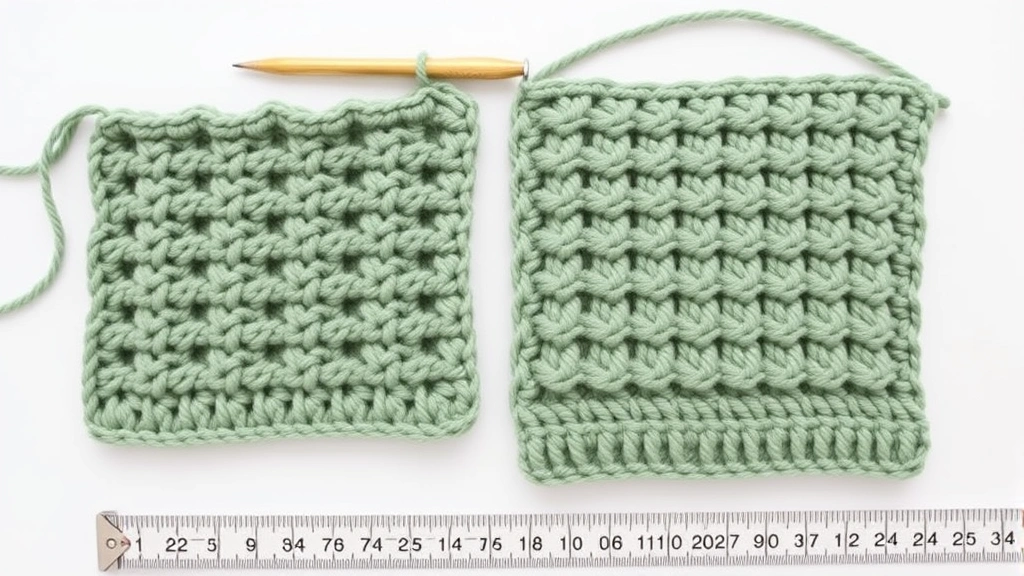
Blocking to Even Things Out
Blocking won’t fix major structural problems, but it can work miracles on slightly uneven edges. Think of it as the final polish that makes your work look professionally finished.
For most projects, wet blocking works best. Soak your finished piece in lukewarm water with a little wool wash or gentle detergent. Gently squeeze out excess water (never wring or twist), then lay it flat on a blocking mat or clean towels.
Here’s where the magic happens: gently stretch and shape your piece to the correct dimensions, paying special attention to those edges. Use blocking pins or blocking wires to hold everything in place while it dries. The yarn fibers will “remember” this new shape once they’re completely dry.
Different fibers respond differently to blocking. Cotton and linen can handle more aggressive stretching and will hold their shape well. Wool is forgiving and responds beautifully to blocking. Acrylic is trickier – it doesn’t block as dramatically, but steam blocking can help relax the fibers.
Blocking Supplies You Actually Need
You don’t need fancy equipment to block effectively. A set of blocking mats (or even clean towels), rust-proof pins, and a measuring tape will handle most projects. For pieces with long straight edges, blocking wires can be incredibly helpful – they create perfectly straight lines that individual pins can’t match.
Steam blocking is great for acrylic yarns and quick touch-ups. Hold a steam iron a few inches above your work and let the steam relax the fibers, then gently shape the piece while it’s still warm and damp.
Prevention Strategies
The best way to deal with uneven edges is to prevent them in the first place. Here are the strategies that have made the biggest difference in my own work and what I teach in my classes.
Start every project with a gauge swatch, even for simple scarves. This isn’t just about getting the right measurements – it’s about understanding how your tension works with that particular yarn and hook combination. Pay attention to how your edges look in the swatch and adjust your technique before starting the main project.
Use stitch markers religiously, at least until you’re confident in your edge control. Mark your first and last stitch of each row, and don’t be afraid to use markers every 10-20 stitches on longer rows. It takes an extra few seconds but saves hours of frogging later.
Take breaks when you feel your tension changing. If you’re getting tired, stressed, or distracted, your stitches will reflect that. It’s better to put your work down for a few minutes than to create problems you’ll have to fix later.
Creating Good Habits
Develop a consistent routine for starting and ending each row. I always count my stitches, check my edge alignment, and make sure my turning chain is the right height before moving on. This might sound obsessive, but it becomes automatic after a while, and it prevents so many problems.
Keep notes about what works for different projects. If you figure out that you need to use chain 2 instead of chain 3 for double crochet turning chains with a particular yarn, write it down. These little details make a huge difference in your finished projects.
Practice with different yarn types and weights. What works for worsted weight cotton might not work for chunky wool or fingering weight silk. The more you practice with different materials, the better you’ll get at adjusting your technique automatically.
Remember that even experienced crocheters have off days. If your edges are being particularly stubborn, sometimes the best solution is to put the project aside for a day and come back with fresh eyes and hands.
Common Questions
Why do my crochet edges curve inward?
Inward-curving edges usually mean you’re losing stitches somewhere in each row. Check that you’re working into the first and last stitch of each row correctly, and count your stitches to make sure you’re maintaining the same number throughout. This is especially common with single crochet, where edge stitches can be hard to identify.
How tight should my crochet tension be?
Your tension should be firm enough that stitches don’t slide around on the hook, but loose enough that you can easily insert your hook into previous stitches. If you’re struggling to get your hook through stitches from previous rows, you’re too tight. If your fabric looks loose and holey, you need to tighten up a bit.
Should I count my turning chain as a stitch?
It depends on the stitch height and your personal preference. For single crochet, the turning chain (usually chain 1) typically doesn’t count as a stitch. For double crochet and taller stitches, the turning chain often does count as a stitch. The key is being consistent throughout your entire project and following your pattern’s instructions.
Can I fix uneven edges after finishing a project?
Minor unevenness can often be improved with blocking, especially if you’re working with natural fibers like wool or cotton. For more significant problems, you might need to add a border or edging to disguise the issues. In extreme cases, you may need to frog back to where the problems started and rework those sections.
How often should I count my stitches?
When you’re learning or working on a new stitch pattern, count every row. Once you’re confident and your edges are staying straight, you can count every few rows. Always count immediately if you notice your edges starting to look uneven. It’s much easier to fix problems when you catch them early.
What’s the best yarn for practicing edge control?
Medium-weight cotton yarn (like Lily Sugar ‘n Cream or Lion Brand 24/7 Cotton) is excellent for practicing. It’s affordable, has good stitch definition so you can see what you’re doing, and doesn’t split easily. Avoid fuzzy or dark yarns when you’re learning – they make it harder to see individual stitches.
How do I know if my turning chain is the right height?
Your turning chain should bring your hook to the same height as the stitches you’re about to work. If it’s too short, your edges will pull in. If it’s too long, your edges will be loose and sloppy. Make a small swatch and try different turning chain heights to see what works best with your tension and the specific yarn you’re using.
Why do my edges look different on each side of my work?
This often happens when you’re inconsistent about which side you start each row from, or when you handle your turning chain differently on right-side versus wrong-side rows. Make sure you’re turning your work the same way each time and treating your turning chains consistently regardless of which side you’re working on.
Getting consistent, professional-looking edges takes practice, but it’s absolutely achievable. The techniques I’ve shared here have helped hundreds of my students transform their work from “obviously handmade” to “beautifully handcrafted.” Remember, every expert crocheter has struggled with wonky edges at some point – you’re in good company.
The key is being patient with yourself while you develop muscle memory for consistent tension and stitch placement. Start with simple projects where you can focus on your edges without worrying about complex stitch patterns. Use stitch markers, count religiously, and don’t be afraid to frog a few rows if something doesn’t look right.
Most importantly, keep practicing. Each project teaches you something new about your own crochet style and how to work with different yarns and stitches. Before you know it, straight, even edges will become second nature, and you’ll be helping other crocheters figure out their own edge challenges. Happy crocheting!