
Last weekend, I was teaching my neighbor how to crochet, and she asked me something that stopped me in my tracks: “What’s the difference between a granny square and a granny stitch?” I realized I’d been using these terms interchangeably for years without really thinking about it. After digging into my pattern collection and doing some research, I discovered there’s actually a meaningful distinction that can help you choose the right technique for your project.
The confusion is totally understandable. Both involve that classic three-double-crochet cluster that we all associate with vintage afghans and cozy throws. But here’s the thing: understanding the difference can actually make you a more versatile crocheter and help you tackle projects with more confidence.
I’ve been crocheting for over fifteen years, and I wish someone had explained this distinction to me early on. It would have saved me from some frustrating moments when patterns didn’t turn out quite right, or when I couldn’t figure out why my granny square blanket looked different from the photo.
Whether you’re a beginner who’s just learned the basic crochet stitches or someone who’s been hooking for years, getting clear on these fundamentals will make your crochet journey smoother and more enjoyable.
Quick Answer
A granny square is a specific motif worked in rounds from the center outward, while granny stitch refers to the three-double-crochet cluster technique used in various patterns. The square is a complete unit; the stitch is just the building block.

What Is a Granny Square?
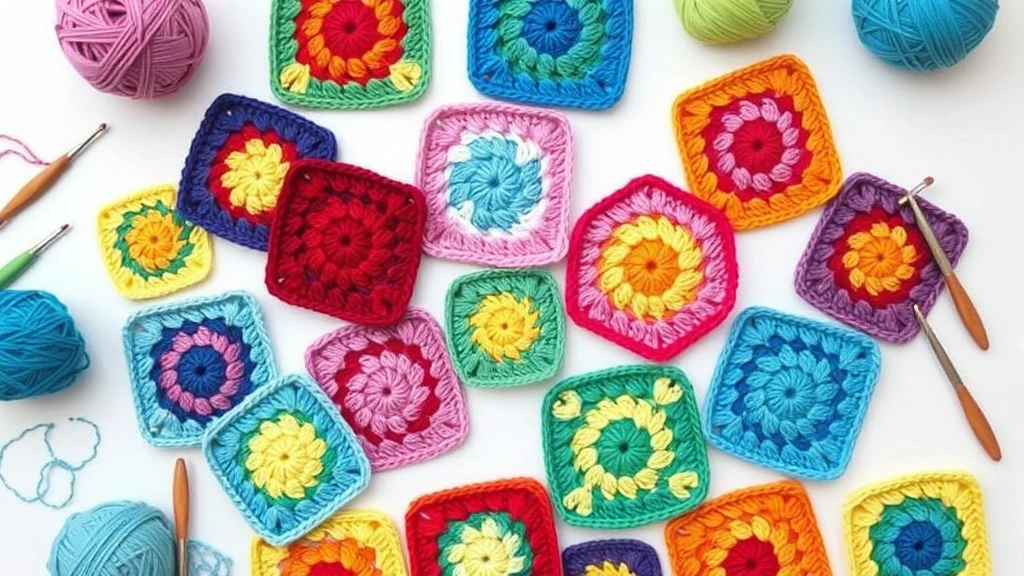
A granny square is a complete crochet motif that’s worked in rounds from the center outward. Think of it as a finished piece that you can use on its own or combine with other squares to create larger projects. The traditional granny square starts with a magic ring (or chain 4 joined with a slip stitch) and builds outward in concentric rounds.
The classic granny square pattern creates a square shape with distinctive corner spaces and a lacy, open texture. Each round adds another “frame” around the previous work, and the corners are formed by working extra chain spaces that create the square’s angles.
Basic Granny Square Construction
Here’s how a traditional granny square comes together:
- Center Ring
Start with a magic ring or chain 4 joined with slip stitch. This forms the foundation for your first round.
- Round 1
Work groups of 3 double crochets separated by chain spaces. Typically, you’ll make 4 groups with chain-2 spaces between them.
- Round 2 and Beyond
Each subsequent round works into the chain spaces of the previous round, adding corner increases to maintain the square shape.
The beauty of granny squares lies in their modularity. You can make them in any size by simply adding more rounds, and they’re perfect for using up yarn scraps. I love making scrap yarn projects with granny squares because each one can be a different color combination.
Pro Tip: When making multiple granny squares for a project, keep your tension consistent. I recommend using the same hook size and similar yarn weights to ensure all your squares end up the same size.
The traditional granny square uses worsted weight yarn with an H-8 (5.0mm) hook, but you can adapt the pattern for any yarn weight. Just remember that lighter weights will create smaller squares, while bulky yarns will make larger ones.
What Is Granny Stitch?
Granny stitch, on the other hand, is the actual stitch technique used within granny squares and many other crochet patterns. It’s that characteristic three-double-crochet cluster separated by chain spaces that gives granny work its distinctive look and drape.
The granny stitch creates an open, lacy fabric that’s perfect for blankets, shawls, and other projects where you want good drape and breathability. Unlike solid stitches, granny stitch naturally creates holes in the fabric, making it ideal for layering pieces or summer garments.
How to Work Granny Stitch
The basic granny stitch pattern repeat is surprisingly simple:
- Work the Cluster
Make 3 double crochets in the same stitch or space. These should be worked close together to form a cluster.
- Add the Chain Space
Chain 1 or 2 (depending on your pattern) to create the space between clusters.
- Skip Stitches
Skip the appropriate number of stitches in your foundation row, then repeat the cluster in the next designated spot.
What makes granny stitch so versatile is that you can use it in rows, rounds, or even as an edging technique. I’ve used granny stitch for everything from baby blankets to summer tops, and it always creates that perfect vintage vibe.
Yarn Choice Matters: Granny stitch works beautifully with cotton yarns like Lion Brand 24/7 Cotton for summer projects, or acrylic blends for cozy afghans.
The stitch naturally creates a fabric that’s about 25% more open than solid double crochet, so you’ll use less yarn for the same coverage area. This makes it economical for large projects like afghans.
Key Differences Between Them
Now that we’ve covered what each one is, let’s break down the key differences that matter for your crochet projects:
| Aspect | Granny Square | Granny Stitch |
|---|---|---|
| Definition | Complete motif/pattern | Stitch technique |
| Construction | Worked in rounds from center | Can be worked in rows or rounds |
| Shape | Always creates a square | Creates fabric of any shape |
| Usage | Modular construction | Continuous fabric |
| Joining | Squares joined together | No joining needed |
Structural Differences
The most important difference is structural. A granny square is a self-contained unit with defined edges and corners. When you finish a granny square, you have a complete piece that can stand alone or be joined with others.
Granny stitch, however, is just the building block. It’s like the difference between a brick (granny square) and the mortar technique (granny stitch). You use the stitch technique to build various shapes and projects, not just squares.
Project Planning Implications
This distinction affects how you plan your projects. With granny squares, you’re thinking about how many squares you need, what size to make them, and how to join them. You might make 100 squares for a large blanket, each one a complete unit.
With granny stitch worked continuously, you’re thinking about overall dimensions, stitch counts, and shaping. You might work a rectangular baby blanket entirely in granny stitch without any seaming or joining.
I learned this the hard way when I tried to follow a “granny stitch blanket” pattern but kept making individual squares instead of working continuously. The finished project looked completely different from what I expected!
When to Use Each Technique
Choosing between granny squares and continuous granny stitch depends on your project goals, time constraints, and personal preferences. Here’s when each technique shines:
Choose Granny Squares When:
- You want portability: Individual squares are perfect for travel crochet or working in small time chunks
- Using multiple colors: Each square can be a different color combination, perfect for color work projects
- You enjoy modular construction: Some people love the satisfaction of completing individual units
- Making gifts: You can make a few squares at a time and build up to a full project gradually
- Want easy size adjustments: Just add or remove squares to change the final dimensions
Choose Continuous Granny Stitch When:
- You want faster completion: No seaming means less finishing work
- Prefer seamless construction: Continuous fabric often drapes better than joined squares
- Making fitted garments: Easier to shape necklines, armholes, etc.
- Want consistent tension: Working continuously often results in more even fabric
- Making large projects: Less bulk from seams in the final piece
I’ve found that beginners often prefer granny squares because they can see progress quickly and fix mistakes in individual squares without affecting the whole project. More experienced crocheters sometimes gravitate toward continuous construction for its efficiency.
Consider Your Lifestyle: If you crochet mainly while watching TV at home, continuous granny stitch might work well. If you crochet during commutes or in waiting rooms, portable granny squares might be more practical.
Common Variations and Applications
Both granny squares and granny stitch have spawned countless variations over the decades. Understanding these can help you choose the right approach for your specific project needs.
Granny Square Variations
Solid Granny Squares: These fill in the chain spaces with additional stitches, creating a denser fabric. Perfect for projects where you don’t want the open, lacy look.
Sunburst Granny Squares: Start with a different center motif, often resembling a flower or sun. These add visual interest to traditional square layouts.
Granny Rectangles and Hexagons: The granny technique adapts well to other shapes, giving you more layout options for your projects.
Granny Stitch Applications
Granny Stripe Patterns: Working granny stitch in rows creates beautiful striped effects. I love using this for striped blankets where each row can be a different color.
Granny Stitch Shawls: The open nature of granny stitch makes it perfect for lightweight shawls and wraps. The Ravelry database has thousands of granny stitch shawl patterns.
Granny Mesh Bags: The natural holes in granny stitch fabric make it ideal for market bags and beach totes.
Modern Interpretations
Contemporary designers have taken both techniques in new directions. Some create granny squares with unusual color placement or modified corner treatments. Others use granny stitch in unexpected ways, like for structured garments or home decor items.
The Craft Yarn Council has documented how these traditional techniques continue to evolve with modern yarn choices and design sensibilities.
Troubleshooting Common Issues
Over the years, I’ve helped countless crocheters work through problems with both granny squares and granny stitch. Here are the most common issues and their solutions:
Granny Square Problems
Squares aren’t the same size: This usually comes down to tension consistency. Try using a consistent hook size and measuring your squares after each round. If some are larger, use a smaller hook; if smaller, use a larger hook.
Corners aren’t square: Make sure you’re working the correct number of chains in your corner spaces. Traditional granny squares use chain-2 corners, but some patterns call for chain-1 or chain-3.
Holes are too big: This often happens with loose tension or using a hook that’s too large for your yarn weight. Try going down a hook size.
Granny Stitch Problems
Fabric is too stiff: Granny stitch should have good drape. If your fabric feels stiff, you might be working too tightly or using a yarn that’s too structured for the pattern.
Rows aren’t straight: Count your clusters carefully. It’s easy to accidentally increase or decrease when working granny stitch in rows.
Edge curling: This is common with granny stitch fabric. A border in single crochet or another stable stitch usually solves the problem.
Blocking is Your Friend: Both granny squares and granny stitch fabric benefit from blocking. Steam blocking works well for acrylic yarns, while wet blocking is better for natural fibers.
Project Ideas for Both Techniques
Ready to put your knowledge into practice? Here are some project ideas that showcase each technique beautifully:
Perfect Granny Square Projects
- Sampler Afghan: Make each square in a different stitch pattern for a learning experience
- Temperature Blanket: One square per day, colored according to the daily temperature
- Memory Blanket: Each square represents a special memory or milestone
- Portable Lap Blanket: Perfect size for travel and easy to work on anywhere
Great Granny Stitch Projects
- Summer Beach Cover-up: The open stitch is perfect for layering over swimwear
- Quick Baby Blanket: Continuous construction means faster completion for gift-giving
- Market Bag: The natural holes make it perfect for groceries
- Lightweight Throw: Great for air-conditioned rooms or spring evenings
When choosing yarn for either technique, consider the final use. Cotton works beautifully for summer projects and items that need frequent washing. Acrylic blends are perfect for everyday blankets and afghans. Wool and wool blends add warmth and luxury to special pieces.
For beginners, I recommend starting with worsted weight acrylic yarn like Red Heart Super Saver or Caron Simply Soft. These yarns are forgiving, affordable, and available in lots of colors.
Common Questions
Can I use granny stitch to make a square shape?
Absolutely! You can work granny stitch in rounds to create a square, but it won’t have the same structure as a traditional granny square. The result will be more like a square piece of granny stitch fabric rather than the distinct motif that defines a true granny square.
Which technique uses less yarn?
Granny stitch typically uses less yarn than solid stitches because of its open structure, but the difference between granny squares and continuous granny stitch is minimal. The main factor is whether you’re seaming squares together (which uses extra yarn) or working continuously.
How long does it take to make a granny square blanket?
This depends on the size of your squares and the finished blanket dimensions. A baby blanket using 4-inch squares might need 48 squares and take 15-20 hours total. A queen-size blanket could require 200+ squares and 60-80 hours of work, not including joining time.
Is granny stitch good for beginners?
Yes! Granny stitch only requires knowledge of chain, slip stitch, and double crochet. The repetitive nature makes it great for practicing tension and rhythm. Many crocheters learn granny stitch right after mastering basic stitches.
Can I mix granny squares and granny stitch in the same project?
Definitely! You might use granny squares for the main body of a blanket and add a granny stitch border, or create a garment with granny square motifs connected by granny stitch fabric. The techniques complement each other beautifully.
What’s the best way to join granny squares?
There are several methods, including whip stitch, slip stitch, and join-as-you-go techniques. The joining method you choose affects both the appearance and durability of your finished project. I prefer the flat slip stitch join for most blankets.
How do I calculate yarn amounts for granny projects?
For granny squares, make one complete square and weigh it, then multiply by the total number needed. Add 10% for joining and finishing. For continuous granny stitch, use standard yardage calculations but remember that granny stitch uses about 20% less yarn than solid double crochet.
Can I make granny squares with different yarn weights?
You can, but they’ll end up different sizes. If you want uniform squares from different yarn weights, you’ll need to adjust hook sizes and possibly add or subtract rounds. It’s easier to stick with one yarn weight for projects requiring identical squares.
Understanding the difference between granny squares and granny stitch opens up so many possibilities in your crochet journey. Whether you choose the modular approach of individual squares or the continuous flow of granny stitch fabric, both techniques offer that timeless, cozy appeal that makes crochet so special.
I hope this guide helps you approach your next project with confidence. Remember, there’s no right or wrong choice between these techniques – it’s all about what works best for your project, your lifestyle, and your personal preferences. The most important thing is to enjoy the process and create something that brings you joy.
Happy crocheting, and don’t hesitate to experiment with both approaches. You might discover a new favorite technique or find the perfect solution for that project you’ve been planning!