You know that moment when you’re scrolling through Pinterest at 2 AM, and you see the most gorgeous crochet stitch pattern that makes your heart skip a beat? That’s exactly what happened to me when I first discovered the moss stitch. I’d been crocheting for years, churning out the same old single and double crochet projects, when this beautifully textured stitch caught my eye. The way it creates this subtle, bumpy texture that’s both modern and timeless – I knew I had to master it.
Here’s the thing though: when I first tried to follow a moss stitch tutorial, I ended up with what looked more like a tangled mess than the elegant fabric I’d admired. Sound familiar? The moss stitch has this reputation for being tricky, but honestly, once you understand the rhythm, it’s surprisingly straightforward. It’s just different from what most of us learn first.
What makes the moss stitch so special isn’t just how it looks (though it does photograph beautifully for Instagram). It’s incredibly versatile – perfect for everything from cozy blankets to structured bags. The texture adds visual interest without being overwhelming, and it works up relatively quickly once you get the hang of it. Plus, it’s one of those stitches that looks way more complicated than it actually is, which means instant crochet street cred.
Quick Answer
The moss stitch alternates single crochet and chain-1 spaces in an offset pattern, creating a textured fabric with small holes. Work into chain spaces on even rows and skip single crochets, then reverse the pattern on odd rows for the characteristic bumpy texture.
What is the Moss Stitch?
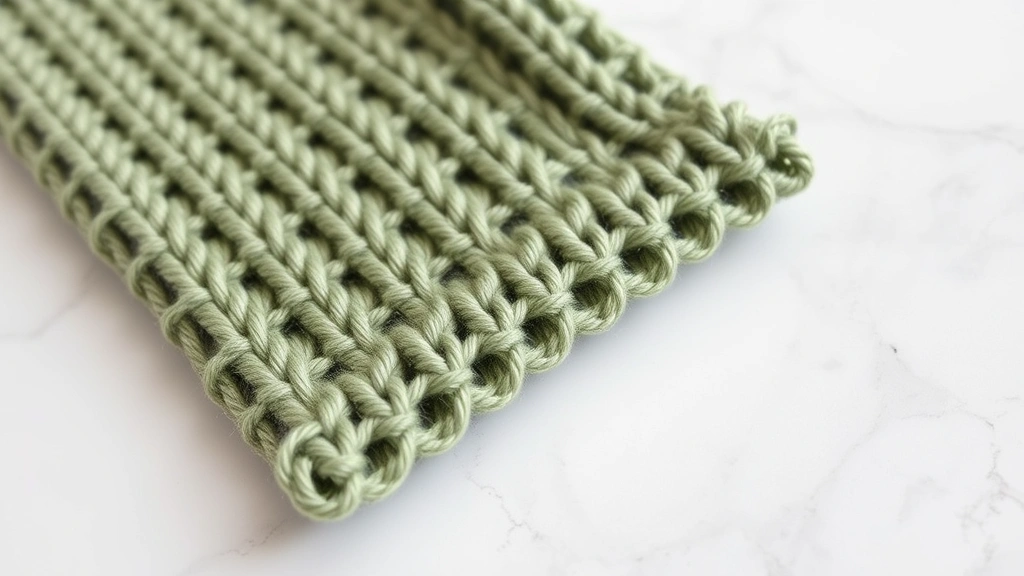
The moss stitch, sometimes called the granite stitch or seed stitch, creates a lovely textured fabric that’s both dense and breathable. Unlike basic single crochet, which creates smooth rows, the moss stitch alternates between single crochet stitches and chain-1 spaces in a specific pattern that creates small holes and raised bumps.
What sets this stitch apart is its offset pattern. On one row, you’ll work single crochet stitches into the chain-1 spaces from the previous row, and chain-1 over the single crochet stitches. Then on the next row, you flip it – working single crochet into what were previously chain spaces, and chaining over what were single crochets. This creates the characteristic bumpy texture that gives the stitch its name.
The beauty of moss stitch lies in its versatility. It’s sturdy enough for bags and baskets, soft enough for blankets and scarves, and creates just enough texture to make simple projects look sophisticated. The small holes also make it perfect for lightweight summer tops or as an accent stitch in larger projects.
One thing I love about this stitch is how it looks almost woven when you’re done. The alternating pattern creates this subtle geometric effect that works with both modern and traditional design aesthetics. It’s definitely more interesting than plain single crochet, but not as busy as some of the more complex textured stitches.
Basic Moss Stitch Technique
The moss stitch foundation is crucial to get right, and it’s a bit different from your typical foundation chain. You’ll want to start with an odd number of chains – this is important because the pattern repeat works on odd numbers. I usually add one extra chain for the turning chain, so if I want a finished width of 20 stitches, I’ll chain 22.
The basic concept is simple: you’re alternating between working stitches and skipping spaces, but in a way that creates an offset pattern. Row 1 establishes your base pattern, and Row 2 creates the offset that gives you the textured effect. After that, you just repeat Row 2 over and over.
Pro Tip: Keep your chain-1 spaces loose but not sloppy. Too tight and you’ll struggle to work into them on the next row. Too loose and your fabric will look uneven.
The rhythm goes like this: single crochet, chain 1, skip the next stitch, single crochet, chain 1, skip the next stitch. But here’s where it gets interesting – on the return row, you’re working single crochet into those chain-1 spaces you created, and chaining over the single crochet posts from the previous row.
This offset is what creates the moss-like bumpy texture. Each single crochet sits slightly forward or back compared to the row below it, creating depth and visual interest. It takes a few rows to really see the pattern emerge, so don’t panic if your first few rows look a bit wonky.
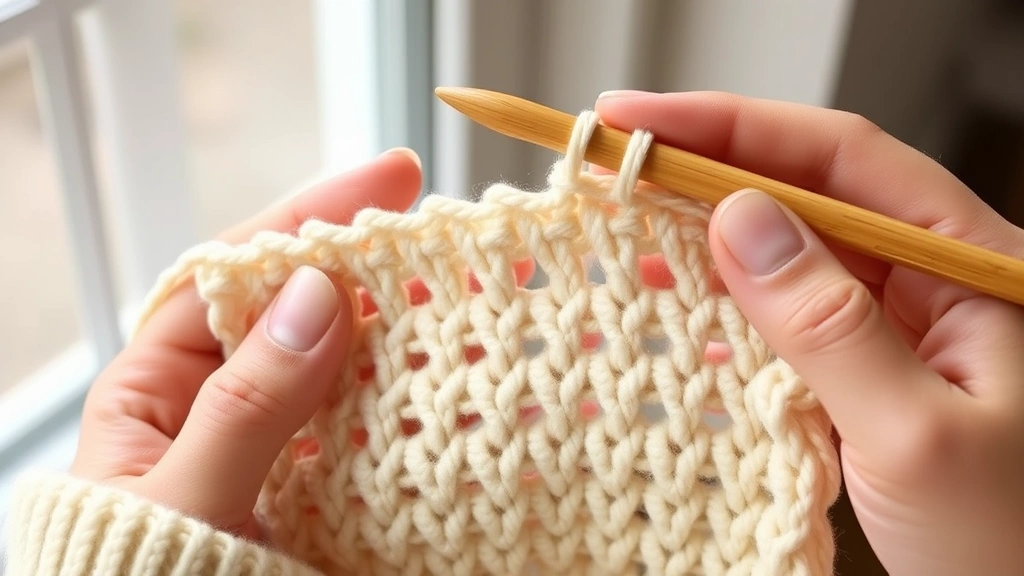
Step-by-Step Tutorial
Let me walk you through this step by step, because honestly, reading about it and actually doing it are two different things. I’m going to use a practice swatch of 21 chains (which will give us 20 working stitches) so you can follow along.
- Foundation Chain
Chain 22 (21 for your working stitches plus 1 turning chain). Make sure your foundation chain isn’t too tight – you’ll be working into it, and tight chains are a nightmare to work with.
- Row 1 (Right Side)
Skip the first chain (that’s your turning chain), then single crochet in the second chain from hook. *Chain 1, skip the next chain, single crochet in the next chain.* Repeat from * to * across. You should end with a single crochet in the last chain.
- Row 2 (Wrong Side)
Chain 1 and turn. Single crochet in the first single crochet from the previous row. *Chain 1, single crochet in the next chain-1 space.* Repeat from * to * across, ending with single crochet in the last single crochet.
- Row 3 and Beyond
Chain 1 and turn. Single crochet in the first single crochet. *Chain 1, single crochet in the next chain-1 space.* Repeat across. This is the same as Row 2 – you just keep repeating this row.
The key thing to remember is that you’re always working single crochet into chain spaces and chaining over single crochet posts. It feels backward at first, but once you get into the rhythm, it becomes second nature.
Don’t worry if your first few attempts look uneven. Like most textured stitches, moss stitch has a bit of a learning curve. Your tension will even out as you get comfortable with the pattern.
Best Yarn and Hook Combinations
The yarn and hook combination you choose can dramatically affect how your moss stitch looks and behaves. I’ve experimented with everything from fine cotton thread to chunky wool, and each creates a completely different effect.
| Yarn Weight | Hook Size | Best For | Gauge (4″) |
|---|---|---|---|
| DK (3) | 4.5mm (G) | Baby blankets, dishcloths | 16-18 sts |
| Worsted (4) | 5.5mm (I) | Afghans, scarves | 14-16 sts |
| Chunky (5) | 6.5mm (K) | Quick blankets, bags | 11-13 sts |
| Cotton (varies) | One size smaller than recommended | Dishcloths, market bags | Varies |
For beginners, I always recommend starting with a smooth worsted weight yarn in a light color. The Lion Brand Vanna’s Choice or Red Heart Super Saver are perfect for practicing – they’re affordable, widely available, and forgiving to work with.
Cotton yarns create a more structured fabric that’s perfect for dishcloths and market bags. The moss stitch’s small holes make it ideal for these functional items. I love using Bernat Handicrafter Cotton for kitchen items because it holds up well to washing and the texture adds scrubbing power to dishcloths.
If you’re planning a cozy blanket, consider a soft acrylic or wool blend. The moss stitch creates enough texture to be interesting but isn’t so bumpy that it’s uncomfortable to snuggle under. Caron Simply Soft or Lion Brand Heartland are excellent choices that won’t break the bank for larger projects.
Hook Size Considerations
Generally, you’ll want to use a hook that’s slightly larger than what the yarn label recommends. The moss stitch naturally creates a denser fabric than basic single crochet, so the larger hook helps maintain good drape and prevents the fabric from becoming too stiff.
For cotton projects like dishcloths, you might even go up two hook sizes to ensure the fabric stays flexible and absorbent. Trust me, a stiff dishcloth is pretty useless, no matter how pretty the stitch pattern is.
Common Mistakes and How to Fix Them
Let’s talk about the mistakes I see most often with moss stitch, because honestly, we all make them. The good news is that most of these are easy fixes once you know what to look for.
Uneven Stitch Count
This is the big one. Because you’re alternating between working stitches and creating spaces, it’s easy to accidentally add or lose stitches. I always count my stitches at the end of each row until the pattern becomes automatic. You should have the same number of single crochet stitches and chain-1 spaces in each row.
If you find yourself with extra stitches, you probably worked into a chain space AND the single crochet next to it. If you’re short stitches, you likely skipped a chain space somewhere. The fix is to tink back (that’s knit spelled backward – it means undoing stitches one by one) to where the mistake happened.
Tight Chain-1 Spaces
New crocheters often make their chain stitches too tight, which makes it nearly impossible to work into them on the next row. Your chain-1 should be loose enough that you can easily insert your hook, but not so loose that it creates huge holes in your fabric.
Quick Fix: If you realize your chains are too tight after you’ve finished a row, gently stretch the fabric widthwise before starting the next row. This can help open up those tight spaces.
Working in the Wrong Place
The most confusing part of moss stitch is figuring out where to put your hook. Remember: single crochet goes into chain spaces, and chain-1 goes over single crochet posts. If your fabric starts looking like regular single crochet, you’re probably working into the wrong spots.
A good way to check is to look at your work from the side. You should see the single crochet stitches creating little bumps that alternate position from row to row. If all your stitches are lined up vertically, you’re not creating the offset pattern that makes moss stitch special.
Inconsistent Tension
This stitch can be unforgiving when it comes to tension issues. Too tight and your fabric becomes stiff and difficult to work. Too loose and it looks sloppy. The key is finding that sweet spot where your stitches are even but not rigid.
I find that taking breaks helps with tension consistency. When I’m tired or stressed, my stitches get tighter. If you notice your fabric getting progressively stiffer as you work, it might be time for a coffee break.
Perfect Projects for Moss Stitch
One of the things I love most about moss stitch is how versatile it is. The texture adds interest to simple projects, and the structure makes it perfect for items that need to hold their shape. Here are some of my favorite ways to use this stitch.
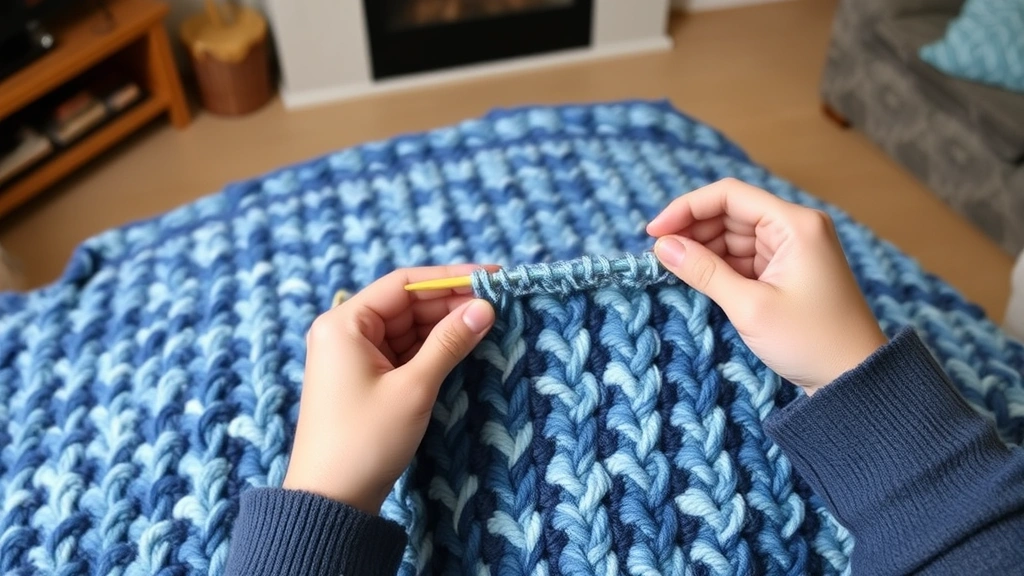
Blankets and Throws
Moss stitch creates gorgeous afghans and throws. The texture is interesting enough to make a solid-color blanket look sophisticated, but not so busy that it competes with variegated yarns. I made a moss stitch baby blanket in soft mint green that’s been my go-to baby shower gift for years.
For a full-size throw, you’re looking at about 1,200-1,500 yards of worsted weight yarn, depending on your desired finished size. The moss stitch works up relatively quickly – faster than more complex textured stitches but slower than plain single crochet.
Dishcloths and Kitchen Items
The small holes in moss stitch make it perfect for functional kitchen items. Dishcloths made with this stitch have built-in scrubbing texture, and the holes help with drainage. I like to make sets in coordinating colors – they’re quick, practical, and make great housewarming gifts.
For dishcloths, use cotton yarn and make them about 8-10 inches square. They’ll shrink slightly after the first wash, so err on the larger side. The Craft Yarn Council recommends cotton for items that need frequent washing, and moss stitch holds up beautifully to repeated laundering.
Bags and Baskets
The structure of moss stitch makes it excellent for bags that need to hold their shape. I’ve made everything from market bags to storage baskets using this stitch. The key is choosing the right yarn – cotton or cotton blends work best for items that need structure.
For a basic tote bag, you can work moss stitch in rounds or work flat pieces and seam them together. The texture adds visual interest while the density ensures your bag won’t stretch out of shape when loaded with groceries.
Scarves and Cowls
Moss stitch creates beautiful, drapey fabric that’s perfect for scarves and cowls. The texture is subtle enough to work with any outfit, and the small holes add just a touch of laciness without being too delicate for everyday wear.
I particularly love moss stitch for infinity scarves. The texture prevents the fabric from looking too plain when it’s looped, and the slight stretch makes it comfortable to wear.
Moss Stitch Variations
Once you’ve mastered the basic moss stitch, there are several fun variations to explore. These modifications can change the look and drape of your fabric while still maintaining that characteristic bumpy texture.
Double Crochet Moss Stitch
This variation uses double crochet instead of single crochet, creating a taller, more open fabric. The technique is the same – double crochet, chain 1, skip, repeat – but the finished effect is more dramatic. This version works up faster and uses less yarn, making it perfect for lightweight shawls or summer tops.
You’ll need to adjust your foundation chain for this variation. Instead of adding just one turning chain, you’ll need three chains at the beginning of each row to account for the height of the double crochet stitches.
Alternating Moss Stitch
This variation alternates between moss stitch rows and plain single crochet rows, creating horizontal stripes of texture. It’s a great way to add interest to a project without the full commitment of all-over moss stitch. I’ve used this technique in striped blankets where I wanted some rows to have texture and others to be smooth.
Moss Stitch in the Round
Working moss stitch in the round requires a bit more planning, but it’s definitely doable. You’ll need to adjust your stitch count to ensure the pattern works out evenly around the circumference. This technique is perfect for hats, baskets, or the body of a sweater.
The key is making sure you have the right number of stitches to complete your pattern repeat. For basic moss stitch, you need an even number of stitches when working in the round, which is the opposite of working flat.
Round Work Tip: Use a stitch marker to mark the beginning of each round. The moss stitch pattern can make it tricky to see where rounds begin and end, especially in the first few rounds.
Color Work with Moss Stitch
Moss stitch looks stunning with color changes. You can change colors every row for subtle stripes, or every few rows for bolder bands of color. The texture of the stitch adds depth to color work that you don’t get with plain stitches.
When working with multiple colors, I like to carry the unused yarn up the side rather than cutting and rejoining. This works well for up to three colors – beyond that, it gets too bulky.
Common Questions
How much yarn do I need for a moss stitch blanket?
For a standard throw blanket (about 50″ x 60″), you’ll need approximately 1,200-1,500 yards of worsted weight yarn. Moss stitch uses slightly more yarn than basic single crochet due to the chain spaces, so always buy an extra skein. Baby blankets typically require 600-800 yards, while king-size blankets can need 2,500+ yards.
Is moss stitch suitable for beginners?
Yes, but with a caveat. You should be comfortable with single crochet and chain stitches before attempting moss stitch. The technique itself isn’t difficult, but the alternating pattern can be confusing at first. I’d recommend mastering basic stitches first, then trying moss stitch on a small project like a dishcloth.
Why does my moss stitch look like regular single crochet?
This usually happens when you’re working into the wrong places. Make sure you’re working single crochet into chain-1 spaces and chaining over single crochet posts. If you work into the tops of single crochet stitches like you would in regular single crochet, you won’t get the offset pattern that creates the moss texture.
Can I use moss stitch for wearables?
Absolutely! Moss stitch creates a lovely fabric for sweaters, cardigans, and tops. The key is choosing the right yarn weight and hook size for good drape. DK or sport weight yarns work particularly well for garments. Keep in mind that the fabric has less stretch than basic single crochet, so you may need to size up for comfortable fit.
How do I fix a mistake several rows back?
For moss stitch, it’s usually best to tink back (undo stitches one by one) to the mistake rather than trying to drop down and pick up stitches like you might in knitting. The alternating pattern makes it tricky to reconstruct the correct stitch placement. Mark your mistake with a safety pin, then carefully undo stitches until you reach it.
Does moss stitch curl at the edges?
Moss stitch has much less tendency to curl than basic single crochet, which is one of its advantages. The alternating pattern and chain spaces create a more stable fabric. However, if you’re having curling issues, try going up a hook size or adding a border of single crochet around the edges.
What’s the difference between moss stitch and seed stitch?
In crochet, moss stitch and seed stitch are often used interchangeably, though some patterns distinguish between them. Generally, both create similar textured fabrics using alternating single crochet and chain spaces. The specific construction might vary slightly between pattern writers, so always read the individual pattern instructions carefully.
How long does it take to crochet a moss stitch project?
Moss stitch works up faster than complex textured stitches but slower than basic single crochet. A dishcloth might take 2-3 hours, while a throw blanket could take 20-30 hours depending on size and your crochet speed. The rhythm becomes faster once you’re comfortable with the pattern – those first few projects always take longer as you’re learning.
The moss stitch has become one of my absolute favorite go-to stitches, and I hope this guide helps you fall in love with it too. There’s something so satisfying about watching that bumpy texture emerge as you work, and the versatility means you’ll find yourself reaching for this stitch again and again.
Remember, like any new technique, it might feel awkward at first. Give yourself permission to make a few wonky practice swatches before diving into a big project. Once you get the rhythm down, you’ll be amazed at how quickly and naturally it flows. The moss stitch might just become your new favorite way to add texture and interest to your crochet projects.
Happy crocheting, and don’t forget to share your moss stitch creations – I love seeing how different yarn choices and color combinations can completely transform the look of this classic stitch!