Last week, I was helping my neighbor Sarah with her first baby blanket project, and she kept asking the same question: “How do I know if my stitches are even?” As we sat there examining her work, I realized this is something every crocheter worries about, especially when working on projects that need to look polished and professional.
Uneven stitches can make even the most beautiful pattern look wonky. Your single crochet rows might have different heights, your double crochets could be loose in some spots and tight in others, or your entire piece might be pulling to one side. Trust me, I’ve been there – staring at a project wondering if I should rip it all out and start over.
The good news? Most stitch inconsistencies are totally fixable, and with the right techniques, you can train your hands to create beautifully even stitches naturally. After fifteen years of crocheting everything from delicate doilies to chunky afghans, I’ve learned that consistent stitches aren’t about perfection – they’re about developing good habits and knowing a few key tricks.
Quick Answer
Even crochet stitches come from consistent yarn tension, proper hook grip, and maintaining the same working height for each stitch type. Practice counting stitches, use stitch markers, and check your gauge regularly to catch inconsistencies early.
Understanding Yarn Tension
Yarn tension is probably the biggest factor in creating even stitches, and it’s something that took me years to really master. When I started crocheting, my tension was all over the place – loose when I was relaxed, tight when I was concentrating hard on a new stitch pattern.
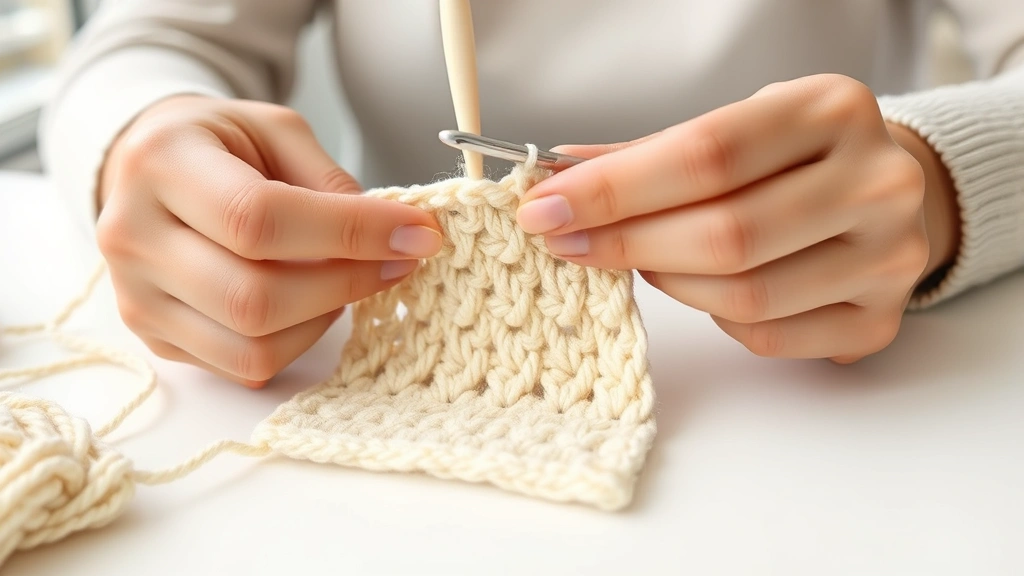
The key is finding your sweet spot and sticking with it. Your yarn should flow smoothly through your fingers without being so loose that stitches look sloppy, or so tight that your hook fights through every stitch. I hold my yarn with my non-dominant hand, wrapping it around my pinky finger and over my index finger. This creates just enough friction to control the flow.
Here’s what I’ve learned about tension control: your working yarn should have about the same resistance as pulling a piece of cooked spaghetti through your fingers. Sounds weird, but it’s surprisingly accurate! When working with different yarn weights, you’ll need to adjust slightly – bulky yarn naturally needs looser tension than fingering weight.
Pro Tip: If your hands get tired or crampy, your tension is probably too tight. Take breaks and consciously relax your grip.
Temperature affects tension too. My stitches are always tighter on cold mornings when my hands are stiff, and looser in the evening when I’m relaxed. I’ve started doing a few hand stretches before I pick up my hook, especially for projects where consistency really matters.
Proper Hook Grip and Hand Position
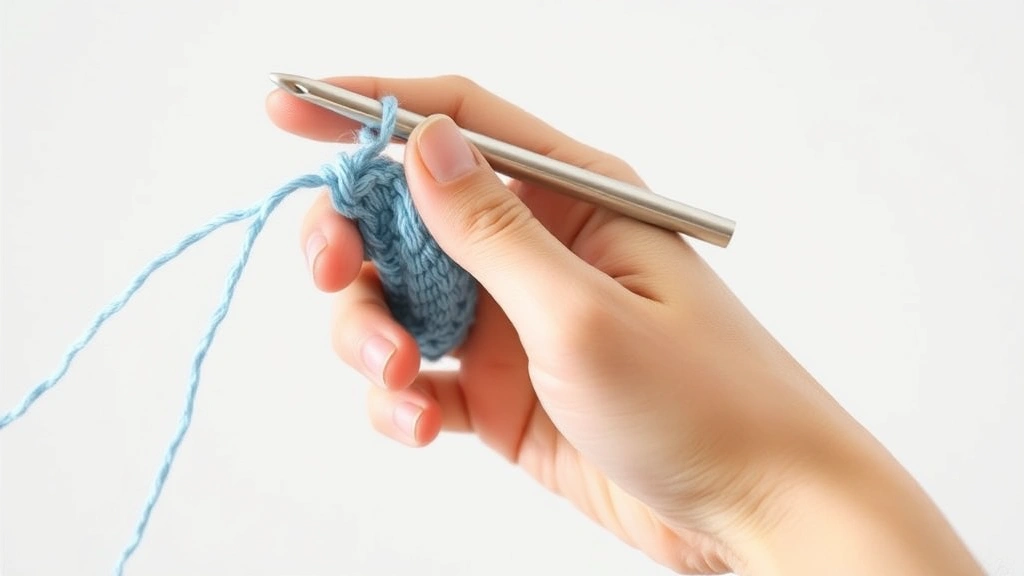
Your hook grip directly impacts stitch evenness, and there are two main ways to hold your hook: like a pencil or like a knife. I’m a pencil gripper myself – it gives me better control for detailed work. The knife grip works great for speed and larger projects, but pencil grip tends to produce more consistent stitches when you’re learning.
Whatever grip you choose, keep your wrist straight and relaxed. I see so many crocheters hunched over their work with bent wrists, which leads to fatigue and inconsistent stitches. Your hook should move smoothly through the yarn without you having to wrestle with it.
The distance between your hook and your work matters too. I keep about 2-3 inches of working yarn between my hook and the last completed stitch. This gives me enough yarn to work with while maintaining consistent tension. When I’m working on projects that require double crochet stitches, I might allow a bit more working yarn since these stitches are taller.
| Hook Grip | Best For | Tension Control |
|---|---|---|
| Pencil Grip | Detailed work, beginners | Excellent |
| Knife Grip | Speed, large projects | Good with practice |
Hand position relative to your work is crucial too. I like to support my project with my non-hook hand, keeping the working area flat and accessible. This prevents the fabric from bunching up and helps me see exactly where each stitch should go.
Maintaining Consistent Stitch Heights
Different crochet stitches have standard heights, and maintaining these consistently is what makes your work look professional. Single crochet should be about as wide as it is tall, double crochet should be roughly twice the height of single crochet, and so on.
The secret is in how you work your yarn overs and pull through loops. For half double crochet, I make sure to yarn over with the same motion every time and pull through all three loops in one smooth motion. Hesitation or uneven pulling creates irregular stitch heights.
Here’s something that really helped me: I practice making swatches with just one stitch type until they look like perfect little bricks. Start with worsted weight yarn and a size H (5mm) hook. Make a foundation chain of 20 stitches, then work 10 rows of single crochet. Every stitch should be the same height and width.
Height Check: Lay your work flat and look at it from the side. All stitches of the same type should line up perfectly at the top.
When working taller stitches like treble crochet, consistency becomes even more important. I count my yarn overs carefully – treble crochet gets two yarn overs, not one and a half or two and a bit more. The rhythm should be: yarn over, yarn over, insert hook, yarn over, pull through, then work off the loops two at a time.
Working Into the Right Part of Each Stitch
This might sound basic, but working into the wrong part of your stitches can make your work look uneven even when your technique is perfect. Unless your pattern specifies otherwise, always work into both loops of the stitch from the previous row.
I see a lot of new crocheters accidentally working into just the front loop or splitting the yarn instead of going cleanly through both loops. Take your time to identify the correct spot before inserting your hook.
Counting Stitches and Using Markers
Nothing ruins the look of even stitches like having the wrong number of them in each row. I learned this the hard way when I made my first scarf – it looked like a wonky trapezoid because I kept losing stitches on one end.
Count your stitches at the end of every row, especially when you’re learning. It feels tedious at first, but it becomes automatic pretty quickly. For most projects, you should have the same number of stitches in every row (unless you’re increasing or decreasing intentionally).
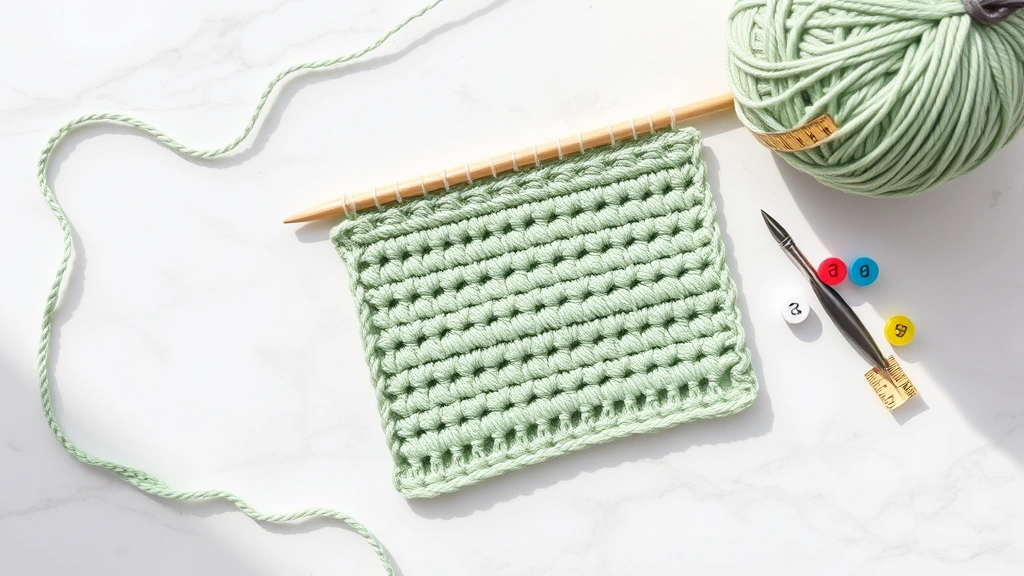
Stitch markers are your best friend for keeping track. I use different colored markers for different purposes: red for the beginning of the round in projects worked in the round, blue for pattern repeats, and yellow for places where I need to remember to do something different.
Marker Placement: Place a marker in the top of your last stitch of each row. This makes it easy to count and ensures you don’t miss the last stitch of the next row.
For larger projects, I count in groups of ten. Instead of counting “1, 2, 3, 4…” up to 150, I count “10, 20, 30…” which is much faster and less error-prone. You can use a row counter or just make tick marks on paper.
Reading Your Work
Learning to “read” your crochet is a game-changer for maintaining even stitches. Each stitch type creates a distinctive pattern, and once you can recognize what correct stitches look like, you’ll spot mistakes immediately.
Single crochet creates neat little “V” shapes across the top. Double crochet makes taller posts with clear spaces between them. If something looks off, it probably is – trust your eyes and check your stitch count.
Why Gauge Matters for Even Stitches
Gauge isn’t just important for making sure your sweater fits – it’s also a great way to check if your stitches are consistent. When you make a gauge swatch, you’re essentially testing whether you can create the same size stitches repeatedly.
The Craft Yarn Council recommends making a 4-inch square swatch for gauge checking. I usually make mine a bit larger – about 6 inches square – because it gives me a better sense of how my stitches look over a larger area.
Here’s what to look for in your gauge swatch: all stitches should be the same size, rows should be straight and parallel, and the fabric should lay flat without curling or puckering. If your swatch fails any of these tests, your actual project probably will too.
| Yarn Weight | Typical Hook Size | Expected SC Gauge |
|---|---|---|
| DK (3) | G/6 (4mm) | 18 sts = 4 inches |
| Worsted (4) | H/8 (5mm) | 16 sts = 4 inches |
| Chunky (5) | J/10 (6mm) | 12 sts = 4 inches |
Don’t just measure stitch gauge – measure row gauge too. Uneven row heights are just as problematic as uneven stitch widths, especially in projects like baby blankets where you want perfect rectangles.
Common Uneven Stitch Problems
Let’s talk about the most common issues I see and how to fix them. The first big one is the “leaning tower” effect – when your work gradually gets wider or narrower. This almost always happens because you’re either adding or losing stitches without realizing it.
The most common culprit is not working into the last stitch of each row. That last stitch can be hard to see, especially if your tension is tight. I always place a stitch marker in the top of the last stitch to make it obvious where I need to work.
Another frequent problem is inconsistent turning chains. Your turning chain should be the same height as the stitches you’re about to make. For single crochet, chain 1. For double crochet, chain 3. But here’s the thing – some crocheters chain loosely and others chain tightly. If your turning chains are much looser or tighter than your regular stitches, your edges will look wonky.
Edge Fix: If your edges are consistently loose, try chaining one less than the pattern calls for. If they’re too tight, chain one more.
Yarn splitting is another consistency killer. This happens when your hook goes through the yarn instead of cleanly through the stitch. It’s more common with fuzzy yarns like mohair or loosely twisted yarns. Take your time inserting your hook, and make sure you’re going through the stitch loops, not the yarn strands.
Fixing Mistakes Without Starting Over
Sometimes you’ll notice an uneven stitch or a mistake several rows back. Before you rip out all that work, consider whether it’s really noticeable. Minor inconsistencies often disappear when you block your finished project.
For more obvious problems, you can sometimes fix individual stitches by gently stretching or compressing the surrounding fabric. This works especially well with natural fibers that have some give to them.
Practice Exercises for Better Consistency
The best way to develop even stitches is through focused practice. I recommend making sample squares with different stitch types until your hands know exactly what each stitch should feel like.
Start with a basic single crochet square using worsted weight yarn and an H hook. Make it 20 stitches wide and 20 rows tall. Focus on making every single stitch identical – same tension, same height, same spacing. This might take a few tries, and that’s totally normal.
Once your single crochet is consistent, move on to double crochet squares. The taller stitches make inconsistencies more obvious, so they’re great for training your eye and your hands.
- Single Crochet Consistency
Make 5 squares of 20×20 single crochet stitches. Compare them – they should all be the same size and have the same stitch appearance.
- Double Crochet Practice
Create 3 squares of 15×15 double crochet stitches. Focus on consistent yarn overs and smooth loop pull-throughs.
- Mixed Stitch Patterns
Try simple stitch patterns that alternate between different stitch types. This tests your ability to maintain consistent heights across different stitches.
I also recommend practicing with different yarn types. Cotton yarn is less forgiving than acrylic – it doesn’t stretch to hide minor inconsistencies. If you can make even stitches with cotton, you can make them with anything.
Practice Schedule: Spend 15-20 minutes a day on consistency exercises. It’s better than one long practice session because your hands need time to develop muscle memory.
Try working in different lighting conditions too. I practiced making stitches while watching TV, in dim light, and in bright sunlight. This helped me develop a sense of touch that doesn’t rely entirely on seeing every detail.
Common Questions
How long does it take to develop consistent stitches?
Most crocheters see significant improvement in 2-4 weeks of regular practice. Your hands need time to develop muscle memory, so consistency comes from repetition rather than just understanding the technique. Practice 15-20 minutes daily for the fastest improvement.
Should I rip out work with uneven stitches?
It depends on the project and how noticeable the inconsistencies are. For learning projects or items that won’t be closely examined, minor variations are fine. For gifts or display pieces, consistent stitches make a big difference in the final appearance. When in doubt, block your work first – blocking often evens out minor inconsistencies.
Why are my stitches tight at the beginning and loose at the end?
This usually happens because you start with nervous energy and gradually relax as you work. Try doing a few hand stretches before starting, and consciously check your tension every few rows. Some crocheters find it helpful to take short breaks to reset their tension.
What’s the best yarn for practicing even stitches?
Medium-weight cotton yarn in a light color works best for learning. Cotton doesn’t stretch to hide mistakes like acrylic does, and light colors make it easier to see your stitch definition. Lion Brand 24/7 Cotton or Bernat Handicrafter Cotton are excellent choices for practice.
How do I know if my hook size is affecting stitch evenness?
If you’re following a pattern exactly but your stitches look too tight or too loose compared to the gauge, try going up or down one hook size. Your stitches should flow smoothly off the hook without being forced, and the finished fabric should have a nice drape without being stiff or floppy.
Can I fix uneven edges after finishing a project?
Yes, often you can improve edges during blocking by gently stretching or pinning them into shape. For severe edge problems, you can add a border of single crochet stitches around the entire piece, which often evens out irregularities and gives a finished look.
Why do my stitches look different when I use different yarn brands?
Different yarns have different textures, twist, and fiber content that affect how stitches appear. Some yarns are more forgiving of tension variations, while others show every inconsistency. This is normal – adjust your technique slightly for each yarn type rather than fighting against its natural characteristics.
Should I count stitches in every single row?
For beginners, yes – counting every row helps you catch mistakes early and develop good habits. As you become more experienced, you can count less frequently, but always count when starting a new section or after setting your work down for a while. Use stitch markers to make counting easier and more accurate.
Creating even crochet stitches isn’t about being perfect – it’s about being consistent. Once you develop good habits around tension, hook grip, and stitch placement, your hands will naturally create beautiful, uniform stitches without you having to think about every single movement.
Remember that every crocheter goes through this learning process. I still occasionally have to rip out a few rows when my tension gets wonky, usually because I was distracted or trying to crochet in poor lighting. The difference now is that I can spot problems quickly and fix them before they affect the whole project.
Start with simple projects and focus on consistency over speed. Your muscle memory will develop naturally with practice, and soon you’ll be creating gorgeous, even stitches that make your finished projects look professionally made. Happy crocheting!