You know that moment when you’re scrolling through Pinterest at midnight, and suddenly you’re convinced you need to crochet a gorgeous blanket for your living room? I’ve been there more times than I care to admit. But here’s the thing about blanket crochet patterns – they’re not all created equal, and choosing the wrong one can turn your cozy evening project into a months-long marathon of frustration.
I learned this the hard way when I picked an intricate Celtic knot pattern for my first blanket attempt. Three weeks in, I had a lumpy, uneven mess that looked nothing like the photo. The problem wasn’t my skills (okay, maybe partly), but I’d chosen a pattern that was way too advanced and used completely wrong yarn weight.
The good news? Once you understand how to choose the right blanket pattern for your skill level, yarn stash, and timeline, crocheting blankets becomes one of the most satisfying parts of the craft. There’s something magical about watching those rows grow into something that’ll keep someone warm for years to come.
Quick Answer
The best blanket crochet patterns depend on your skill level and goals: beginners should start with simple granny squares or single crochet stripes, while experienced crocheters can tackle complex colorwork or textured designs. Choose patterns based on yarn weight, time commitment, and intended use.
Best Beginner Blanket Patterns
If you’re new to blanket making, resist the urge to jump into that stunning mandala pattern you saw on Instagram. Trust me, your future self will thank you for starting simple.
Single Crochet Stripes are hands-down the most forgiving first blanket. You’ll work in simple single crochet stitches, changing colors every few rows to create stripes. I recommend using worsted weight yarn (like Lion Brand Vanna’s Choice) with a size H-8 (5mm) hook. For a lap blanket, you’ll need about 1,200 yards total across 3-4 colors.
The beauty of this pattern is that if you mess up tension in one section, it won’t throw off the entire blanket. Plus, you can practice your color changes without worrying about complex stitch patterns.
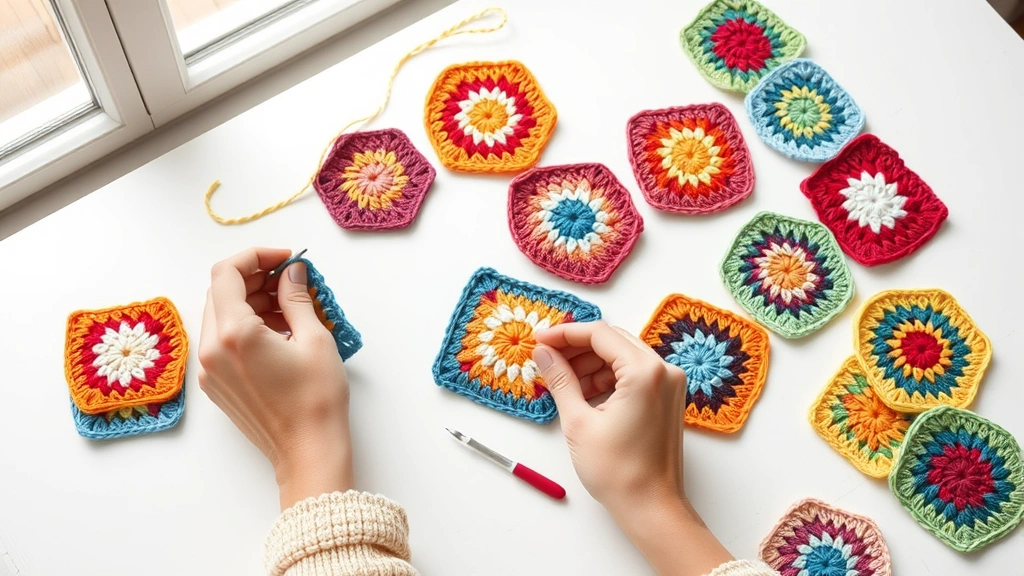
Classic Granny Square Blankets are another excellent starting point. Each square is a small, manageable project that you can complete in one sitting. Once you’ve mastered the basic granny square, you can experiment with different color combinations or even try solid granny squares for a more modern look.
Beginner Tip: Make your first 5-10 granny squares, then measure them. If they’re not all the same size, adjust your tension before making more. It’s much easier to fix tension issues early than to try to block wildly different squares into submission later.
For granny squares, I love using DK weight yarn with a 4mm hook. You’ll get nice stitch definition without the bulk of worsted weight, and the finished squares are easier to join neatly.
Intermediate Blanket Projects
Once you’ve completed a few basic blankets, you’re ready for patterns that challenge your skills without overwhelming you.
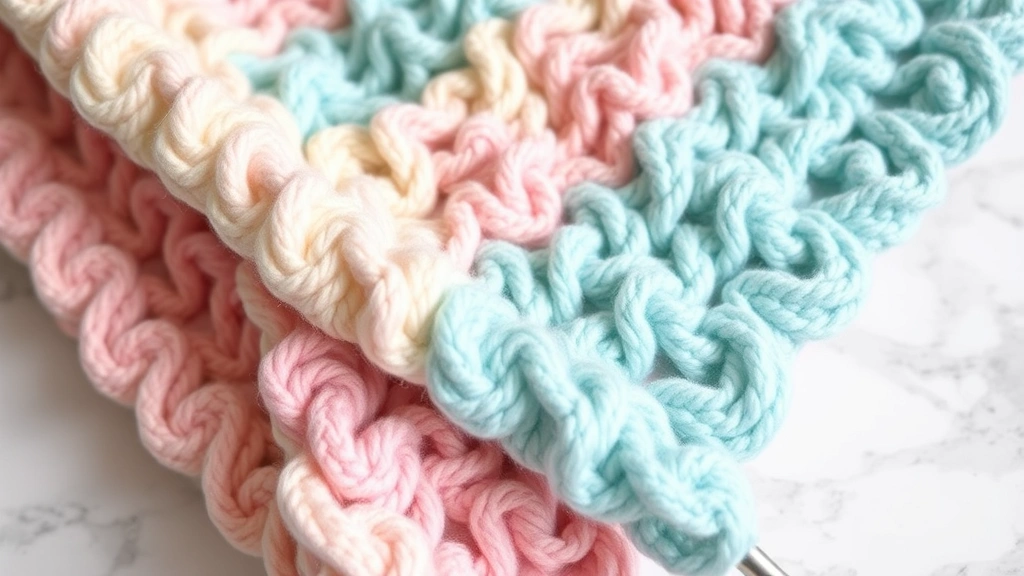
Ripple or Chevron Patterns create gorgeous wavy designs that look complex but follow a simple mathematical repeat. The key is understanding how increases and decreases create the wave effect. I recommend starting with a simple 14-stitch repeat using worsted weight yarn.
The Ravelry pattern database has hundreds of ripple variations, from subtle waves to dramatic peaks and valleys. What I love about ripple blankets is how they showcase variegated yarns beautifully – those color-changing skeins that sometimes look muddy in other patterns really shine in ripples.
Corner-to-Corner (C2C) Blankets have exploded in popularity, and for good reason. You start with a single square and work diagonally, adding squares as you go. This technique is perfect for creating pixelated designs or geometric patterns.
C2C blankets work up surprisingly quickly because you’re essentially making lots of small squares simultaneously. I’ve found that acrylic yarn works particularly well for C2C projects since you’ll be handling the work quite a bit as it grows.
| Pattern Type | Skill Level | Time Estimate | Best Yarn Weight |
|---|---|---|---|
| Single Crochet Stripes | Beginner | 2-3 weeks | Worsted |
| Granny Squares | Beginner | 3-4 weeks | DK or Worsted |
| Ripple/Chevron | Intermediate | 4-6 weeks | Worsted |
| Corner-to-Corner | Intermediate | 3-5 weeks | Worsted |
Textured Stitch Blankets are where intermediate crocheters can really flex their skills. Patterns using shell stitches, bobbles, or cables create stunning visual interest. The shell stitch is particularly beginner-friendly among textured options.
Advanced Blanket Challenges
Advanced blanket patterns aren’t just about complex stitches – they’re about managing multiple techniques simultaneously while maintaining consistent gauge and professional finishing.
Intarsia and Tapestry Crochet allow you to create pictorial designs with multiple colors. Unlike simple stripes, these techniques require you to carry multiple yarns and change colors within rows. The Craft Yarn Council recommends using smooth, plied yarns for the clearest color definition.
I’ll be honest – my first tapestry crochet attempt looked like abstract art gone wrong. The key is maintaining even tension across all colors and understanding when to carry yarn versus cutting and rejoining.
Celtic and Aran-Style Blankets incorporate complex cable patterns that create raised, rope-like designs. These patterns require careful attention to stitch placement and often involve working stitches out of order to create the cable crossings.
For cable blankets, I strongly recommend using a lighter color yarn so you can clearly see your stitch placement. Cream or light gray shows cable definition beautifully, while dark colors can hide your beautiful work.
Advanced Tip: Before committing to a full cable blanket, make several practice squares. Cables are unforgiving – one missed cross can throw off the entire pattern repeat.
Modular Construction Blankets involve creating multiple shaped pieces that fit together like a puzzle. Hexagons, triangles, and other geometric shapes can create stunning kaleidoscope effects when arranged thoughtfully.
Choosing the Right Yarn
Your yarn choice can make or break a blanket project. I’ve learned this through some expensive mistakes, including a beautiful alpaca blend that felted in the first wash (goodbye, three months of work).
Fiber Content Matters more for blankets than almost any other crochet project. Blankets get heavy use, frequent washing, and need to maintain their shape over time. Acrylic yarn gets a bad rap, but modern acrylics like Caron Simply Soft or Lion Brand Vanna’s Choice are incredibly durable and machine washable.
Cotton yarns create breathable, cool blankets perfect for summer or warm climates. However, cotton blankets can become quite heavy when wet, so consider your washing situation. I learned this when my cotton throw blanket took two days to air dry in my humid apartment.
Yarn Weight Considerations affect both the finished look and your sanity during the project. Here’s what I’ve learned about each weight:
- DK Weight (3): Perfect for baby blankets and detailed stitch work. Lighter finished weight, but requires more stitches to cover the same area.
- Worsted Weight (4): The sweet spot for most blanket projects. Good stitch definition, reasonable coverage, widely available.
- Chunky Weight (5): Works up quickly and creates cozy, thick blankets. Can be bulky to handle as the project grows.
- Super Chunky (6): Dramatic and quick, but limited pattern options and can be overwhelming for large projects.
Dye Lot Management is crucial for large projects. Always buy extra skeins from the same dye lot – I recommend 10-15% more than the pattern calls for. Different dye lots can vary significantly in color, creating visible lines in your finished blanket.
Blanket Sizing and Planning
Nothing’s more frustrating than finishing a blanket only to realize it’s too small for its intended purpose. Here are the standard sizes I work with:
| Blanket Type | Dimensions | Approximate Yardage (Worsted) |
|---|---|---|
| Baby Blanket | 30″ x 36″ | 1,000-1,200 yards |
| Lap Blanket | 36″ x 48″ | 1,500-1,800 yards |
| Twin Bed | 66″ x 90″ | 3,500-4,000 yards |
| Queen Bed | 90″ x 90″ | 5,000-5,500 yards |
Always make a gauge swatch, even for simple patterns. Your tension might be different from the pattern designer’s, which can significantly affect the finished size. I measure my gauge after blocking the swatch – some stitches change dramatically after blocking.
For planning purposes, I keep detailed notes about each project: yarn used, hook size, gauge achieved, and actual yardage consumed. This information becomes invaluable for future projects and helps me give accurate advice to other crocheters.
Avoiding Common Pitfalls
Let me save you from the mistakes I’ve made over the years. These aren’t just technical errors – they’re project-killers that can turn your relaxing hobby into a source of stress.
The Gauge Trap: I used to think gauge swatches were suggestions rather than requirements. Wrong. A difference of even half a stitch per inch can make your queen-size blanket come out twin-size. Always, always make a gauge swatch and measure it accurately.
Inconsistent Tension: This is especially problematic in blankets because you’ll be working on the project over weeks or months. Your tension naturally changes as you get tired, stressed, or more comfortable with the pattern. I’ve learned to check my work regularly and take breaks when I notice my stitches getting tighter or looser.
Pro Tip: Take photos of your work in progress. Sometimes tension issues that aren’t obvious while you’re working become glaringly apparent in photos. I catch more mistakes this way than by just looking at my work directly.
Border Disasters: A beautiful blanket can be ruined by a poorly planned border. The border should complement the main pattern, not compete with it. For busy patterns, stick with simple borders. For plain blankets, you can get more creative with decorative borders.
Yarn Substitution Gone Wrong: Not all yarns are created equal, even within the same weight category. Substituting a drapey cotton for a bouncy acrylic can completely change how your blanket behaves. When in doubt, make a test square with your substitute yarn before committing to the full project.
Professional Finishing Tips
The difference between a homemade-looking blanket and a professional-quality one often comes down to finishing techniques. These details take extra time, but they’re what separate good blankets from great ones.
Blocking is Non-Negotiable for most blanket patterns. Even simple stitches benefit from blocking to even out tension variations and set the final shape. For acrylic yarns, use steam blocking rather than wet blocking – acrylic can lose its bounce if soaked.
I block large blankets in sections on my guest bed, using blocking mats and T-pins. It’s not glamorous, but it works better than trying to find a surface large enough for the entire blanket.
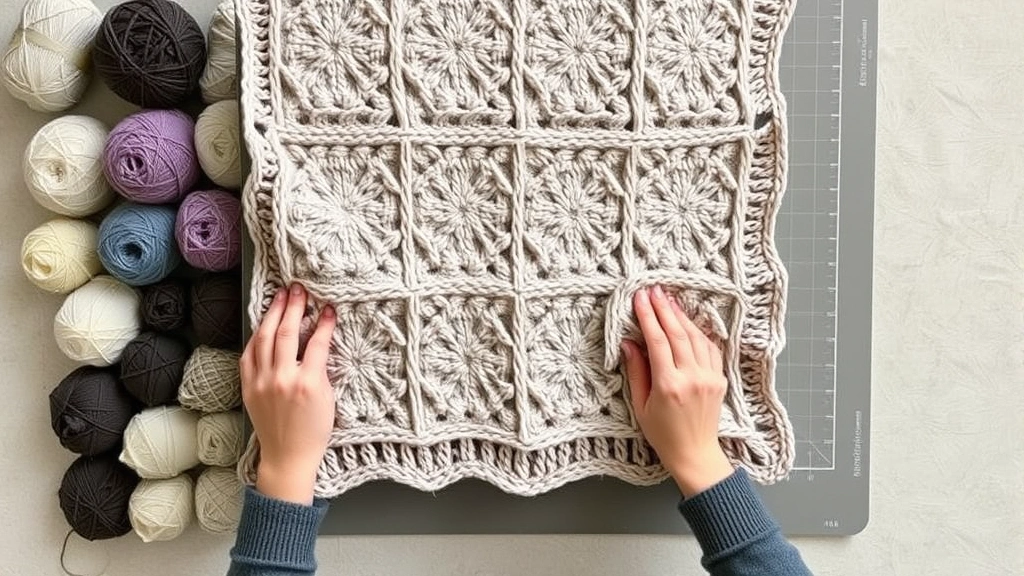
Seaming and Joining Techniques can make or break modular blankets. The invisible seaming method creates the most professional look for granny square blankets, while the join-as-you-go method saves time on the back end.
For granny square blankets, I always join with the same yarn used in the squares rather than a contrasting color, unless contrast is part of the design. The joining should support the squares, not distract from them.
Edge Finishing determines whether your blanket looks handmade in the best way or the worst way. Even edges that seem straight often benefit from a simple single crochet border to clean up any irregularities. For blankets that will see heavy use, consider a reverse single crochet border for extra durability.
- Plan Your Border
Measure all four sides of your blanket and calculate stitch counts. Uneven sides will create puckering or rippling in your border.
- Work a Foundation Round
Even if your main pattern has clean edges, work one round of single crochet around the entire perimeter to establish consistent spacing.
- Add Decorative Elements
Once your foundation is solid, add any decorative border elements like shells, picots, or color changes.
- Block the Finished Blanket
A final blocking after the border is complete will set everything perfectly and eliminate any slight irregularities.
Common Questions
How much yarn do I need for a blanket?
This depends on blanket size and yarn weight, but here are my go-to estimates: baby blankets need 1,000-1,200 yards of worsted weight yarn, lap blankets need 1,500-1,800 yards, and queen-size blankets need 5,000-5,500 yards. Always buy 10-15% extra from the same dye lot.
What’s the easiest blanket pattern for absolute beginners?
Single crochet stripes using worsted weight yarn and an H-8 hook. Change colors every 4-6 rows to create stripes. This pattern is forgiving, builds basic skills, and creates a beautiful finished product. You’ll practice tension control and joining new yarn without complex stitch patterns.
How long does it take to crochet a blanket?
A baby blanket typically takes 2-3 weeks of casual evening crocheting, while a queen-size blanket can take 3-6 months. Complex patterns with multiple colors or intricate stitches take longer. I can complete about 6-8 rows of a lap blanket in an hour using worsted weight yarn.
Should I use acrylic or cotton yarn for blankets?
Both have advantages. Acrylic is lightweight, machine washable, and bounces back from washing beautifully. Cotton is breathable and cool but can be heavy when wet and may shrink. For everyday blankets that need frequent washing, I prefer high-quality acrylic like Caron Simply Soft.
Can I make a blanket with different yarn weights?
It’s possible but challenging. Different yarn weights create different fabric densities, which can cause puckering or stretching. If you want to use multiple weights, plan carefully and make test squares to ensure compatibility. Generally, it’s better to stick with one yarn weight throughout a project.
How do I fix a blanket that’s turning out too small?
Add a wide border to increase the size, or create additional panels to sew onto the sides. For granny square blankets, you can add more squares around the perimeter. Check your gauge – you might be crocheting tighter than the pattern assumes.
What’s the best way to wash a crocheted blanket?
This depends on your yarn fiber. Acrylic blankets can usually go in the washing machine on gentle cycle with cool water. Cotton can typically handle warm water. Always check yarn labels and test wash a gauge swatch first. For delicate fibers or complex patterns, hand washing is safest.
How do I keep my blanket edges straight?
Count your stitches religiously, especially in the first and last few stitches of each row. Mark your turning chains clearly and be consistent about whether you work into them. Using stitch markers on the first and last stitches of each row helps maintain consistent edges.
Creating beautiful blankets takes practice, patience, and the right pattern for your skill level. Don’t rush into complex designs before mastering the basics – there’s real satisfaction in completing a simple blanket perfectly rather than struggling through an advanced pattern. Remember, every expert crocheter started with their first single crochet stitch, and every gorgeous blanket begins with choosing the right pattern for your journey. Happy crocheting, and may your yarn stash always have exactly what you need for your next cozy creation.