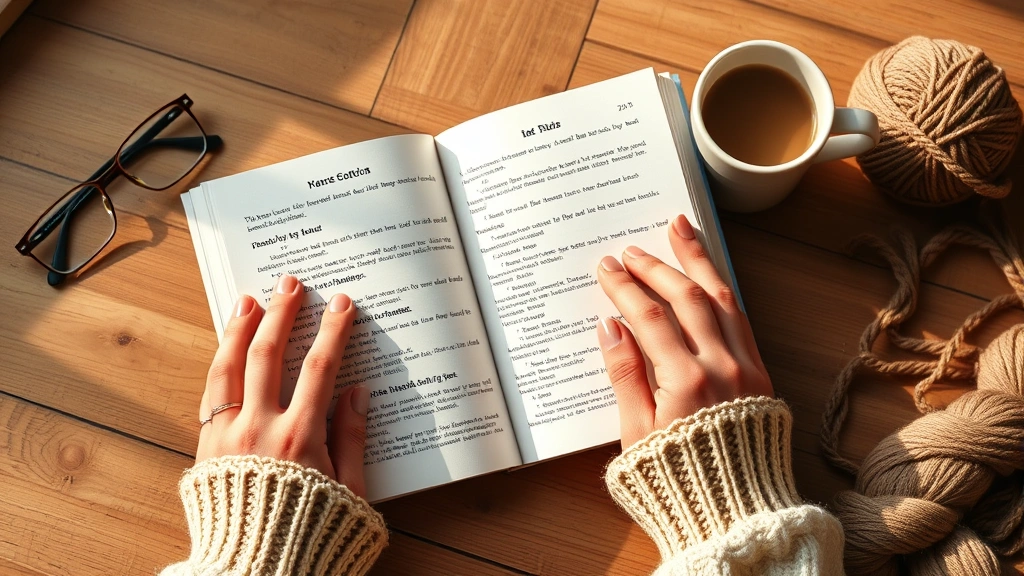
Picture this: you’re sitting there with your hook and yarn, staring at a pattern that might as well be written in ancient hieroglyphics. The abbreviations are swimming before your eyes, and you’re wondering if “dc” means double crochet or if you’re supposed to conjure up some kind of direct current magic. Trust me, I’ve been there – we all have.
Learning to read crochet patterns is like learning a new language, but here’s the thing: once you crack the code, a whole world of beautiful projects opens up to you. I remember my first “real” pattern attempt. It was a simple dishcloth, but I spent more time Googling abbreviations than actually crocheting. Three frogged attempts later, I finally got it, and that little square of cotton felt like I’d conquered Everest.
The truth is, crochet patterns follow a pretty logical system once you understand the basics. Every pattern tells a story – it’s just written in a very specific shorthand that saves space and keeps instructions clear. Think of it like texting abbreviations, but for yarn crafts.
What makes this even trickier is that patterns can vary depending on where they’re published. American patterns use different terms than British ones, vintage patterns have their own quirks, and don’t even get me started on the creative liberties some designers take with formatting. But don’t worry – I’m going to walk you through everything you need to know to read patterns like a pro.
Quick Answer
Crochet patterns use standardized abbreviations and symbols to communicate instructions efficiently. Master the common abbreviations (ch, sc, dc, tr), understand the structure (gauge, materials, instructions), and practice reading the pattern before you start stitching.
Understanding Pattern Structure
Every well-written crochet pattern follows a similar structure, kind of like how recipes always list ingredients before the cooking steps. Getting familiar with this layout will save you tons of confusion down the road.
At the top, you’ll find the pattern name and a brief description of what you’re making. This might seem obvious, but I can’t tell you how many times I’ve started a project thinking I was making a baby blanket only to realize halfway through it was designed as a throw pillow cover. Read this part carefully – it often includes helpful details about the finished size and intended use.
Next comes the skill level indicator. Most patterns use terms like “beginner,” “easy,” “intermediate,” or “advanced.” Don’t let your ego drive here – if you’re new to learning crochet basics, stick with beginner patterns until you’re comfortable with the fundamental stitches.
The materials section is your shopping list. It’ll tell you exactly what yarn weight to use, how much yardage you need, what hook size works best, and any special tools required. This section is crucial – using the wrong yarn weight can completely change how your project turns out.
Pro tip: Always buy a little extra yarn than the pattern calls for. Dye lots can vary, and you don’t want to be stuck with a project you can’t finish because the yarn store ran out of your color.
After materials, you’ll see the gauge section. I know, I know – gauge swatches feel like homework when you just want to start crocheting. But trust me on this one. Gauge determines the final size of your project, and skipping it can lead to baby sweaters that fit toddlers or dishcloths the size of bath towels.
Essential Abbreviations You Need to Know
Crochet abbreviations are like the alphabet of pattern reading – you need to know them by heart to read fluently. The good news is that most patterns stick to standard abbreviations, so once you learn them, you can read patterns from any designer.
Let’s start with the absolute basics. “Ch” means chain, and it’s usually your starting point. “Sc” is single crochet, “dc” is double crochet, and “tr” is treble (or triple) crochet. These four stitches make up the foundation of most patterns. When you’re working on basic crochet stitches, you’ll use these constantly.
| Abbreviation | Full Term | Description |
|---|---|---|
| ch | chain | Basic foundation stitch |
| sc | single crochet | Shortest working stitch |
| hdc | half double crochet | Between single and double in height |
| dc | double crochet | Most common working stitch |
| tr | treble crochet | Tall stitch for quick progress |
| sl st | slip stitch | Used for joining and moving |
Numbers in patterns tell you how many stitches to make. So “ch 10” means make 10 chain stitches, and “3 dc” means make 3 double crochet stitches. Sometimes you’ll see numbers in parentheses like “dc (2 dc, ch 1, 2 dc) in next st” – this means you’re putting that whole group of stitches into one stitch space.
Asterisks (*) are super important – they mark the beginning and end of a section you need to repeat. When you see “*dc in next 3 sts, ch 1; repeat from * across,” you’ll do that sequence over and over until you reach the end of the row.
Brackets [ ] and parentheses ( ) group stitches together. If you see “[sc, ch 2, sc] in next st,” you’re putting all three of those stitches into the same stitch space. It’s like a little package deal.
Decoding the Instructions
Now let’s talk about reading the actual instructions – this is where patterns can get tricky if you don’t know what to look for. Most patterns break down into setup rows and then repeating pattern rows.
Setup rows establish your foundation and often include increases or decreases to get your piece to the right shape. These rows might look completely different from the main pattern, so don’t panic if Row 1 seems way more complicated than Row 2. The setup is doing the heavy lifting to get everything in place.
Pattern rows are the meat of your project – these are the rows you’ll repeat to create the main body of whatever you’re making. Many patterns will say something like “Repeat Rows 2-5 until piece measures 20 inches.” This means you’ll keep cycling through those four rows over and over.
Pay attention to turning chains – these are the chains you make at the beginning of each row to bring your hook up to the right height for the next stitch. Different stitches need different numbers of turning chains. Single crochet usually needs 1 chain, double crochet needs 3, and treble crochet needs 4. Some patterns count the turning chain as a stitch, others don’t – this will be specified in the pattern notes.
Increases and decreases are often written in shorthand too. “2 sc in next st” means you’re increasing by putting two single crochets in one stitch space. “Sc2tog” means you’re decreasing by working two stitches together to make them into one stitch.
When you’re working on projects like granny square patterns, you’ll encounter instructions for working in rounds instead of rows. Round instructions often include joining with slip stitches and chain spaces that create the characteristic granny square look.
Gauge and Materials Section
I used to skip right over the gauge section because it seemed boring, but let me tell you why this part is actually crucial for your success. Gauge tells you how many stitches and rows you should get per inch with the recommended yarn and hook size.
A typical gauge might read “18 sc and 20 rows = 4 inches (10 cm) with size H-8 (5mm) hook.” This means if you crochet a 4-inch square using the pattern’s yarn and hook size, you should get exactly 18 stitches across and 20 rows down. If your square is smaller, your tension is too tight and you need a larger hook. If it’s bigger, your tension is too loose and you need a smaller hook.
The materials section is your roadmap for shopping. It’ll specify yarn weight (fingering, sport, DK, worsted, bulky), yardage needed, and recommended brands. Don’t feel like you have to use the exact yarn specified – you can substitute as long as you match the yarn weight and get the right gauge.
Here’s what different yarn weights work best for:
- Fingering weight: Delicate shawls, baby items, detailed lacework
- Sport weight: Baby blankets, lightweight sweaters, summer tops
- DK weight: Children’s clothes, dishcloths, light afghans
- Worsted weight: Most common, great for blankets, scarves, hats
- Bulky weight: Quick projects, thick blankets, winter accessories
Hook size recommendations are usually given in both US letter sizes (like H-8) and metric sizes (like 5mm). If you’re just starting out, having a complete set of crochet hooks in different sizes will save you trips to the craft store.
Special tools might include stitch markers, tapestry needles for sewing seams, or cable needles for certain techniques. Don’t skip these – they’re listed because they make the project easier or are actually necessary for the techniques used.
Special Techniques and Symbols
Once you get comfortable with basic abbreviations, you’ll start encountering special techniques that add texture and interest to your projects. These might seem intimidating at first, but they’re usually just combinations of basic stitches worked in specific ways.
Front post and back post stitches (fpdc and bpdc) create raised and recessed stitches that add dimensional texture. Instead of working under the top loops of a stitch like usual, you insert your hook around the post (the vertical part) of the stitch from either the front or back.
Clusters and shells are groups of stitches worked into the same space or stitch. A shell might be “5 dc in same st” while a cluster might be “3 dc worked together” (meaning you start each double crochet but don’t complete them until the end, then pull through all loops at once).
Color changes are often indicated with letters like “A” and “B” for different yarn colors. The pattern will tell you when to switch colors, usually with instructions like “change to B in last st of row” or “with B, ch 3.”
Some patterns include charts or diagrams alongside written instructions. These visual representations can be super helpful, especially for complex stitch patterns or when working in rounds. Each symbol represents a specific stitch, and once you learn to read charts, you might find them easier to follow than written instructions.
Advanced techniques like Tunisian crochet or tapestry crochet have their own sets of abbreviations and symbols. Don’t worry about these until you’re ready to tackle more complex projects – stick with the basics until they feel natural.
Common Reading Mistakes
Let me share some of the most common mistakes I see (and made myself) when learning to read patterns. Recognizing these pitfalls early can save you hours of frustration and frogging.
The biggest mistake is not reading the entire pattern before starting. I know it’s tempting to dive right in, but patterns often include important notes or special instructions buried in the middle. Spend five minutes reading through everything first – it’ll save you time in the long run.
Another common issue is confusing American and British terminology. In American patterns, “double crochet” is what British patterns call “treble crochet.” If your project is turning out way bigger or smaller than expected, check if you’re using the right terminology. Most patterns will specify which system they’re using.
Miscounting turning chains trips up a lot of people. Some patterns count the turning chain as a stitch, others don’t. This affects your stitch count and can throw off your entire project. The pattern should specify this, but if it doesn’t, look at the stitch count at the end of each row for clues.
Skipping gauge swatches is tempting, but it’s probably the most expensive mistake you can make. I once made an entire sweater that ended up fitting my 10-year-old nephew instead of me because I couldn’t be bothered to check my gauge. Learn from my mistake – always, always make a gauge swatch for fitted items.
Here’s a reality check: if your stitch count is off by even one or two stitches per row, that error compounds over dozens of rows. What starts as a minor discrepancy can turn into a major sizing issue by the end of your project.
Not understanding repeat instructions causes a lot of confusion. When a pattern says “repeat from * to end,” it means you repeat everything after that asterisk until you run out of stitches in that row. Don’t include any instructions that came before the asterisk in your repeats.
Finally, many people struggle with understanding pattern formatting when working complex stitches or color work. Take your time with these sections and don’t be afraid to practice the technique on a swatch before incorporating it into your main project.
Building Your Pattern Reading Skills
Like any skill, reading crochet patterns gets easier with practice. Here are some strategies I’ve found helpful for building confidence and fluency.
Start with simple patterns that use basic stitches and clear formatting. Dishcloths, scarves, and simple hats are perfect for practicing pattern reading without getting overwhelmed by complex techniques. As you get more comfortable, gradually work up to patterns with more advanced stitches and shaping.
Keep a notebook or use your phone to jot down unfamiliar abbreviations as you encounter them. I still have a little cheat sheet taped to my project bag with the abbreviations I don’t use very often. There’s no shame in looking things up – even experienced crocheters encounter new techniques and abbreviations.
Practice reading patterns out loud or explaining them to someone else. This might sound silly, but verbalizing the instructions helps cement them in your memory and often reveals areas where your understanding is fuzzy.
Join online communities where you can ask questions about specific patterns. Ravelry has project pages for most published patterns where other makers share their experiences, modifications, and solutions to common problems.
Don’t be afraid to mark up your patterns. Highlight important sections, make notes about modifications you want to try, or track your progress by crossing off completed rows. Patterns are tools – use them in whatever way helps you succeed.
When you’re ready to tackle more complex projects, consider starting with amigurumi patterns. These small projects let you practice reading patterns with increases, decreases, and color changes without committing to a huge time investment.
Consider taking a class or workshop focused on pattern reading. Many yarn shops offer these, and having an experienced instructor available to answer questions in real-time can accelerate your learning curve significantly.
Common Questions
What’s the difference between American and British crochet terms?
The main difference is in stitch names. What Americans call “single crochet,” the British call “double crochet.” American “double crochet” is British “treble crochet,” and so on. Each American term is one step lower than the British equivalent. Most patterns specify which terminology they use, but when in doubt, check the gauge – British patterns typically result in taller stitches for the same gauge measurement.
How do I know if I should count my turning chain as a stitch?
The pattern should specify this in the notes or special instructions section. If it doesn’t, look at the stitch count given at the end of each row. If the count matches the number of stitches you worked plus your turning chain, then yes, count it. Generally, turning chains for taller stitches (double crochet and above) are more likely to count as stitches than shorter ones.
What does it mean when a pattern says “work even”?
“Work even” means continue in the established pattern without any increases or decreases. You’re maintaining the same stitch count and pattern repeat until the instructions tell you to do something different. This is common in the body sections of sweaters or the main portion of blankets.
How do I substitute yarn if I can’t find the recommended brand?
Match the yarn weight first – this is more important than the fiber content for most projects. Check the yardage per skein and buy enough to meet the total yardage requirement. Always make a gauge swatch with your substitute yarn, as different brands can behave differently even in the same weight category. The Craft Yarn Council provides excellent guidelines for yarn substitution.
Why does my project look different from the pattern photo?
The most common culprits are gauge differences, yarn substitution, or tension variations. Check your gauge first – even small differences compound over many rows. Different yarn fibers can also drape differently than the original. Finally, consider that pattern photos are often styled and photographed under ideal conditions, so some variation is normal.
What should I do if I find an error in a pattern?
First, double-check that you’re reading the instructions correctly – sometimes what looks like an error is actually correct. If you’re confident there’s a mistake, check the designer’s website or Ravelry page for published errata. Many designers maintain correction lists for their patterns. You can also reach out to the designer directly or ask in online crochet communities where others may have encountered the same issue.
How long should it take me to read and understand a new pattern?
This varies widely based on the pattern complexity and your experience level. A simple dishcloth pattern might take 5-10 minutes to read through, while a complex sweater pattern could take an hour or more to fully understand. Don’t rush this process – time spent understanding the pattern upfront saves time fixing mistakes later. As you gain experience, pattern reading becomes much faster.
Should I always make a gauge swatch?
For fitted items like sweaters, hats, or anything with specific size requirements, absolutely yes. For projects where exact size isn’t critical (like scarves or dishcloths), you can often skip it, but checking your gauge on the actual project’s first few rows is still wise. Remember that gauge affects not just size but also yarn usage – being off gauge can mean running out of yarn before finishing your project.
Reading crochet patterns really is like learning a new language, but it’s one of the most rewarding skills you can develop as a crocheter. Once you’re fluent in “pattern speak,” the entire world of published designs opens up to you. You’ll be able to tackle everything from simple easy crochet projects to complex heirloom pieces with confidence.
Remember, every expert crocheter started exactly where you are now – staring at abbreviations that looked like alphabet soup and wondering if they’d ever make sense. The key is to start simple, practice regularly, and don’t be afraid to ask questions when you’re stuck. The crochet community is incredibly welcoming and helpful, and we’ve all been there.
Take your time, be patient with yourself, and celebrate the small victories. That moment when you read through a pattern and actually understand what you’re supposed to do? That’s when you know you’ve really got it. Happy crocheting, and remember – every expert was once a beginner who didn’t give up.