
There’s something magical about watching a flat piece of fabric transform into a three-dimensional creation. I still remember the first time I successfully worked a corner on a granny square blanket – after frogging it three times because I couldn’t figure out why my corners kept curling up like potato chips. If you’ve ever stared at a crochet pattern calling for corner increases and felt that familiar knot in your stomach, you’re definitely not alone.
Corner increases are one of those techniques that seem intimidating until you understand the basic principle behind them. Once it clicks, you’ll wonder why you ever stressed about it. The key is understanding that corners need extra stitches to lie flat and turn properly, whether you’re working on a granny square blanket or trying to navigate the corner of a rectangular dishcloth.
I’ve taught this technique to dozens of crocheters over the years, and the most common mistake I see is people either adding too many stitches (creating ruffles) or too few (causing the dreaded curl). The good news? There’s actually a pretty straightforward formula for most corner situations, and once you learn it, you can apply it to almost any project.
Quick Answer
Corner increases typically require 3 stitches in the corner space for single crochet, 5 stitches for double crochet projects. The middle stitch becomes your new corner stitch, with equal stitches on either side creating the 90-degree turn your fabric needs to lie flat.
Understanding Corner Increases
Think of corner increases like the architectural support beams of your crochet project. When you’re working in rounds or creating any flat geometric shape, corners need extra fabric to accommodate the 90-degree turn. Without enough stitches, your work pulls inward and cups. Too many stitches, and you get waves or ruffles.
The mathematical principle is actually pretty simple. In a straight line, each stitch takes up a certain amount of horizontal space. When you turn a corner, you need to maintain that same spacing while changing direction. This requires adding stitches at the pivot point.
For most basic crochet stitches, the standard corner increase follows this pattern: work the specified number of stitches into the same stitch or space, with the middle stitch serving as your corner marker. This creates a small fan that spreads the fabric in both directions from the corner point.
When Corner Increases Are Essential
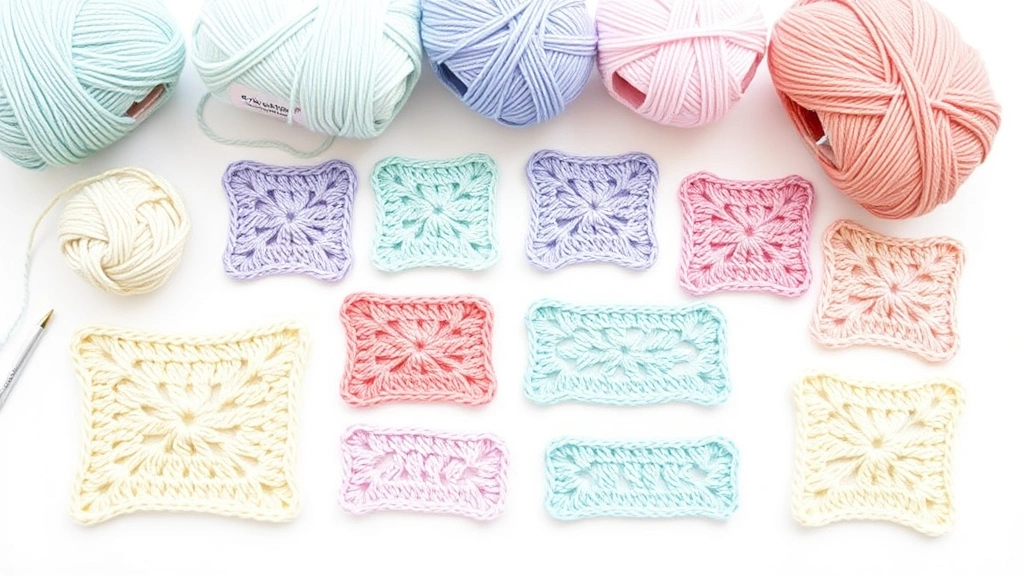
You’ll encounter corner increases in several common scenarios. Granny squares are probably the most obvious example – each corner needs those extra double crochets to keep the square flat. But you’ll also use them in afghan patterns worked from the center out, rectangular dishcloths with rounded corners, and even some amigurumi patterns where you’re creating flat circular bases.
The key is recognizing when your pattern calls for them versus when you need to improvise. Sometimes patterns will explicitly tell you to “work 3 sc in corner st.” Other times, especially in vintage or translated patterns, you might need to figure it out from context clues.
Basic Corner Increase Techniques
Let’s start with the most common corner increase method, which works for about 80% of the projects you’ll encounter. This technique creates a balanced corner that lies flat and looks professional.
The basic formula depends on your stitch height. For single crochet, you typically work 3 stitches in the corner. For double crochet, it’s usually 5 stitches. Half double crochet falls somewhere in between at 4 stitches, though some patterns prefer 3.
- Identify Your Corner
This might be a specific stitch, a chain space, or a corner from the previous round. Make sure you’re working into the correct spot – this is where many beginners go wrong.
- Work Your First Stitch
Insert your hook and complete the first stitch of your corner increase. This stitch angles slightly to one side of the corner.
- Add the Center Stitch
Work your second stitch into the same space. This becomes your true corner stitch and should sit right at the corner point.
- Complete the Increase
Add your final stitch(es) to complete the corner. These angle toward the other side, creating that essential fan shape.
The spacing between these stitches is crucial. You want them close enough to prevent gaps but spread enough to create the corner turn. This usually happens naturally if you’re maintaining consistent tension.
Chain Space Corners
Many patterns use chain spaces at corners instead of working multiple stitches into one stitch. This creates a more open, lacier look and can be easier for beginners to manage. The most common version is “ch 2” between corner stitches, though you might see “ch 1” or “ch 3” depending on the pattern and yarn weight.
When working into chain spaces on subsequent rounds, treat the entire chain space as one unit. Your corner increase goes into that space, not into individual chains.
Stitch-Specific Methods
Different stitches require slightly different approaches to corner increases. Here’s how to handle the most common ones you’ll encounter in patterns.
Single Crochet Corners
Single crochet corners are usually the most forgiving, which makes them perfect for beginners. The standard increase is 3 sc in the corner stitch or space. Since single crochet stitches are short, they don’t create as much bulk at the corner.
I’ve found that worsted weight yarn with a size H (5mm) hook gives the cleanest single crochet corners. If you’re using a bulkier yarn, you might need to adjust your technique slightly to prevent the corner from getting too thick.
| Yarn Weight | Hook Size | Corner Stitches | Best For |
|---|---|---|---|
| DK | G (4.25mm) | 3 sc | Baby items, dishcloths |
| Worsted | H (5mm) | 3 sc | Afghans, scarves |
| Chunky | J (6mm) | 3 sc (loose tension) | Quick projects |
Double Crochet Corners
Double crochet corners need more stitches because of the stitch height. The standard is 5 dc in the corner, though some patterns use 4 or 6 depending on the yarn and desired look.
Here’s where yarn weight really matters. Thicker yarns might only need 4 dc to avoid too much bulk, while finer yarns might need the full 5 to create enough spread for the corner.
One trick I learned from an experienced crocheter is to work your corner double crochets slightly looser than your regular stitches. This prevents the corner from becoming too tight and pulling the fabric.
Half Double Crochet Corners
Half double crochet is the middle child of corner increases – not quite as simple as single crochet, but not as tall as double crochet. Most patterns call for 4 hdc in the corner, though 3 can work for lighter weight yarns.
The key with half double crochet corners is watching your yarn overs. Since hdc has that distinctive lean, you want to make sure your corner stitches are sitting straight and not tilting too much in either direction.
Troubleshooting Common Problems
Even experienced crocheters run into corner issues sometimes. Here are the most common problems I see and how to fix them without starting over.
Corners That Cup or Curl
This is usually a sign that you don’t have enough stitches in your corners. The fabric is trying to turn 90 degrees without enough room to spread out. If you’re following a pattern exactly and still getting cupping, try adding one more stitch to each corner on your next round.
Sometimes the problem isn’t the number of stitches but where you’re placing them. Make sure you’re working into the actual corner stitch or space, not the stitch next to it. I’ve seen people accidentally skip the corner entirely, which definitely causes cupping.
Quick Fix: If you notice cupping after completing a round, you can often fix it by working an extra stitch into each corner on the next round, then returning to the pattern’s corner count.
Ruffled or Wavy Corners
Too many stitches create the opposite problem – your corners start to ruffle and wave. This is more common with beginners who think “more is better” when it comes to corner increases.
If your corners are ruffling, try reducing the number of corner stitches by one on your next round. For persistent ruffling, you might need to adjust your overall stitch count, not just the corners.
Uneven Corner Spacing
Sometimes corners look lumpy or uneven even when the stitch count is correct. This usually comes down to tension issues. Corner stitches should be worked at the same tension as your regular stitches – not tighter because you’re worried about gaps, and not looser because you’re trying to prevent bulk.
Practice maintaining consistent tension through corner increases. It takes time to develop this muscle memory, so don’t get frustrated if it doesn’t feel natural right away.
Advanced Corner Techniques
Once you’ve mastered basic corner increases, there are several advanced techniques that can give your projects a more polished, professional look.
Invisible Corner Joins
When working in rounds, the join between rounds can create a visible seam at corners. Advanced crocheters use techniques like the invisible join or standing stitches to minimize this line.
The Ravelry community has excellent tutorials on invisible joins that can really elevate your corner work. The technique takes practice, but the results are worth it for special projects.
Decorative Corner Treatments
Some patterns incorporate decorative elements into corner increases. These might include picots, shell stitches, or cluster stitches that serve both functional and aesthetic purposes.
When working decorative corners, pay extra attention to the pattern instructions. These often require different stitch counts or special techniques that don’t follow the standard corner increase rules.
Corner Shaping for Fitted Projects
Garments and fitted accessories sometimes need modified corner increases to accommodate body curves or specific shapes. This might mean graduated increases over several rounds or asymmetrical corner treatments.
These techniques are more advanced and usually come with detailed pattern instructions. Don’t try to improvise fitted corner shaping – follow the designer’s guidance carefully.
Project-Specific Applications
Different types of projects have their own corner increase conventions. Understanding these can help you adapt patterns or troubleshoot issues more effectively.
Blanket and Afghan Corners
Large projects like baby blankets put extra stress on corner increases because of the weight and size of the finished piece. You want corners that will stay flat even after washing and regular use.
For blankets, I usually err on the side of slightly fewer corner stitches rather than too many. A blanket that lies perfectly flat when new might develop waves over time if the corners are too loose.
Many blanket patterns use border rounds with different corner treatments. Pay attention to whether the pattern changes the corner increase method for the border – this is common and intentional.
Dishcloth and Washcloth Corners
Utility items like dishcloths need corners that can withstand frequent washing and wringing. This usually means slightly tighter corner increases that won’t stretch out over time.
Cotton yarn behaves differently than acrylic when it comes to corner increases. Cotton has less stretch, so you might need one extra stitch per corner compared to what you’d use with acrylic yarn.
Decorative Doily Corners
Lace and doily patterns often have elaborate corner treatments that serve as focal points of the design. These might include multiple rounds of increases, chain spaces, or complex stitch combinations.
When working doily corners, blocking becomes crucial. The corner increases might look uneven or bunched while you’re working, but proper blocking will open up the lace and reveal the intended shape.
Practice Exercises
The best way to master corner increases is through targeted practice. Here are some exercises that will help you develop muscle memory and confidence.
Basic Square Practice
Start with a simple granny square using worsted weight yarn and an H hook. Work 4 rounds, focusing on keeping your corners consistent. This gives you practice with both chain space corners and the traditional granny square corner increase.
Make several squares using different hook sizes with the same yarn. Notice how hook size affects corner behavior – larger hooks create looser corners, smaller hooks create tighter ones.
Single Crochet Rectangle
Crochet a simple rectangle in single crochet, working in rounds with 3 sc in each corner. Start with about 20 stitches across and work 10 rounds. This exercise helps you understand how corner increases affect overall shape in single crochet.
Try the same rectangle with different corner stitch counts – 2 sc, 3 sc, and 4 sc in corners. Compare the results to see how stitch count affects the final shape.
Mixed Stitch Corner Sampler
Create a sampler that uses different stitches in each section – single crochet, half double crochet, and double crochet. Use the appropriate corner increase for each stitch type. This helps you internalize the different requirements for different stitch heights.
Practice Tip: Keep a small notebook of your corner experiments. Note the yarn, hook size, and corner stitch count for each sample. This becomes a valuable reference for future projects.
Common Questions
How many stitches should I use for corners in different crochet stitches?
The standard is 3 stitches for single crochet, 4 for half double crochet, and 5 for double crochet. However, this can vary based on yarn weight, hook size, and personal tension. Thicker yarns might need fewer stitches to prevent bulk, while thinner yarns might need the full count or even one extra.
Why do my corners keep curling up even when I follow the pattern?
Curling corners usually mean you need more stitches in the corner. This can happen if your tension is tighter than the pattern designer’s, if you’re using a different yarn weight, or if you’re accidentally skipping the actual corner stitch. Try adding one extra stitch to each corner on your next round.
Can I fix corner problems without starting over?
Often, yes! Minor corner issues can usually be corrected on subsequent rounds by adjusting the stitch count. For severe cupping, add extra stitches to corners. For ruffling, reduce corner stitches. If the problem is only on the last round, you might need to frog back to that round and rework it.
Should corner increases be worked tighter or looser than regular stitches?
Corner increases should be worked at the same tension as your regular stitches. Many beginners work them too tightly because they’re worried about gaps, but this actually makes corner problems worse. Consistent tension throughout your work is key to even, flat corners.
How do I know if I’m working into the right corner spot?
Look for the center stitch of your previous corner increase – this is usually where you’ll work your new corner. In granny squares, it’s typically a chain space. For solid fabric, it’s the middle stitch of the corner group. When in doubt, check if your corner stitches are centered over the previous round’s corner.
What’s the difference between corner increases and regular increases?
Regular increases are spread throughout a round or row to add overall width or circumference. Corner increases are specifically placed at corner points to create 90-degree turns in flat geometric shapes. Corner increases follow specific patterns (like 3-5 stitches in one spot), while regular increases might be distributed evenly across the work.
Do I need different corner techniques for different yarn weights?
Yes, yarn weight affects how many stitches you need for clean corners. Bulky yarns might need fewer stitches per corner to avoid excessive bulk, while lace weight yarns might need more stitches to create enough spread. Start with the standard counts and adjust based on how your corners look.
How can I make my corners look more professional?
Consistent tension is the biggest factor in professional-looking corners. Also, make sure you’re working into the correct stitch or space, maintain the same corner stitch count throughout your project, and consider blocking your finished piece to even out any minor irregularities. Using quality yarn and the right hook size for your yarn also makes a noticeable difference.
Corner increases might seem tricky at first, but they’re really just another tool in your crochet toolkit. Like any technique, they become second nature with practice. Start with simple projects and work your way up to more complex corner treatments as your confidence grows.
Remember that every crocheter has their own tension and style, so don’t be afraid to adjust standard corner counts to work with your particular way of crocheting. The goal is corners that lie flat, look even, and stand up to use and washing. Once you master these basics, you’ll find yourself approaching new patterns with much more confidence, knowing you can handle whatever corner challenges they throw at you.
Keep practicing, be patient with yourself, and don’t forget to enjoy the process. There’s something deeply satisfying about working a perfect corner that turns out exactly as planned. Happy crocheting!